
HOgardenME D328Q7W433V974K8219833Y28
HOgardenME Wooden Digital Alarm Clock User Manual
Model: D328Q7W433V974K8219833Y28
Introduction
Thank you for purchasing the HOgardenME Wooden Digital Alarm Clock. This device combines a digital time and temperature display with multiple alarm settings and a convenient wireless charging function. This manual provides detailed instructions for setup, operation, and maintenance to ensure optimal performance and longevity of your product.
Safety Information
- Do not expose the device to extreme temperatures, direct sunlight, or high humidity.
- Avoid dropping or subjecting the device to strong impacts.
- Use only the provided USB cable or a certified power adapter.
- If using batteries, ensure they are inserted with correct polarity. Do not mix old and new batteries or different types of batteries.
- Keep the device away from water or other liquids.
- Do not attempt to disassemble or repair the device yourself. Contact customer support if issues arise.
Package Contents
- 1 x HOgardenME Wooden Digital Alarm Clock
- 1 x USB Power Cable
- 1 x User Manual (this document)
- Note: 4 AAA batteries are not included and must be purchased separately if battery power is desired.
Product Overview
The HOgardenME Wooden Digital Alarm Clock features a sleek design with a clear LED display. It includes various functions such as time, date, temperature display, multiple alarm settings, brightness adjustment, and a built-in wireless charging pad on top.

Image: The HOgardenME Wooden Digital Alarm Clock shown in black, light wood, and dark wood finishes, displaying time and temperature.
Key Features:
- Time Display (12/24-hour format)
- Temperature Display (Fahrenheit/Celsius)
- Date Display (Month/Day/Year)
- Three Alarm Settings with Working Alarm Option
- Manual and Automatic Brightness Adjustment
- Wireless Charging Function (5W output)
- Dual Power Options (USB or 4x AAA Batteries)
Setup
1. Powering the Device
The alarm clock can be powered in two ways:
- USB Power: Connect the included USB cable to the clock's power input port and plug the other end into a USB power adapter (not included) or a powered USB port. This is the recommended method for continuous operation and to enable the wireless charging function.
- Battery Power: Insert 4 AAA batteries (not included) into the battery compartment located on the back of the clock, ensuring correct polarity. Battery power is suitable for travel or as a backup, but the wireless charging function will not operate when powered solely by batteries.
2. Initial Setup
Upon first power-up, the clock will display default settings. Refer to the "Operating Instructions" section to set the correct time, date, temperature unit, and alarm preferences.
Operating Instructions
1. Time Display (12/24-hour switching)
The clock supports both 12-hour and 24-hour time formats. Consult the physical buttons on the back or bottom of the clock for specific instructions on how to toggle between these modes and set the time. Typically, a "SET" or "MODE" button is used to enter setting mode, and "UP"/"DOWN" buttons adjust values.
2. Temperature Display (Fahrenheit/Celsius switching)
The clock can display temperature in either Fahrenheit (°F) or Celsius (°C). Locate the temperature unit switch or button (often labeled "TEMP" or integrated with other settings) to select your preferred unit.
3. Date Display (Month/Day/Year)
The date display shows the month, day, and year. Use the setting buttons to adjust these values according to your current date.
4. Alarm Settings (Three groups / Working alarm)
The clock allows for setting up to three independent alarms. There may also be an option for a "working alarm" which typically activates only on weekdays. Refer to the button labels (e.g., "ALARM 1", "ALARM 2", "ALARM 3", "WORKDAY ALARM") and the manual's specific button sequence for setting and activating alarms.
5. Brightness Adjustment (Manual/Automatic)
The display brightness can be adjusted manually or set to an automatic dimming mode. In automatic mode, the display will dim between 18:00 (6 PM) and 06:00 (6 AM) to reduce light pollution during sleep hours. Look for a "BRIGHTNESS" or "DIMMER" button to cycle through brightness levels or activate auto-dimming.
6. Wireless Charging Function
When the clock is powered via the USB cable, the wireless charging function is active. To charge a compatible mobile phone:
- Ensure the alarm clock is connected to a power source via the USB cable.
- Place your mobile phone with wireless charging capability directly on the top surface of the clock, aligning it with the charging symbol.
- The phone should begin charging automatically. If your phone does not have built-in wireless charging, a compatible wireless charging receiver (not included) is required.
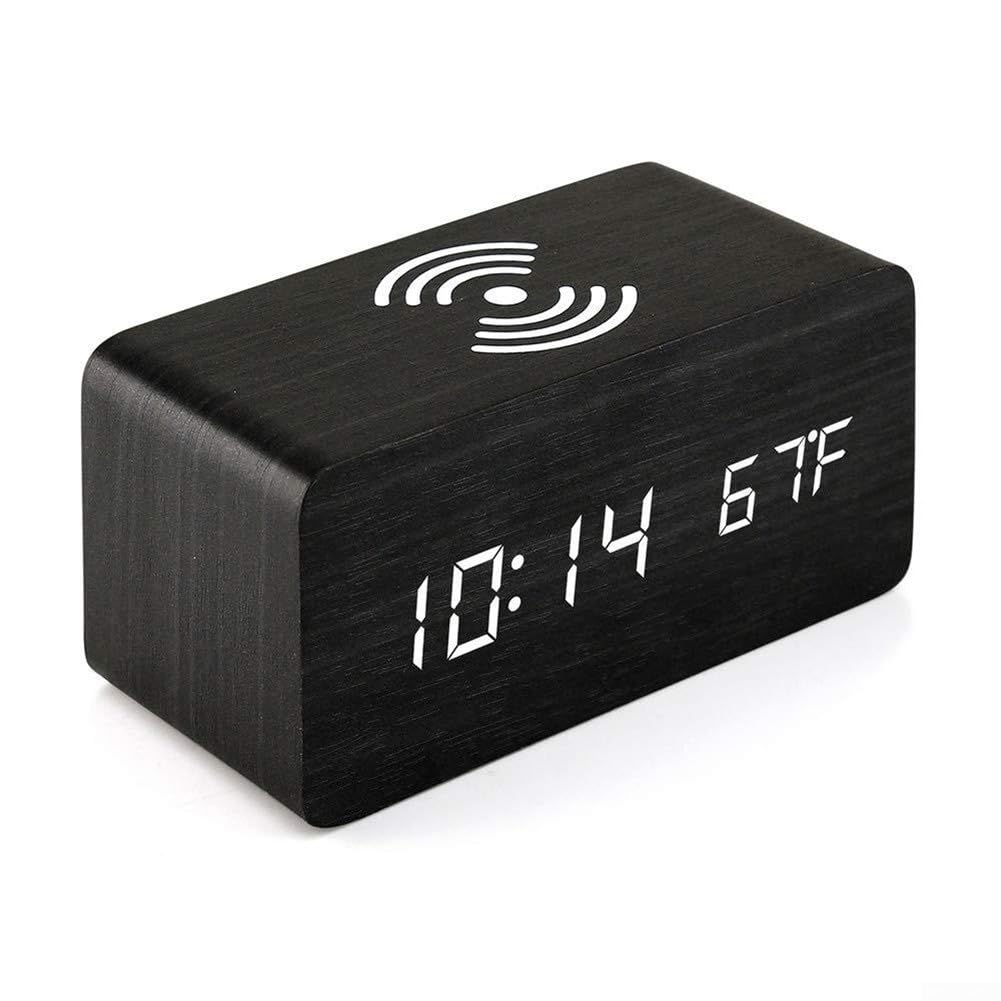
Image: A black HOgardenME Wooden Digital Alarm Clock displaying time and temperature, with a smartphone placed on its top surface, indicating active wireless charging.
Maintenance
- Clean the clock's surface with a soft, dry cloth. Do not use abrasive cleaners or solvents.
- If using batteries, replace them when the display becomes dim or functions become erratic. Remove batteries if the device will not be used for an extended period.
Troubleshooting
| Problem | Possible Cause | Solution |
|---|---|---|
| Display is off or dim. | No power, low batteries, or auto-dimming active. | Check USB connection. Replace AAA batteries. Adjust brightness settings or disable auto-dimming. |
| Wireless charging not working. | Not connected via USB, phone not compatible, or misaligned. | Ensure clock is powered by USB. Verify phone has wireless charging or use a receiver. Reposition phone on the charging pad. |
| Alarm does not sound. | Alarm not set or volume too low. | Verify alarm time and activation. Check alarm volume settings (if applicable). |
| Incorrect time/date. | Not set correctly or power interruption. | Re-enter time and date settings. Ensure continuous power supply. |
Specifications
- Model Number: D328Q7W433V974K8219833Y28
- Material: PVC, MDF
- Display Type: Digital LED
- Power Source: USB (DC 5V) or 4 x AAA Batteries (not included)
- Wireless Charging Output: 5W
- Product Dimensions: Approximately 3.43"W x 7.28"H
- Color: Black
- Functions: Time (12/24H), Date (M/D/Y), Temperature (F/C), 3 Alarms, Brightness Adjustment, Wireless Charging
Warranty and Support
For warranty information or technical support, please refer to the contact details provided with your purchase or visit the official HOgardenME website. Keep your purchase receipt as proof of purchase.
Ask a question about this manual
Ask about setup, troubleshooting, compatibility, parts, safety, or missing instructions. Manuals+ will review the question and use this page’s manual context to help answer it.