
1. Introduction
This manual provides detailed instructions for the installation, configuration, and operation of the PUSR USR-AP310i WiFi 6 Ceiling Access Point. The USR-AP310i is a high-performance dual-band wireless access point designed to provide robust and stable wireless connectivity in various environments, supporting the latest WiFi 6 (802.11ax) standard. It features AX3000 speeds, Power over Ethernet (PoE) support, and multiple operating modes to suit diverse networking needs.

Figure 1: PUSR USR-AP310i WiFi 6 Ceiling Access Point
The image displays the PUSR USR-AP310i WiFi 6 Ceiling Access Point, a white, square-shaped device with rounded corners, featuring a small indicator light on its front surface.
2. Product Overview
2.1 Key Features
- WiFi 6 Technology: Utilizes Qualcomm's WiFi 6 core solution, supporting OFDMA, MU-MIMO, and 160MHz bandwidth for enhanced performance.
- High Capacity: Supports up to 256 concurrent wireless clients, ideal for high-density environments.
- Dual-Band Operation: Provides connectivity on both 2.4GHz and 5GHz bands for flexible and high-speed wireless access.
- Power over Ethernet (PoE): Simplifies deployment by allowing power and data transmission over a single Ethernet cable (802.3at PoE compatible).
- Flexible Installation: Designed for ceiling or wall mounting, blending seamlessly into various commercial and residential settings.
- Multiple Operating Modes: Functions as an Access Point, Router, or Wireless Repeater.
- Seamless Roaming: Supports seamless roaming solutions for applications like Automated Guided Vehicles (AGV).
2.2 Package Contents

Figure 2: Package Contents
The image illustrates the items included in the product package: one PUSR USR-AP310i device, a Quick Start Guide, and an expansion screw bag containing screws and wall anchors for mounting.
Please verify that all items are present in the package:
- USR-AP310i Access Point (x1)
- Quick Start Guide (x1)
- Expansion Screw Bag (x1, includes screws and wall anchors)
3. Setup and Installation
3.1 Powering the Device
The USR-AP310i can be powered in two ways:
- Standard PoE (Power over Ethernet): Connect the AP to a PoE-enabled switch (e.g., USR-S1210P) using a single Ethernet cable. This cable will provide both power and data.
- DC 12V Power Adapter: If PoE is not available, connect a 12V DC power adapter (not included) to the DC jack on the AP.

Figure 3: Powering Options
This diagram illustrates two methods for powering the PUSR USR-AP310i: via a standard PoE switch (USR-S1210P) using a single Ethernet cable for both power and data, or via a 12V DC power source connected to a standard network switch (USR-SG1008).
3.2 Physical Installation (Ceiling/Wall Mounting)
The USR-AP310i is designed for flexible mounting on ceilings or walls to optimize WiFi coverage and blend with the environment.
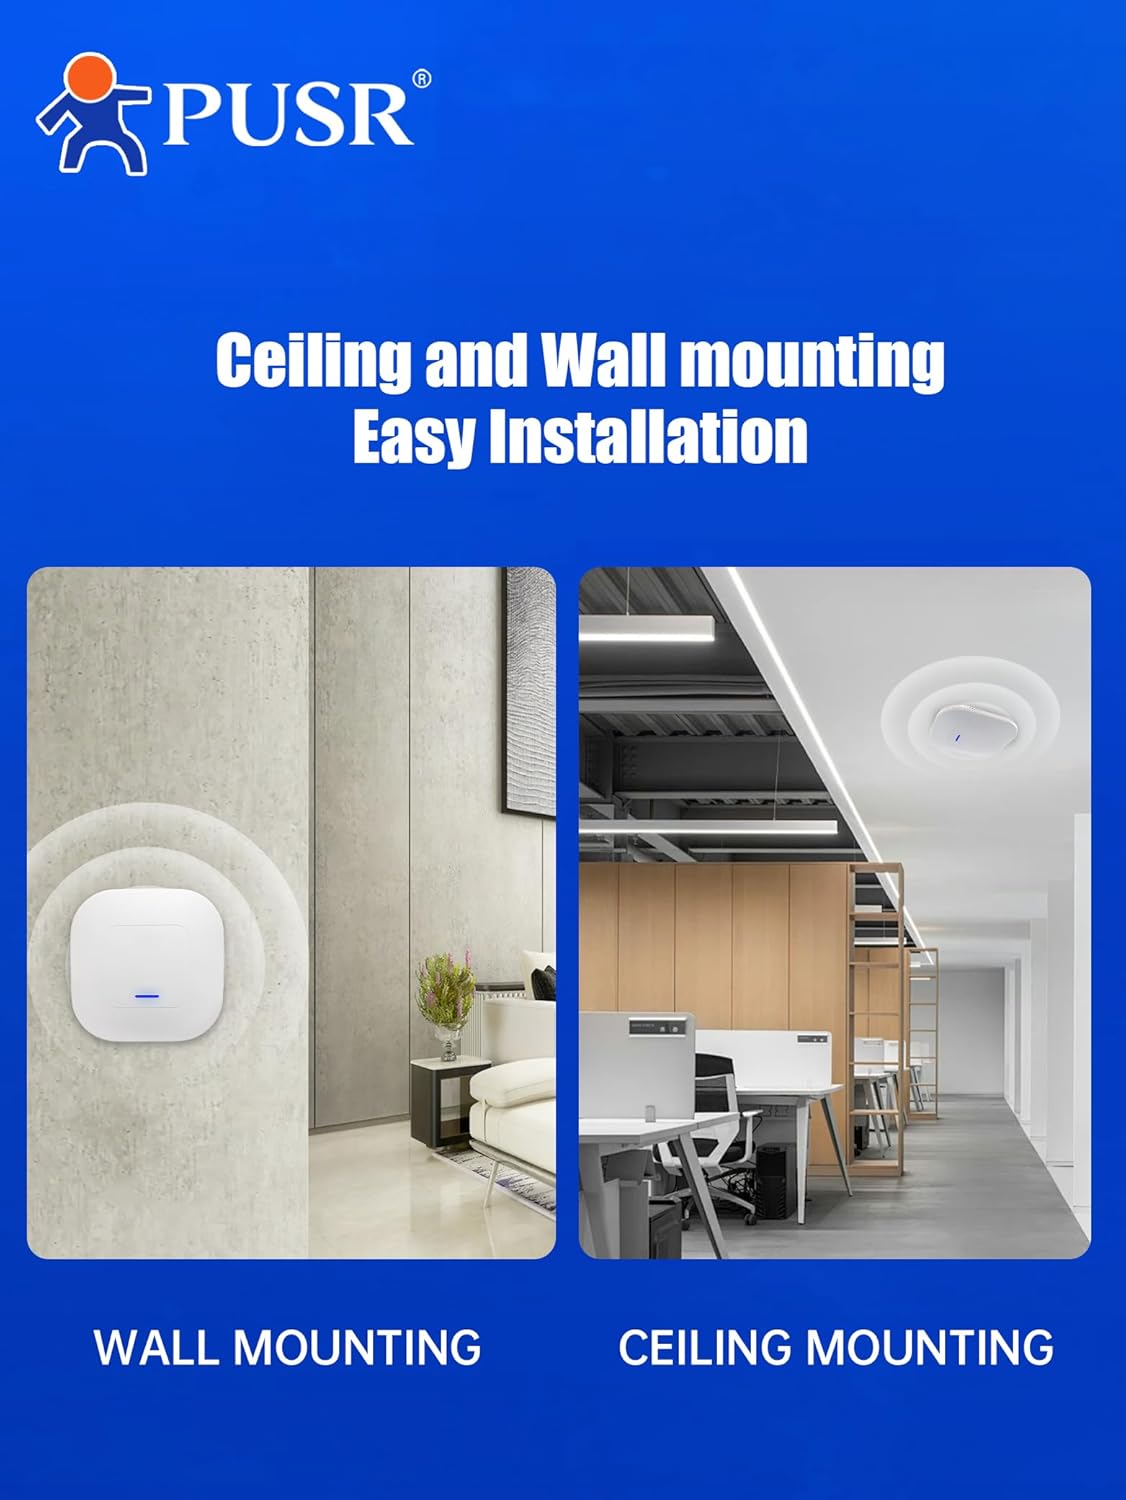
Figure 4: Mounting Options
The image shows the PUSR USR-AP310i mounted on a wall in a bedroom setting and on a ceiling in an office environment, demonstrating its versatile installation options.
To mount the device:
- Choose a suitable location on a ceiling or wall, ensuring optimal signal coverage and proximity to an Ethernet cable.
- Use the included expansion screws and anchors to securely attach the mounting bracket (if applicable, or directly mount if the device has integrated mounting points) to the surface.
- Connect the Ethernet cable to the appropriate port on the AP.
- Attach the AP to the mounted bracket or directly to the wall/ceiling using the provided hardware.

Figure 5: Ceiling Mounted AP Connectivity
This diagram illustrates a PUSR USR-AP310i access point mounted on a ceiling, connected via an Ethernet cable to either a PoE switch or a PoE adapter, which in turn connects to a wired broadband source. Wireless devices such as phones, notebooks, and tablet computers connect to the AP.
3.3 Port Overview

Figure 6: Device Ports
The image displays the underside of the PUSR USR-AP310i, highlighting its connectivity ports: a 1G Ethernet Port, a 2.5G Ethernet Port, and a DC Jack for power. These ports facilitate broadband service connections.
- 1G ETH Port: Standard Gigabit Ethernet port for network connection.
- 2.5G ETH Port: A 2.5 Gigabit Ethernet port for higher bandwidth network connections.
- DC Jack: For connecting a 12V DC power adapter if PoE is not used.
4. Operating Modes
The USR-AP310i supports multiple operating modes to adapt to various network architectures and requirements.

Figure 7: Operating Modes
This diagram illustrates the PUSR USR-AP310i's capability to function as a Router, Access Point, or Wireless Repeater. It also shows support for centralized management via a controller using protocols like PPTP, L2TP, and IPSec.
- Access Point (AP) Mode: Extends an existing wired network wirelessly. This is the primary function for ceiling installations.
- Router Mode: Functions as a primary network device, providing NAT, DHCP, and firewall services.
- Wireless Repeater Mode: Extends the range of an existing wireless network by retransmitting the signal.
Configuration of these modes is typically done via the device's web-based management interface. Refer to the Quick Start Guide for initial access details.
4.1 High-Density Scenarios and Seamless Roaming

Figure 8: Application Scenarios
The image displays various typical application scenarios for the PUSR USR-AP310i, including offices, villas, shopping malls, community clinics, institutions for early education, and factories, highlighting its versatility in different environments.
The USR-AP310i is optimized for high-density user environments, such as offices, shopping malls, and educational institutions, providing stable connections for up to 256 end-users. Its support for MU-MIMO technology ensures efficient data handling for multiple devices simultaneously.
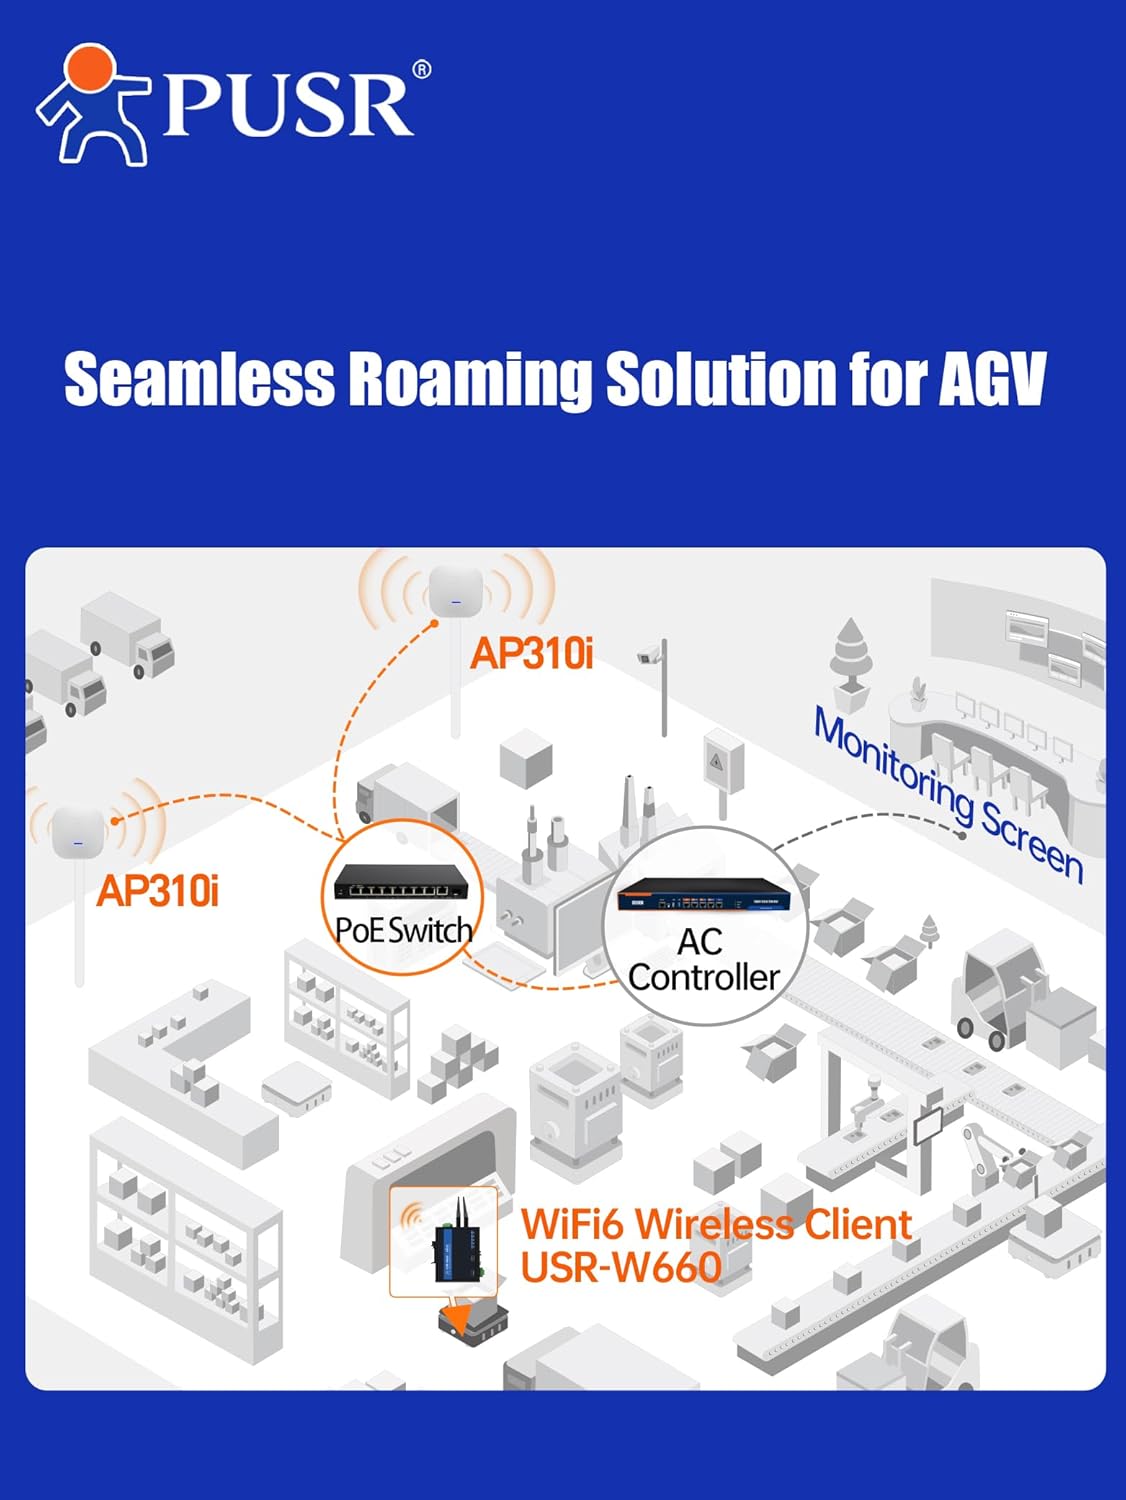
Figure 9: Seamless Roaming
This diagram illustrates a seamless roaming solution for Automated Guided Vehicles (AGV) in a factory setting. Multiple AP310i access points are connected to a PoE switch and an AC controller, enabling AGVs equipped with WiFi 6 wireless clients (USR-W660) to maintain continuous connectivity while moving across different AP coverage areas, with monitoring displayed on a central screen.
For applications requiring continuous connectivity across large areas, such as Automated Guided Vehicles (AGV) in factories, the USR-AP310i can be deployed as part of a seamless roaming solution, managed by an AC Controller.
5. Specifications

Figure 10: Performance Overview
The image highlights key technical specifications of the PUSR USR-AP310i, including its compatibility with IEEE 802.11a/b/g/n/ac/ax standards, 512MB RAM, and a WiFi rate of up to 3000Mbps.

Figure 11: WiFi 6 and Client Capacity
This image emphasizes the device's WiFi 6 core solution, its ability to support up to 256 clients simultaneously, and its low-latency performance.
| Feature | Description |
|---|---|
| Model Number | USR-AP310i |
| Wireless Standard | 802.11ax (WiFi 6), 802.11ac, 802.11n, 802.11g, 802.11b, 802.11a |
| Frequency Band | Dual-Band (2.4GHz & 5GHz) |
| Max WiFi Rate | Up to 3000Mbps (AX3000) |
| Ethernet Ports | 1x 1G Ethernet Port, 1x 2.5G Ethernet Port |
| Power Supply | 802.3at PoE or 12V DC |
| RAM | 512MB |
| Max End Users | Up to 256 |
| Security Protocols | WPA, WPA2PSK TKIPAES, WPA2 EAP, WPA3 |
| Dimensions | 7.87 x 5.91 x 1.97 inches |
| Item Weight | 1.47 pounds |
| Manufacturer | Jinan USR IOT Technology Limited |
6. Maintenance
To ensure optimal performance and longevity of your USR-AP310i, consider the following maintenance guidelines:
- Firmware Updates: Regularly check the manufacturer's website for firmware updates. Keeping the firmware up-to-date ensures access to the latest features, security patches, and performance improvements.
- Cleaning: Periodically clean the exterior of the device with a soft, dry cloth. Avoid using liquid cleaners or aerosols. Ensure ventilation openings are free from dust accumulation.
- Environmental Conditions: Ensure the device is operated within its specified temperature and humidity ranges. Avoid exposing it to direct sunlight, excessive heat, or moisture.
- Network Cable Integrity: Periodically inspect Ethernet cables for any signs of damage or wear. Damaged cables can lead to intermittent connectivity or reduced performance.
7. Troubleshooting
If you encounter issues with your USR-AP310i, try the following basic troubleshooting steps:
- No Power:
- Verify that the Ethernet cable is securely connected to both the AP and the PoE switch/injector, or that the 12V DC power adapter is correctly plugged in.
- Ensure the PoE switch or power adapter is functioning correctly and receiving power.
- No Wireless Connectivity:
- Check if the AP's indicator light is on, indicating it's powered and operating.
- Confirm that the Ethernet cable connecting the AP to your network is functional.
- Access the AP's web interface to ensure the wireless network (SSID) is enabled and configured correctly.
- Restart the AP and your client devices.
- Slow Performance:
- Ensure the AP is placed in an optimal location, free from obstructions and sources of interference.
- Check for firmware updates.
- Verify that your client devices support WiFi 6 for optimal speeds.
- Reduce the number of connected devices if exceeding the recommended capacity.
- Cannot Access Web Interface:
- Ensure your computer is connected to the same network as the AP.
- Verify the IP address of the AP and your computer.
- Try a different web browser.
- If the default IP address has been changed and forgotten, a factory reset might be necessary (refer to the Quick Start Guide for reset instructions).
8. Warranty and Support
For specific warranty information, please refer to the warranty card included with your product or visit the official PUSR website.
If you require further assistance or encounter issues not covered in this manual, please contact PUSR customer support through their official channels.
- Manufacturer: Jinan USR IOT Technology Limited
- Brand: PUSR
- Online Support: Visit the PUSR Store on Amazon or their official website for contact information and resources.

