
Andeman AS-1
Andeman 1000W 10-inch Slim Under-Seat Powered Car Subwoofer (Model AS-1) Instruction Manual
Model: AS-1 | Brand: Andeman
1. Introduction
Thank you for choosing the Andeman 1000W 10-inch Slim Under-Seat Powered Car Subwoofer. This manual provides essential information for the proper installation, operation, and maintenance of your new car audio system component. Please read this manual thoroughly before use to ensure safe and optimal performance.

Figure 1: Andeman 1000W 10-inch Slim Under-Seat Powered Car Subwoofer overview.
2. Product Features
- 1000W Peak Power Bass: Features a 10-inch large-caliber driver and dual-layer voice coil, delivering 20Hz-150Hz ultra-low frequencies. Includes a precision-tuned bass reflex port for enhanced airflow efficiency.
- Excellent Heat Dissipation: Constructed with a cast aluminum enclosure for stable performance, high strength, corrosion resistance, and effective heat dissipation, ensuring long product life.
- Under-Seat Blue Bass Sync Lighting: Integrated cool blue LED rings pulse with bass beats, adding visual appeal. Designed for discreet under-seat installation with a 3.5-inch ultra-slim profile.
- Built-in High to Low Level Input: Equipped with a built-in Hi/Lo converter for universal compatibility with both factory and aftermarket audio systems, eliminating the need for external adapters.
- Pro-Grade Bass Precision: Engineered for less than 0.15% ultra-low distortion and a 20Hz-150Hz frequency range. Features +12dB bass boost, 90dB SNR, and 15A-25A fuse protection for reliable operation.
3. Package Contents
Ensure all items are present and in good condition upon unpacking:
- Andeman 1000W 10-inch Slim Under-Seat Powered Car Subwoofer (Model AS-1)
- Remote Bass Control Knob with Cable
- Power Wiring Kit (including power, ground, and remote wires)
- RCA Audio Cables (Low-Level Input)
- High-Level Input Harness
- Mounting Brackets and Screws
- User Manual
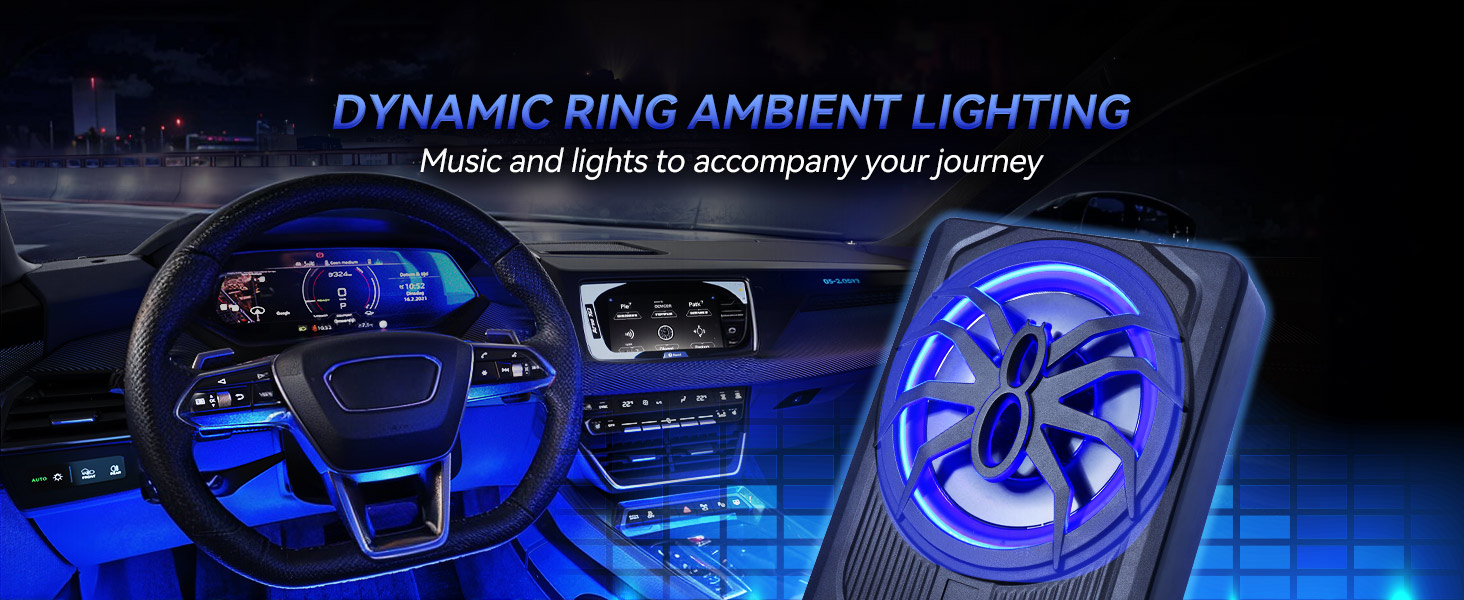
Figure 2: Included accessories and wiring kit.
4. Controls and Connections
The control panel on the subwoofer allows for fine-tuning of audio output and provides various input options.

Figure 3: Rear control panel with various inputs and adjustments.
- Power/Protection Indicators: Green LED indicates power on, Red LED indicates protection mode.
- Phase Switch: Adjusts the phase (0° or 180°) to optimize bass response with other speakers.
- Low Pass Filter (LPF): Adjustable crossover (50Hz-150Hz) to control the upper frequency limit of the subwoofer.
- Bass Boost: Adjusts bass level from 0 to +12dB.
- Gain Input: Controls the input sensitivity to match the output of your head unit.
- Remote Control Port: Connects the wired remote bass control knob.
- High-Level Inputs: For connecting directly to speaker wires from your head unit if RCA outputs are not available.
- Low-Level Inputs (RCA): For connecting to RCA pre-out outputs from your head unit.
- Fuse: Integrated 15A-25A fuse for circuit protection.
- Power Terminals: Connections for +12V (power), GND (ground), and REM (remote turn-on).
- Auto Power On Switch: Enables automatic power on/off when a signal is detected via high-level input.
5. Setup and Installation
Proper installation is crucial for optimal performance and safety. If you are unsure about any steps, consult a professional car audio installer.
5.1 Choosing a Mounting Location
The slim design of the AS-1 subwoofer allows for flexible placement. Common locations include under a seat, in the trunk, or in the cargo area of SUVs/Jeeps. Ensure the chosen location provides adequate ventilation and does not obstruct vehicle controls or passenger movement.

Figure 4: Example of under-seat subwoofer installation.
5.2 Wiring Connections
- Power (+12V): Connect the main power wire from the subwoofer's +12V terminal directly to the positive terminal of your vehicle's battery. Ensure an in-line fuse (included in the kit) is installed as close to the battery as possible for protection.
- Ground (GND): Connect the ground wire from the subwoofer's GND terminal to a clean, unpainted metal surface on the vehicle's chassis. Ensure a solid, secure connection for proper grounding.
- Remote Turn-On (REM): Connect the remote wire from the subwoofer's REM terminal to the remote output of your head unit. This wire signals the subwoofer to turn on/off with your vehicle's audio system. If using high-level inputs and your head unit does not have a remote output, the "Auto Power On" feature can be used.
- Audio Input:
- Low-Level (RCA): Connect RCA cables from your head unit's pre-out outputs to the subwoofer's Low-Level Inputs.
- High-Level: If your head unit lacks RCA outputs, use the provided high-level input harness. Connect the harness wires to your vehicle's speaker wires (e.g., rear speaker wires).
- Remote Bass Control: Connect the remote bass control knob to the "REMOTE CONTROL" port on the subwoofer. This allows for convenient bass level adjustment from the driver's seat.
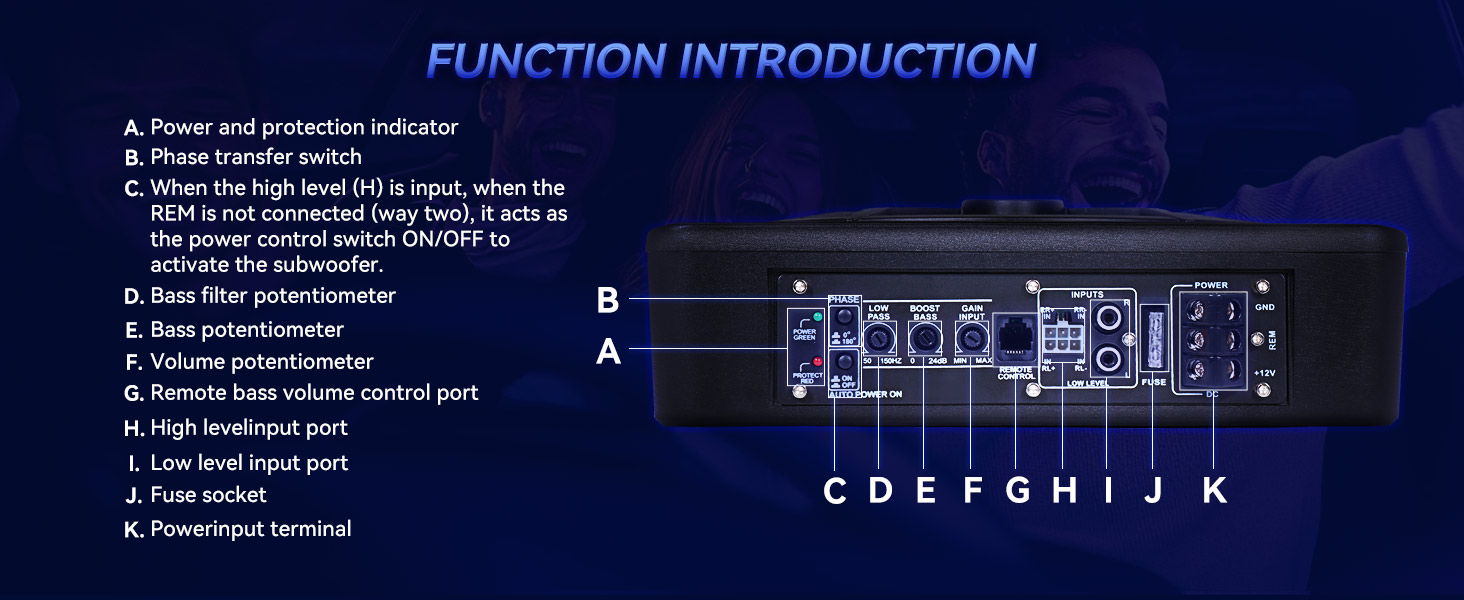
Figure 5: General wiring diagram for a powered car subwoofer.
6. Operating Instructions
Once installed, adjust the subwoofer settings for optimal sound integration with your vehicle's audio system.
- Initial Power-Up: After all connections are secure, turn on your vehicle's ignition and audio system. The green "Power" LED on the subwoofer should illuminate. If the red "Protect" LED lights up, refer to the Troubleshooting section.
- Gain Adjustment: Start with the "Gain Input" knob at its minimum setting. Play a familiar piece of music with strong bass. Slowly increase the gain until the bass output blends well with your main speakers without distortion. Avoid setting the gain too high, as this can lead to clipping and damage.
- Low Pass Filter (LPF): Adjust the LPF knob to blend the subwoofer's output with your main speakers. A common starting point is around 80-100Hz. Experiment to find the best balance where bass sounds natural and not "boomy" or localized.
- Bass Boost: Use the "Bass Boost" control sparingly. Excessive bass boost can introduce distortion. Adjust it to add a subtle punch if desired, but prioritize clear, undistorted bass.
- Phase Switch: Experiment with the 0° and 180° phase settings. Choose the setting that provides the strongest and most impactful bass from your listening position. This helps ensure the subwoofer's sound waves are in sync with your main speakers.
- Remote Bass Control: Use the wired remote to conveniently adjust the bass level from your driving position without accessing the subwoofer directly.
7. Maintenance
Regular maintenance ensures the longevity and performance of your subwoofer.
- Cleaning: Use a soft, dry cloth to clean the exterior of the subwoofer. Avoid using harsh chemicals or abrasive cleaners.
- Connection Checks: Periodically inspect all wiring connections (power, ground, remote, audio inputs) to ensure they are secure and free from corrosion. Loose connections can lead to poor performance or damage.
- Ventilation: Ensure the subwoofer's heat sink and ventilation areas are not obstructed to prevent overheating.
- Fuse Replacement: If the subwoofer stops working and the power LED is off, check the fuse. Replace it only with a fuse of the same type and rating (15A-25A).
8. Troubleshooting
If you encounter issues with your subwoofer, refer to the following table for common problems and solutions:
| Problem | Possible Cause | Solution |
|---|---|---|
| Amplifier cannot be started (No Power) |
|
|
| Protection indicator light is ON after amplifier starts |
|
|
| No output |
|
|
| Low power output |
|
|
9. Specifications
| Feature | Specification |
|---|---|
| Product Model | AS-1 |
| Speaker Type | Car Subwoofer |
| Speaker Size | 10 Inches |
| Speaker Maximum Output Power | 1000 Watts (Peak) |
| Frequency Response | 20Hz-150Hz |
| Signal-to-Noise Ratio (SNR) | >90 dB |
| Total Harmonic Distortion (THD) | 0.4% |
| Input Voltage | 15 Volts (Operating range 10-15V) |
| Impedance | 4 Ohms |
| Material | Aluminum |
| Product Dimensions (L x W x H) | 16"D x 5"W x 13"H (approx. 395 x 320 x 125mm) |
| Item Weight | 10.93 pounds (approx. 4.97 kg) |
| Fuse Rating | 15A-25A |
| Connectivity Technology | Auxiliary, RCA, Wired |
| Control Method | Remote |
| Special Feature | Built-in Amplifier, Blue LED Light, Hi/Lo Input |
10. Warranty and Support
This Andeman product comes with a limited warranty. For detailed warranty information, product support, or technical assistance, please refer to the contact information provided in the product packaging or visit the official Andeman website.
Please retain your proof of purchase for any warranty claims.
Related documentsAS-1


Ask a question about this manual
Ask about setup, troubleshooting, compatibility, parts, safety, or missing instructions. Manuals+ will review the question and use this page’s manual context to help answer it.