
Hayve CM4
Hayve Handheld Digital Microscope User Manual
Model: CM4
1. Introduction
Thank you for choosing the Hayve Handheld Digital Microscope. This portable device is designed to provide an engaging and educational experience for exploring the microscopic world. Featuring a 16MP camera, 1080P video recording, up to 1000X magnification, and a 2-inch IPS screen, it's perfect for observing various specimens, from insect wings to plant cells and coins. This manual provides essential information for setup, operation, maintenance, and troubleshooting to ensure optimal performance and enjoyment of your microscope.

Image 1.1: Hayve Handheld Digital Microscope and included accessories.
2. Package Contents
Please verify that all items are present in your package:
- Hayve Handheld Digital Microscope x 1
- Type-C USB Cable x 1
- User Manual x 1
- 8GB Micro SD Card x 1
- Packing Box x 1
- Prepared Slides x 6

Image 2.1: Visual representation of the package contents.
3. Product Features & Components
Familiarize yourself with the key features and components of your Hayve Digital Microscope:
- 2-inch IPS Screen: Provides a clear, real-time display of magnified images and videos. The screen is rotatable for comfortable viewing angles.
- 16MP Camera: Captures high-resolution still images.
- 1080P Video Recording: Records clear video footage of your observations.
- 8 Adjustable LED Lights: Integrated illumination system with 4 brightness modes to ensure optimal lighting for various specimens.
- Focus Wheel: Located on the microscope body, used to adjust the clarity of the image.
- Light Wheel: Controls the brightness of the LED lights.
- Micro SD Card Slot: For storing captured photos and videos (8GB card included).
- USB-C Port: For charging and connecting to a computer.
- Built-in Rechargeable Battery: Provides up to 3 hours of continuous use.

Image 3.1: Key components and features of the microscope.

Image 3.2: The 2.0-inch IPS screen provides a clear view of magnified objects.
4. Getting Started
4.1 Charging the Device
Before first use, fully charge the microscope. Connect the included Type-C USB cable to the microscope's USB-C port and the other end to a standard USB power adapter (not included) or a computer's USB port. The charging indicator light will show the charging status.
4.2 Inserting the Micro SD Card
The microscope comes with an 8GB Micro SD card for storage. Locate the SD card slot on the device. Gently insert the Micro SD card into the slot until it clicks into place. Ensure the card is inserted in the correct orientation.

Image 4.1: Inserting the 8GB Micro SD card for photo and video storage.
4.3 Powering On/Off
- To Power On: Press and hold the Power button located on the microscope body until the screen illuminates.
- To Power Off: Press and hold the Power button again until the screen turns off.
5. Operation Guide
5.1 Adjusting Magnification and Focus
The microscope offers 100X to 1000X magnification. To adjust the focus, place the microscope over your desired specimen. Rotate the focus wheel on the microscope body until the image on the screen appears clear and sharp. The digital zoom can be adjusted using the appropriate buttons on the device.

Image 5.1: Examples of different magnification levels achievable with the microscope.
5.2 Controlling LED Illumination
The microscope is equipped with 8 adjustable LED lights to illuminate your specimen. Use the Light Wheel to cycle through 4 brightness adjustment modes (0%, 50%, 100%) to achieve optimal lighting conditions for clear images.
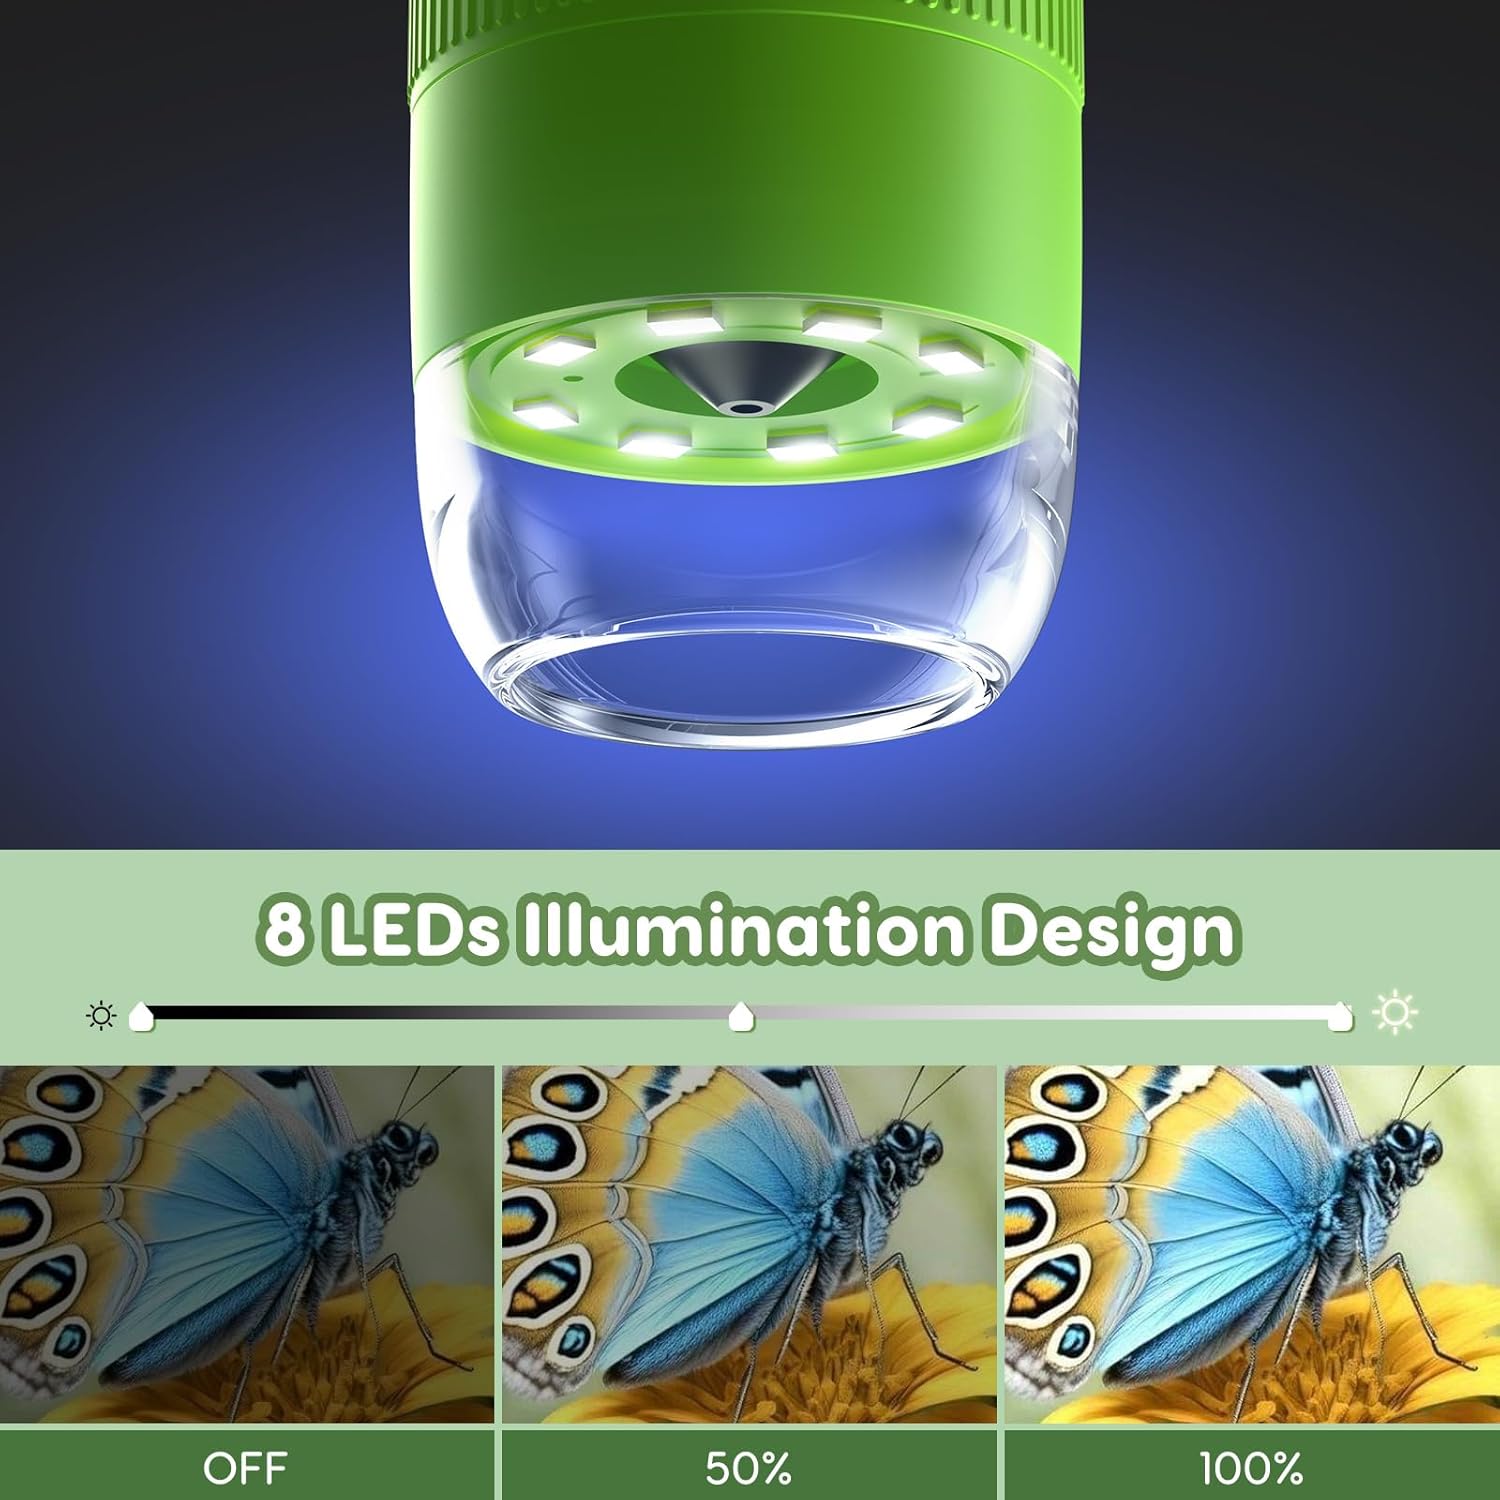
Image 5.2: Adjusting LED brightness for optimal viewing.
5.3 Capturing Photos and Videos
With the 8GB Micro SD card inserted, you can capture high-definition photos and 1080P videos of your discoveries. Use the dedicated Photo/Video button on the device to switch between modes and capture content. The captured media will be saved directly to the SD card.

Image 5.3: The microscope allows for easy capture of photos and videos.
5.4 Connecting to a PC
For a larger viewing experience or to transfer files, you can connect the microscope to a Windows or Mac computer via the USB-C cable. Once connected, the microscope can function as a webcam, allowing real-time viewing on your computer screen. You can also access the stored photos and videos directly from the SD card via the PC connection.

Image 5.4: Connecting the microscope to a PC for a larger display.
5.5 Using Prepared Slides
The microscope comes with six prepared slides to enhance your learning experience. Place a slide under the microscope's lens and adjust the focus and lighting to observe the intricate details of the specimens.

Image 5.5: The included educational slides for immediate exploration.
6. Maintenance and Care
- Cleaning: Use a soft, dry cloth to clean the microscope's body. For the lens and screen, use a microfiber cloth specifically designed for optics. Do not use liquid cleaners directly on the lens or screen.
- Storage: Store the microscope in a cool, dry place away from direct sunlight and extreme temperatures. Keep it in its original packaging or a protective case when not in use to prevent dust and damage.
- Battery Care: To prolong battery life, avoid fully discharging the battery frequently. Charge the device regularly, even if not in use for extended periods.
7. Troubleshooting
| Problem | Possible Cause | Solution |
|---|---|---|
| Microscope does not power on. | Low battery. | Charge the microscope using the provided USB-C cable. |
| Image is blurry. | Incorrect focus. | Rotate the focus wheel until the image is clear. Ensure the microscope is close enough to the specimen. |
| Screen is too dark/bright. | LED brightness not adjusted. | Adjust the LED brightness using the Light Wheel. |
| Cannot save photos/videos. | SD card not inserted or full. | Ensure the 8GB Micro SD card is correctly inserted. If full, transfer files to a computer and delete them from the card, or replace the card. |
| PC connection not working. | Incorrect cable or driver issue. | Ensure you are using the correct USB-C cable. Try a different USB port on your computer. Check your computer's device manager for driver issues. |
8. Technical Specifications
| Feature | Specification |
|---|---|
| Model Name | CM4 |
| Magnification Maximum | 1000x |
| Camera Resolution | 16MP |
| Video Resolution | 1080P |
| Screen Size | 2.0 inch IPS |
| Light Source | 8 Adjustable LEDs |
| Storage | 8GB Micro SD Card (included) |
| Battery | 1 Lithium Ion battery (included), 800mAh |
| Battery Life | Approx. 3 hours working time |
| Connectivity | USB-C (PC View compatible with Windows/Mac) |
| Product Dimensions | 4.17 x 2.55 x 7.59 inches |
| Item Weight | 8.4 ounces (0.24 Kilograms) |
| Material | Plastic |
| Color | Green |

Image 8.1: The compact and lightweight design of the microscope.
9. Warranty and Support Information
Hayve products are designed for quality and reliability. For specific warranty details and support, please refer to the warranty card included with your product or visit the official Hayve website. If you encounter any issues or have questions not covered in this manual, please contact Hayve customer support for assistance.
You can visit the Hayve Store on Amazon for more information: Hayve Amazon Store
Related documentsCM4

Ask a question about this manual
Ask about setup, troubleshooting, compatibility, parts, safety, or missing instructions. Manuals+ will review the question and use this page’s manual context to help answer it.