
1. Introduction
Thank you for purchasing the CHEVROLET KID'S16BD 16-inch Kids Bicycle. This manual provides important information for the safe assembly, operation, and maintenance of your bicycle. Please read this manual thoroughly before assembly and use, and keep it for future reference.
Safety Information
- Always wear a helmet when riding.
- Ensure all bolts and nuts are securely tightened before each ride.
- Check brake functionality before each use.
- Do not ride in traffic or on busy roads.
- Adult supervision is required for young riders.
2. Product Overview
The CHEVROLET KID'S16BD is a 16-inch kids bicycle designed for toddlers, featuring a durable alloy steel frame and essential accessories for a safe and enjoyable riding experience.
Key Features:
- Adjustable Handlebar and Saddle: Allows for customization to suit your child's growth.
- Front Basket: Convenient for carrying small items.
- 16-inch Tires: Slightly wider tires (16 x 2.125) for enhanced stability.
- Front and Rear Mudguards: Protects against splashes in wet conditions.
- Full Chain Cover: Prevents clothing from getting caught in the chain.
- Training Wheels: Provides stability for beginners.
- Reflector: For increased visibility.

Figure 2.1: CHEVROLET KID'S16BD 16-inch Kids Bicycle (Red)

Figure 2.2: Available Colors: Red and Beige
3. Assembly Instructions
The bicycle requires some assembly. Please follow these steps carefully. It is recommended to have two adults for assembly.
Required Tools (Not Included):
- Adjustable wrench
- Screwdriver
- Hex key set
Assembly Steps:
- Install Training Wheels and Rear Carrier:
Attach the training wheels to the rear axle. Secure the rear carrier (if included) to the frame using the provided bolts and nuts. Ensure all connections are tight.Figure 3.1: Training wheels and rear carrier installation.
- Install Front Wheel and Mudguard:
Insert the front wheel into the fork. Ensure the wheel is centered and the axle nuts are securely tightened. Attach the front mudguard to the fork using the provided hardware.
Figure 3.2: Front wheel and mudguard assembly.
- Install Handlebars:
Insert the handlebar stem into the head tube of the frame. Adjust the height and alignment, then tighten the stem bolt securely. Ensure the handlebars are straight and firm.
Figure 3.3: Handlebar installation and adjustment.
- Install Saddle:
Insert the saddle post into the seat tube. Adjust the saddle height to an appropriate level for the rider, then tighten the quick-release lever or seat post clamp bolt.
Figure 3.4: Saddle height adjustment.
- Install Pedals:
Identify the left (L) and right (R) pedals. The left pedal has a left-hand thread (tightens counter-clockwise), and the right pedal has a right-hand thread (tightens clockwise). Thread the pedals into the crank arms and tighten them securely with a wrench.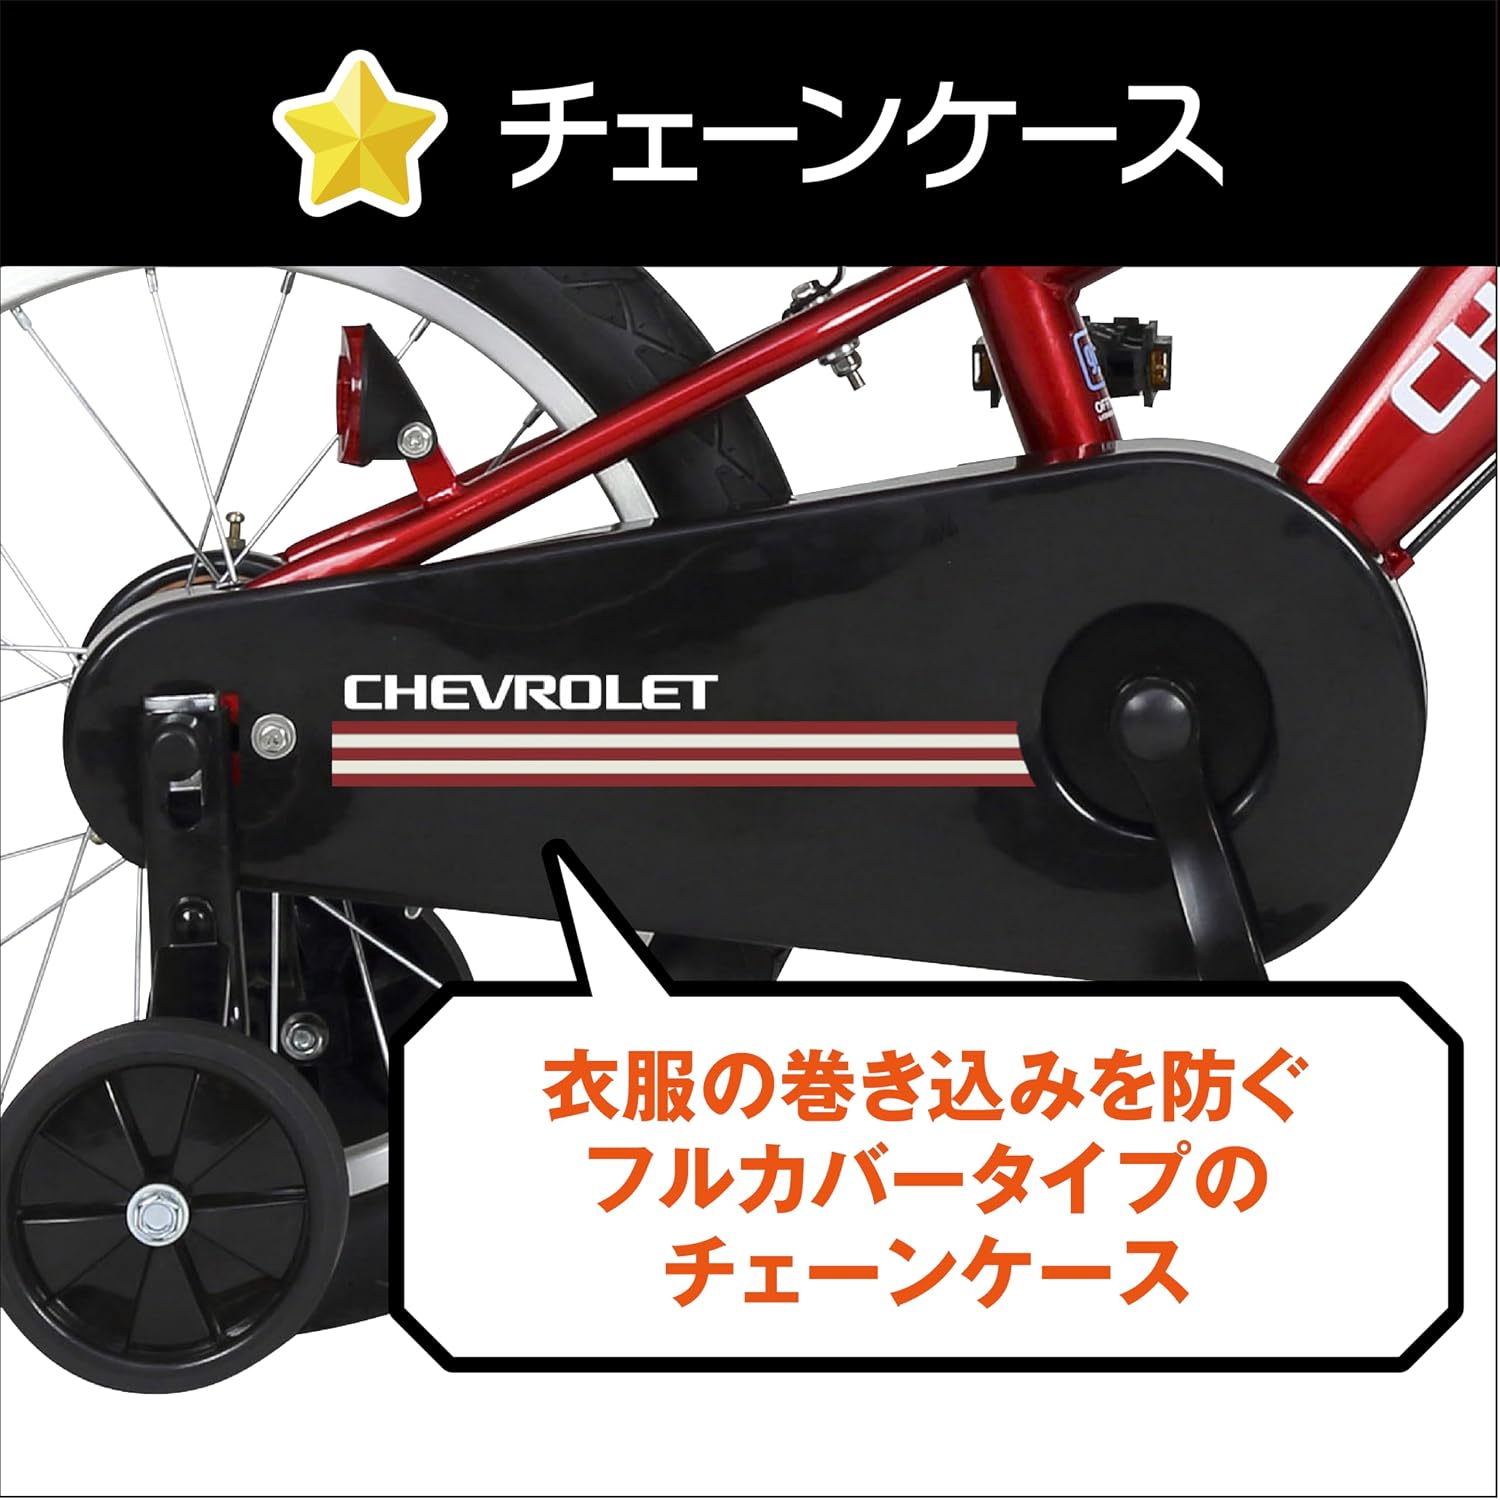
Figure 3.5: Pedal installation.
- Install Front Basket:
Attach the front basket to the handlebars and the front fork using the provided brackets and hardware. Ensure it is securely fastened and does not interfere with steering or braking.
Figure 3.6: Front basket attachment.
- Adjust Brakes:
Ensure both front (caliper) and rear (drum) brakes are properly connected and adjusted. The brake levers should be easily accessible and provide firm stopping power without excessive force. Adjust cable tension as needed.Figure 3.7: Brake adjustment.
4. Operating Instructions
Riding Safely:
- Always ensure the rider wears a properly fitted helmet.
- Teach your child how to use the brakes effectively.
- Start riding in a safe, open area away from traffic.
- Adjust the saddle height so the child can comfortably touch the ground with their feet.
- The training wheels provide initial stability; remove them when the child is confident balancing.
5. Maintenance
Regular maintenance will ensure the longevity and safe operation of your bicycle.
Routine Checks:
- Tires: Check tire pressure regularly. The recommended pressure is usually indicated on the tire sidewall.
- Brakes: Inspect brake pads for wear and ensure cables are not frayed. Adjust brake tension as needed for optimal stopping power.
- Chain: Keep the chain clean and lubricated to prevent rust and ensure smooth pedaling.
- Bolts and Nuts: Periodically check and tighten all bolts and nuts, especially on the handlebars, seat post, wheels, and pedals.
- Frame: Clean the frame with a damp cloth and mild soap. Avoid harsh chemicals.
6. Troubleshooting
Here are some common issues and their solutions:
| Problem | Possible Cause | Solution |
|---|---|---|
| Brakes feel weak | Loose brake cable, worn brake pads, incorrect adjustment. | Tighten brake cable, replace worn pads, adjust brake calipers/drum. |
| Pedals are stiff or noisy | Lack of lubrication, loose or overtightened pedals. | Lubricate chain and pedal bearings, ensure pedals are correctly tightened. |
| Wobbly wheels | Loose axle nuts, damaged wheel. | Tighten axle nuts securely. If wheel is damaged, seek professional repair. |
| Handlebars are loose | Stem bolt is loose. | Tighten the handlebar stem bolt. |
7. Specifications
| Feature | Detail |
|---|---|
| Model | KID'S16BD |
| Brand | Chevrolet |
| Bicycle Type | Kids Bike |
| Wheel Size | 16 inches |
| Frame Material | Alloy Steel |
| Number of Speeds | 1 |
| Brake Style | Caliper Brake (front), Drum Brake (rear) |
| Saddle Height (from ground) | Approx. 49cm - 60cm |
| Handlebar Width | Approx. 50cm |
| Total Length | Approx. 111cm |
| Weight | Approx. 11kg |
| Included Components | Mudguards, Chain Cover, Training Wheels, Basket, Reflector |
| Target Age | Toddler |
| Helmet Size (if included) | XS (48-53cm) |
| Manufacturer | Gic |
| Release Year | 2024 |
8. Warranty and Support
Warranty Information:
This product comes with a 1-year warranty from the date of purchase. The warranty covers manufacturing defects under normal use. Please retain your proof of purchase for warranty claims.
Customer Support:
For any questions, concerns, or technical assistance, please contact your retailer or the manufacturer's customer service. Refer to your purchase documentation for specific contact details.