1. Introduction
Welcome to the user manual for your Optonica 4-Zone Single Colour LED Remote Control. This device is designed to provide intuitive and precise control over your single-color LED lighting systems, allowing for seamless dimming and independent zone management. Please read this manual carefully before installation and operation to ensure proper use and longevity of the product.
2. Product Overview
The Optonica 4-Zone Single Colour LED Remote Control features a sleek, wall-mounted touch panel design, offering comprehensive control over up to four independent lighting zones and the ability to save and recall scene presets.
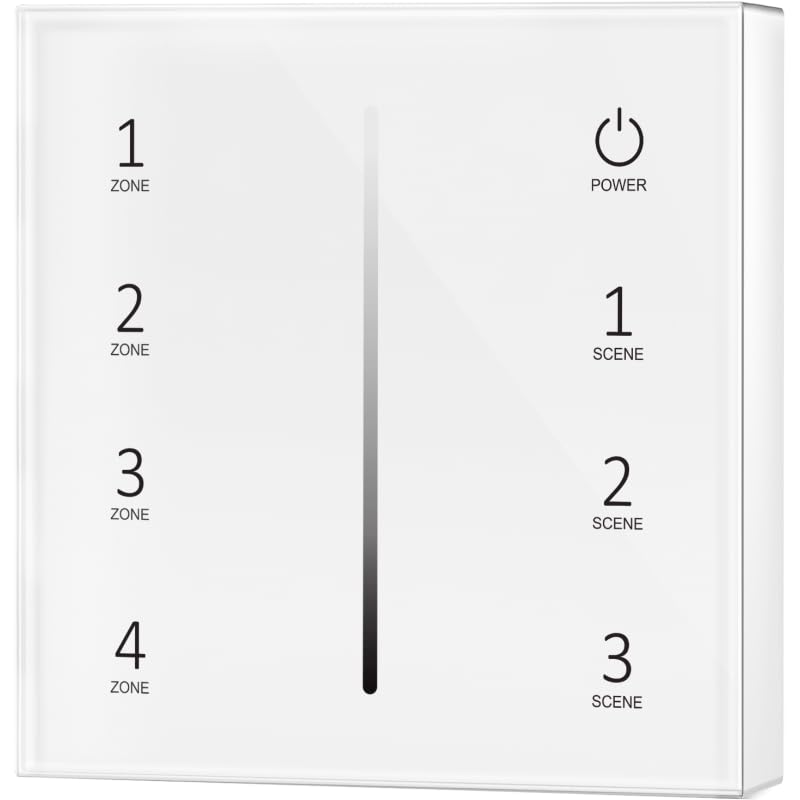
Front view of the Optonica 4-Zone Single Colour LED Remote Control, showing four zone selection buttons (1-4) on the left, a vertical dimming slider in the center, a power button at the top right, and three scene preset buttons (1-3) on the right.
3. Setup and Installation
3.1. Power Requirements
This remote control operates on DC12V. Ensure your LED receiver system and power supply are compatible with this voltage and provide stable power.
3.2. Pairing Instructions
To pair the remote control with your LED receiver(s) for each zone:
- Ensure the LED receiver you wish to pair is powered off.
- Power on the LED receiver.
- Within 3 seconds of powering on the receiver, press and hold the desired Zone button (1, 2, 3, or 4) on the remote control for approximately 5 seconds.
- The connected LED lights will flash three times to indicate successful pairing.
- Repeat this process for other zones if you have multiple receivers or wish to assign different zones to the remote control.
4. Operating Instructions
4.1. Button Functions
- Power Button (Top Right): Press this button to turn all paired lights ON or OFF.
- Zone Buttons (1-4, Left Side): Briefly press one of these buttons to select a specific zone for individual control. Long press to initiate pairing for that zone (as described in Section 3.2).
- Dimming Slider (Center Vertical): Slide your finger up or down along this touch-sensitive bar to adjust the brightness level of the currently selected zone. If no specific zone is selected, this will adjust the brightness of all active zones.
- Scene Buttons (1-3, Right Side):
- Save Scene: With the desired brightness set for a zone or all zones, press and hold a Scene button (1, 2, or 3) for approximately 3 seconds until the lights flash. This action saves the current brightness state to that scene preset.
- Recall Scene: Briefly press a Scene button (1, 2, or 3) to recall the previously saved brightness level for the selected zone or all active zones.
4.2. Multi-Zone Control
To control multiple zones simultaneously, ensure all desired zones are paired to the remote control. You can then adjust brightness using the dimming slider or recall scenes, affecting all active zones without needing to select them individually.
5. Maintenance
- Clean the remote control surface with a soft, dry cloth.
- Do not use abrasive cleaners, solvents, or harsh chemicals, as these may damage the surface or internal components.
- Keep the device away from excessive moisture, high humidity, and direct sunlight.
- This device has an IP20 rating, meaning it is protected against solid objects larger than 12.5mm but offers no protection against water ingress.
6. Troubleshooting
| Problem | Possible Cause | Solution |
|---|---|---|
| Remote not responding | No power supply or incorrect wiring. | Check the DC12V power connection to the remote control and ensure wiring is correct according to installation diagrams. |
| Lights not responding to remote | Remote not paired with the receiver. | Follow the pairing instructions in Section 3.2. |
| Lights flicker or don't dim smoothly | Incompatible receiver or unstable power supply. | Ensure your LED receiver is compatible with single-color dimmable LEDs. Check the stability and voltage of your power supply. |
7. Specifications
- Model: Optonica AC6375
- Type: 4-Zone Single Colour LED Remote Control / Touch Panel
- Dimensions: 86 x 86 x 13.5 mm
- Input Voltage: DC12V
- IP Rating: IP20 (Indoor use only)
- Control Method: Touch Panel
- Number of Zones: 4
- Scene Presets: 3
8. Warranty and Support
For warranty information or technical support regarding your Optonica product, please contact your original retailer or visit the official Optonica website. When seeking support, please have your model number (AC6375) and purchase details readily available.


