Product Overview
The ClimaTek 36C68-212 is an upgraded gas valve designed as a direct replacement for White Rodgers 36C68-212 models. This component is engineered for durability and reliable performance in various HVAC heating systems.
- This is a brand new upgraded Gas Valve.
- This ClimaTek Part Directly Replaces Part # 36C68-212.
- Top Quality ClimaTek Replacement Part, Built to Last!
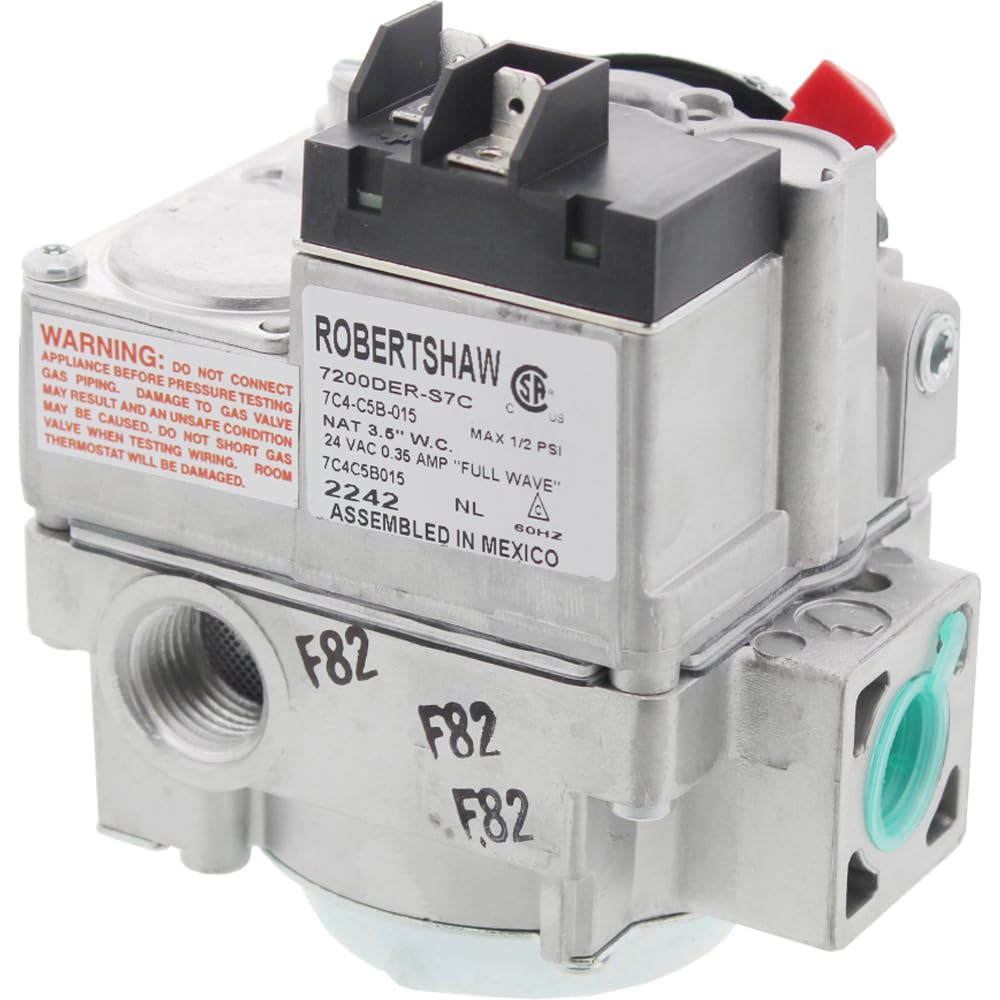
Image of the ClimaTek 36C68-212 Upgraded Gas Valve. The visible label indicates 'ROBERTSHAW 7200DER-S7C', 'NAT 3.5" W.C.', 'MAX 1/2 PSI', '24 VAC 0.35 AMP "FULL WAVE"', '60HZ', and 'ASSEMBLED IN MEXICO'. A warning label is also visible.
Important Safety Information
WARNING: DO NOT CONNECT APPLIANCE BEFORE PRESSURE TESTING GAS PIPING. DAMAGE TO GAS VALVE MAY RESULT AND AN UNSAFE CONDITION MAY BE CAUSED. DO NOT SHORT GAS VALVE WHEN TESTING WIRING. ROOM THERMOSTAT WILL BE DAMAGED.
Installation and service of this gas valve must be performed by a qualified service technician. Failure to follow these instructions could result in property damage, personal injury, or death. Always adhere to local codes and regulations.
Specifications
- Model: 36C68-212
- Replaces: White Rodgers 36C68-212
- Manufacturer: ClimaTek
- Product Dimensions: 4 x 6 x 5 inches
- Weight: 2.44 Pounds
- Electrical Rating: 24 VAC, 0.35 AMP "FULL WAVE", 60HZ
- Gas Type: Natural Gas (NAT 3.5" W.C.)
- Max Inlet Pressure: 1/2 PSI
- Assembly Location: Assembled in Mexico
Installation Instructions
This gas valve is a critical component of your HVAC system. Proper installation is essential for safe and efficient operation. It is strongly recommended that installation be performed by a certified HVAC technician.
- Safety First: Ensure all power to the appliance and gas supply are turned off before beginning any work. Verify with a multimeter.
- Depressurize Gas Lines: If replacing an existing valve, ensure gas lines are depressurized according to local codes and manufacturer guidelines.
- Disconnect Wiring: Carefully disconnect all electrical wiring from the old gas valve, noting their positions for correct re-connection. Take photos if necessary.
- Remove Old Valve: Disconnect gas piping from the old valve. Use appropriate tools and ensure no damage to existing pipes.
- Inspect New Valve: Before installing, visually inspect the new ClimaTek 36C68-212 gas valve for any signs of damage or debris.
- Install New Valve: Apply appropriate pipe sealant (suitable for gas) to threaded connections (if required by local codes) and carefully install the new valve into the gas piping. Ensure it is oriented correctly and tightened to manufacturer specifications.
- Reconnect Wiring: Reconnect all electrical wiring to the new valve as noted during disconnection. Ensure secure, clean connections.
- Leak Test: After installation, slowly turn on the gas supply and perform a thorough leak test on all connections using an approved leak detection solution. Do not use an open flame.
- Restore Power: Once leak testing is complete and no leaks are detected, restore power to the appliance.
- Test Operation: Follow appliance manufacturer's instructions to test the operation of the gas valve and the entire heating system, including ignition and shutdown cycles.
Operating Principles
The gas valve controls the flow of natural gas to the burner assembly in your heating appliance. When the thermostat calls for heat, a low-voltage signal (24 VAC) energizes the solenoid within the gas valve, opening the valve and allowing gas to flow to the main burner. Once the thermostat is satisfied, the electrical signal is removed, and the valve closes, shutting off the gas supply.
This specific model is designed for natural gas applications with a maximum inlet pressure of 1/2 PSI and operates on a 24 VAC 'FULL WAVE' electrical signal, ensuring compatibility with systems requiring this specification.
Maintenance
The ClimaTek 36C68-212 gas valve is designed for reliable operation with minimal user maintenance. However, regular inspection of your entire HVAC system by a qualified technician is recommended annually to ensure optimal performance and safety.
- Annual Inspection: Have a qualified technician inspect the gas valve and associated components for signs of wear, corrosion, gas leaks, or operational issues.
- Cleanliness: Ensure the area around the gas valve is kept clean and free from dust, debris, or obstructions that could impede its function or ventilation.
- Wiring Check: During annual service, ensure all electrical connections to the valve are secure, free from corrosion, and properly insulated.
- Do Not Lubricate: Do not attempt to lubricate or disassemble the gas valve. Internal components are not user-serviceable and tampering can lead to malfunction or unsafe conditions.
Troubleshooting
If your heating appliance is not functioning correctly, consult a qualified HVAC technician. The following are general troubleshooting steps related to gas valve operation, but professional diagnosis is always recommended due to the inherent risks associated with gas appliances.
- No Heat:
- Check if the thermostat is set correctly and actively calling for heat.
- Verify the main gas supply valve to the appliance is open.
- Ensure the appliance's electrical power supply is on and circuit breakers are not tripped.
- Listen for a 'click' from the gas valve when the thermostat calls for heat; absence of a click may indicate an electrical issue, a faulty thermostat, or a malfunctioning valve.
- Pilot Light Issues (if applicable):
- If your system has a pilot light, ensure it is lit. A faulty gas valve can sometimes prevent adequate gas flow to the pilot or main burner.
- Refer to your appliance's specific instructions for pilot relighting procedures.
- Gas Odor:
- If you detect a gas odor, immediately turn off the gas supply at the main valve, evacuate the premises, and contact your gas provider and a qualified technician. Do not attempt to troubleshoot a gas leak yourself or operate any electrical switches.
- Repeated Cycling:
- This issue is often related to other system components (e.g., thermostat, limit switches, dirty filters) but can sometimes be influenced by gas valve operation. A qualified technician can accurately diagnose the cause.
Support and Warranty
For technical support or warranty inquiries regarding your ClimaTek 36C68-212 Upgraded Gas Valve, please contact ClimaTek customer service or visit the official ClimaTek store.
ClimaTek Store: Visit the ClimaTek Store on Amazon
Specific warranty details may vary. Please retain your proof of purchase for all warranty claims and provide the model number (36C68-212) when contacting support.


