1. Introduction
This manual provides detailed instructions for the setup, operation, and maintenance of your BISOFICE D2015 TAM Expandable Phone System. This system includes a corded base station with an integrated answering machine and a cordless handset, designed for clear communication and ease of use. Please read this manual thoroughly before using your phone system to ensure proper functionality and to utilize all available features.
2. Package Contents
Verify that all items listed below are present in your package:
- Telephone Base (Corded Unit)
- Cordless Handset
- Handset Charging Cradle
- Telephone Line Cord
- Power Adapter for Base Station
- Power Adapter for Handset Charging Cradle
- Rechargeable AAA Batteries (2x)
- User Manual (this document)

Image: All components included in the BISOFICE D2015 TAM Phone System package.
3. Product Overview
3.1 Base Station Layout

Image: Labeled diagram of the base station's front and rear panels.
- Working indicator light: Indicates operational status.
- Display screen: 3.1-inch LCD for caller ID, menu, and status.
- Downlink/Incoming call button: To answer incoming calls.
- M1-M4 Photo Memory Keys: Four one-touch memory keys for frequently dialed numbers.
- MEMO recording button: For recording voice memos.
- OGM recording button: For recording outgoing messages for the answering machine.
- Answering record switch: To turn the answering machine on/off.
- One-touch voice increase (BOOST) button: Increases call volume by 15dB.
- Flash/Delete (FL/CLR) button: For flash function or clearing entries.
- Redial/Pause (RD/P) button: For redialing the last number or inserting a pause.
- Hands-free button: To activate speakerphone.
- Uplink/Outgoing call button: To initiate calls.
- Menu key/Confirm key/Mute: Navigates menus, confirms selections, or mutes the microphone.
- Phonebook/Return: Accesses the phonebook or returns to the previous menu.
- Playback button: Plays back answering machine messages.
- Number keys (0-9, *, #): For dialing and data entry.
- Telephone line socket: Connects to the telephone wall jack.
- DC6V socket: Connects to the power adapter.
3.2 Cordless Handset Layout

Image: Cordless handset highlighting the AMP (volume boost) button and side volume controls.
- 1.8-inch Half-Dot Display: Shows caller ID, menu, and status.
- M1, M2, M3 Keys: Three one-touch memory keys for quick dialing.
- OK/Menu Button: Accesses menus and confirms selections.
- Navigation Buttons (Up/Down/Left/Right): For menu navigation and volume adjustment during calls.
- Talk/Speakerphone Button: To make or answer calls, or activate speakerphone.
- End Call/Power Button: To end calls or power the handset on/off.
- R/CLR (Redial/Clear) Button: For redialing or clearing entries.
- INT (Intercom) Button: For internal calls between handsets.
- RD/P (Redial/Pause) Button: For redialing the last number or inserting a pause.
- AMP (Volume Boost) Button: Located on the side, increases call volume by 15dB.
- Side Volume Buttons: Adjusts earpiece or speakerphone volume (8 levels).
4. Setup
4.1 Battery Installation (Cordless Handset)
- Locate the battery compartment cover on the back of the cordless handset.
- Slide the cover downwards to remove it.
- Insert the two supplied 1.2V 400mAh Ni-MH AAA rechargeable batteries, observing the correct polarity (+ and -).
- Replace the battery compartment cover by sliding it upwards until it clicks into place.
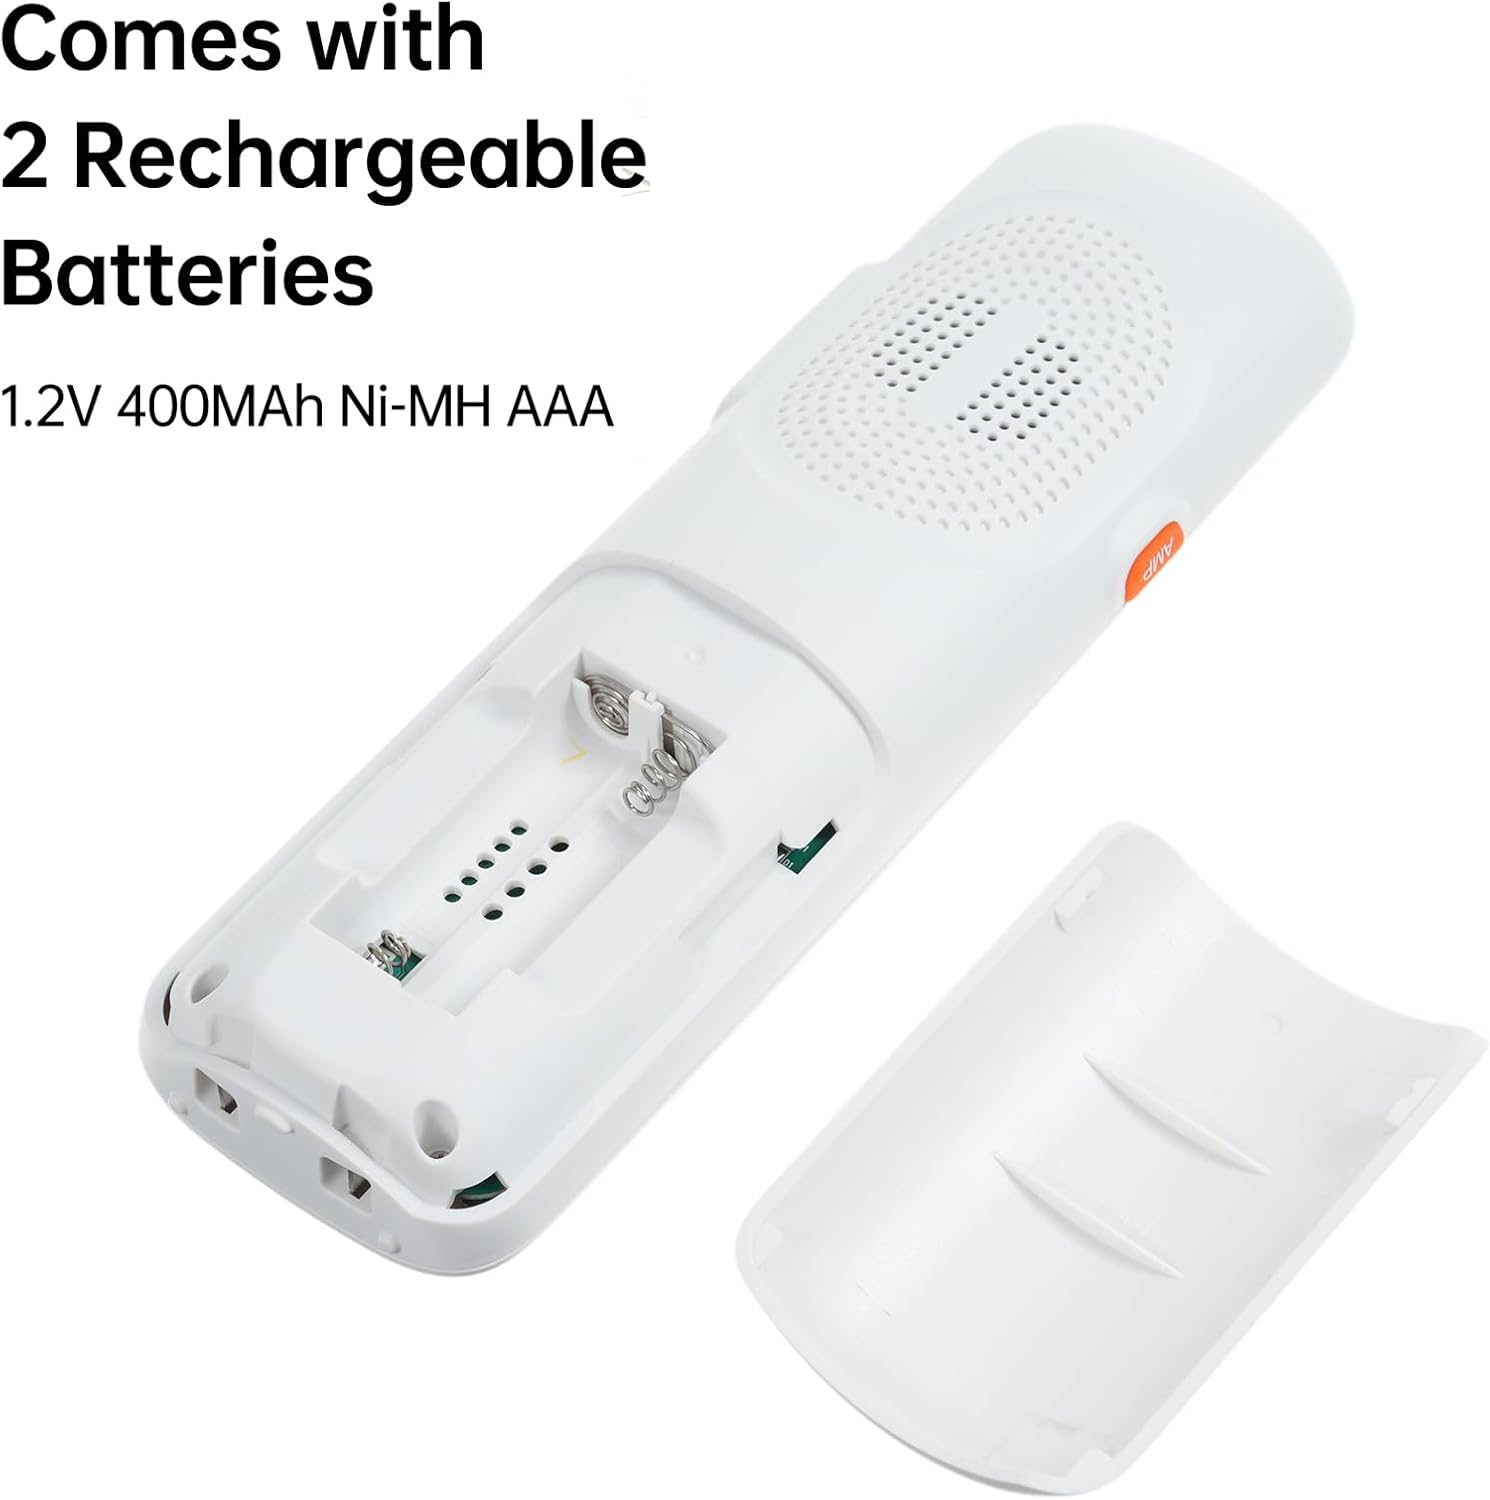
Image: Battery compartment of the cordless handset with batteries inserted.
4.2 Connecting the Base Station and Charging Cradle
- Connect the Telephone Line: Plug one end of the telephone line cord into the TEL LINE socket on the back of the base station and the other end into your telephone wall jack.
- Connect Base Power: Plug the small end of the base station power adapter into the DC6V socket on the back of the base station. Plug the larger end into a standard electrical outlet.
- Connect Handset Charging Cradle Power: Plug the small end of the charging cradle power adapter into the DC6V socket on the back of the charging cradle. Plug the larger end into a standard electrical outlet.
4.3 Initial Charge
Place the cordless handset in its charging cradle. For optimal battery performance, allow the handset to charge continuously for at least 12-15 hours before its first use, even if the display indicates a full charge sooner.
5. Basic Operations
5.1 Making a Call
- Using the Corded Base: Lift the corded handset or press the Hands-free button. Dial the desired number using the number keys.
- Using the Cordless Handset: Press the Talk/Speakerphone button. Dial the desired number using the number keys.
5.2 Answering a Call
- Using the Corded Base: Lift the corded handset or press the Hands-free button when the phone rings.
- Using the Cordless Handset: Press the Talk/Speakerphone button when the phone rings.
5.3 Adjusting Volume
- Corded Base: Use the volume up/down buttons (often integrated with navigation) during a call. Press the BOOST button for a 15dB volume increase.
- Cordless Handset: Use the side volume buttons or the navigation up/down buttons during a call. Press the AMP button on the side for a 15dB volume increase. There are 8 volume levels available.
5.4 One-Touch Dialing (M1-M4)
The base station features four one-touch memory keys (M1-M4), and the cordless handset has three (M1-M3). These allow for quick dialing of pre-programmed numbers.

Image: Base station and handset highlighting the one-touch memory dial buttons.
To Program a One-Touch Key:
- Press and hold the desired memory key (M1-M4 on base, M1-M3 on handset) until the display prompts for number entry.
- Enter the phone number you wish to store.
- Press the same memory key again to save.
To Use a One-Touch Key: Simply press the desired memory key to dial the stored number.
5.5 Phonebook Management
The system supports storing up to 50 phonebook entries. Both the base station and handset offer caller ID memory, dialed number memory, and phonebook memory.

Image: Base station and handset illustrating the phonebook memory feature.
To Add a Phonebook Entry:
- Press the Phonebook button (on base) or navigate to the Phonebook menu (on handset).
- Select 'Add New Entry'.
- Enter the name using the alphanumeric keys. (For example, press '2' once for 'A', twice for 'B', three times for 'C').
- Enter the phone number.
- Save the entry.
To Dial from Phonebook:
- Access the Phonebook.
- Scroll to the desired entry.
- Press the Talk/Speakerphone button (handset) or lift the handset/press Hands-free (base) to dial.
6. Advanced Features
6.1 Digital Answering Machine (TAM)
The base station includes a digital answering machine with up to 60 minutes of recording time for incoming messages and up to 120 seconds for memo recording.

Image: Base station display indicating an answering machine function is active.
- Turning On/Off: Use the Answering record switch on the base station.
- Recording Outgoing Message (OGM): Press the OGM recording button and follow the voice prompts.
- Playing Messages: Press the Playback button on the base station.
- Memo Recording: Press the MEMO recording button to record a personal reminder.
6.2 Intercom and Conference Calls
The system supports intercom functionality between two registered handsets and conference calling with an external line.

Image: Illustration of multi-device interconnectivity, showing handsets communicating across different rooms.
- Intercom: From a cordless handset, press the INT button and select the desired handset number to call.
- Conference Call: During an external call on a handset, you can initiate an intercom call to another handset. Once the second handset answers, select the 'Conference' option from the menu to merge the calls.
6.3 Multi-Handset Registration
The system supports up to 5 handsets registered to the same base station. Each handset can also be registered to up to 4 different base stations.
To Register an Additional Handset:
- On the base station, enter the registration mode (refer to the base station's menu for specific steps, usually found under 'Settings' or 'Registration').
- On the new cordless handset, access the 'Registration' menu.
- Follow the on-screen prompts to complete the registration process. This typically involves entering a PIN (default is often 0000).
7. Settings and Customization
7.1 Ringtones and Volume
You can choose from 10 different ringtones and adjust the ringtone, headset, and speakerphone volumes. Different melodies can be set for different incoming calls.
- Access the 'Settings' or 'Ringtone' menu on either the base station or handset.
- Select your preferred ringtone and adjust volume levels.
7.2 Dialing Modes and Flash Time
Customize tone/pulse dialing modes and flash time (100/300/600/1000ms) to suit your telephone line requirements.
- Navigate to 'Settings' > 'Dialing Mode' or 'Flash Time' in the menu.
- Select the appropriate option for your service provider.
7.3 Alarm Function
The phone system includes an alarm function.
- Access the 'Alarm' menu via the handset or base station.
- Set the desired alarm time and activation status.
8. Troubleshooting
If you encounter issues with your phone system, refer to the table below for common problems and solutions.
| Problem | Possible Cause | Solution |
|---|---|---|
| No dial tone | Telephone line cord is disconnected or faulty. | Ensure the telephone line cord is securely connected to both the base station and the wall jack. Test with another phone if possible. |
| Handset display is blank or 'Searching' | Handset is out of range, batteries are low, or not registered. | Move the handset closer to the base. Place the handset on the charging cradle. Re-register the handset if necessary (refer to Section 6.3). |
| Cannot make or receive calls | Power adapter is disconnected, telephone line issue, or system error. | Check all power and telephone line connections. Unplug the base station power adapter, wait 15 seconds, then plug it back in. |
| Poor call quality (static, interference) | Interference from other electronic devices or distance from base. | Move the base station away from other electronic devices (Wi-Fi routers, microwaves). Move closer to the base station. |
| Answering machine not recording | Answering machine is off or memory is full. | Ensure the answering machine is switched on. Delete old messages to free up memory. |
9. Specifications
- Product Dimensions: 8.66 x 3.54 x 12.6 inches (Base unit)
- Item Weight: 2.82 pounds
- Brand: Bisofice
- Color: White
- Telephone Type: Corded (Base) / Cordless (Handset)
- Material: Acrylonitrile Butadiene Styrene (ABS)
- Power Source: Corded Electric
- Answering System Type: Digital
- Answering Machine Recording Time: Up to 60 minutes
- Memo Recording Time: Up to 120 seconds
- Compatible Devices: PSTN Network
- Conference Call Capability: Basic
- Multiline Operation: Multi-Line Operation (via multiple registered handsets)
- Handset Display: 1.8-inch half-dot display
- Base Station Display: 3.1-inch LCD screen
- Handset Volume Boost: +15dB via AMP button
- Base Station One-Touch Memory Keys: 4
- Handset One-Touch Memory Keys: 3
- Phonebook Memory: 50 entries

Image: Dimensions of the base station and cordless handset.
10. Warranty and Support
Your BISOFICE D2015 TAM Expandable Phone System is covered by a manufacturer's warranty. Please refer to the warranty card included in your package for specific terms and conditions. For technical support, troubleshooting assistance, or warranty claims, please contact BISOFICE customer service through the retailer where the product was purchased or visit the official BISOFICE website for contact information.


