
1. Product Overview
The PowMr ZBL-30A Solar Charge Controller is designed to manage the power flow from your solar panel to your battery, ensuring efficient charging and protecting the battery from overcharge and over-discharge. It is compatible with 12V/24V lead-acid battery systems and features an LCD display for monitoring and dual USB outputs for charging external devices.
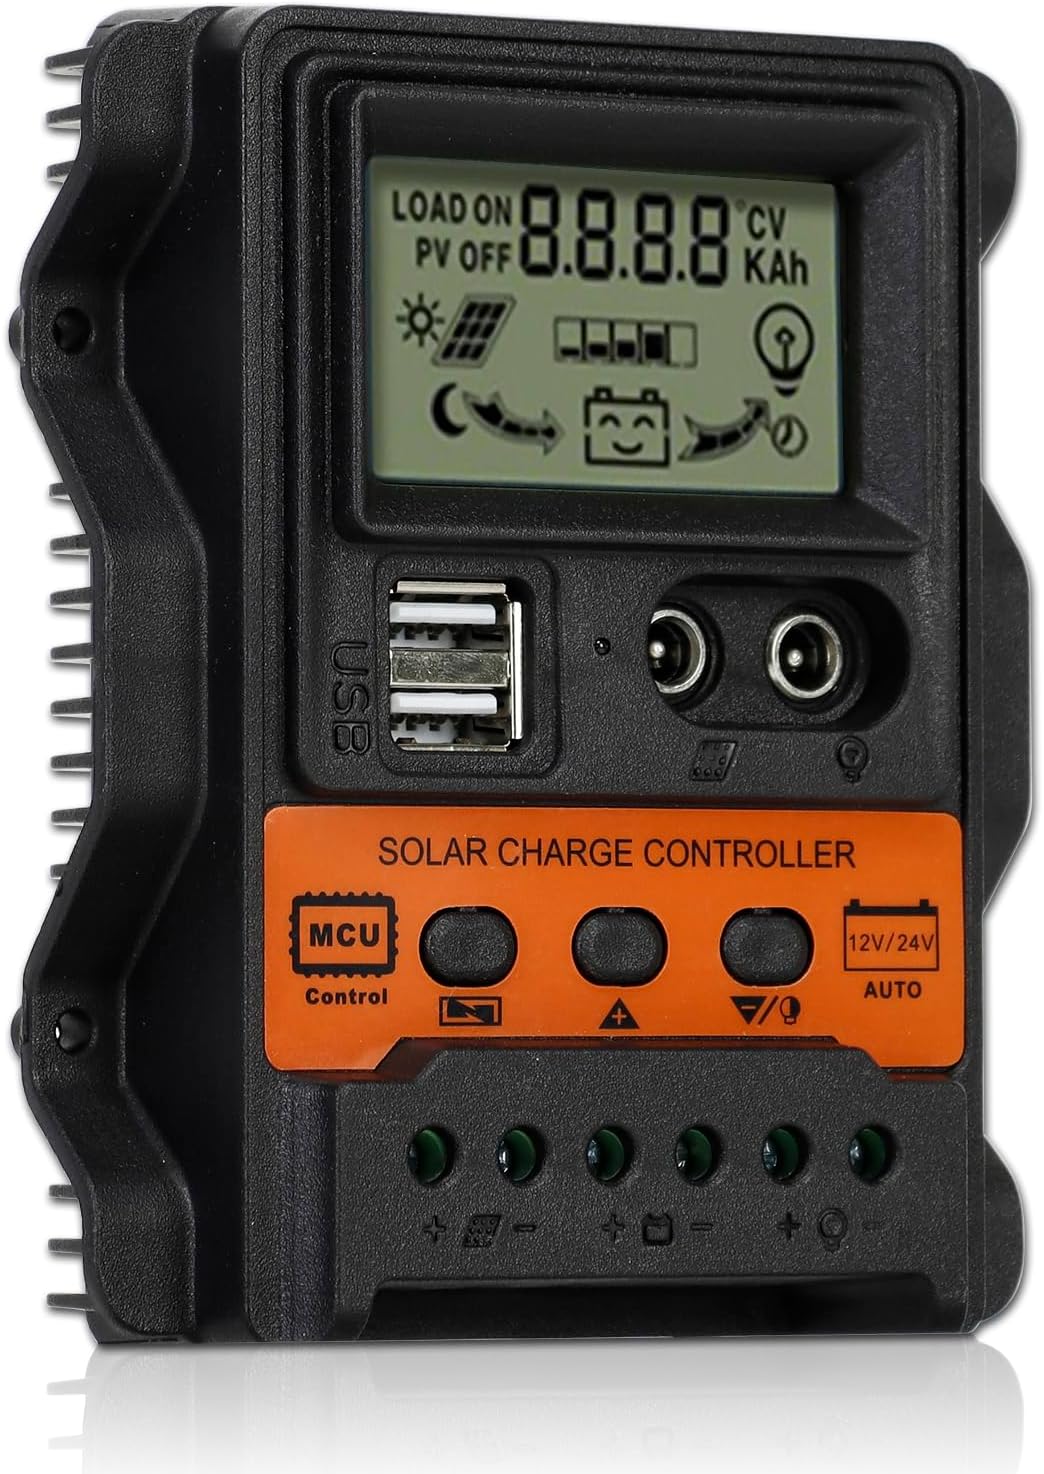
Image 1.1: Front view of the PowMr ZBL-30A Solar Charge Controller, showing the LCD display, control buttons, USB ports, and wiring terminals.
2. Key Features
- 30A Current Rating: Manages up to 30A discharge current for 12V/24V systems.
- Automatic Voltage Detection: Automatically detects 12V or 24V battery systems.
- LCD Display: Provides clear status and data, with three buttons for easy parameter configuration.
- Dual USB Output: Two 5V/2.5A (max) USB ports for charging mobile devices.
- Lead-Acid Battery Compatibility: Specifically designed for all types of lead-acid batteries (open, sealed, gel).
- Comprehensive Protection: Includes short-circuit, open-circuit, reverse polarity, and over-load protection.
- 3-Stage PWM Charging: Optimizes battery charging to improve efficiency and extend battery lifespan.

Image 2.1: Visual representation of the controller's six-point safety system, including short circuit, over current, open circuit, self-recovery, temperature, and high-temperature protection.
3. Safety Information and Precautions
- Ensure proper ventilation around the controller to prevent overheating.
- Only use solar panels as the charging power source.
- Connect the battery first, then the solar panel, and finally the load. Disconnect in the reverse order.
- Verify correct polarity for all connections to avoid damage.
- This controller is designed exclusively for lead-acid batteries. Do not use with other battery types.
- Keep the device away from water and humid environments.
- Do not attempt to disassemble or repair the controller yourself. Contact qualified personnel for service.
4. Setup and Installation
4.1 Wiring Order
Follow the correct wiring sequence to prevent damage to the controller and connected components:
- Connect the battery to the controller. The controller will automatically detect the battery voltage (12V or 24V).
- Connect the solar panel to the controller.
- Connect the load to the controller.
To disconnect the system, follow the reverse order: disconnect the load, then the solar panel, and finally the battery.
4.2 Connection Diagram

Image 4.1: Diagram illustrating the correct connection sequence for the battery, solar panel, and DC load to the solar charge controller.
- Connect the battery's positive and negative terminals to the controller.
- Connect the load's positive and negative terminals to the controller, ensuring correct polarity.
- Connect the solar panel to the controller as shown.
Important: Ensure all connections are secure and correct polarity is observed. Incorrect wiring can damage the controller or other components.
5. Operating Instructions
5.1 LCD Display and Buttons
The controller features an LCD screen that displays various system parameters and three buttons for navigation and settings.

Image 5.1: Close-up of the LCD screen and key specifications of the 30A solar charge controller.
The display shows information such as battery voltage, solar panel charge current, load discharge current, and various settings.
5.2 Parameter Settings
To navigate and adjust parameters:
- Short press the Menu button: Cycle through the interface and display parameters.
- Long press the Menu button (3 seconds): Enter manual settings. The number to be adjusted will start flashing.
- Use Up/Down buttons: Rotate the dial to select the desired setting project and adjust the parameters to the desired values.
- Once finished: The system will automatically save the settings and exit the setup menu.

Image 5.2: Detailed operation instructions showing button functions and the flow of display screens for parameter adjustment.
Common adjustable parameters include:
- Battery Voltage (main interface)
- Solar Panel Charge Current
- Load Discharge Current
- High Voltage Disconnection (HVD)
- Low Voltage Reconnection (LVR)
- Low Voltage Disconnection (LVD)
- Load Working Mode
6. Maintenance
Regular maintenance ensures optimal performance and longevity of your solar charge controller:
- Cleanliness: Keep the controller clean and free from dust and debris. Use a dry cloth for cleaning.
- Connections: Periodically check all wiring connections to ensure they are tight and free from corrosion.
- Ventilation: Ensure the installation area remains well-ventilated to prevent heat buildup.
- Battery Inspection: Regularly inspect your lead-acid battery for any signs of damage or leakage.
7. Troubleshooting
Refer to the table below for common issues and their solutions:
| Case | Possible Reason | Solution |
|---|---|---|
| Not charging when sunny | Solar panel opened or reversed | Reconnect |
| Load icon off | Wrong mode setting | Reset |
| Low battery voltage | Recharge | |
| Overload | Reduce the load | |
| Load icon flash | Short circuit protection | Remove short circuit |
| Automatic recovery for about 1 min | ||
| Power off | Low battery voltage/reverse | Check battery/reconnect |
8. Specifications
| Parameter | Value |
|---|---|
| Model | ZBL-30A |
| System Voltage | 12V/24V Auto Detection |
| Rated Charging Current | 30A |
| Rated Discharging Current | 10A |
| Max PV Input Voltage | 23V (12V battery), 46V (24V battery) |
| USB Output | Dual USB, 5V/2.5A |
| Display Type | LCD |
| Operating Temperature | -31°F to 140°F (-35°C to 60°C) |
| Product Dimensions (L x W x H) | 4.4 x 1.3 x 4.2 inches |
| Item Weight | 6.3 ounces (179 Grams) |
| Material | Plastic |
9. Customer Support
For technical assistance, warranty information, or any questions regarding your PowMr ZBL-30A Solar Charge Controller, please contact PowMr customer support through their official channels or visit their website.
Website: PowMr Official Store on Amazon