1. Introduction
This manual provides comprehensive instructions for the assembly, operation, maintenance, and troubleshooting of your ErGear Electric Standing Desk, model EG-ESD88W. Please read this manual thoroughly before assembly and use to ensure safe and efficient operation. Retain this manual for future reference.

Image 1.1: The ErGear Electric Standing Desk (EG-ESD88W) in a typical office setup, showcasing its spacious desktop and ergonomic design.
2. Safety Instructions
- Ensure all components are present and undamaged before assembly.
- Do not exceed the maximum weight capacity of 80 kg (176 lbs).
- Keep children and pets away from the desk during operation.
- Ensure there are no obstructions in the desk's path during height adjustment.
- Do not sit or stand on the desk.
- Unplug the power cord before cleaning or maintenance.
- Use only the provided power adapter.
- If the desk malfunctions, discontinue use and contact customer support.
3. Package Contents
Verify that all parts are included in your package. If any parts are missing or damaged, contact ErGear customer support immediately.
- Desktop (Spliced Board, 160 x 80 cm)
- Lifting Columns (2x)
- Feet (2x)
- Control Box
- Handset (Control Panel with 4 Memory Presets)
- Power Adapter and Cable
- Cable Grommets (2x)
- Headphone Hook (2x)
- Assembly Hardware (Screws, Allen Keys, etc.)

Image 3.1: An illustration of the various components included in the ErGear Electric Standing Desk package, ready for assembly.
4. Setup and Assembly
Follow these steps carefully for proper assembly. It is recommended to have two people for certain steps.
- Unpack Components: Carefully remove all parts from the packaging and lay them out on a soft, clean surface to prevent scratches.
- Attach Feet to Lifting Columns: Secure the feet to the bottom of the lifting columns using the provided screws.
- Assemble Frame: Connect the lifting columns to the crossbar/frame components.
- Attach Desktop: Place the desktop upside down on a soft surface. Carefully align the assembled frame with the pre-drilled holes on the desktop and secure it with screws.
- Install Control Box and Handset: Mount the control box and handset to the underside of the desktop in the designated locations.
- Connect Cables: Connect the motor cables from the lifting columns to the control box. Connect the handset cable to the control box. Finally, connect the power adapter to the control box.
- Install Cable Grommets and Hooks: Insert the cable grommets into the desktop holes. Attach the headphone hooks to the desired locations on the desk frame.
- Cable Management: Use the included cable ties or management clips to organize cables neatly.
- Initial Power-Up: Carefully flip the desk upright. Plug the power cord into a wall outlet.

Image 4.1: Close-up of the control panel, showing the display and memory preset buttons, crucial for operating the desk's height adjustment.
5. Operating Instructions
5.1. Basic Height Adjustment
- Raise Desk: Press and hold the "Up" arrow button (▲) to raise the desk. Release the button when the desired height is reached.
- Lower Desk: Press and hold the "Down" arrow button (▼) to lower the desk. Release the button when the desired height is reached.
- The current height in centimeters will be displayed on the LED panel.
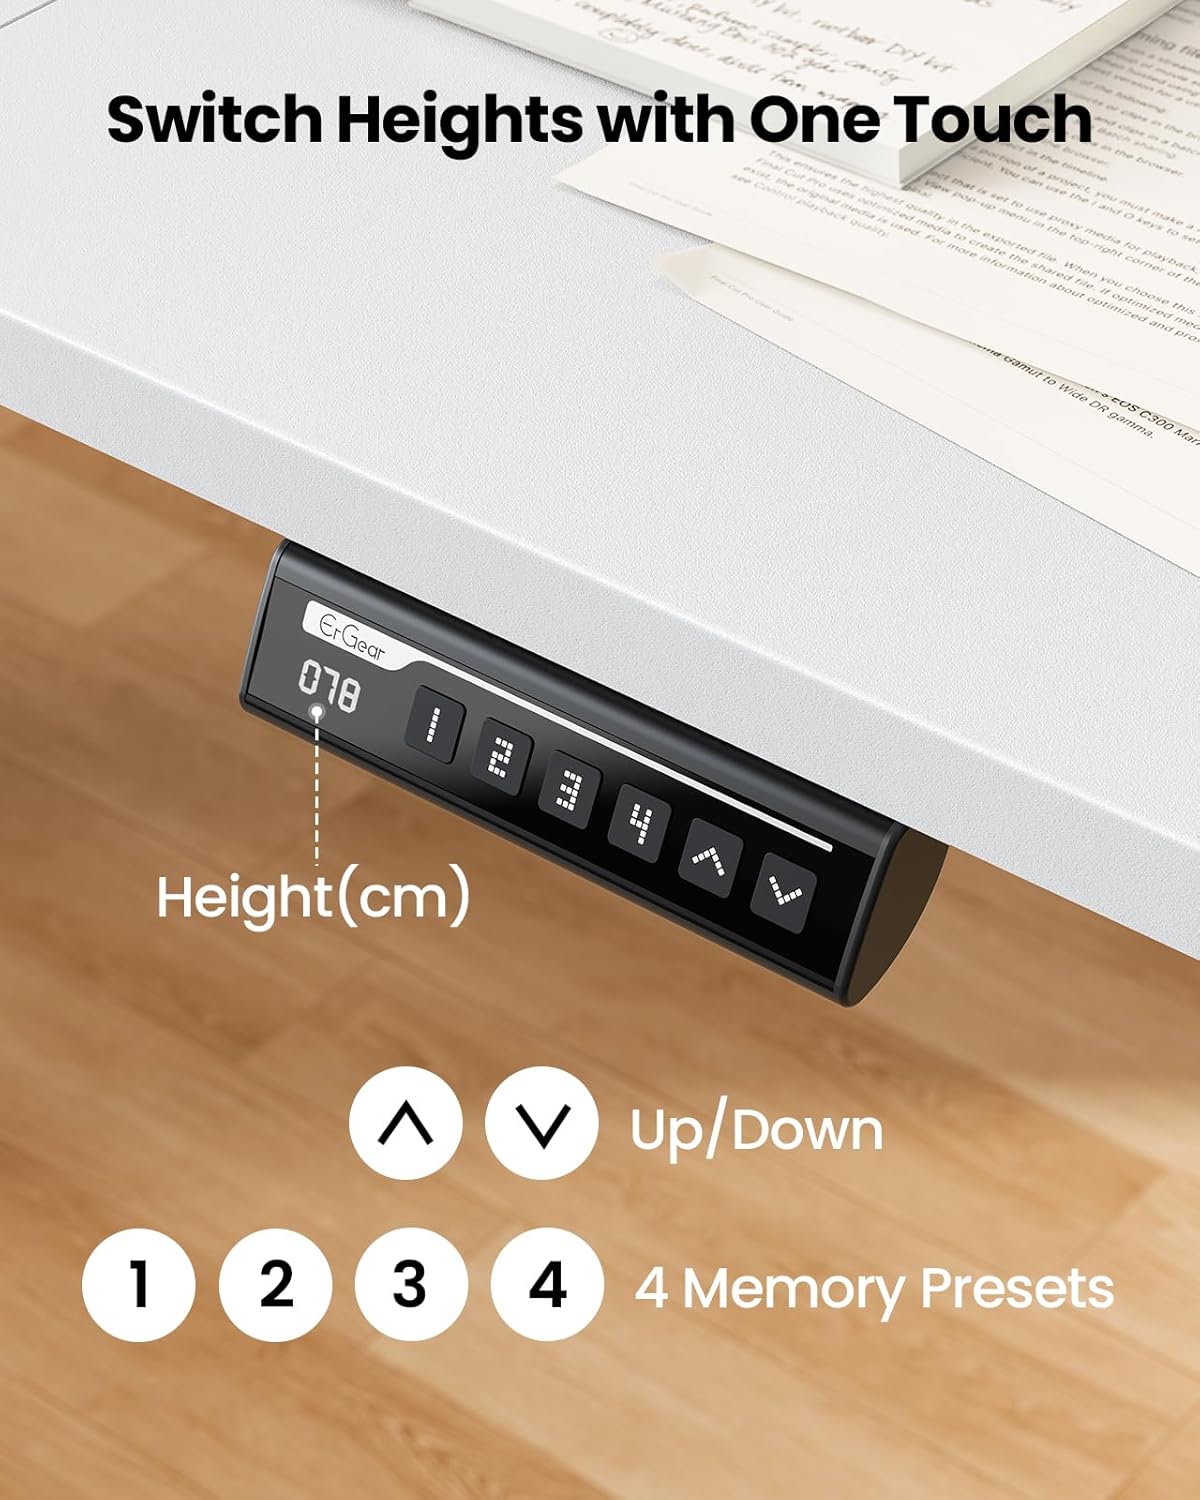
Image 5.1: The smart control panel, highlighting the up and down arrow buttons for manual height adjustment and the digital height display.
5.2. Memory Presets
The desk features 4 memory preset buttons (1, 2, 3, 4) to store and recall your preferred sitting and standing heights.
- Set a Memory Preset:
- Adjust the desk to your desired height using the Up/Down buttons.
- Press the "M" button (or "SET" button if present) once. The display will show "S-".
- Within 3 seconds, press one of the number buttons (1, 2, 3, or 4). The display will show "S-1", "S-2", etc., confirming the height is saved.
- Recall a Memory Preset:
- Simply press the desired number button (1, 2, 3, or 4). The desk will automatically move to the saved height.

Image 5.2: Visual representation of the desk's height adjustment range, demonstrating a seamless transition between sitting (72cm) and standing (118cm) positions.
5.3. Reset Function
If the desk encounters an error or does not operate smoothly, a reset may be required.
- Press and hold the "Down" arrow button until the desk reaches its lowest position and then slightly rises and stops. Release the button.
- Alternatively, press and hold the "M" button (or "SET" button) and the "Down" arrow button simultaneously for approximately 5 seconds until the display shows "RST" or "RESET". The desk will move to its lowest position and then slightly rise and stop, indicating a successful reset.
6. Maintenance
- Cleaning: Wipe the desk surface and frame with a soft, damp cloth. Avoid harsh chemicals or abrasive cleaners.
- Cable Management: Periodically check and reorganize cables to prevent tangling or damage.
- Fasteners: Occasionally check all screws and bolts to ensure they are tight. Retighten if necessary.
- Power Cord: Inspect the power cord for any signs of damage. Do not use if damaged.
7. Troubleshooting
| Problem | Possible Cause | Solution |
|---|---|---|
| Desk does not move. | Power cord unplugged, motor cable loose, overload, or system error. | Check power connection. Ensure all cables are securely connected. Reduce weight on desk. Perform a reset (see Section 5.3). |
| Desk moves unevenly or makes unusual noise. | Uneven load, loose fasteners, or system error. | Distribute weight evenly. Check and tighten all screws. Perform a reset. |
| Display shows "E01", "E02", etc. | Error code indicating a specific issue. | Refer to the specific error code in the full manual (if available) or perform a reset. If the error persists, contact customer support. |
| Memory presets not working. | Presets not saved correctly. | Re-save the memory presets following instructions in Section 5.2. |
8. Specifications
- Model: EG-ESD88W
- Desktop Dimensions: 160 cm (Length) x 80 cm (Width)
- Height Adjustment Range: 72 cm to 118 cm
- Weight Capacity: 80 kg (176 lbs)
- Motor Type: Electric Lifting System
- Control Panel: LED display with 4 Memory Presets, Up/Down buttons
- Noise Level: ≤55 dB
- Material: Metal frame, Wood desktop (spliced)
- Color: White
- Assembly Required: Yes

Image 8.1: Diagram illustrating the key dimensions of the ErGear Electric Standing Desk, including desktop size and height range.
9. Warranty and Support
ErGear products are designed for durability and performance. For warranty information, technical support, or to report missing/damaged parts, please contact ErGear customer service.
Customer Support: Please refer to the contact information provided on the ErGear official website or your purchase documentation. You can often find support resources at www.ergear.com (example link, verify actual URL).


