
1. Introduction
Thank you for choosing the Hostreat Christmas Snowflake Projector Lights. This device is designed to project dynamic snowflake patterns, creating a festive atmosphere for both indoor and outdoor settings. Please read this manual thoroughly before use to ensure proper installation, operation, and maintenance.

Image 1.1: The Hostreat Christmas Snowflake Projector Lights creating a festive snowflake display on a house.
2. Safety Information
- Ensure the power source matches the device's requirements.
- Do not look directly into the light source to avoid eye damage.
- Keep the device away from open flames and excessive heat.
- Do not attempt to disassemble or modify the device. Refer all servicing to qualified personnel.
- Ensure all connections are secure and waterproof for outdoor use.
- Unplug the device during lightning storms or when unused for extended periods.
3. Package Contents
The package includes the following items:
- Hostreat Christmas Snowflake Projector Light unit (Model LL-050-2)
- Ground stake
- Round base
- Power adapter
- Instruction manual

Image 3.1: Overview of the projector components, including the main unit, mounting options, and power supply.
4. Setup Instructions
The Hostreat Snowflake Projector offers flexible installation options for various environments.
4.1 Assembling the Projector Heads
The projector features three adjustable heads. Gently push each projector head onto its designated ball joint on the main unit. Twist the locking piece to secure it in place. No additional tools are required for this step.
4.2 Mounting Options
- Ground Installation: Attach the ground stake to the base of the projector. Insert the stake firmly into soft ground (e.g., lawn or garden bed).
- Flat Surface Installation: Attach the round base to the projector. Place the projector on a flat, stable surface such as a patio, deck, or indoor floor.
- Wall Mounting: The round base can also be used for wall mounting. Secure the base to a wall using appropriate screws (not included) and then attach the projector unit.
4.3 Power Connection
Connect the power adapter to the projector unit and then plug the adapter into a standard electrical outlet. Ensure the connection is tight and protected from moisture, especially for outdoor use.
Video 4.1: A short demonstration of the Hostreat Snowflake Projector's setup and operation, highlighting its ease of use.
5. Operating Instructions
Once powered on, the projector will automatically begin displaying dynamic snowflake patterns. The three projector heads can be individually angled to cover a wider area or focus on specific points. The optimal projection distance is 16-36 feet, covering an area of 235-521 square feet.

Image 5.1: This diagram shows the effective projection range and coverage area, indicating how distance affects the illuminated surface size.
5.1 Indoor and Outdoor Use
The projector is suitable for both indoor and outdoor use. For indoor applications, project onto walls or ceilings to create a magical snowfall effect. For outdoor use, project onto the exterior of your home, fences, or trees.
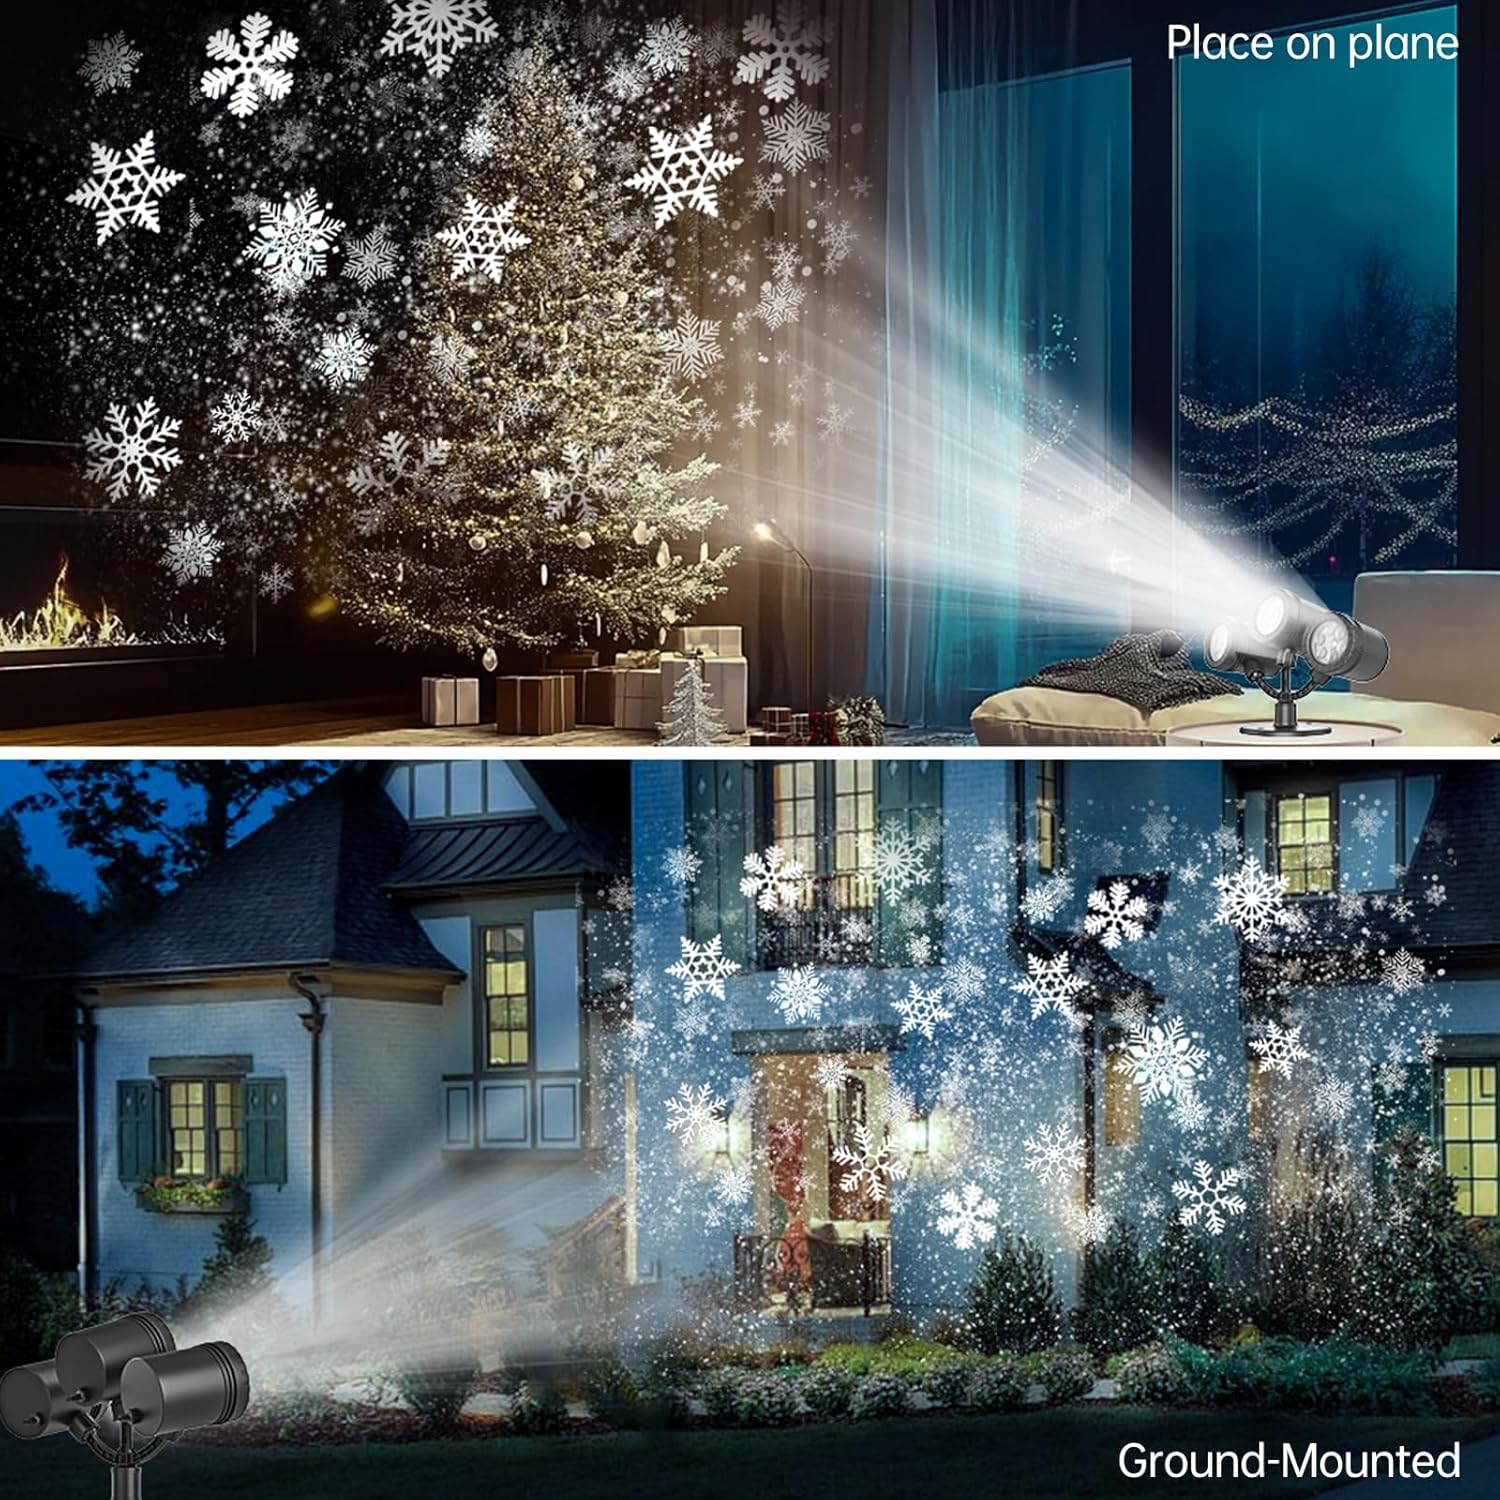
Image 5.2: The projector's versatility is shown with examples of its use in both indoor and outdoor settings.
Video 5.1: A demonstration of the 2024 upgraded snowflake projector in action, showcasing its dynamic patterns.
6. Maintenance
Regular maintenance ensures the longevity and optimal performance of your projector.
- Cleaning: Gently wipe the lens and exterior with a soft, dry cloth. Do not use abrasive cleaners or solvents.
- Storage: When not in use, store the projector in a cool, dry place, away from direct sunlight and extreme temperatures.
- Inspection: Periodically check the power cord and connections for any signs of damage.
7. Troubleshooting
If you encounter any issues, refer to the following troubleshooting guide:
| Problem | Possible Cause | Solution |
|---|---|---|
| Projector does not turn on. | No power supply; faulty connection. | Check power outlet, ensure adapter is securely connected. |
| Snowflake patterns are dim or unclear. | Excessive ambient light; incorrect projection distance; dirty lens. | Operate in darker conditions; adjust projection distance (16-36ft recommended); clean the lens. |
| Patterns are not moving. | Motor malfunction. | Contact customer support if the issue persists after power cycling. |
8. Specifications
| Feature | Detail |
|---|---|
| Model Number | LL-050-2 |
| Brand | Hostreat |
| Light Source Type | Light Emitting Diode (LED) |
| Number of Light Sources | 3 |
| Light Source Wattage | 12 Watts |
| Material | Acrylonitrile Butadiene Styrene (ABS) |
| Color | White |
| Product Dimensions | 5.9"L x 5.7"W x 4.7"H |
| Item Weight | 15.5 Ounces |
| Power Source | Corded Electric |
| Mounting Type | Wall Mount, Ground/Lawn Mount |
| Beam Angle | 30 Degrees |
| Certification | FCC |
9. Warranty and Support
For warranty information or technical support, please refer to the contact details provided with your purchase or visit the official Hostreat website. Keep your purchase receipt as proof of purchase for any warranty claims.