Introduction
The HOUSBAY 3-in-1 Alarm Clock Radio is a versatile bedside device combining a digital alarm clock, a 10W wireless charging station, and a Bluetooth dual speaker with FM radio functionality. It also features a dimmable bedside night light with multiple color options and soothing natural alarm sounds for a gentle awakening experience. This manual provides detailed instructions for setup, operation, and maintenance of your device.
Package Contents
- HOUSBAY 3-in-1 Alarm Clock Radio (Model: TS3RT)
- Power Adapter
- Charging Cables (USB-C cable for power input)
- User Manual (this document)
Product Overview
Familiarize yourself with the various components and controls of your HOUSBAY device.

Figure 1: Front View with Wireless Charging. This image displays the main unit with a smartphone placed on the top surface, indicating active wireless charging. The digital clock display is visible on the front.
Top Panel Controls

Figure 2: Top Panel Controls. This image highlights the buttons on the top surface, including Bluetooth (BT), Backward, Forward, SNOOZE/Nightlight, Radio On/Off, Time Setting, Alarm Setting, and More features.
- Wireless Charging Pad: Central area for 10W wireless charging.
- BT Button: Activates/deactivates Bluetooth pairing.
- Backward/Forward Buttons: Used for track navigation in Bluetooth mode or station tuning in FM mode.
- SNOOZE/Nightlight Button: Snoozes alarm or toggles/adjusts night light.
- Radio On/Off Button: Toggles FM radio function.
- Time Setting Button: Initiates time adjustment.
- Alarm Setting Button: Initiates alarm time and sound adjustment.
- More Features Button: Accesses additional settings.
Rear Panel Ports

Figure 3: Rear Panel Ports. This image shows the back of the device with the USB charging port and the DC power input port clearly visible.
- USB Charging Port (USB-A): For charging other devices via a USB cable (cable not included).
- DC IN Port: Connects to the provided power adapter.
- FM Antenna: Integrated wire antenna for FM radio reception.
Setup
- Connect Power: Plug the provided power adapter into the DC IN port on the back of the alarm clock, then plug the adapter into a wall outlet. The display will light up.
- Set Time:
- Press the Time Setting button (clock icon) on the top panel. The hour digits will flash.
- Use the Backward or Forward buttons to adjust the hour.
- Press the Time Setting button again to confirm the hour and move to minute adjustment. The minute digits will flash.
- Use the Backward or Forward buttons to adjust the minutes.
- Press the Time Setting button a third time to select 12-hour or 24-hour format. Use the Backward or Forward buttons to choose.
- Press the Time Setting button one last time to save the settings.
Operating Instructions
Alarm Function

Figure 4: Natural Alarm Sounds. This image illustrates the variety of natural sounds available for the alarm, promoting a gentle wake-up experience.
- Set Alarm Time:
- Press the Alarm Setting button (bell icon) on the top panel. The hour digits will flash.
- Use the Backward or Forward buttons to adjust the alarm hour.
- Press the Alarm Setting button again to confirm the hour and move to minute adjustment. The minute digits will flash.
- Use the Backward or Forward buttons to adjust the alarm minutes.
- Press the Alarm Setting button a third time to select the alarm sound. Use the Backward or Forward buttons to cycle through available sounds (e.g., birdsong, ocean waves, babbling brook, piano).
- Press the Alarm Setting button one last time to save the alarm settings.
- Snooze Function: When the alarm sounds, press the SNOOZE/Nightlight button to temporarily silence the alarm for a few minutes. The alarm will sound again after the snooze period.
- Turn Off Alarm: To turn off the alarm completely, press any button other than the SNOOZE/Nightlight button when the alarm is sounding.
Wireless Charging

Figure 5: Wireless Charging Feature. This image highlights the 10W wireless charging capability on the top surface of the device.
Place your Qi-compatible smartphone or other device directly onto the wireless charging pad located on the top surface of the alarm clock. Ensure the device is centered on the charging pad for optimal charging. A charging indicator will typically appear on your device's screen.
Bluetooth Speaker

Figure 6: Dual Speaker System. This image visually represents the dual speaker setup, emphasizing the dynamic stereo audio output.
- Pairing:
- Press the BT button on the top panel to enter Bluetooth pairing mode. The Bluetooth indicator on the display will flash.
- On your smartphone or Bluetooth-enabled device, search for "HOUSBAY TS3RT" (or similar name) in the Bluetooth settings.
- Select the device to pair. Once connected, the Bluetooth indicator will stop flashing and remain solid.
- Playback Control: Use the Backward and Forward buttons on the top panel to skip tracks. Volume is typically controlled via your connected device.
FM Radio
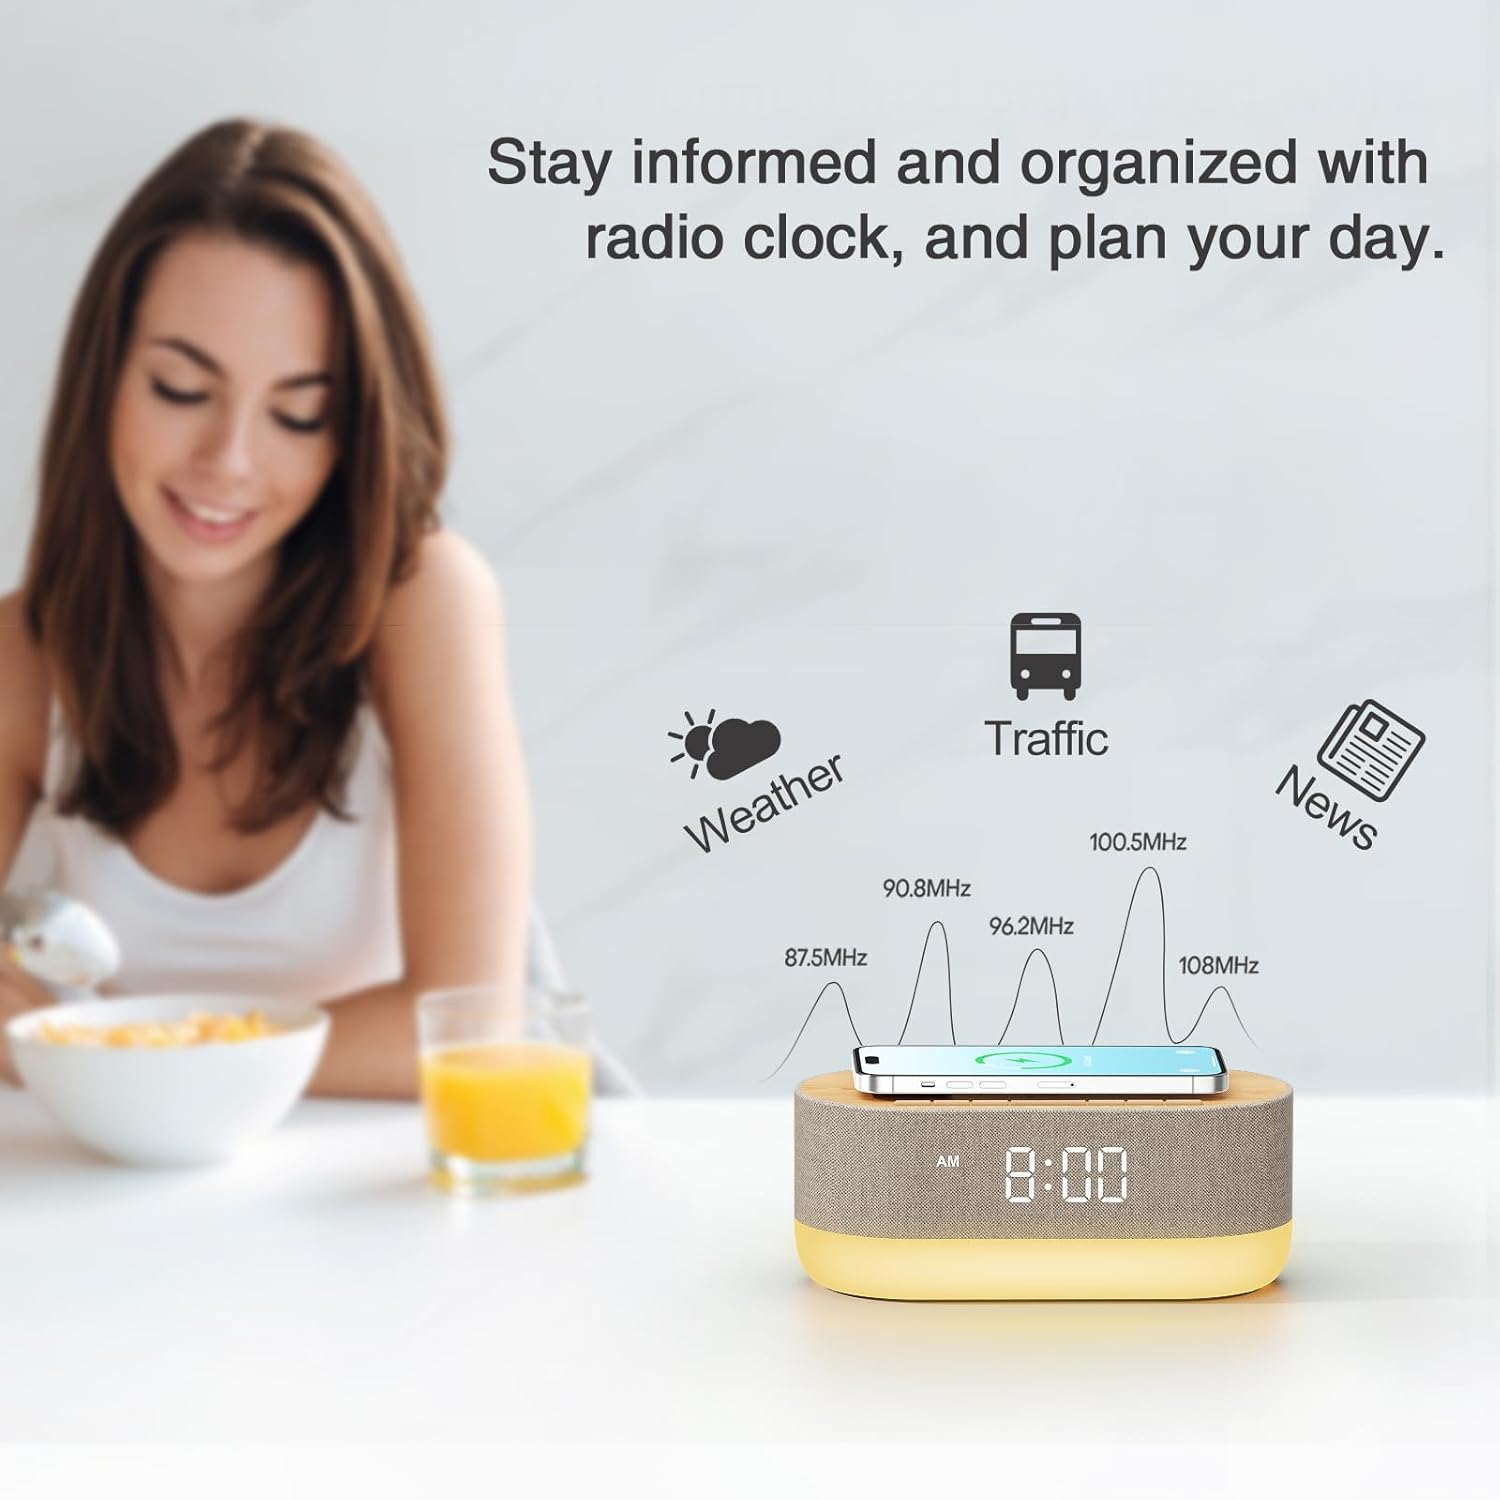
Figure 7: FM Radio Functionality. This image illustrates the FM radio feature, indicating its use for staying informed with news, traffic, and weather.
- Turn On/Off: Press the Radio On/Off button (radio icon) to activate or deactivate the FM radio.
- Tune Stations: Use the Backward or Forward buttons to manually tune to desired FM stations.
- Automatic Scan: (If applicable, common feature) Hold down the Radio On/Off button for a few seconds to initiate an automatic scan for available stations.
Dimmable Bedside Night Light

Figure 8: Mood Light Options. This image displays the various color options for the integrated mood light, including Warm Glow, Refreshing Green, Calming Blue, and Living Orange.
- Toggle Light: Press the SNOOZE/Nightlight button briefly to turn the night light on or off.
- Change Color/Mode: Press the SNOOZE/Nightlight button repeatedly to cycle through the 10 available light colors and modes.
- Adjust Brightness: Hold down the SNOOZE/Nightlight button to adjust the brightness level of the night light. Release when the desired brightness is reached.
- Dimmable Display: The digital display brightness can also be adjusted or turned off completely to avoid disturbances during sleep. Refer to the "More Features" section or specific instructions for display dimming.
USB Charging Port
Figure 9: USB Charging Port. This image shows the USB-A port on the back, used for charging devices that are not Qi-compatible.
Connect your device's USB charging cable (not included) to the USB-A port on the rear panel of the alarm clock to charge non-wireless charging compatible devices such as smartwatches, earbuds, or other small electronics.
Maintenance
- Cleaning: Use a soft, dry cloth to clean the surface of the device. Do not use liquid cleaners or abrasive materials.
- Storage: If storing the device for an extended period, unplug it from the power source and store it in a cool, dry place.
Troubleshooting
| Problem | Possible Cause | Solution |
|---|---|---|
| Device not powering on. | Power adapter not connected or faulty outlet. | Ensure power adapter is securely plugged into the device and a working wall outlet. Try a different outlet. |
| Wireless charging not working. | Device not Qi-compatible, not centered, or foreign objects on pad. | Ensure your device supports Qi wireless charging. Reposition the device on the pad. Remove any metal objects or thick cases. |
| Bluetooth not connecting. | Device not in pairing mode, or already connected to another device. | Ensure the alarm clock is in Bluetooth pairing mode (flashing BT indicator). Disconnect from other devices. Restart both devices. |
| FM radio static or poor reception. | Weak signal or antenna not extended. | Extend and adjust the position of the FM antenna. Try moving the unit to a different location. |
| Alarm not sounding. | Alarm not set or volume too low. | Verify alarm time and ensure it is enabled. Check the alarm volume setting. |
Specifications
- Brand: HOUSBAY
- Model: TS3RT
- Color: Wood Tone
- Display Type: Digital
- Power Source: Corded Electric
- Product Dimensions: 7"W x 12"H
- Item Weight: 1.74 pounds
- Material: Metal (Frame)
- Wireless Charging Output: 10W
- Bluetooth Version: 5.0
- FM Radio Frequency: 76MHz-108MHz
Warranty and Support
This HOUSBAY product comes with a Limited Warranty. For detailed warranty information, product support, or technical assistance, please contact HOUSBAY customer service through the retailer's platform or visit the official HOUSBAY website. Please retain your proof of purchase for warranty claims.
Manufacturer: HOUSBAY


