
1. Introduction
This manual provides detailed instructions for the assembly, operation, and maintenance of your Suptek ML132 Monitor Stand. Please read this manual thoroughly before installation and use to ensure proper function and safety. Keep this manual for future reference.
2. Package Contents
Before beginning installation, verify that all parts listed below are present and undamaged. If any parts are missing or damaged, please contact customer service.
- Monitor Stand Base
- Vertical Support Pole
- VESA Mounting Plate
- Cable Management Clips
- Assembly Hardware (screws, nuts, washers, Allen wrenches)
- User Manual (this document)
Note: Specific screw sizes and types are included to accommodate various monitor models. Refer to the assembly instructions for details.
3. Specifications
| Feature | Description |
|---|---|
| Compatible Monitor Size | 13 to 32 inches (Note: Some images indicate compatibility up to 43 inches, but 32 inches is the primary specified range.) |
| VESA Compatibility | 50x50mm, 75x75mm, 100x100mm |
| Weight Capacity | Up to 20 KG (44 LBS) |
| Tilt Adjustment | +10° / -15° |
| Swivel Adjustment | ±35° |
| Rotation | 360° (Portrait to Landscape) |
| Height Adjustment | 3 levels (245mm, 315mm, 385mm from desk to VESA panel center) |
| Base Material | Wood (water-resistant) |
| Arm/Pole Material | Iron |
| Color | Black |

Image: Detailed dimensions, VESA compatibility (Min: 50x50mm, Max: 100x100mm), maximum monitor size (Max: 43"), and weight capacity (20KG/44LBS) for the Suptek ML132 monitor stand.
4. Setup Instructions
Follow these steps to assemble your monitor stand and attach your monitor.
- Assemble the Base: Attach the vertical support pole to the wooden base using the provided screws and tools. Ensure all connections are secure.
- Attach VESA Plate to Monitor: Carefully place your monitor face down on a soft, clean surface. Attach the VESA mounting plate to the back of your monitor using the appropriate screws from the hardware kit. Ensure the screws are tightened securely but do not overtighten.
- Mount Monitor to Stand: Slide the VESA plate with the attached monitor onto the vertical support pole. Ensure it clicks into place or is secured by the safety lock mechanism.
- Adjust Height: The stand offers three fixed height levels. To adjust, remove the monitor from the pole, reposition the VESA plate to the desired height slot, and re-mount the monitor. The available heights from the desk to the VESA panel center are 245mm, 315mm, and 385mm.

Image: Illustration showing the three distinct height adjustment levels of the Suptek ML132 monitor stand: 245mm, 315mm, and 385mm from the desk surface to the center of the VESA mount.

Image: A person using the Suptek ML132 monitor stand, demonstrating the three height levels (Level 1, Level 2, Level 3) for ergonomic positioning.
5. Operating Instructions
The Suptek ML132 monitor stand offers various adjustments to optimize your viewing experience.
5.1. Tilt Adjustment
Adjust the monitor's vertical angle to reduce glare and improve viewing comfort. The stand allows for a tilt range of +10° upwards and -15° downwards.

Image: A monitor mounted on the Suptek ML132 stand, illustrating the tilt adjustment range of +10° to -15°.
5.2. Swivel Adjustment
Rotate the monitor horizontally to share your screen with others or adjust your viewing angle. The stand supports a swivel range of ±35°.

Image: An overhead view of a monitor on the Suptek ML132 stand, demonstrating the ±35° swivel capability.
5.3. Rotation Adjustment
Rotate your monitor 360° to switch between landscape and portrait orientations. This is useful for coding, document viewing, or specific applications.

Image: A monitor on the Suptek ML132 stand, showing the 360° rotation feature, allowing for both landscape and portrait modes.

Image: A summary graphic illustrating the Tilt (+10°/-15°), Swivel (±35°), and Rotation (360°) capabilities of the Suptek ML132 monitor stand.
5.4. Cable Management
Utilize the included cable management clips to route and organize your monitor cables along the vertical support pole. This helps maintain a tidy workspace and prevents cable clutter.
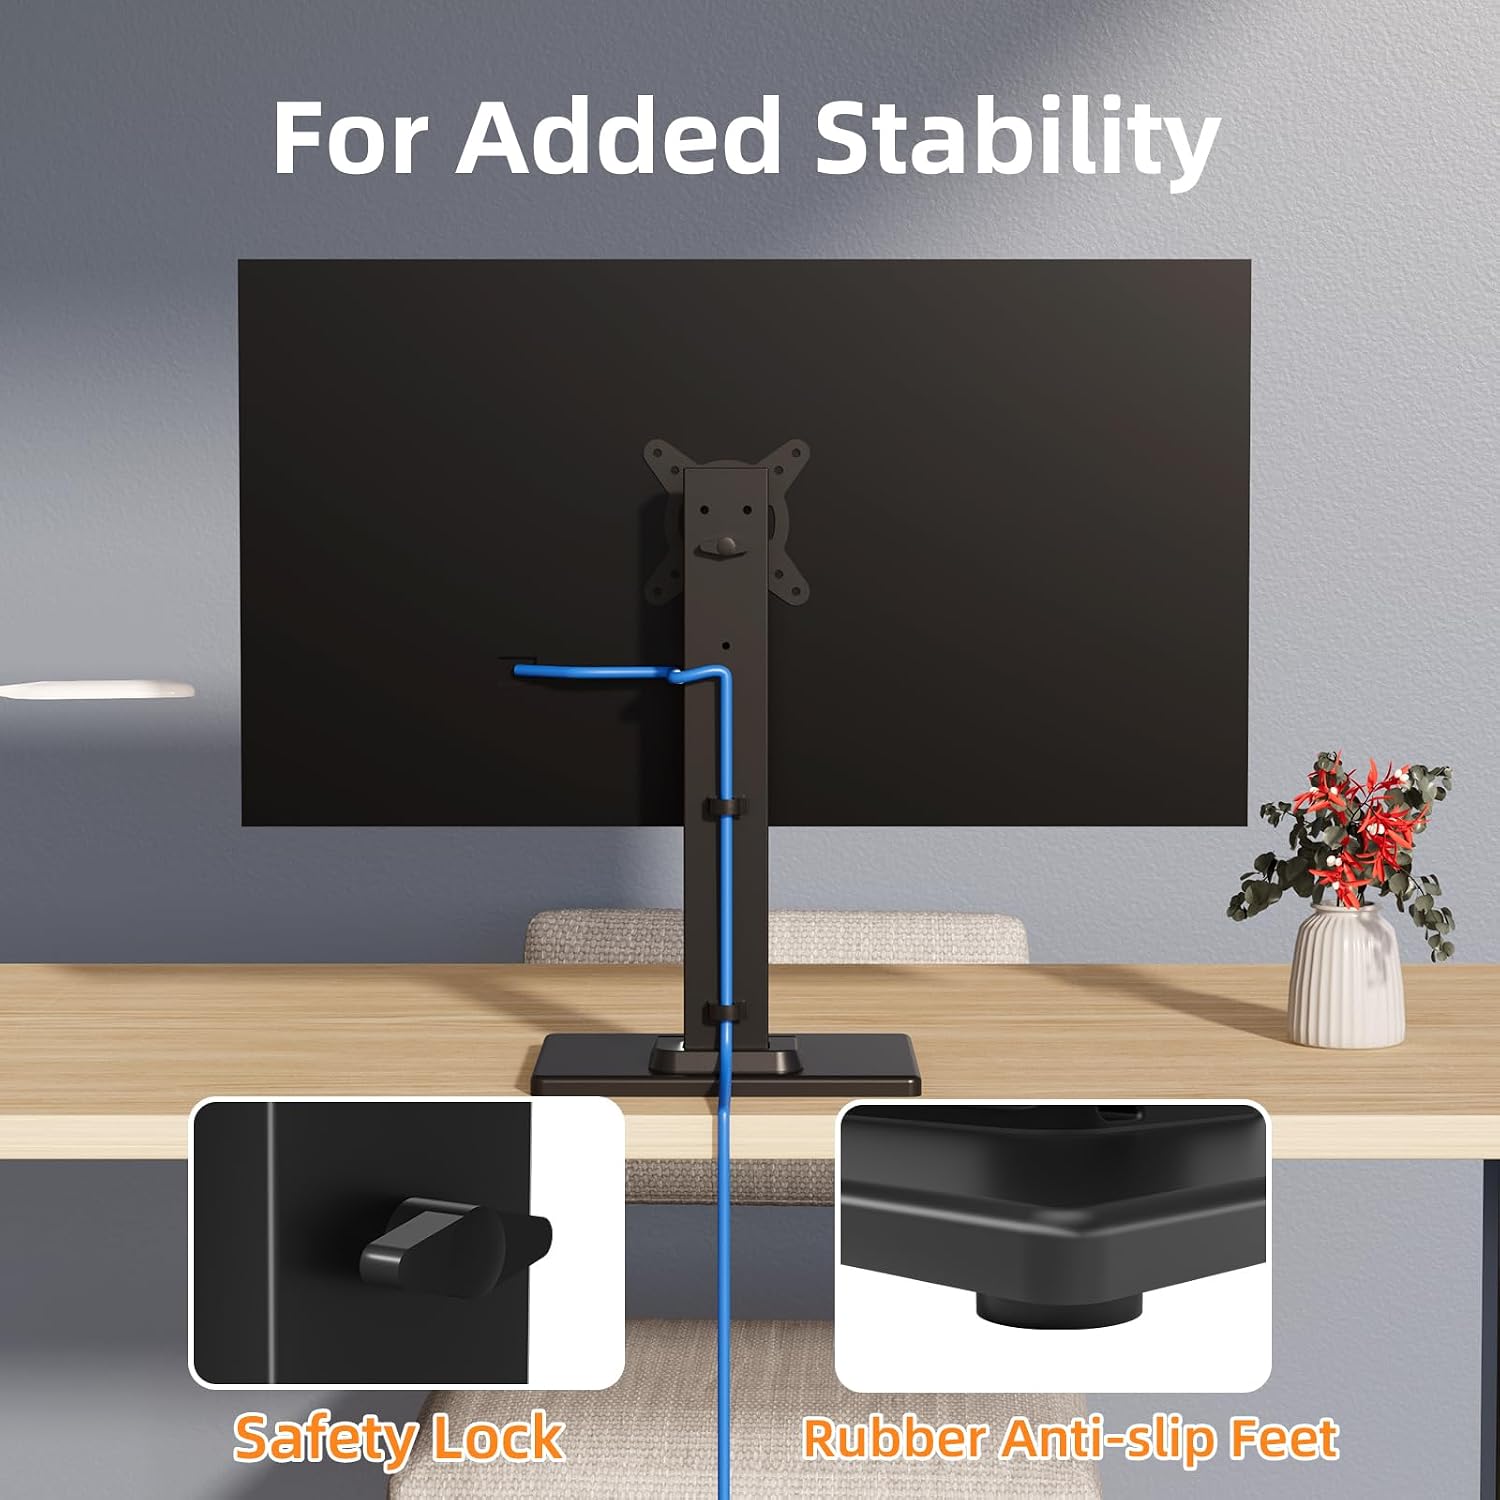
Image: Close-up view of the Suptek ML132 monitor stand highlighting the safety lock mechanism and rubber anti-slip feet for enhanced stability, along with cable management clips.
6. Maintenance
- Cleaning: Use a soft, dry cloth to clean the stand. For the wooden base, a slightly damp cloth can be used, but ensure it is dried immediately. Avoid abrasive cleaners or solvents.
- Tightness Check: Periodically check all screws and connections to ensure they remain tight and secure. Loose connections can affect stability and safety.
- Base Care: The wooden base is designed to be water-resistant. In case of spills, wipe immediately to prevent any potential damage.
7. Troubleshooting
| Problem | Possible Solution |
|---|---|
| Monitor is wobbly or unstable. | Ensure all assembly screws are tightened. Verify the monitor's weight does not exceed the 20KG (44 LBS) capacity. Check that the stand is placed on a flat, stable surface. |
| Monitor does not fit the VESA plate. | Confirm your monitor's VESA pattern is 50x50mm, 75x75mm, or 100x100mm. If not, an adapter may be required (not included). |
| Difficulty adjusting tilt/swivel/rotation. | Check for any locking mechanisms or tension screws that might need loosening or tightening. Refer to the operating instructions for proper adjustment methods. |
| Missing parts during unboxing. | Review the "Package Contents" section. If parts are genuinely missing, contact customer service immediately. |
8. Warranty and Support
The Suptek ML132 Monitor Stand comes with a 1-year warranty from the date of purchase, covering manufacturing defects. This warranty does not cover damage caused by improper installation, misuse, accidents, or unauthorized modifications.
For technical support, warranty claims, or inquiries regarding missing parts, please contact Suptek customer service through the retailer where the product was purchased or visit the official Suptek website for contact information.
Please retain your proof of purchase for warranty validation.


