
1. Product Overview
The TechRise Door and Window Alarm system provides enhanced security for your home or property. This easy-to-install sensor triggers an immediate alarm when a door or window is opened, offering peace of mind. It features adjustable volume levels and multiple operating modes to suit various security needs.

Image: Multiple TechRise Door and Window Alarm units, each consisting of a main alarm unit and a smaller magnetic sensor.

Image: Detailed view of the alarm unit and magnet, highlighting the LED sensor light, volume switch, alarm/chime/off switch, and magnet mounting plate.
The compact design allows for versatile application across various locations, including:
- Doors
- Windows
- Drawers and Cabinets
- Garages
- Other entry points requiring security monitoring

Image: Examples of the alarm's multi-scene usage, including doors, windows, cabinets, and garages.
2. Setup and Installation
The TechRise Door and Window Alarm is designed for easy, wire-free installation using double-sided adhesive tape. No screws or complex wiring are required.
2.1 Battery Installation
The alarm is powered by batteries, which are required but not included with the product. Please ensure you have the correct battery type before installation. Refer to the specifications section for battery requirements.
2.2 Installation Steps
- Clean the Surface: Ensure the wall or frame surface where the alarm will be installed is clean, dry, and free of dust or grease. This ensures optimal adhesion.
- Remove Battery Insulation Sheet: If present, remove the battery insulation sheet from the alarm unit to activate the battery.
- Apply Adhesive Tape: Peel off the backing from the double-sided adhesive tape provided and firmly attach it to the back of both the main alarm unit and the magnetic sensor.
- Mount the Alarm Unit: Attach the main alarm unit to the door frame or window frame.
- Mount the Magnetic Sensor: Attach the magnetic sensor to the door or window itself, ensuring it is aligned with the main alarm unit. The sensor must be placed within 0.5 inches (approximately 12.7 mm) of the alarm unit's arrow side for proper function.
- Activate the Alarm: Turn on the switch button on the alarm unit to begin operation.
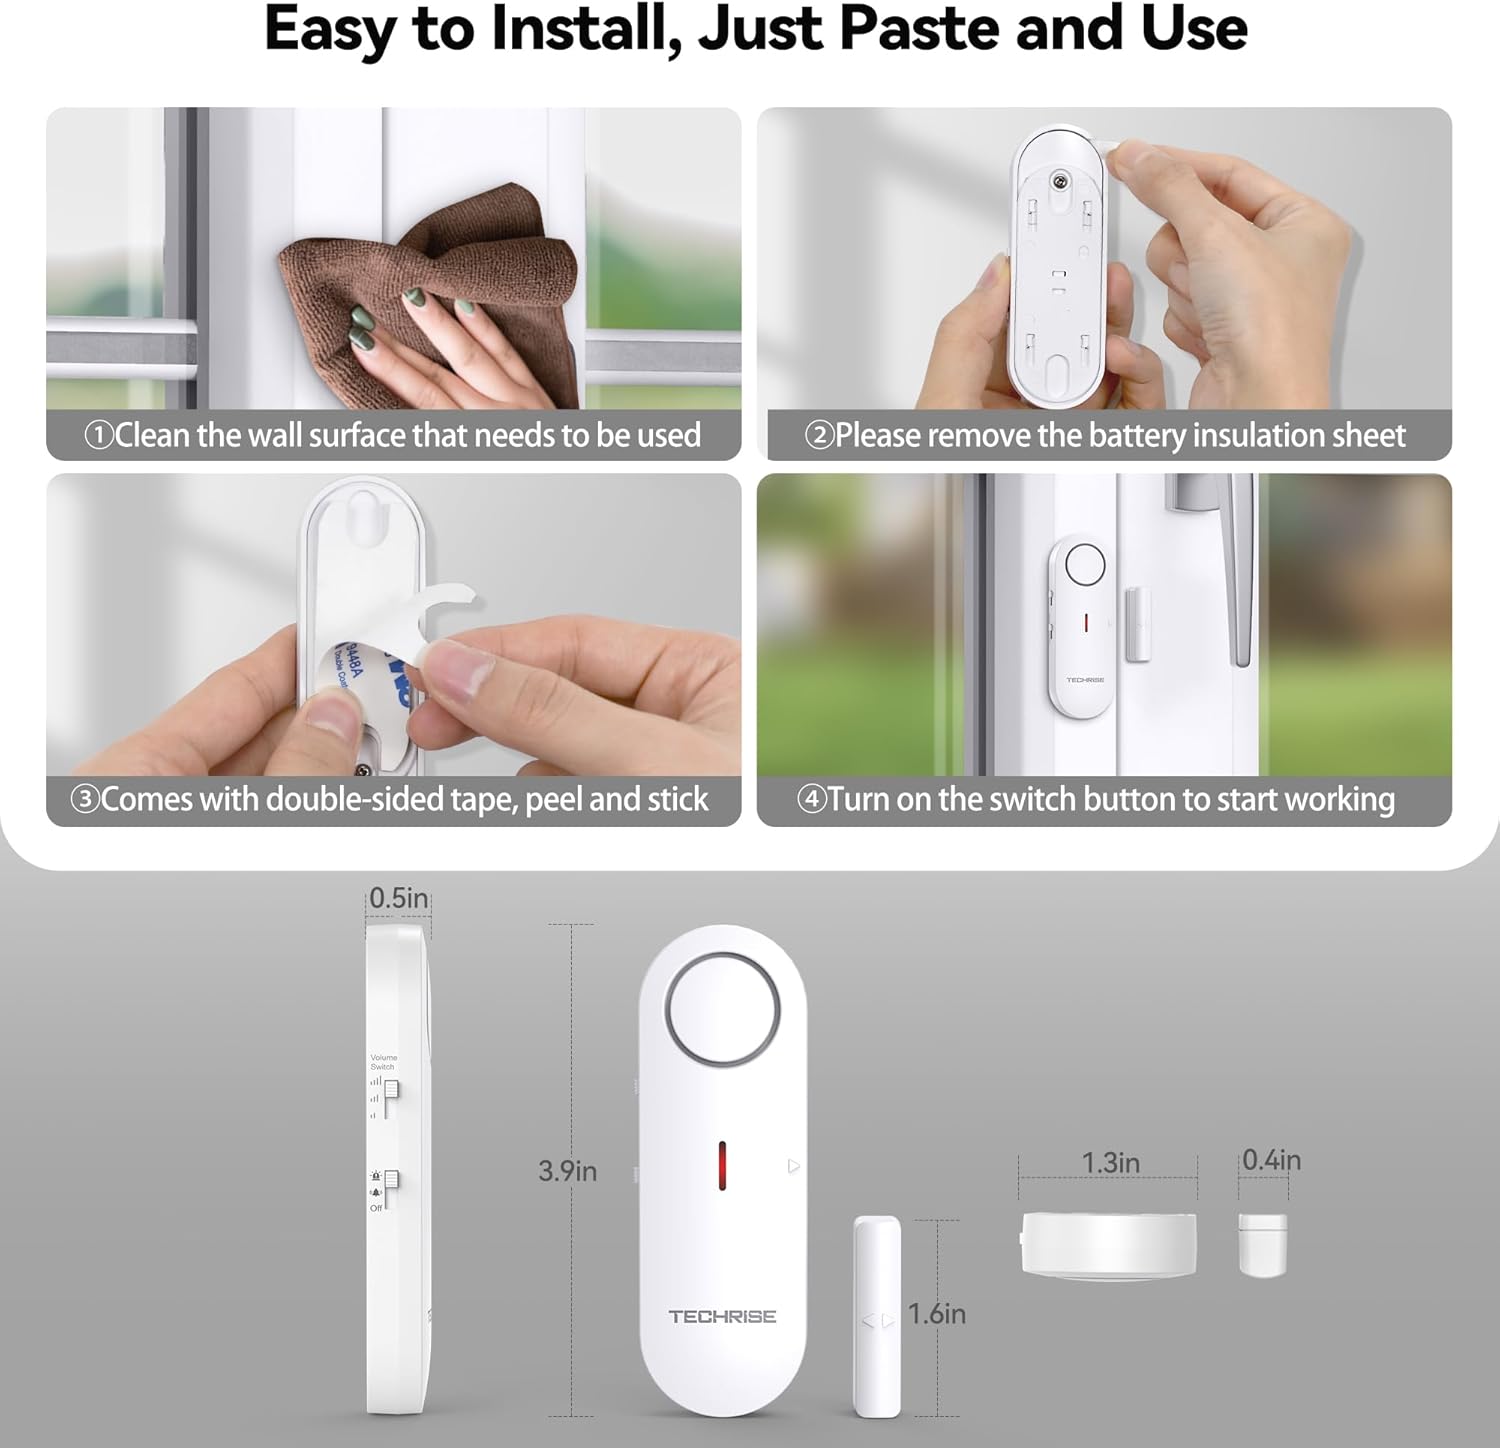
Image: Visual guide for the installation process, including surface cleaning, battery activation, adhesive application, and power-on. Product dimensions are also shown.
3. Operating Instructions
The TechRise Door and Window Alarm offers two primary operating modes and adjustable volume settings.
3.1 Operating Modes (Alarm vs. Chime)
The alarm system supports switching between two modes:
- Alarm Mode: When triggered, the unit emits a loud, continuous alarm sound (100 dB) until the door/window is closed. This mode is suitable for deterring intruders.
- Chime Mode: When triggered, the unit emits a pleasant chime sound. This mode is suitable for notification purposes, such as knowing when a door is opened by a child or a customer enters a shop.
Use the switch on the side of the alarm unit to select between Alarm, Chime, or Off modes.

Image: Comparison of Chime mode (notification sound) and Alarm mode (loud security alert).
3.2 Volume Adjustment
The alarm features a 3-level volume adjustment, allowing you to customize the sound output based on your environment and needs.
- Low Volume
- Medium Volume
- High Volume (up to 100 dB)
Adjust the volume using the dedicated volume switch on the side of the alarm unit. Note: In alarm mode, the high volume setting can be very loud and may startle children.

Image: Illustration of the 3-level volume adjustment, showing sound coverage within a house layout.
3.3 Alarm Trigger Mechanism
The alarm is triggered by the separation of the main alarm unit and its magnetic sensor. When the distance between the two components exceeds approximately 0.78 inches (20mm), the alarm will sound immediately. The alarm will continue until the door or window is closed, bringing the magnet back within range of the main unit.
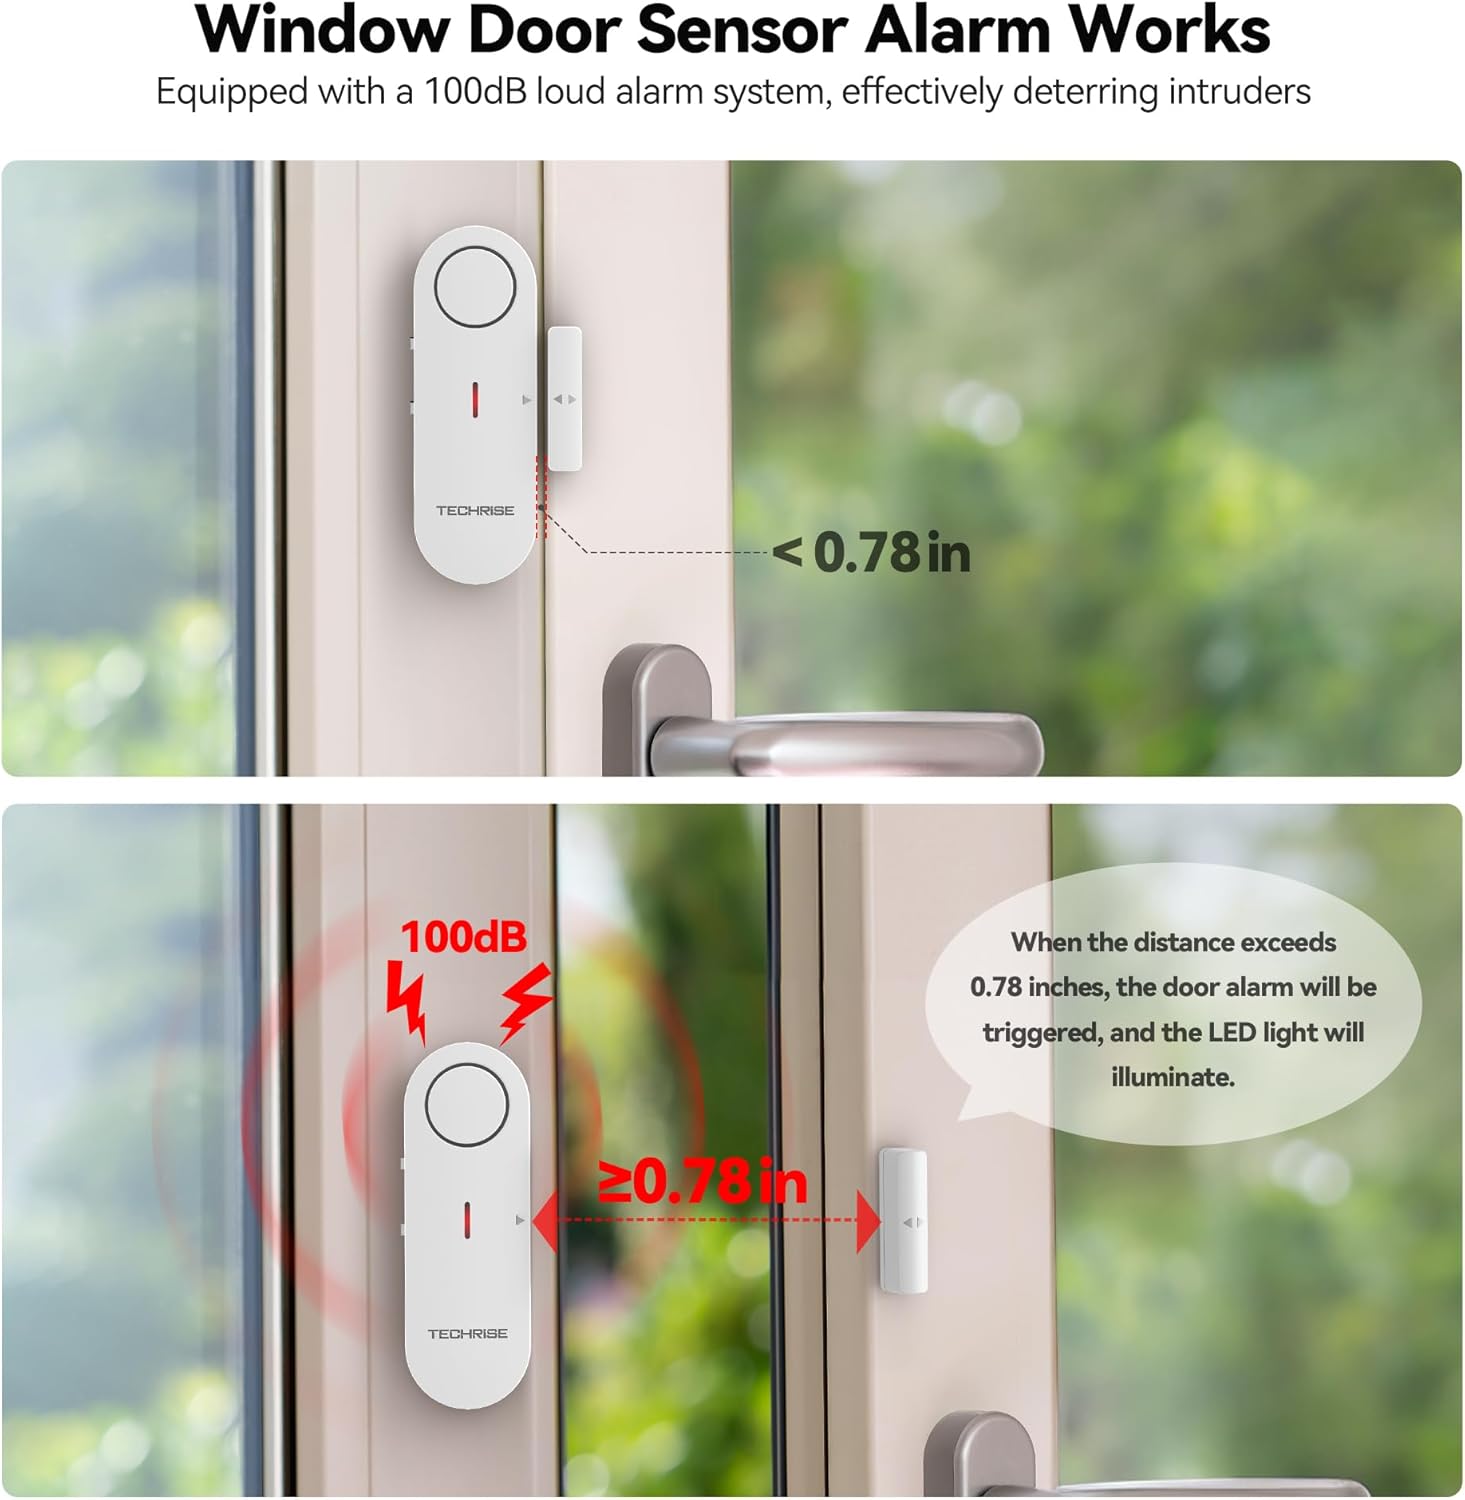
Image: Visual explanation of the alarm trigger mechanism, showing the critical distance (0.78 inches) for activation.
4. Maintenance
4.1 Battery Replacement
The alarm is battery-powered. If the alarm's performance degrades or it stops functioning, the batteries may need to be replaced. Refer to the specifications for the correct battery type. To replace batteries, carefully open the battery compartment, remove old batteries, insert new ones with correct polarity, and close the compartment securely.
4.2 Cleaning
To maintain optimal performance and appearance, wipe the alarm unit and magnetic sensor with a soft, dry cloth. Avoid using abrasive cleaners or solvents, as these can damage the device.
5. Troubleshooting
5.1 Alarm Not Functioning
- Check Power Switch: Ensure the alarm is not in the "Off" position. Verify it is set to "Alarm" or "Chime" mode.
- Check Batteries: If the alarm is not functioning, the batteries may be depleted. Replace them with new ones.
- Sensor Alignment: Ensure the main alarm unit and the magnetic sensor are correctly aligned and within the specified 0.5-inch (12.7 mm) proximity when the door/window is closed.
- Separation Distance: Confirm that the separation distance between the alarm unit and the magnet exceeds 0.78 inches (20mm) when the door/window is opened to trigger the alarm.
5.2 False Alarms
- Improper Alignment: Re-check the alignment of the main unit and the magnetic sensor. They should be perfectly aligned and close enough when the door/window is closed.
- Loose Mounting: Ensure both components are securely mounted and do not shift, which could cause an unintended separation.
6. Specifications
| Feature | Detail |
|---|---|
| Brand | TechRise |
| Model Number | TR-WA901 |
| Product Dimensions | 27 x 14 x 1.8 cm |
| Item Weight | 299 g |
| Power Source | Battery Powered |
| Batteries Required? | Yes |
| Batteries Included? | No |
| Sound Level | 100 dB (Max) |
| Trigger Distance | > 0.78 inches (20mm) separation |
| Sensor Proximity for Closed State | Within 0.5 inches (12.7mm) |
| Included Components | Alarm unit, Magnetic sensor, Double-sided adhesive tape |
| Date First Available | Nov. 6 2024 |
7. Warranty and Support
7.1 Warranty Information
TechRise offers a 36-month warranty period for registered users. Please retain your proof of purchase for warranty claims.
7.2 Customer Support
If you encounter any issues or have questions regarding your TechRise Door and Window Alarm, please contact our professional customer service team. Refer to the product packaging or the official TechRise website for specific contact details.