
1. Introduction
Thank you for choosing the Faber Della 3 Burner 72cm Hob. This appliance is designed for efficient and convenient cooking. Please read this manual thoroughly before installation, operation, or maintenance to ensure safe and optimal performance. Keep this manual for future reference.
Video 1: Overview of the Faber Della 3 Burner 72cm Hob. This video provides a general visual introduction to the product's design and key features.
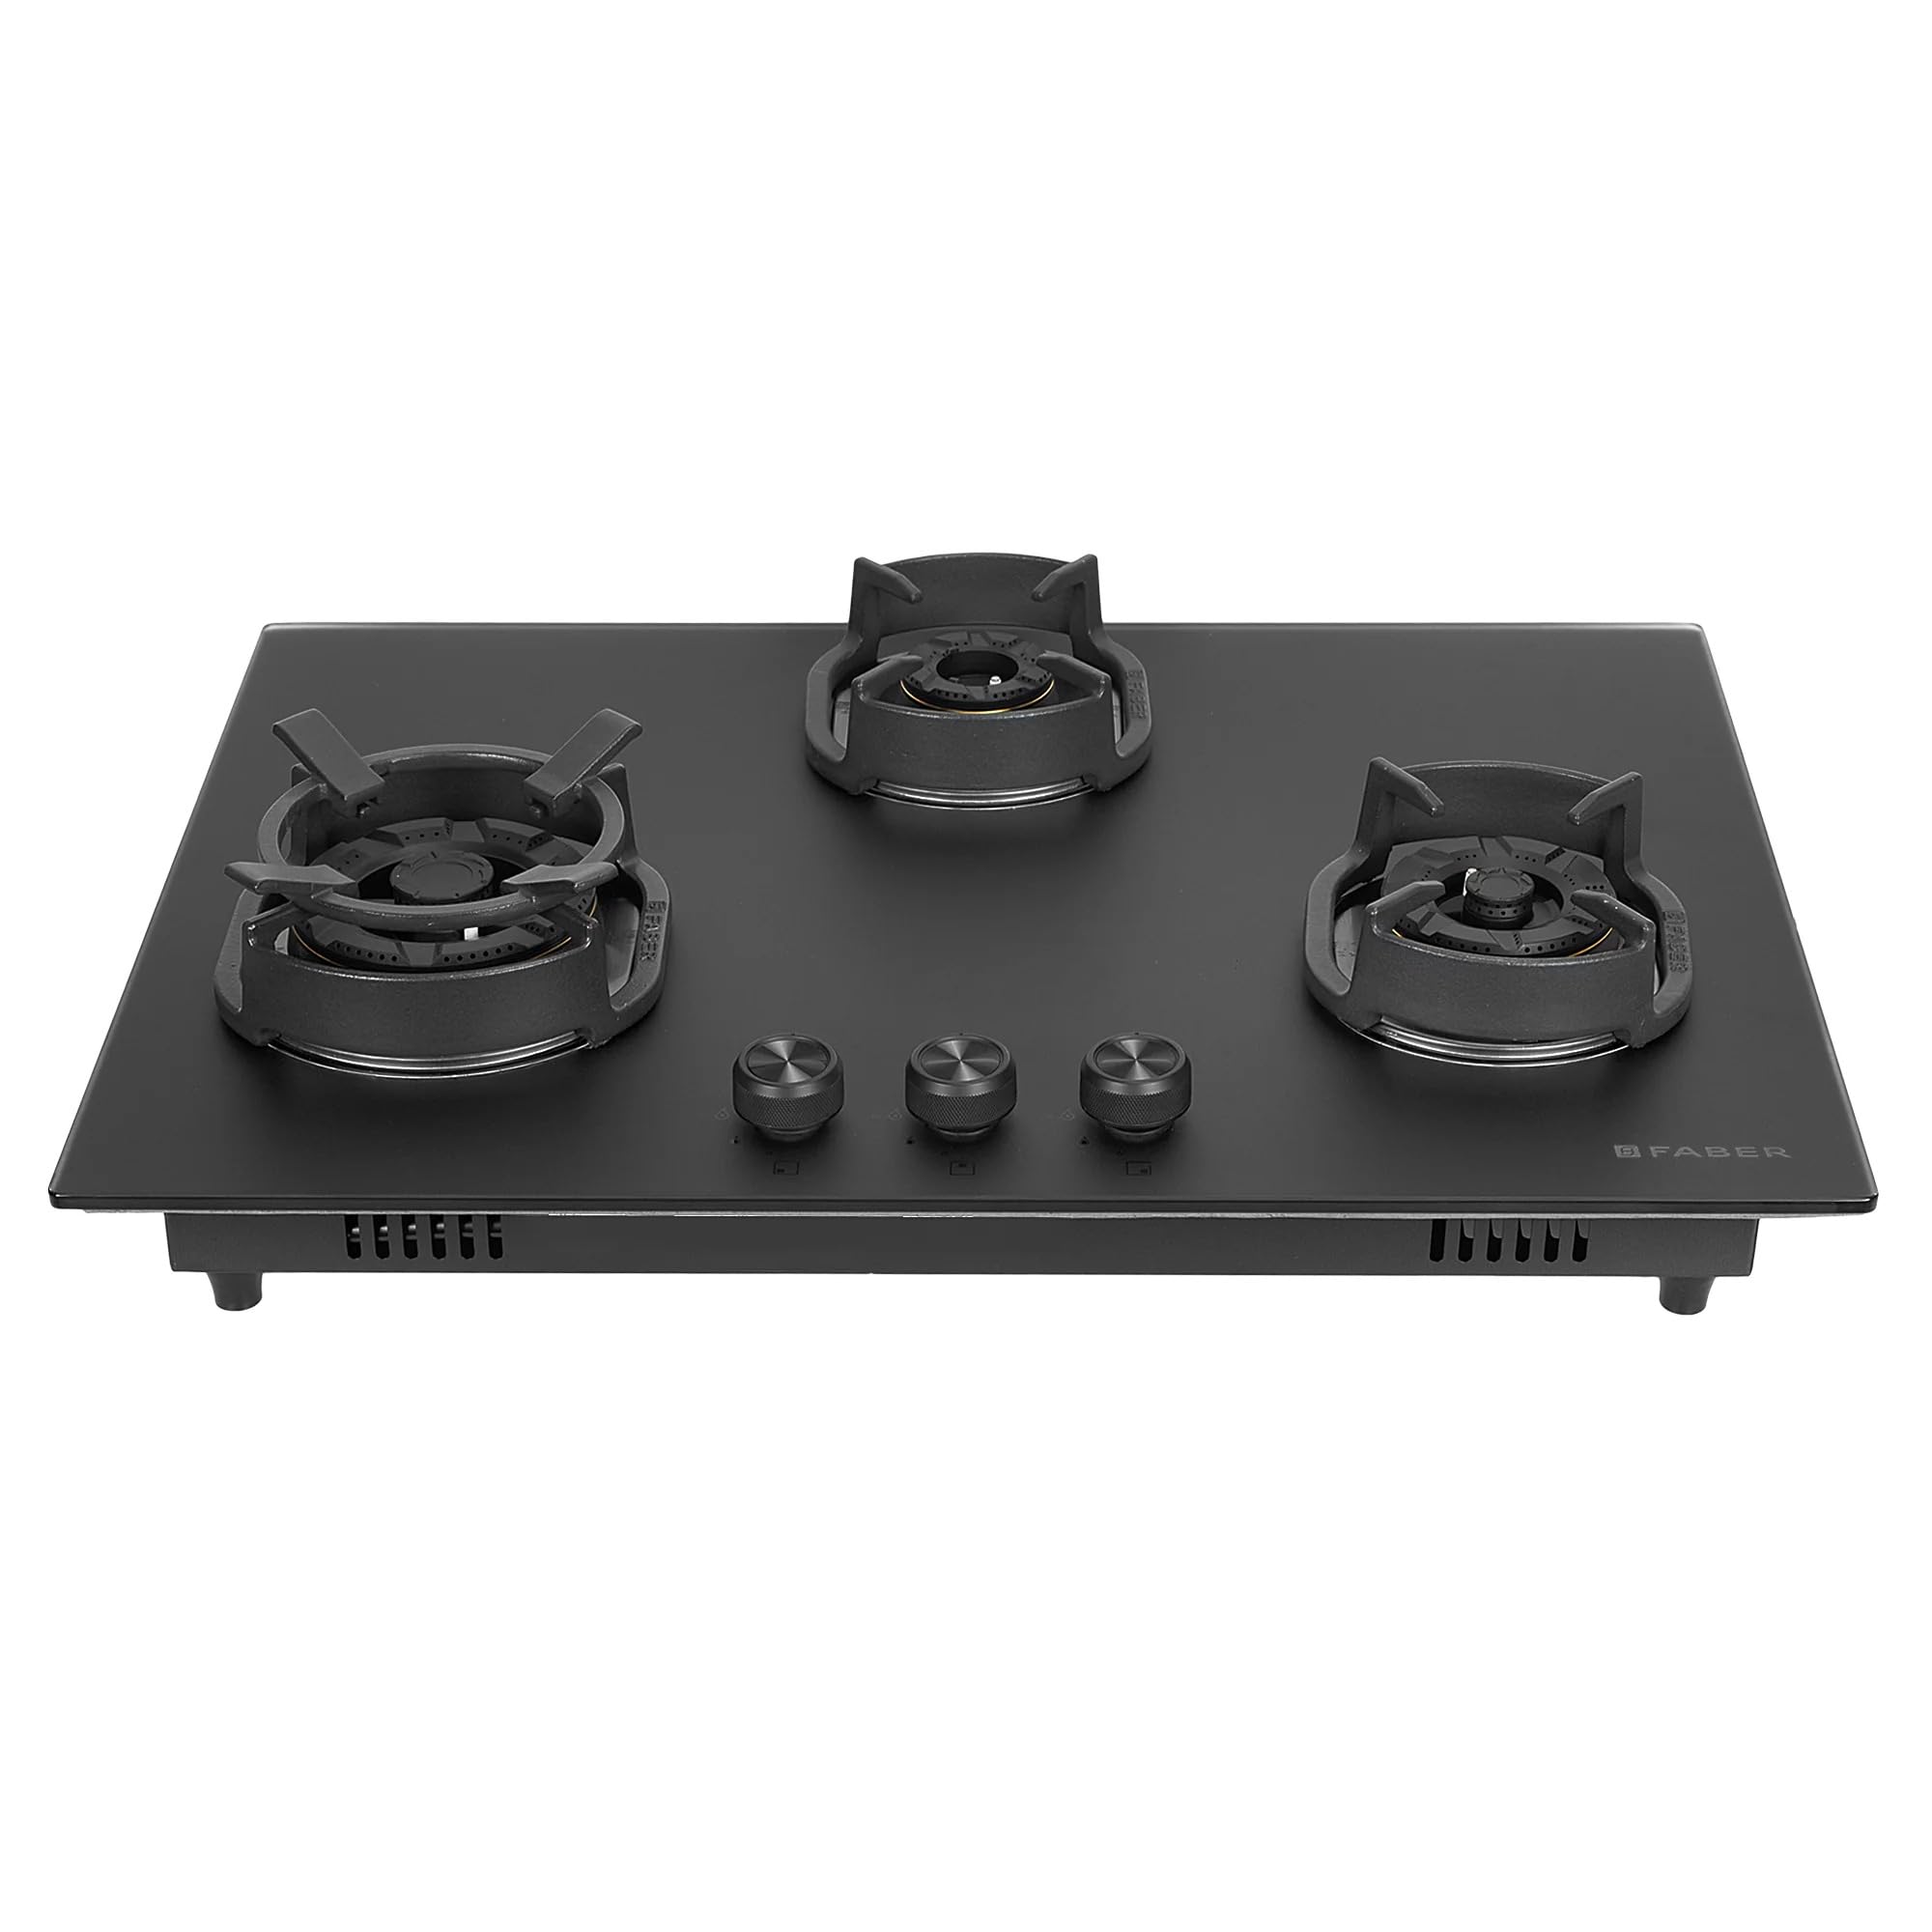
Image 1: Front view of the Faber Della 3 Burner 72cm Hob, showcasing its sleek matt black glass finish and three brass burners with cast iron pan supports.
2. Important Safety Information
Please read and follow all safety instructions carefully to prevent accidents and ensure proper operation of the appliance.
- This appliance is intended for domestic use only.
- Ensure proper ventilation in the kitchen area when using the hob.
- Do not store flammable materials near the appliance.
- Keep children away from the hob during operation and when it is cooling down.
- Always use appropriate cookware for gas burners.
- In case of a gas leak, immediately turn off the gas supply, open windows, and do not operate any electrical switches or appliances. Contact a qualified technician.
- Do not modify the appliance. All repairs and installations must be performed by authorized personnel.
- Ensure the gas supply pressure is compatible with the appliance specifications.
3. What's in the Box
Upon unpacking, please verify that all components are present and undamaged:
- Faber Della 3 Burner 72cm Hob Unit
- Warranty Card
- User Manual (this document)
4. Product Specifications
| Feature | Specification |
|---|---|
| Brand | Faber |
| Model Number | HD723 CI AI (106.0711.362) |
| Type | Hob / Hobtop Hybrid |
| Finish | Matt Black Glass, 8mm |
| Number of Burners | 3 |
| Burner Type | Brass Burners |
| Burner Power | Triple Ring 4.5 Kw, Mini; Triple Ring 3 Kw, Dual; Ring 1.5 Kw |
| Ignition | In-built Auto Electric, AC 220V Power Operated |
| Pan Support | Cast Iron |
| Knobs | Premium Metal Knobs |
| Item Weight | 16 kg 400 g |
| Dimensions (LxWxH) | 52.5 x 72 x 14.5 Centimeters |
| Fuel Type | Gas |

Image 2: Dimensional drawing of the hob, indicating a width of 720mm and depth of 525mm.
5. Installation
Proper installation is crucial for the safe and efficient operation of your hob. It is highly recommended that installation be performed by a qualified technician or authorized service personnel.
5.1 Pre-Installation Checks
- Ensure the kitchen counter cutout dimensions match the hob's requirements (refer to the dimensions in Section 4).
- Verify that the gas supply line is correctly installed and compatible with the appliance.
- Confirm that the electrical outlet for auto-ignition is properly grounded and meets the AC 220V requirement.
- Ensure adequate ventilation around the hob.
5.2 Installation Steps (General)
- Carefully place the hob into the prepared cutout in the countertop.
- Connect the gas supply line to the hob's inlet, ensuring a leak-free connection using appropriate seals and tools.
- Plug the power cord for the auto-ignition into a suitable electrical outlet.
- Perform a gas leak test using soapy water on all connections. Bubbles indicate a leak.
- Test all burners for proper ignition and flame stability.
For detailed installation instructions, please refer to the separate installation guide provided with your appliance or consult a professional.
6. Operating Instructions
This section guides you through the basic operation of your Faber Della Hob.
6.1 Using the Burners
- Ignition: Push down the desired burner knob and turn it counter-clockwise to the 'Ignition' position (usually marked with a flame symbol). The auto-ignition system will spark, igniting the gas.
- Flame Adjustment: Once the burner is lit, continue to hold the knob for a few seconds to allow the thermocouple to heat up (if applicable). Release the knob. You can then adjust the flame size by turning the knob between the 'High' and 'Low' settings.
- Turning Off: To turn off a burner, turn the knob clockwise until it clicks back into the 'Off' position.

Image 3: Illustration of the built-in auto-ignition system, showing a burner igniting with a blue flame.
6.2 Burner Types and Usage
- Triple Ring Burner (4.5 Kw, Mini): Ideal for large pots and rapid heating.
- Triple Ring Burner (3 Kw, Dual): Versatile for various cooking needs, offering good heat distribution.
- Ring Burner (1.5 Kw): Suitable for simmering, small pots, and delicate cooking.

Image 4: Detail of a dual flame brass burner, designed for efficient heat distribution.

Image 5: View of the premium metal control knobs, indicating their robust design and placement.
7. Maintenance and Cleaning
Regular cleaning and maintenance will prolong the life of your hob and ensure its continued performance.
7.1 General Cleaning
- Always ensure the hob is cool before cleaning.
- Disconnect the appliance from the power supply before cleaning.
- Use a soft cloth and mild detergent for the glass surface. Avoid abrasive cleaners or scouring pads that can scratch the glass.
- For stubborn stains, use a specialized hob cleaner.

Image 6: Detail of the matt black glass surface, highlighting its smooth and easy-to-clean texture.
7.2 Cleaning Burners and Pan Supports
- Remove the cast iron pan supports and brass burner caps/crowns.
- Wash them with warm soapy water. For heavy grease, a non-abrasive cleaner can be used.
- Ensure all parts are completely dry before reassembling them. Moisture can affect ignition.
- Clean the burner ports with a soft brush or needle to ensure no blockages.

Image 7: Overhead view showing the round cast iron pan supports, designed for enhanced stability and even heat distribution.
8. Troubleshooting
Before contacting customer service, please refer to the following common issues and their solutions:
| Problem | Possible Cause | Solution |
|---|---|---|
| Burner does not ignite | No gas supply, power outage (for auto-ignition), clogged burner ports, wet burner components. | Check gas cylinder/line. Verify power supply. Clean burner ports. Ensure burner components are dry. |
| Flame is uneven or yellow | Clogged burner ports, incorrect gas pressure, burner components not seated correctly. | Clean burner ports. Ensure burner caps and crowns are correctly placed. Contact a technician for gas pressure issues. |
| Gas smell detected | Gas leak. | Immediately turn off gas supply, open windows, do not operate electrical switches. Contact emergency services and a qualified technician. |
| Auto-ignition not sparking | Power supply issue, igniter electrode dirty or damaged. | Check power connection. Clean igniter electrode with a dry cloth. If damaged, contact service. |
9. Warranty and Customer Support
Faber provides comprehensive warranty coverage for your peace of mind.
9.1 Warranty Details
- Comprehensive Warranty: 2 Years
- Burners Warranty: 5 Years
- Glass and Valve Warranty: 5 Years
Please retain your purchase receipt and warranty card for any claims. The warranty covers manufacturing defects under normal domestic use.
9.2 Customer Support
For service, support, or warranty claims, please contact Faber customer service:
- Manufacturer: Franke Faber India Private Limited
- Contact Number: 1800-209-3484
- Address: 1086/1/2, SANASWADI, TAL - SHIRUR, PUNE - 412208, MAHARASHTRA, INDIA
You can also visit the official Faber Store on Amazon.in for more product information and support.