1. Introduction
Thank you for purchasing the Andoer 4K 60FPS Multifunctional Cycling Camera. This device is designed to capture high-quality video and photos during your cycling, motorcycling, or camping adventures, while also providing essential safety features like a powerful flashlight and a bicycle horn. This manual provides detailed instructions on how to set up, operate, and maintain your camera to ensure optimal performance.

Image 1.1: The Andoer Multifunctional Cycling Camera, designed for various outdoor activities, shown with a cyclist.
2. Safety Information
Please read all safety instructions carefully before using the product. Failure to follow these instructions may result in injury or damage to the device.
- Do not expose the camera to extreme temperatures or direct sunlight for extended periods.
- Keep the device away from water and moisture, despite its IPX5 rating, to prevent internal damage.
- Do not attempt to disassemble or modify the camera. This will void the warranty.
- Use only the specified charging cable and power adapter.
- If you notice any damage, deformation, or abnormal performance, discontinue use immediately and contact customer support.

Image 2.1: General warning information regarding product damage or abnormal performance.
3. Package Contents
Verify that all items are present in the package:
- Andoer Cycling Camera
- Rubber Ring (for mounting)
- Line-Controlled Button (for horn/recording)
- USB Cable (Type-C)
- User Manual (English & Chinese)
4. Product Overview
Familiarize yourself with the components of your Andoer Cycling Camera.

Image 4.1: Various perspectives of the camera, highlighting its compact design and integrated features.

Image 4.2: Key features of the camera, including the 2.0-inch IPS screen, 2500mAh battery, 4K/60fps video, LED light, EIS, and bike horn.
Camera Components:
- 2.0-inch IPS Screen: For live view, playback, and menu navigation.
- Camera Lens: Captures 4K video and 20MP photos.
- LED Flashlight: Provides illumination with multiple modes.
- Control Buttons: Power, Mode, Record/Shutter, Horn.
- Type-C Port: For charging and data transfer.
- Micro SD Card Slot: Supports up to 128GB TF card (not included).
- Microphone: For audio recording.
- Speaker: For horn sound and playback audio.
5. Setup
5.1 Charging the Battery
Before first use, fully charge the camera's built-in 2500mAh battery.
- Connect the provided Type-C USB cable to the camera's Type-C port.
- Connect the other end of the USB cable to a USB power adapter (not included) or a computer's USB port.
- The charging indicator light will illuminate. Once fully charged, the light will change or turn off.

Image 5.1: The camera's Type-C port, used for charging and data transfer.
5.2 Inserting a Micro SD Card
A Micro SD card (TF card) is required for recording video and photos. The camera supports cards up to 128GB.
- Locate the Micro SD card slot on the camera.
- Insert the Micro SD card with the gold contacts facing the back of the camera until it clicks into place.
- To remove, gently push the card in until it springs out.
Note: It is recommended to format the Micro SD card in the camera before first use to ensure compatibility and optimal performance.
5.3 Mounting the Camera
The camera can be mounted in various ways to suit your activity.
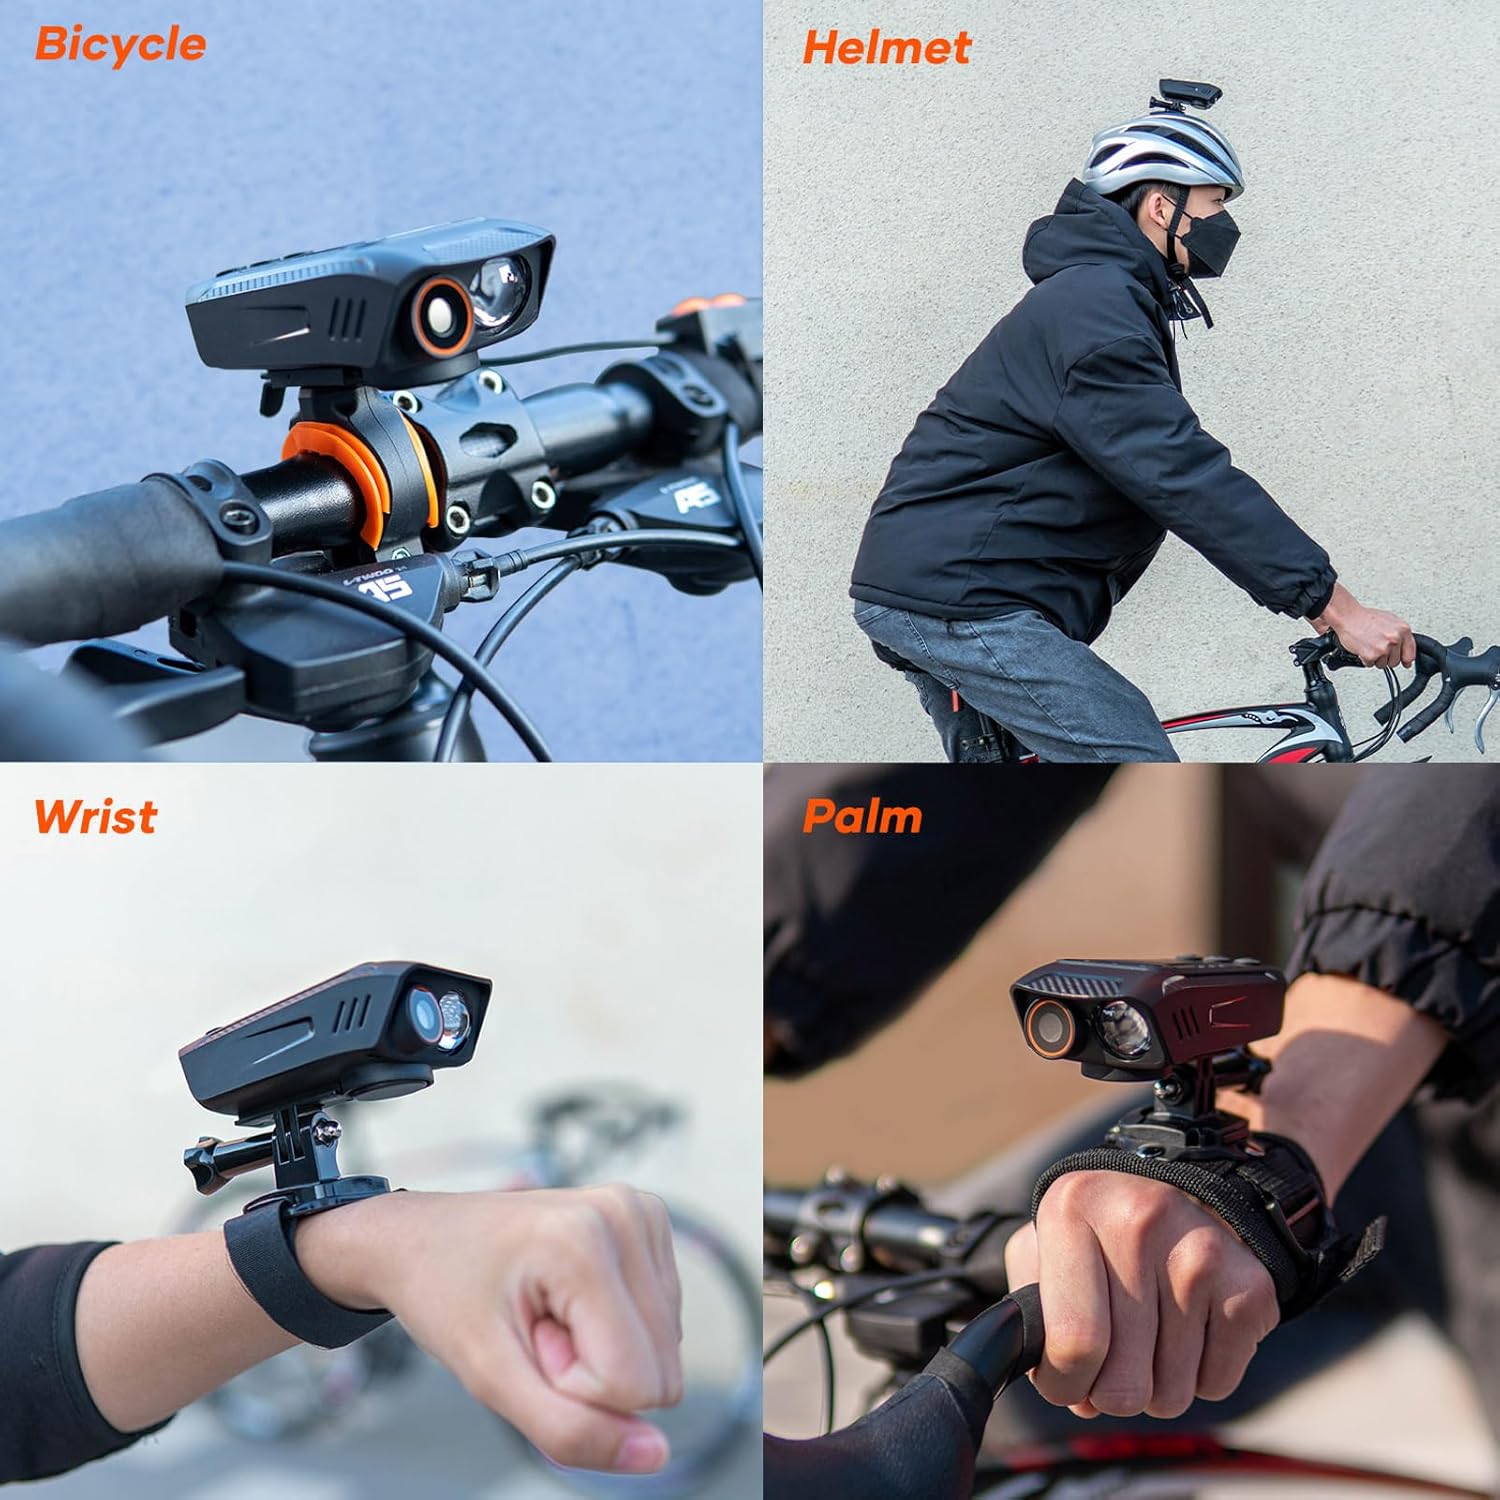
Image 5.2: Examples of how the camera can be mounted on a bicycle, helmet, wrist, or held in hand.
- Bicycle Handlebar: Use the provided rubber ring and mounting bracket to secure the camera to your bicycle handlebar.
- Helmet: Attach the camera to a helmet mount (sold separately) for a head-level perspective.
- Wrist/Palm: Utilize a wrist strap or hand mount (sold separately) for unique action shots.
Note: Ensure the camera is securely fastened before beginning any activity to prevent loss or damage.
6. Operating Instructions
6.1 Power On/Off
- To Power On: Press and hold the Power button (ⓘ symbol) until the screen illuminates.
- To Power Off: Press and hold the Power button until the screen turns off.
6.2 Recording Video
The camera supports 4K 60fps video recording.
- Ensure the camera is powered on and in video recording mode (indicated by a video camera icon on the screen). If not, press the Mode button to switch.
- Press the Record/Shutter button (circular icon) once to start recording. A red indicator light will flash, and a timer will appear on the screen.
- Press the Record/Shutter button again to stop recording. The red indicator light will stop flashing.
Shortcut: The line-controlled button can also be used to start/stop recording.
6.3 Taking Photos
Capture high-resolution 20MP photos.
- Ensure the camera is powered on and in photo mode (indicated by a camera icon on the screen). If not, press the Mode button to switch.
- Frame your shot using the IPS screen.
- Press the Record/Shutter button once to take a photo. The screen may flash briefly.
6.4 Using the Flashlight
The integrated 1000lm flashlight offers three lighting modes.

Image 6.1: The camera's powerful LED flashlight in action, illustrating its 20-meter range and multiple modes.
- Locate the flashlight button (often integrated with other controls or a dedicated button).
- Press the flashlight button repeatedly to cycle through the modes: High Light, Bright, SOS Flashing, and Off.
6.5 Activating the Bicycle Horn
The 100dB bicycle horn has 5 different ring tones for safety.
- Press the dedicated Horn button (often represented by a horn icon) or the line-controlled button to activate the horn.
- Repeated presses may cycle through different horn sounds, or a long press may activate a continuous sound. Refer to on-screen prompts if available.
Note: The horn is loud. Use responsibly and considerately.
6.6 WiFi Connection
Connect your camera to a smartphone via WiFi for remote control and file transfer.
- Download the official Andoer camera app from your smartphone's app store.
- On the camera, navigate to the WiFi settings and enable WiFi. The camera's WiFi network name (SSID) and password will be displayed.
- On your smartphone, go to WiFi settings and connect to the camera's network.
- Open the Andoer app and follow the on-screen instructions to connect to your camera.
7. Maintenance
- Cleaning: Use a soft, dry cloth to clean the camera body. For the lens, use a specialized lens cleaning cloth and solution. Do not use abrasive cleaners.
- Storage: Store the camera in a cool, dry place away from direct sunlight when not in use.
- Battery Care: For long-term storage, charge the battery to about 50-60% every few months to prolong its lifespan.
- Firmware Updates: Check the official Andoer website periodically for any available firmware updates to improve performance and add features.
8. Troubleshooting
- Camera not turning on:
- Ensure the battery is charged. Connect to a power source and try again.
- Press and hold the Power button for at least 5 seconds.
- Cannot record video/take photos:
- Check if a Micro SD card is inserted correctly.
- Ensure the Micro SD card has sufficient free space.
- Format the Micro SD card in the camera's settings.
- Poor video/photo quality:
- Clean the camera lens with a soft cloth.
- Ensure adequate lighting conditions.
- Check camera settings for resolution and EIS (Electronic Image Stabilization).
- WiFi connection issues:
- Ensure WiFi is enabled on the camera and your smartphone.
- Restart both the camera and your smartphone.
- Verify you are connecting to the correct camera WiFi network and entering the correct password.
9. Specifications

Image 9.1: Detailed product specifications for the Andoer Cycling Camera.
| Feature | Detail |
|---|---|
| Image Sensor | 12MP CMOS |
| Screen | 2.0 inch IPS |
| Lens Type | Fixed Focus |
| Aperture | F2.8 |
| Focal Length | f=2.3mm |
| View Angle | 110° |
| Flashlight Luminous Flux | 1000lm |
| Flashlight Distance | 20M |
| Storage Media | TF card, max. 128GB (not included) |
| Charging Interface | Type-C |
| Video Format | MP4 |
| Photo Format | JPG |
| Video Resolution | 4K 60fps, 4K 30fps EIS |
| Photo Resolution | 20MP |
| WiFi | Yes |
| Exposure | Auto |
| Battery | 2500mAh Polymer Battery |
| Recording Time | Up to 10 hours |
| High Lighting Time | Up to 4 hours |
| Waterproof Level | IPX5 |
| Dimensions | 105.2 x 53.7 x 37.1 mm |
| Weight | 130g (approx. 4.58 oz) |
10. Warranty and Support
Andoer products are designed for reliability and performance. For warranty information and customer support, please refer to the warranty card included in your package or visit the official Andoer website.
If you encounter any issues not covered in this manual, please contact Andoer customer service for assistance. Please have your product model number (B0D97JJ6YL) and purchase date ready when contacting support.
Online Support: Visit the Andoer Store on Amazon
