1. Introduction
Thank you for choosing the BuTure VAC BR700 Portable Car Jump Starter with Air Compressor. This versatile device is designed to be your reliable companion for various automotive and outdoor needs, combining multiple essential functions into one compact unit. Please read this manual thoroughly before use to ensure safe and optimal performance.
The BR700 integrates a powerful jump starter, a high-capacity power bank, a digital tire inflator, and an emergency LED light, making it an indispensable tool for roadside emergencies, camping, and daily use.
2. Product Features
- 6000A Peak Jump Starter: Capable of starting all 12V gas engines and up to 8.0L diesel engines. Features a manual override function for extreme cases.
- 150PSI Air Compressor: Cordless digital tire inflator with 45L/Min airflow, smart preset pressure, and auto shut-off to prevent over-inflation. Suitable for car tires, bicycles, motorcycles, balls, and inflatable toys.
- 26800mAh Power Bank: High-capacity battery charger with two smart USB output ports (including 18W Quick Charge) and a 160W max DC output for powering various 12V devices like car vacuum cleaners or refrigerators.
- 5W Emergency LED Light: Features a large luminous area with upgraded floodlight brightness and enlarged coverage. Includes multiple modes: steady, strobe, and SOS for emergency signaling.
- LCD Screen: Clear digital display for real-time battery status and tire pressure readings, enhancing diagnostics and adjustments.
- Advanced Safety Protections: Built-in intelligent clip protection against over-discharge, over-current, reverse-connection, high-temperature, reverse-charge, short-circuit, high-voltage, and overload.
3. Package Contents
Please check the package contents upon unboxing:
- BuTure VAC BR700 Jump Starter Unit
- Smart Jumper Cables
- Air Hose with Nozzle Adapters (Tire Pump Nozzle, Ball Needle, Cone Adapter)
- USB-C Charging Cable
- 12V DC Car Charger Adapter
- Durable Storage Case
- User Manual

Image: BuTure VAC BR700 Jump Starter with all included accessories.
4. Setup and Initial Use
4.1 Charging the Unit
Before first use, fully charge the BR700 unit. It is recommended to charge the product every 3 months to prolong its lifespan, especially if not in regular use.
- Connect the provided USB-C charging cable to the unit's input port.
- Connect the other end of the USB-C cable to a 5V/2A or higher rated USB charger (not included).
- The LCD screen will indicate charging status. The unit is fully charged when the battery icon is full.
4.2 Familiarizing with Ports and Controls
Locate the various ports and controls on your BR700 unit:
- Power Switch: On/Off toggle for the main unit.
- LCD Display: Shows battery level, pressure readings, and operating modes.
- Control Buttons: Navigation and selection for air compressor settings and light modes.
- USB Output Ports: For charging mobile devices.
- DC Output Port: For powering 12V devices.
- Jump Start Port: For connecting the smart jumper cables.
- Air Hose Port: For connecting the air inflation hose.
5. Operating Instructions
5.1 Jump Starting a Vehicle
Ensure the BR700 unit is sufficiently charged before attempting a jump start.
- Turn off your vehicle's ignition and all accessories.
- Insert the blue plug of the smart jumper cables into the jump start port on the BR700 unit.
- Connect the red (+) clamp to the positive terminal of your vehicle's battery.
- Connect the black (-) clamp to the negative terminal of your vehicle's battery.
- Once connected, the indicator light on the smart jumper cable will turn solid green, indicating it's ready to jump start. If it flashes red/green, check connections. If it's solid red, there's an error (e.g., reverse polarity).
- Start your vehicle.
- Once the vehicle starts, immediately remove the black (-) clamp from the vehicle battery, followed by the red (+) clamp.
- Disconnect the smart jumper cables from the BR700 unit.
Manual Override (Force Start): In extreme cases where the battery is completely dead and the smart cable indicator does not turn green, you can use the manual override function. Press and hold the 'Force Start' button on the smart cable until the indicator turns solid green. Caution: Using manual override disables safety features. Ensure correct polarity before proceeding.

Image: Proper connection for jump starting a vehicle.
Video: Demonstration of the 6000A Heavy-duty Car Jump Starter in action.
5.2 Using the Air Compressor
The BR700's air compressor can inflate tires and other inflatables quickly and accurately.
- Connect the air hose to the air hose port on the BR700 unit.
- Attach the appropriate nozzle adapter to the air hose and securely connect it to the item you wish to inflate (e.g., tire valve).
- Turn on the BR700 unit using the power switch. The LCD screen will display the current pressure.
- Use the control buttons to set your desired pressure (PSI, BAR, KPA, Kg/CM²).
- Press the start button to begin inflation. The compressor will automatically stop once the preset pressure is reached.
- Disconnect the air hose from the item and the BR700 unit.
Note: For extended inflation, it's recommended to stop the compressor every 8 minutes to allow it to cool down, preventing overheating.
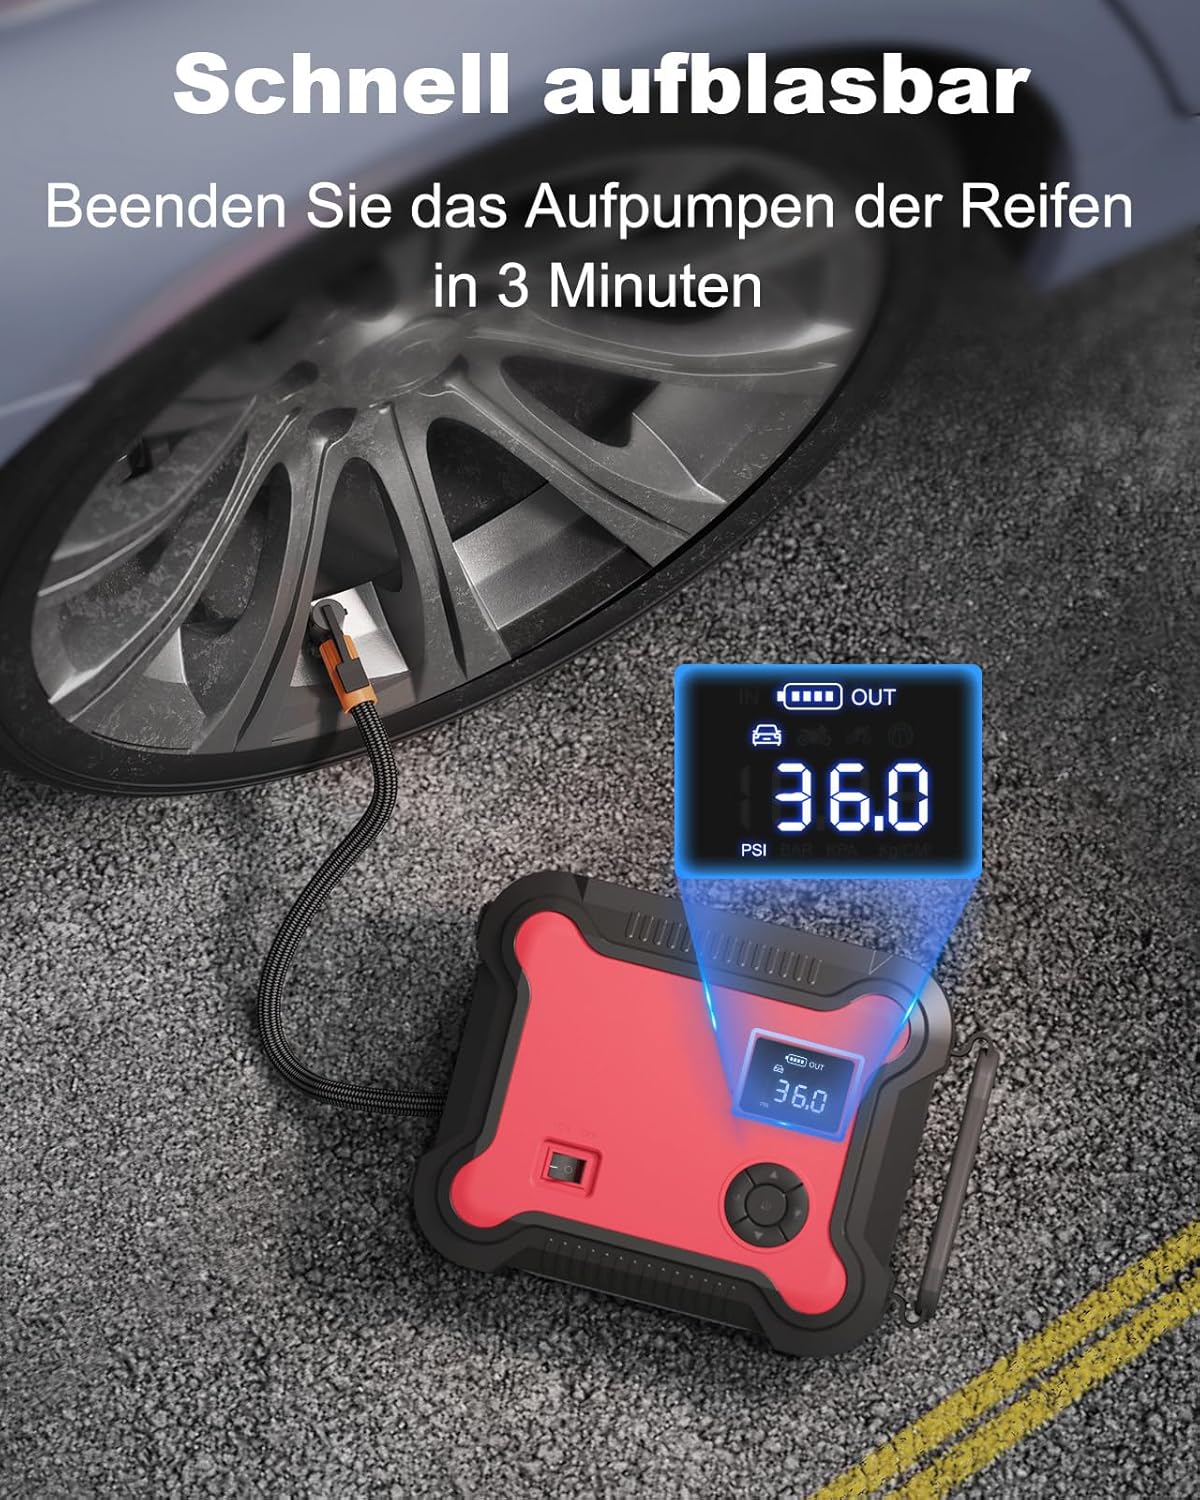
Image: The BR700 unit actively inflating a car tire, showing the digital pressure display.

Image: Various nozzle adapters for different inflation needs, including tire, ball, and cone adapters.
5.3 Using as a Power Bank
The 26800mAh capacity allows you to charge multiple electronic devices or power 12V accessories.
- Open the protective cover for the USB output ports.
- Connect your mobile phone, tablet, or other USB-powered devices to the USB-A or USB-C output ports using their respective charging cables.
- For 12V accessories, connect the 12V DC car charger adapter to the DC output port on the BR700, then plug in your accessory.

Image: The BR700 unit charging a smartphone and a tablet, demonstrating its power bank functionality.

Image: The BR700 unit powering a car vacuum cleaner via its 160W DC output, highlighting its versatility.
5.4 Using the Emergency LED Light
The integrated LED light provides illumination for various situations.
- Press the dedicated light button to cycle through the different light modes:
- First Press: Steady white light (flashlight mode).
- Second Press: Strobe light (for signaling).
- Third Press: SOS signal (for emergencies).
- Fourth Press: Turn off the light.

Image: The BR700 unit providing bright illumination in a dark outdoor setting, showcasing its emergency light feature.
6. Maintenance and Storage
Proper maintenance ensures the longevity and optimal performance of your BR700 unit.
- Regular Charging: Recharge the unit every 3 months, even if not in use, to maintain battery health.
- Storage Temperature: Store the unit at temperatures no higher than 122℉ (50℃). The operating temperature range is -4℉ to 140℉ (-20℃ to 60℃).
- Avoid Full Discharge: Do not frequently fully discharge the unit, as this can reduce battery lifespan.
- Avoid Direct Sunlight: Prolonged exposure to direct sunlight can damage the unit.
- Cleaning: Use a soft, dry cloth to clean the unit. Do not use harsh chemicals or abrasive materials.
- Air Compressor Cooling: If using the air inflator for extended periods, stop for 8 minutes after every 8 minutes of continuous use to allow the unit to cool down.
7. Troubleshooting
If you encounter issues with your BR700 unit, refer to the following common problems and solutions:
| Problem | Possible Cause | Solution |
|---|---|---|
| Unit does not turn on. | Battery is completely drained. | Charge the unit fully. |
| Jump start fails. | Incorrect clamp connection; battery too low; vehicle issue. | Ensure correct polarity (red to +, black to -). Use manual override if necessary (with caution). Check vehicle battery health. |
| Air compressor not inflating. | Hose not securely connected; pressure not set; unit not powered on. | Check all connections. Ensure unit is on and desired pressure is set. |
| LCD screen not displaying. | Unit is off or in standby mode. | Press the power button to activate the display. |
If the problem persists after trying these solutions, please contact customer support.
8. Specifications
| Feature | Detail |
|---|---|
| Model Number | BR700 |
| Peak Current | 6000A |
| Battery Capacity | 26800mAh |
| Max Air Pressure | 150 PSI |
| Airflow Rate | 45L/Min |
| DC Output | 160W |
| LED Light Power | 5W |
| Item Weight | 6.36 pounds |
| Package Dimensions | 12.52 x 11.69 x 6.18 inches |
| Battery Type | Lithium Polymer |
9. Warranty and Support
BuTure VAC offers a Lifetime Hassle-Free Service for this product. For any inquiries or support needs, please contact our dedicated support team.
Support Email: support@ibuture.com
We aim to reply to all inquiries within 12 working hours.

Image: BuTure VAC customer support is available to assist you.


