
Introduction
Thank you for choosing the Jack & Rose Travel Steamer & Iron 2-in-1. This versatile and portable appliance is designed to keep your garments wrinkle-free and fresh, whether you're at home or traveling globally. Please read this manual thoroughly before use to ensure safe and optimal performance.

Figure 1: Jack & Rose Travel Steamer & Iron 2-in-1 with its base and travel pouch.
Safety Instructions
- Always unplug the appliance when filling or emptying the water tank, and when not in use.
- Do not immerse the steamer in water or other liquids.
- Keep out of reach of children.
- Use only distilled or demineralized water to prevent mineral buildup.
- Do not touch the hot steam plate or steam output during operation.
- Ensure the voltage rating on the appliance matches your local power supply before plugging in.
- Do not operate the steamer with a damaged cord or plug.
Setup
- Unpack: Carefully remove all components from the packaging.
- Fill Water Tank:
- Detach the water tank from the main unit.
- Open the water inlet cap.
- Fill the tank with up to 5 oz (150ml) of distilled or demineralized water. Do not overfill.
- Close the cap securely and reattach the water tank to the main unit.
- Positioning: Place the steamer on its heat-resistant base on a stable, flat surface, or hold it upright for hanging garments.
- Plug In: Insert the power cord into a suitable electrical outlet. The LED display will illuminate.
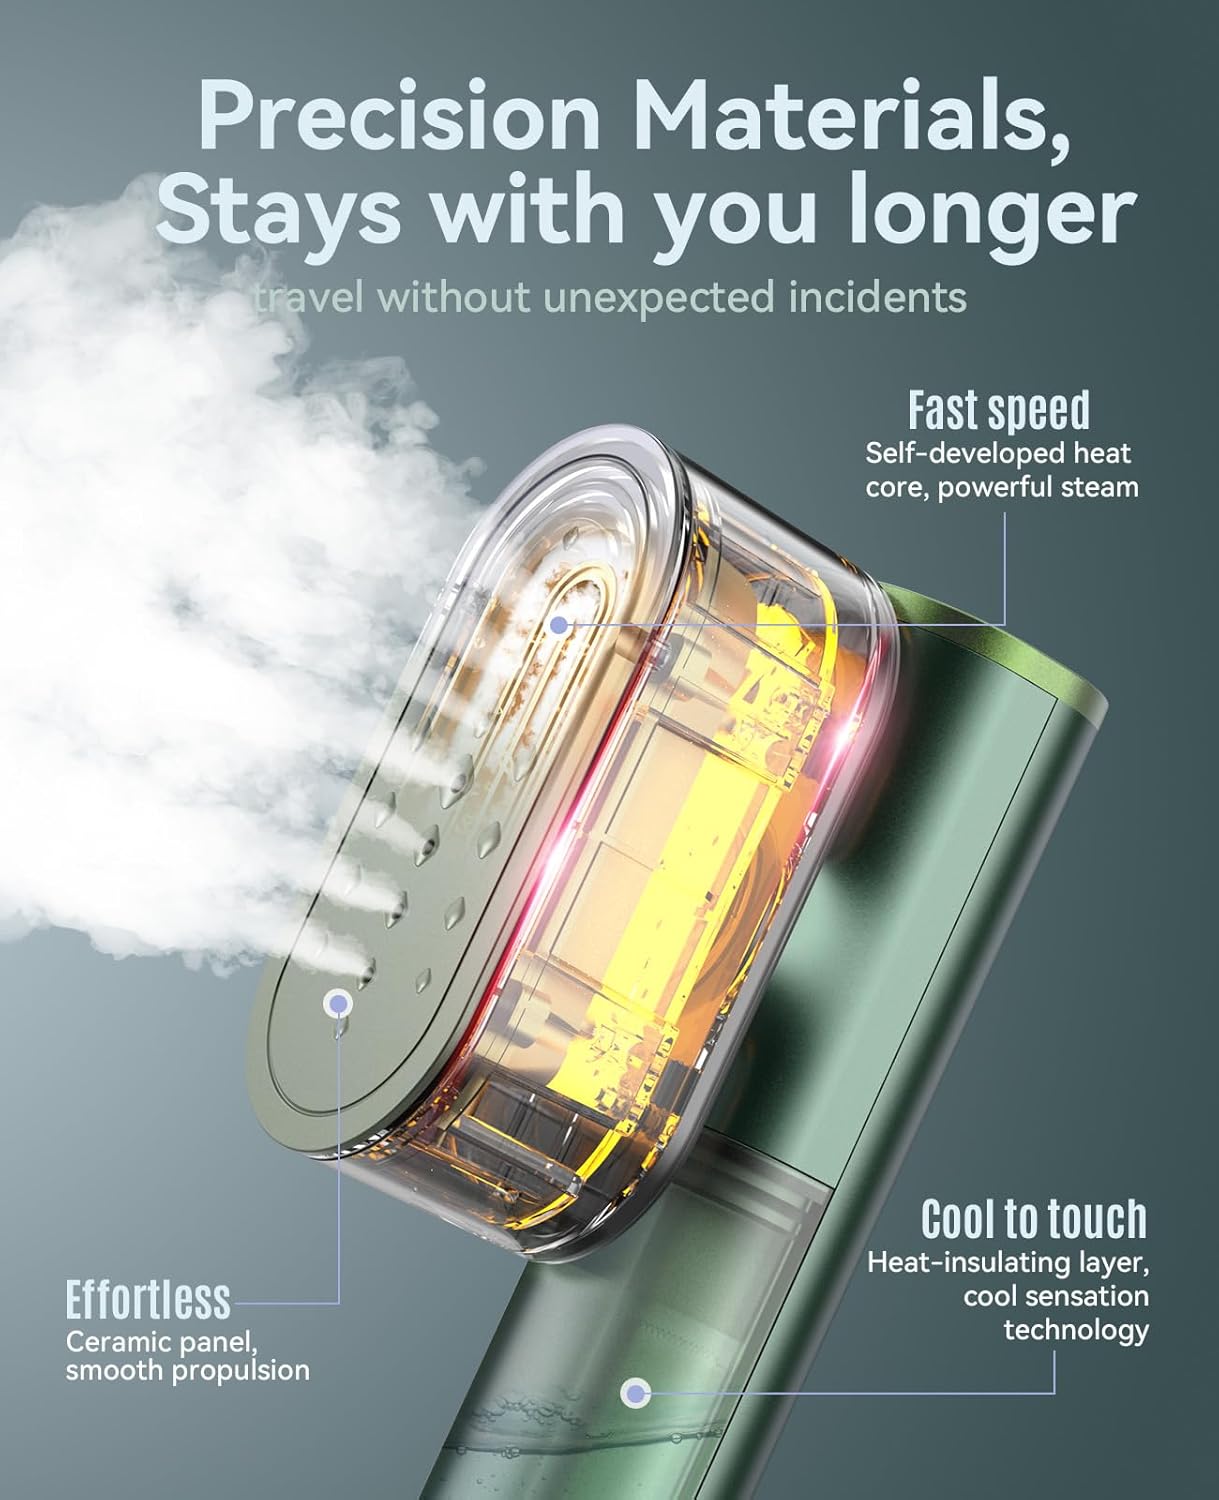
Figure 2: Illustration of the steamer's internal components and water tank for easy filling.
Operating Instructions
The Jack & Rose steamer offers both steaming and dry ironing functions with adjustable settings.
- Power On: Press the power button (usually indicated by 'M' or a power symbol) to turn on the steamer. It will begin to heat up.
- Select Mode: Use the mode selection button to cycle through the available settings:
- Low Steam: For delicate fabrics.
- High Steam: For heavier fabrics and stubborn wrinkles.
- Dry Iron: Activates the ceramic heating panel for traditional ironing without steam.
- Preheating: The steamer heats up in approximately 15 seconds. Wait for the indicator light to signal readiness (refer to LED display for specific indicators).
- Steaming Garments:
- Hang the garment on a hanger.
- Hold the steamer upright, ensuring the steam panel is facing the fabric.
- Gently glide the steamer over the fabric, moving from top to bottom. For best results, pull the fabric taut with your free hand.
- The rotating steam head allows for flexible use in various orientations.
- Dry Ironing:
- Ensure the steamer is in 'Dry Iron' mode.
- Place the garment on a flat, heat-resistant surface (e.g., an ironing board or the provided heat-resistant plate).
- Press the ceramic heating panel directly onto the fabric and move it smoothly to remove wrinkles. This is ideal for collars, cuffs, and pant legs.
- Auto Shut-off: For safety, the steamer features an auto shut-off function if left idle for a period.

Figure 3: Demonstrating the effectiveness of the steamer on a wrinkled shirt, showing quick wrinkle removal.

Figure 4: Using the steamer's swivel design for precise dry ironing on a shirt collar.
Maintenance
- Empty Water Tank: After each use, unplug the steamer and allow it to cool. Empty any remaining water from the tank to prevent mineral buildup and odors.
- Cleaning:
- Wipe the exterior of the steamer with a soft, damp cloth.
- For mineral buildup on the ceramic plate, use a cloth dampened with a vinegar solution, then wipe clean with plain water.
- Storage: Store the steamer in a cool, dry place. Utilize the provided deluxe travel bag for convenient and protected storage, especially when traveling. The rotating head design maximizes space.
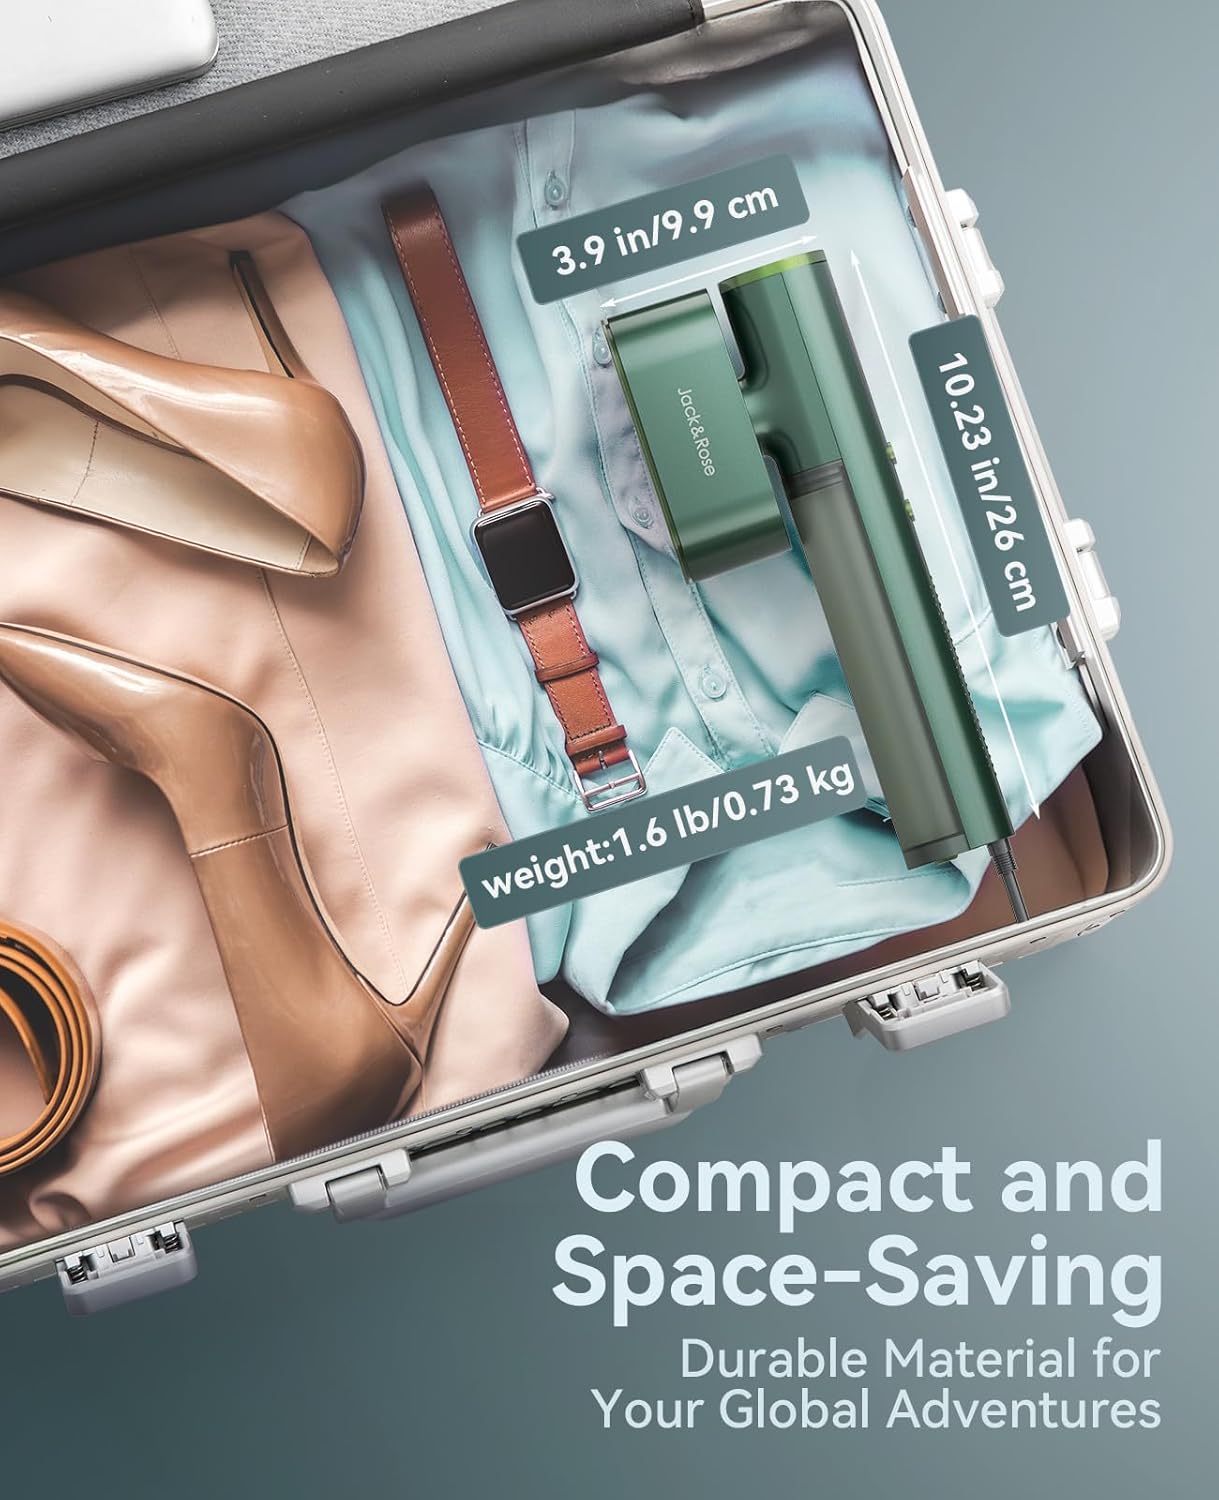
Figure 5: The compact design of the steamer, highlighting its dimensions (10.23x3.9 inches, 1.6 lbs) for easy travel and storage.
Troubleshooting
| Problem | Possible Cause | Solution |
|---|---|---|
| No steam output. | Water tank is empty or not properly inserted. Steamer not heated up. | Fill water tank and ensure it's securely attached. Wait 15 seconds for preheating. |
| Water spitting/leaking. | Overfilling the water tank. Not fully heated. Using tap water. | Do not overfill. Allow full preheating. Use distilled/demineralized water. |
| Steamer not turning on. | Not plugged in. Power outlet issue. Auto shut-off activated. | Check power connection. Try a different outlet. Press power button to restart. |
| Wrinkles not removed effectively. | Incorrect mode selected. Not enough steam. Fabric too thick. | Switch to High Steam mode. For stubborn wrinkles, use Dry Iron mode. |
Specifications
- Model: E1
- Dimensions: 10.23 x 3.9 x 1.69 inches
- Weight: 1.6 lbs
- Voltage: 100V-220V (Global Compatible)
- Power: 1,000 Watts
- Heat-up Time: Approximately 15 seconds
- Steam Output: Up to 0.78 ounces per minute
- Steam Temperature: Up to 248°F (120°C)
- Dry Iron Panel Temperature: 302°F (150°C)
- Water Tank Capacity: 5 oz (150 ml)
- Max Runtime: Up to 10 minutes (at maximum steam output)
- Cord Length: 7.2 ft
- Features: LED Display, Auto Shut-off, Rotating Steam Head, Ceramic Heating Panel

Figure 6: Visual representation of key product specifications.
Warranty and Support
The Jack & Rose Travel Steamer & Iron 2-in-1 comes with a 2-year warranty from the date of purchase. This warranty covers manufacturing defects under normal use. Please retain your proof of purchase for warranty claims.
For further assistance, troubleshooting not covered in this manual, or warranty inquiries, please contact Jack & Rose customer support through your original point of purchase or visit the official Jack & Rose website for contact information.

