1. General Safety Information
Please read these safety instructions carefully before using the device. Keep this manual for future reference.
- Do not expose the monitor to rain or moisture to prevent fire or electric shock.
- Do not open the monitor casing. There are no user-serviceable parts inside. Refer all servicing to qualified personnel.
- Place the monitor on a stable, flat surface to prevent it from falling.
- Ensure proper ventilation around the monitor. Do not block ventilation openings.
- Use only the power adapter provided with the monitor.
- Disconnect the power plug from the outlet if the monitor will not be used for a long period.
- Avoid placing heavy objects on the power cord.
- Do not use abrasive cleaners or solvents on the monitor. Use a soft, damp cloth for cleaning.
- Important Note for Type-C Connection: Static electricity may accumulate during monitor use with Type-C connections, potentially causing unstable connections (e.g., "no signal"). To ensure stable operation, it is recommended to connect an earth wire (grounding).
2. Setup Guide
2.1 Unpacking and Package Contents
Carefully remove all components from the packaging. Ensure all items listed below are present:
- Monitor Unit
- Japanese Instruction Manual
- Warranty and Repair Request Card
- Stand Post
- Base and Fixing Screws
- Power Adapter
- HDMI Cable
- DP Cable
- Type-C to Type-C Cable
No additional purchases are necessary as all required cables are included.
2.2 Stand Assembly
The monitor stand is designed for easy, tool-free assembly.
- Insert Stand Post into Base: Insert the stand post into the base until it is securely seated.
- Tighten Fixing Screw: Tighten the fixing screw located on the stand post to secure it to the base.
- Attach Stand to Monitor: Insert the assembled stand into the slot on the back of the monitor until you hear a click, indicating it is locked in place.

Image: Step-by-step guide for assembling the monitor stand. It shows inserting the stand post into the base, tightening a screw, and then attaching the assembled stand to the back of the monitor.
2.3 VESA Mount Installation
The monitor supports VESA mounting (75mm x 75mm) for flexible placement options, such as wall mounting or attachment to a monitor arm. Compatible screws are M4 x 6mm to 8mm.

Image: Rear view of the monitor highlighting the VESA mount points (75mm x 75mm) and showing the monitor's dimensions and tilt range.
2.4 Connecting Your Devices
The monitor features HDMI 2.0, DP 1.4, and USB Type-C ports, allowing connection to various devices including PCs, PS4/PS5, and Nintendo Switch. Built-in speakers provide audio without external speakers.
- HDMI Connection: Use the provided HDMI cable to connect to devices like PCs, game consoles (PS4/PS5, Switch).
- DisplayPort (DP) Connection: Use the provided DP cable for high-refresh-rate connections to compatible PCs.
- USB Type-C Connection: If your device's Type-C port supports video output (DP Alt Mode), use the provided Type-C to Type-C cable for video transmission. This port also supports up to 65W Power Delivery to charge connected devices. For Nintendo Switch, a single Type-C cable can connect without a dock. For iPad Air/Pro, it supports mirroring and extended display functionality (check Apple's official site for compatible models for extended display).
- Audio Out: Connect external headphones or speakers to the 3.5mm audio jack.
- Power: Connect the power adapter to the DC power input.
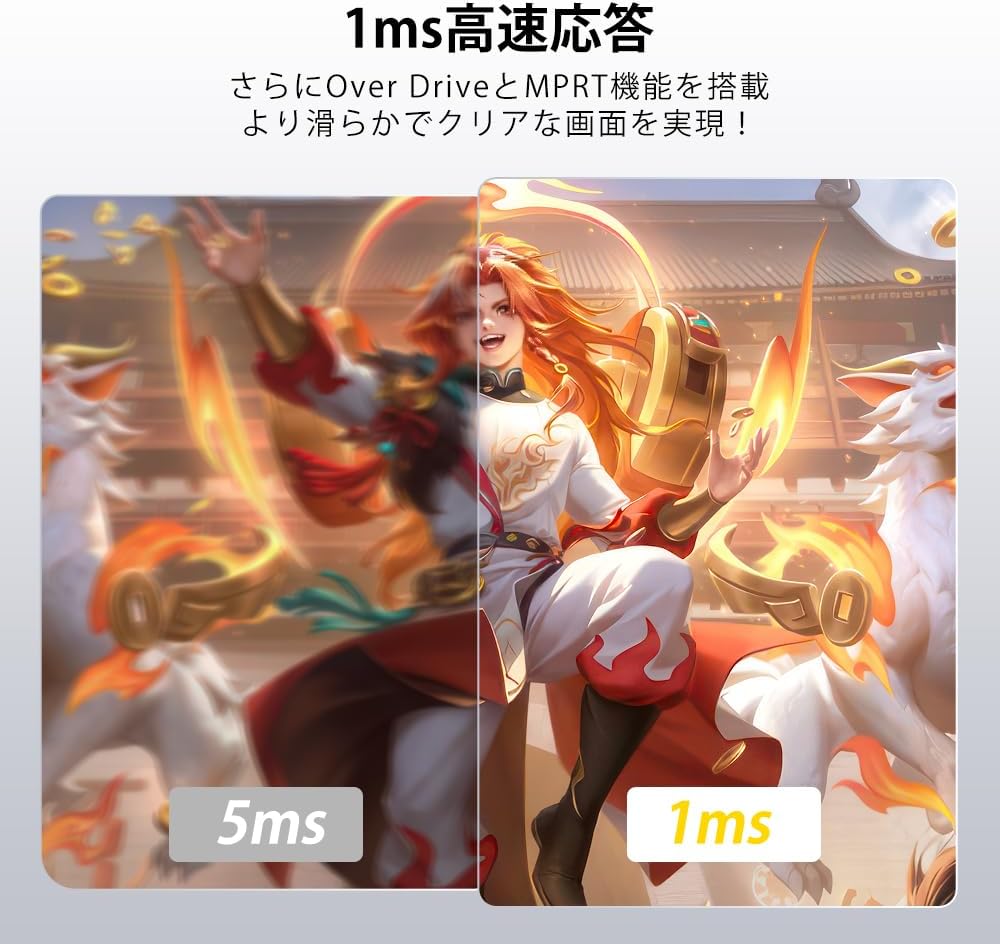
Image: Close-up view of the monitor's input ports, including HDMI 2.0, DP 1.4, Type-C, Audio Out, and DC Power.

Image: The monitor connected to a laptop, smartphone, and Nintendo Switch via Type-C, demonstrating its versatility and charging capabilities.
3. Operating Instructions
3.1 Power On/Off and Input Selection
Use the power button (usually located on the back or bottom of the monitor) to turn the monitor on or off. The monitor can automatically detect the input source, or you can manually select it via the On-Screen Display (OSD) menu.
3.2 On-Screen Display (OSD) Menu
The OSD menu allows you to adjust various monitor settings. Typically, buttons on the back or bottom of the monitor are used to navigate the menu. Common settings include brightness, contrast, color temperature, input source, and gaming features.
3.3 High Refresh Rate and Response Time
This monitor supports a maximum refresh rate of 200Hz and a fast 1ms (MPRT) response time, providing smooth and fluid visuals, especially beneficial for gaming. Features like FreeSync and Overdrive (OD) further enhance image clarity and reduce motion blur.

Image: Visual comparison demonstrating the smoothness of 200Hz refresh rate versus lower refresh rates (65Hz, 165Hz) in a racing game scene.

Image: Comparison of 5ms versus 1ms response time, showing significantly reduced motion blur and ghosting with 1ms.
3.4 Gaming Features (FreeSync, HDR, FPS Assist)
- FreeSync: Reduces image tearing and stuttering for a smoother gaming experience.
- HDR: Provides higher contrast and a wider color gamut for more realistic images.
- FPS Assist Mode: Activate this mode with a single button press to display a crosshair on screen, aiding in FPS games.

Image: A first-person shooter game scene demonstrating the FPS Assist Mode with various crosshair options displayed on the screen.
3.5 IPS Panel and Color Performance
The non-glare IPS panel offers a wide 178° viewing angle, ensuring clear images from any perspective. With 350 nits brightness, a 1000:1 contrast ratio, 120% sRGB wide color gamut, and over 16.7 million display colors, it promises accurate color reproduction for an immersive visual experience.

Image: A vibrant image demonstrating the enhanced color reproduction with 120% sRGB, highlighting the richness and detail of colors.
3.6 Adjustable Display Modes
The monitor offers various display modes optimized for different content, including Game, Movie, FPS, RTS, and Internet browsing. Select the mode that best suits your current activity for an enhanced viewing experience.

Image: A collage of different screen content (game, movie, internet, FPS, RTS) illustrating the monitor's various adjustable display modes.
4. Maintenance
To ensure the longevity and optimal performance of your monitor, follow these maintenance guidelines:
- Cleaning the Screen: Gently wipe the screen with a soft, lint-free cloth. For stubborn marks, slightly dampen the cloth with water or a screen-specific cleaning solution. Never spray liquid directly onto the screen.
- Cleaning the Casing: Use a soft, dry cloth to wipe the monitor casing. Avoid using harsh chemicals, abrasive cleaners, or solvents, as these can damage the finish.
- Ventilation: Ensure the ventilation openings on the monitor are clear of dust and debris to prevent overheating.
- Power Off: Always turn off and unplug the monitor before cleaning or when it will not be used for an extended period.
5. Troubleshooting
If you encounter issues with your cocopar HG-245HCW monitor, please refer to the following common solutions:
- No Signal / Unstable Connection (Type-C): If using a Type-C connection and experiencing "no signal" or unstable connection, it may be due to static electricity accumulation. It is highly recommended to connect an earth wire (grounding) for stable operation. Ensure your device's Type-C port supports video output (DP Alt Mode). Use the provided Type-C cable for optimal performance, as some third-party cables may only support power delivery.
- Refresh Rate Not Reaching 200Hz: The 200Hz refresh rate is the maximum supported. The default may be 60Hz. You must adjust the refresh rate settings on your connected device (PC, game console), not on the monitor itself. The maximum refresh rate achievable can vary depending on the specifications of the connected device and the connection method.
- PS4/PS5 Refresh Rate: The maximum output refresh rate for PS4/PS5 is 120Hz. Some games may only support up to 60Hz. Even for 120fps compatible games, the standby screen might remain at 60Hz, with 120Hz only active during gameplay scenes.
- Screen Appears Glossy / Marks on Screen: Before use, please peel off the protective film located on the upper right corner of the screen. This film is prone to dirt and scratches, which can appear as smudges, lines, or missing dots. Some films may also have inverted text imprinted on them. If this film is not removed, the screen may appear glossy.
- No Power: Ensure the power adapter is securely connected to both the monitor and a working power outlet. Verify the power outlet is functional.
- No Sound from Speakers: Check the volume settings on both the monitor and the connected device. Ensure the audio output is correctly routed to the monitor.
6. Specifications
| Feature | Detail |
|---|---|
| Brand | cocopar |
| Model Number | HG-245HCW |
| Screen Size | 24.5 inches |
| Resolution | 1920 x 1080 pixels (FHD 1080p) |
| Aspect Ratio | 16:9 |
| Panel Type | Non-glare IPS |
| Refresh Rate | Up to 200Hz |
| Response Time | 1ms (MPRT) |
| Brightness | 350 nits |
| Contrast Ratio | 1000:1 |
| Color Gamut | 120% sRGB |
| Viewing Angle | 178° |
| Connectivity | HDMI 2.0 (x1), DP 1.4 (x1), USB Type-C (x1), Audio Out (x1) |
| VESA Mount | 75mm x 75mm |
| Product Dimensions | 21 x 57 x 46 cm |
| Product Weight | 4.55 kg |
7. Warranty and Support
cocopar is committed to providing excellent customer service and product quality.
- Quality Assurance: All products undergo thorough inspection before shipment.
- Initial Defects & Missing Accessories: In the unlikely event of initial defects or missing accessories, please contact us immediately. We will take full responsibility and provide appropriate support.
- Customer Inquiries: If you have any questions about the product, please feel free to contact us anytime. We are available via email and phone, not just through Amazon.
- Warranty Service: If a malfunction occurs within the warranty period (excluding damage due to improper use, and subject to necessary verification), we offer free parts or product exchange.
For further assistance, please visit the official cocopar store on Amazon: cocopar Amazon Store
8. Product Videos
Watch these official videos for more information on the monitor's features and usage.
8.1 KTC 23.8-inch Gaming Monitor Overview
Video: This video showcases the KTC 23.8-inch gaming monitor, highlighting its 190Hz refresh rate, Fast IPS panel, HDR400, and 1ms response time. It demonstrates smooth gameplay and vibrant visuals.
8.2 MiniFire 24-inch USB-C 100Hz Monitor Features
Video: This video presents the MiniFire 24-inch USB-C 100Hz monitor, emphasizing its IPS panel, HDR support, VESA compatibility, frameless design, and built-in speakers. It shows the monitor in various usage scenarios.
8.3 JAPANNEXT 23.8-inch IPS Panel Monitor
Video: A promotional video for the JAPANNEXT 23.8-inch IPS panel monitor, highlighting its Full HD (1920x1080) resolution, tilt function, and various input interfaces including USB-C, DP, and HDMI. It also shows VESA mount compatibility.
8.4 JAPANNEXT 23.8-inch 200Hz Gaming Monitor
Video: This video showcases the JAPANNEXT 23.8-inch 200Hz gaming monitor, featuring an IPS panel, Full HD resolution, and various stand adjustments. It emphasizes the smooth gaming experience provided by the high refresh rate.
8.5 KEY TO COMBAT 23.8-inch H24F8 Monitor
Video: A dynamic video for the KEY TO COMBAT 23.8-inch H24F8 monitor, highlighting its gaming capabilities with 180Hz refresh rate, 1ms response time, low blue light technology, and HDR400 support. It features intense gameplay footage.
8.6 Pixio PX248WAVE White 24-inch Gaming Monitor
Video: This video showcases the Pixio PX248WAVE White 24-inch gaming monitor, emphasizing its aesthetic design, Fast IPS panel, 1ms response time, and 200Hz refresh rate. It also highlights various color options for the monitor.
8.7 Z-EDGE 240Hz 24-inch Gaming Monitor
Video: A video featuring the Z-EDGE 240Hz 24-inch gaming monitor, highlighting its non-glare IPS panel, 240Hz refresh rate, 1ms MPRT response time, HDR support, and AMD FreeSync technology. It shows dynamic gameplay footage.
8.8 Wingame 23.8-inch Gaming Monitor
Video: This video showcases the Wingame 23.8-inch gaming monitor, emphasizing its 1ms GTG response time, FreeSync compatibility, and Full HD (1920x1080) resolution. It illustrates the smooth performance during gaming.


