Blumfeldt 3x4m Garden Gazebo Instruction Manual
Model: GDM26-ShadeFT 3x4
1. Introduction
This manual provides detailed instructions for the assembly, operation, and maintenance of your Blumfeldt ShadeFortress 3x4m Garden Gazebo. Designed for versatile outdoor use, this gazebo offers protection from sun, rain, and wind, making it ideal for family gatherings, barbecues, or simply relaxing outdoors. Its robust construction with an aluminum frame and galvanized steel roof ensures durability and stability.

Image 1.1: The Blumfeldt ShadeFortress 3x4m Garden Gazebo, showcasing its overall design and tied-back curtains.
2. Safety Information
- Always assemble the gazebo on a flat, stable surface.
- Ensure all connections are securely fastened before use.
- Do not use the gazebo in extreme weather conditions, such as strong winds, heavy snow, or thunderstorms. Disassemble or secure it properly to prevent damage or injury.
- Keep children and pets away from the assembly area during installation.
- Regularly inspect the structure for any signs of wear or damage. Replace damaged parts immediately.
- Do not hang heavy objects from the frame.
3. Package Contents
Before beginning assembly, verify that all components listed below are present and undamaged. If any parts are missing or damaged, contact customer support.
| Component | Quantity |
|---|---|
| Aluminum Frame Sections | Various |
| Galvanized Steel Roof Panels | Various |
| Polyester Side Curtains | 4 |
| Mosquito Nets | 4 |
| Hardware (screws, bolts, washers, nuts) | 1 set |
| Assembly Tools (wrenches, hex keys) | 1 set |
| Instruction Manual | 1 |
Note: The exact number of frame and roof sections will vary based on the specific design and size. Refer to the detailed parts list in your physical manual for precise counts.
4. Setup and Assembly
Assembly typically requires two or more people. Follow these steps carefully for a successful setup.
4.1. Prepare the Area
- Choose a level, clear area for assembly, free from obstructions.
- Unpack all components and lay them out, organizing them by type.
4.2. Assemble the Frame
Begin by connecting the main aluminum frame sections. Ensure all bolts are finger-tight before fully tightening them in a later step.

Image 4.2.1: Detail of a frame connection point, illustrating the robust aluminum structure.
- Connect the horizontal beams to the vertical posts to form the base structure.
- Attach the upper frame sections that will support the roof.
- Once the entire frame is loosely assembled, carefully stand it upright.
- Using the provided tools, tighten all bolts and screws securely. Do not overtighten.
4.3. Install the Roof
The galvanized steel roof provides excellent protection. Install the panels according to the numbering or specific instructions in your physical manual.
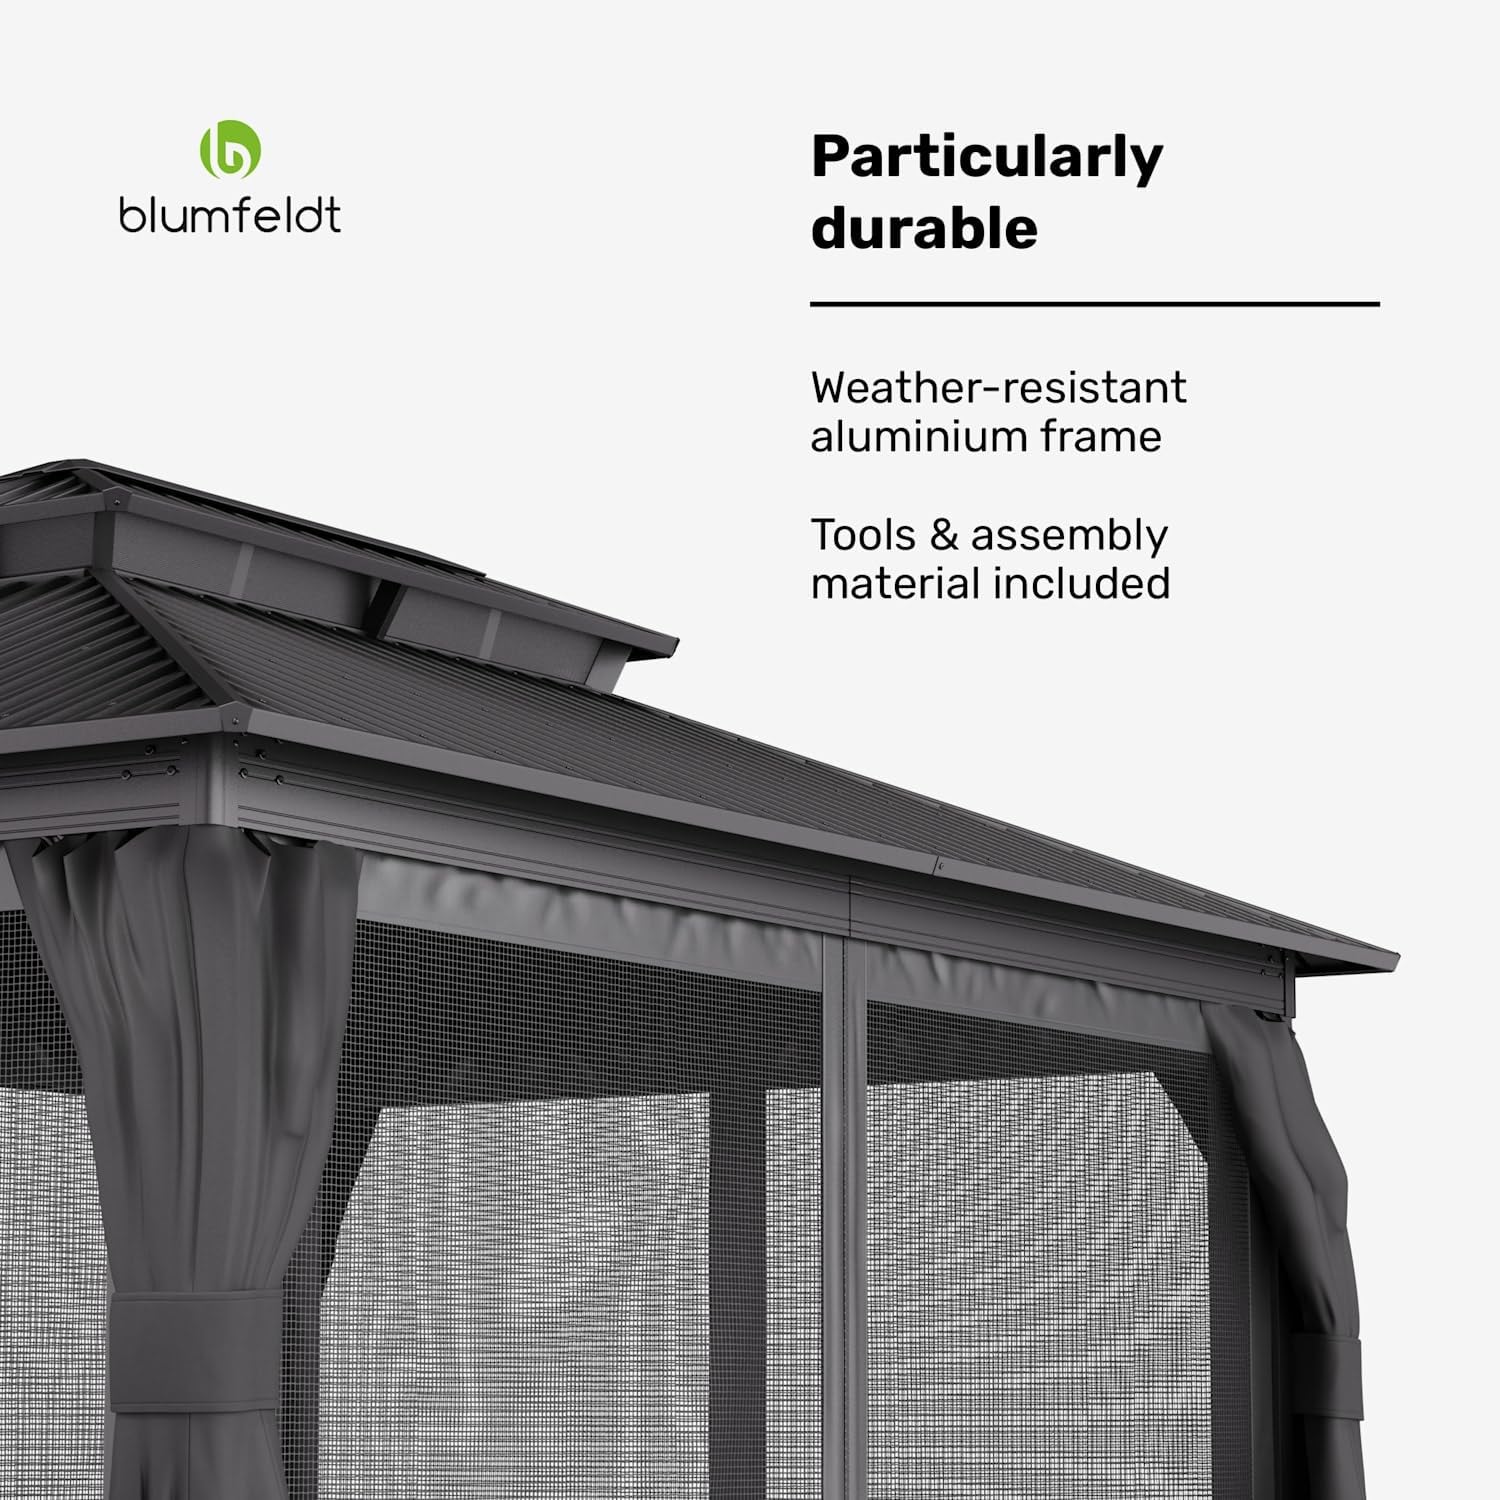
Image 4.3.1: Close-up of the galvanized steel roof, highlighting its weather-resistant design.
- Carefully lift and position the main roof panels onto the upper frame.
- Secure the roof panels using the designated fasteners.
- Install the smaller upper roof section (double-roof) for optimal air circulation.
4.4. Attach Curtains and Mosquito Nets
The gazebo includes both polyester side curtains and mosquito nets for versatile use and protection.
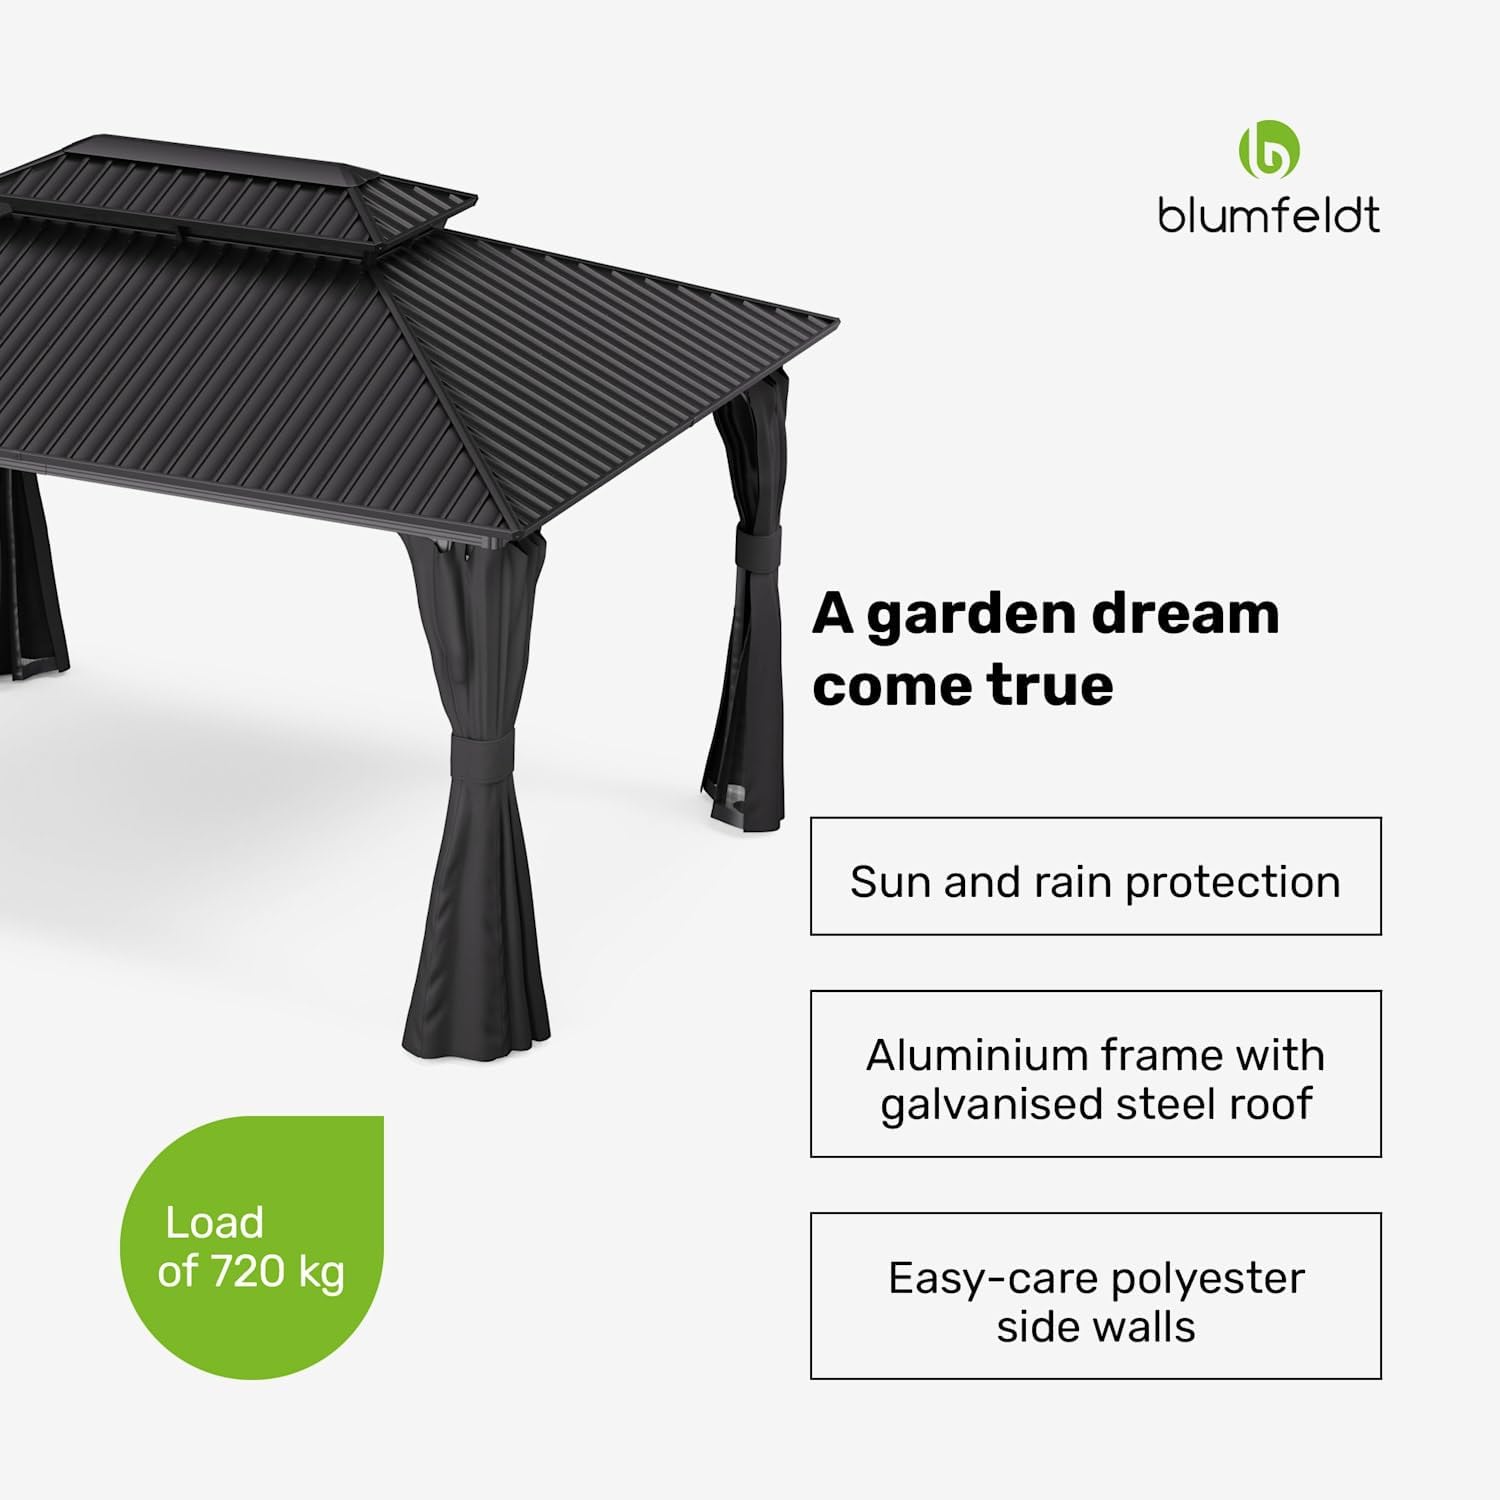
Image 4.4.1: The gazebo with its mosquito nets fully deployed, providing insect protection.
- Hang the polyester side curtains onto the designated tracks or hooks on the frame.
- Attach the mosquito nets in a similar manner, ensuring they can be easily opened and closed independently of the curtains.
5. Operating Instructions
Your Blumfeldt gazebo is designed for flexible use, adapting to your needs and the weather conditions.
5.1. Using the Side Curtains
- Open Position: Gather the curtains and secure them to the posts using the integrated ties. This creates an open, airy space.
- Closed Position: Release the ties and pull the curtains along their tracks to fully enclose the gazebo. This provides privacy and protection from light rain or wind.
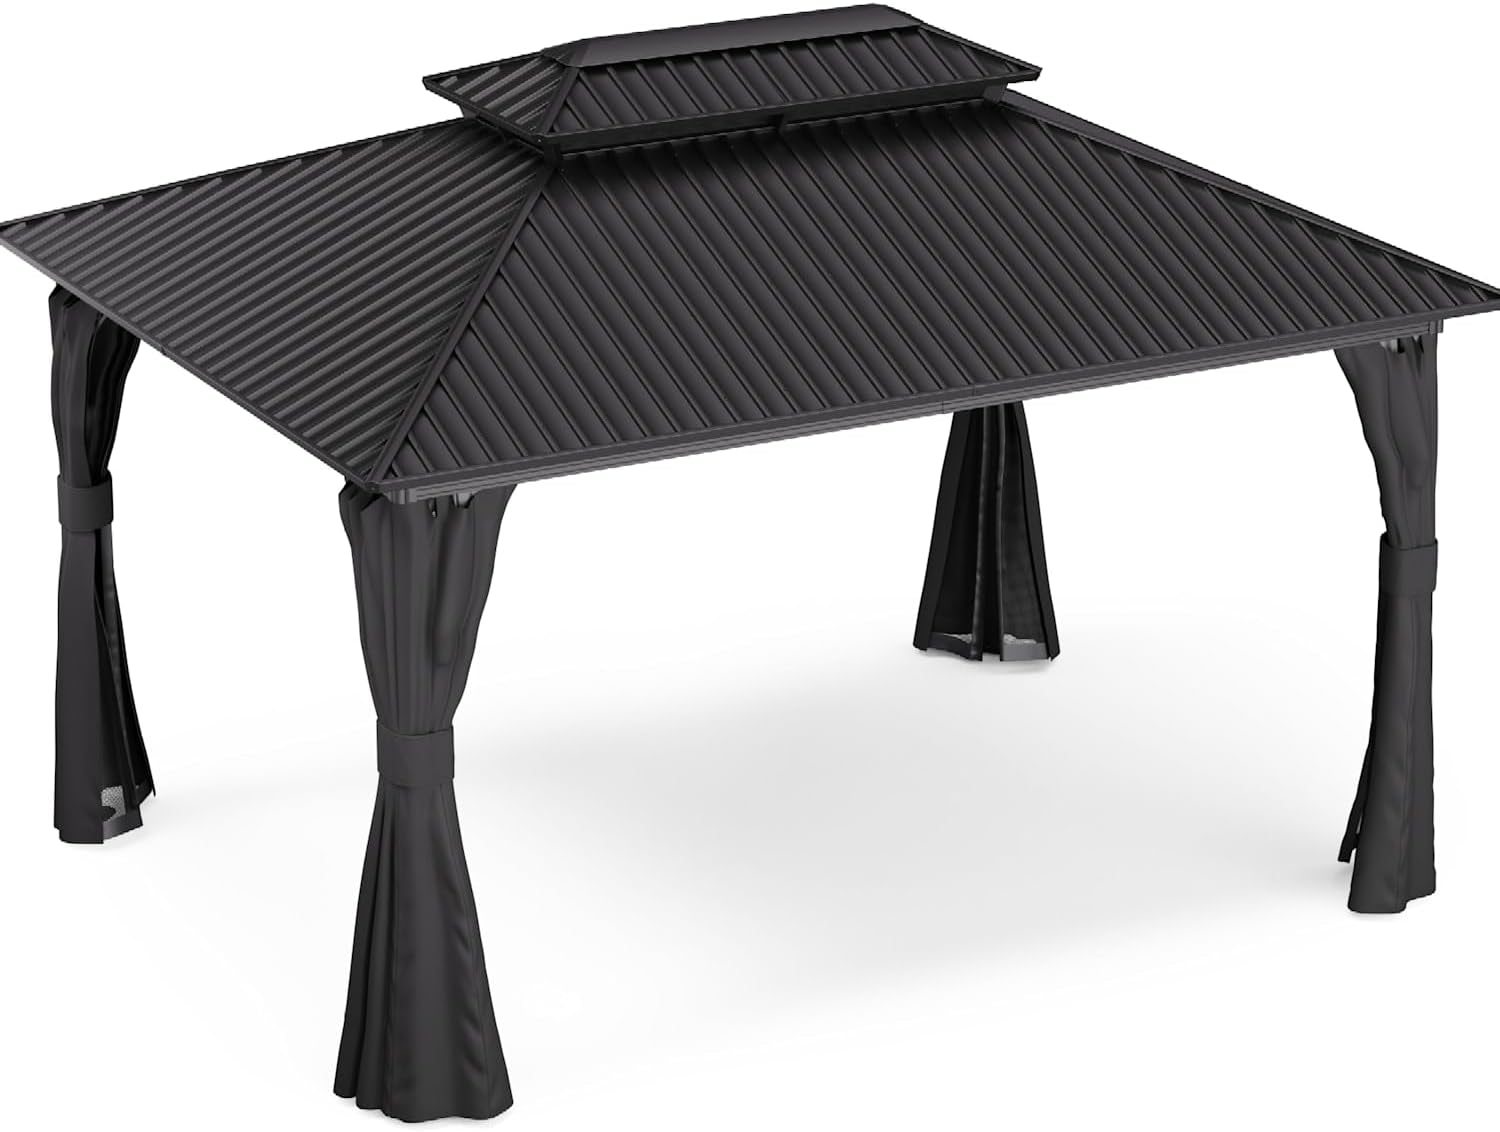
Image 5.1.1: The gazebo with its side curtains neatly tied back, creating an open and inviting space.
5.2. Using the Mosquito Nets
- The mosquito nets operate independently of the curtains. They can be pulled closed to keep insects out while allowing air circulation.
- When not in use, the nets can be tied back similarly to the curtains.
6. Maintenance
Proper maintenance will extend the life of your gazebo and keep it looking its best.
- Cleaning the Frame: Wipe the aluminum frame with a damp cloth and mild soap. Rinse thoroughly and dry. Avoid abrasive cleaners.
- Cleaning the Roof: The galvanized steel roof can be cleaned with water and a soft brush. For stubborn dirt, use a mild detergent.
- Cleaning Curtains and Nets: The polyester side walls and mosquito nets can be spot cleaned with mild soap and water. For deeper cleaning, they may be removed and hand washed or machine washed on a gentle cycle with cold water, then air-dried. Check fabric care labels for specific instructions.
- Seasonal Storage: For prolonged periods of non-use or during harsh winter conditions, it is recommended to disassemble the gazebo and store it in a dry, protected area. Ensure all components are clean and dry before storage to prevent mold or corrosion.
- Regular Inspection: Periodically check all bolts, screws, and connections to ensure they remain tight. Inspect fabric for tears or excessive wear.
7. Troubleshooting
| Problem | Possible Cause | Solution |
|---|---|---|
| Gazebo feels unstable after assembly. | Loose connections; uneven ground. | Ensure all bolts and screws are fully tightened. Relocate to a level surface or use shims to stabilize posts. |
| Water pooling on the roof. | Improper roof panel installation; debris on roof. | Verify roof panels are correctly aligned and secured. Clear any leaves or debris from the roof. |
| Curtains/nets do not slide smoothly. | Dirt in tracks; damaged runners. | Clean the tracks thoroughly. Inspect runners for damage and replace if necessary. |
| Rust spots appearing on metal parts. | Exposure to moisture; protective coating compromised. | Clean affected areas and apply a rust-inhibiting paint or sealant. Ensure proper drying after rain. |
8. Specifications
- Model: GDM26-ShadeFT 3x4
- Dimensions (L x W x H): 400 x 300 x 287 cm (approx. 3x4 meters)
- Weight: 110 kg
- Frame Material: Aluminum
- Roof Material: Galvanized Steel
- Side Wall Material: Polyester
- Color: Dark Grey/Black
- UV Protection: Yes
- Water Resistance: Waterproof
- Features: Double roof for air circulation, integrated mosquito nets, closable side curtains.
9. Warranty and Support
For information regarding warranty coverage, spare parts availability, or technical support, please refer to the warranty card included with your purchase or visit the official Blumfeldt website. Contact details for customer service are typically provided in the full product documentation.


