1. Introduction
This manual provides detailed instructions for the assembly, operation, maintenance, and troubleshooting of your AMERLIFE 4x2 FT Raised Garden Bed, Model YRB001. Please read this manual thoroughly before assembly and use to ensure proper setup and longevity of your product.
2. Safety Information
- Always assemble the raised garden bed on a flat, stable surface.
- Ensure all components are securely fastened before filling with soil.
- Do not overload the planter with excessive weight beyond its stated capacity.
- Keep small children and pets away from assembly area to prevent injury from small parts.
- Wear appropriate safety gear, such as gloves, during assembly to prevent splinters or minor cuts.
- Regularly inspect the wood for signs of wear, damage, or instability. Address any issues promptly.
3. Package Contents
Before beginning assembly, verify that all parts are present and undamaged. If any parts are missing or damaged, contact customer support.
- Wooden panels for sides and bottom
- Corner posts/legs
- Liner (if included)
- Assembly tools (e.g., Allen wrench, screws)
- Fasteners and hardware
Note: The product includes necessary tools and holders for assembly.
4. Assembly Instructions
The AMERLIFE Raised Garden Bed features an embedded combination mode for simple assembly. One person can typically complete the assembly within 15 minutes.
- Unpack Components: Carefully remove all parts from the packaging and lay them out on a clean, flat surface. Identify each component.
- Assemble Side Panels: Connect the wooden side panels using the embedded combination slots. Ensure a firm connection.
- Attach Corner Posts/Legs: Securely attach the corner posts or legs to the assembled side panels. Use the provided fasteners and tools.
- Install Bottom Panels: Place the bottom panels into the designated slots or attach them to form the base of the planter. Ensure the drainage holes are clear.
- Insert Liner (Optional): If a liner is included, place it inside the assembled planter box, ensuring it covers the bottom and sides to protect the wood and retain soil.
- Final Check: Verify that all connections are tight and the structure is stable before proceeding to fill the planter.

5. Operating Instructions
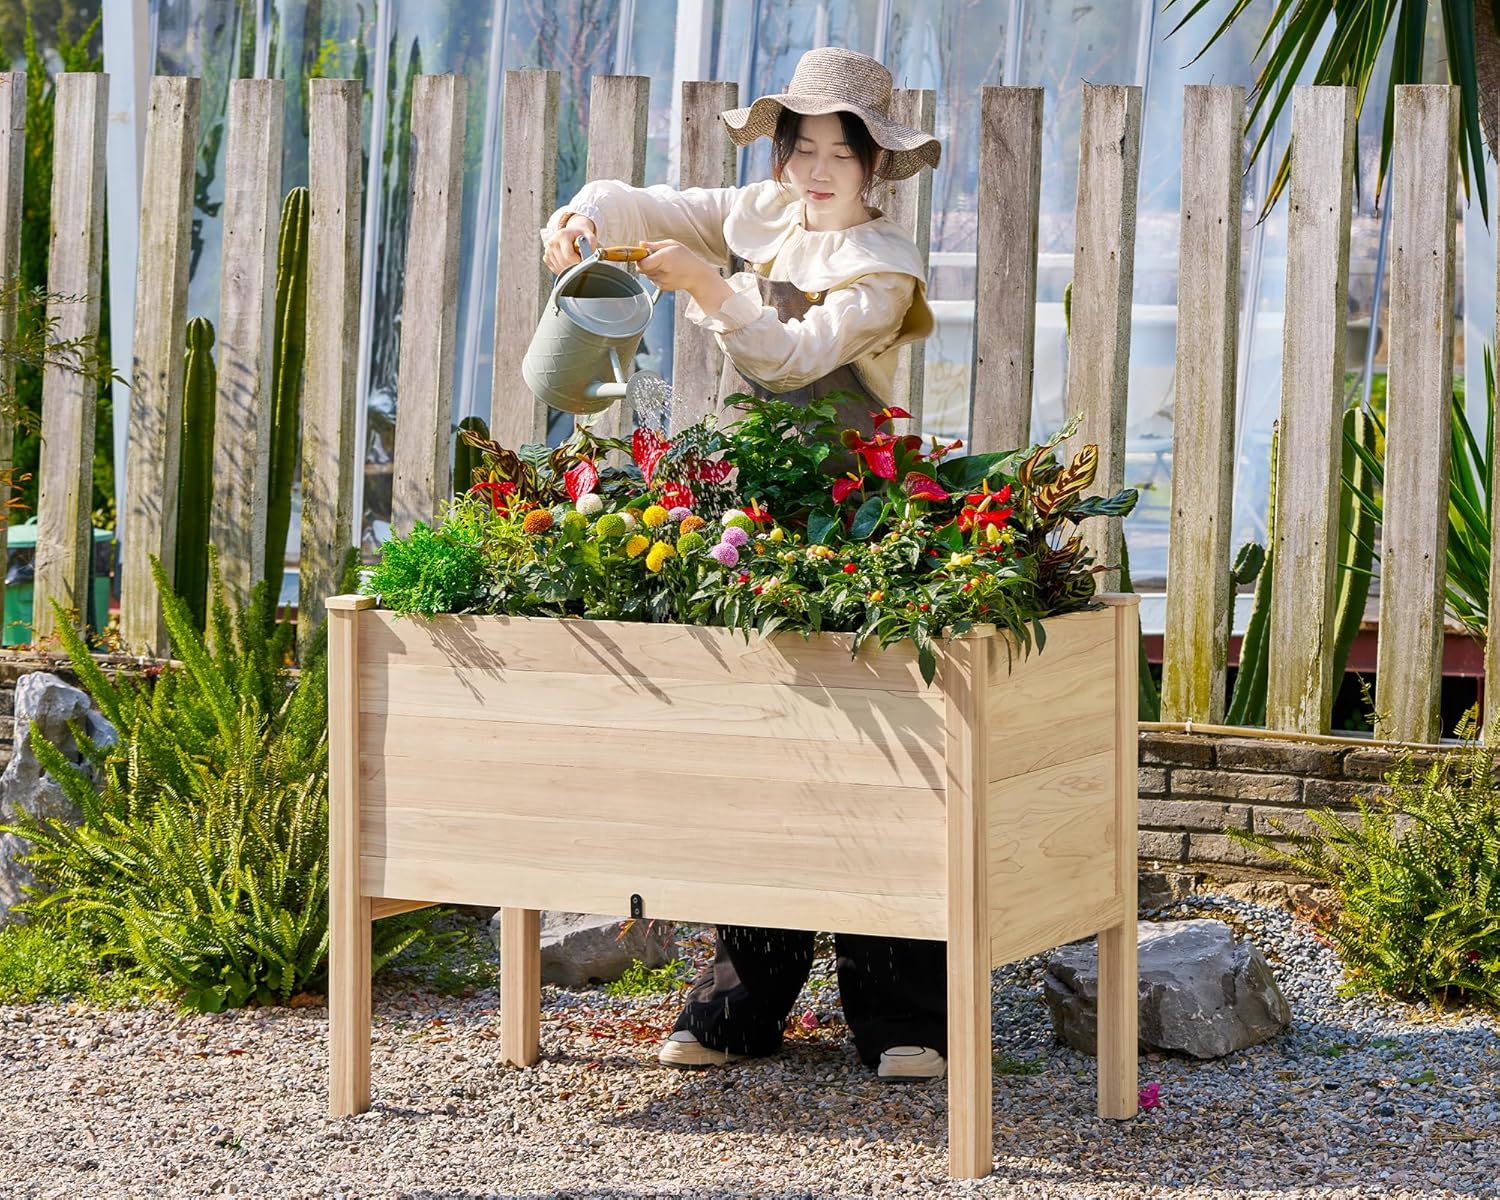
This raised garden bed is designed for outdoor use, providing an elevated space for growing various plants.
- Placement: Choose a suitable outdoor location that receives adequate sunlight for your chosen plants. Ensure the ground is level to maintain stability.
- Filling with Soil: Fill the planter with a high-quality potting mix or garden soil. The 18-inch depth (approximately 16-inch inner depth) accommodates deep-root vegetables like carrots, potatoes, and corn, as well as flowers and herbs. The total capacity is approximately 11 cubic feet.
- Planting: Plant your desired vegetables, flowers, or herbs according to their specific spacing and depth requirements. The elevated design helps protect plants from weeds and invasive species.
- Watering: Water plants as needed. The integrated drainage holes in the base promote excellent airflow and water expulsion, preventing waterlogging and ensuring healthy root respiration.
- Composting (Optional): The elevated design facilitates composting, which can provide additional nutrition for your plants and promote stronger root growth.


6. Maintenance
- Wood Treatment: The raised bed is made of untreated firwood. To enhance its longevity and resistance to moisture, warping, and rot, it is recommended to apply a weather-resistant sealant or exterior wood stain before initial use and periodically thereafter.
- Drainage Check: Periodically ensure the drainage holes at the bottom of the planter are clear of debris to maintain optimal water flow and prevent waterlogging.
- Cleaning: Clean the exterior of the planter with a damp cloth as needed. Avoid harsh chemicals that may damage the wood.
- Structural Inspection: Regularly check all joints and fasteners for tightness. Re-tighten any loose connections to maintain the structural integrity of the raised bed.
- Winter Care: In regions with harsh winters, consider emptying the planter and storing it in a sheltered location, or covering it to protect the wood from extreme weather conditions.
7. Troubleshooting
| Problem | Possible Cause | Solution |
|---|---|---|
| Wood warping or splitting | Exposure to moisture without adequate protection; natural expansion/contraction of wood. | Apply a high-quality exterior wood sealant or stain before use. Reapply periodically. Ensure proper drainage to prevent prolonged water exposure. |
| Poor drainage, water pooling | Drainage holes are blocked; soil is too dense. | Check and clear drainage holes. Use a well-draining potting mix. Consider adding a layer of gravel at the bottom before soil. |
| Planter feels unstable after assembly | Loose fasteners; uneven ground. | Re-tighten all screws and connections. Ensure the planter is placed on a firm, level surface. |
| Parts do not fit during assembly | Manufacturing defect; incorrect orientation of parts. | Double-check part orientation against instructions. If parts are genuinely defective, contact customer support for replacements. |
8. Specifications
| Feature | Detail |
|---|---|
| Model Number | YRB001 |
| Material | Wood (Firwood) |
| Color | Natural Wood |
| Product Dimensions | 18"D x 23"W x 32"H (Overall) |
| Inner Depth | Approximately 16 inches |
| Capacity | 11 Cubic Feet |
| Special Feature | Drainage Holes |
| Indoor/Outdoor Usage | Outdoor |
| Mounting Type | Floor Standing |
| Manufacturer | AMERLIFE |
9. Warranty and Support
For warranty information, product support, or to order replacement parts, please contact AMERLIFE customer service. Refer to your purchase documentation for specific contact details or visit the official AMERLIFE website.
Please retain your proof of purchase for any warranty claims.


