1. Introduction and Overview
This manual provides detailed instructions for setting up and operating your Hosyond 3.5-inch 320x480 Touch Screen ESP32 Display Module. This module integrates an ESP32-32E dual-core MCU with Wi-Fi and Bluetooth capabilities, a 3.5-inch LCD color screen, and a resistive touch function, making it suitable for various IoT and Arduino projects.
The display supports 16-bit RGB 65K color with a resolution of 320x480 pixels. It features a TF card slot for storage expansion, serial port interface, and dedicated interfaces for temperature/humidity sensors (DHT11) and other IO. The module is designed for convenient development, offering compatibility with Arduino IDE, ESP IDE, Micropython, and Mixly, along with provided library functions and sample programs.
It also supports lithium battery power supply, including charging and discharging management with protection features, ensuring portability and stable operation.
2. What's in the Box
Verify that all components are present in the package:
- 1 x 3.5'' ESP32 Display Module
- 1 x USB Cable
- 1 x Touch Pen
- 1 x 4Pin Connector Cable
- 1 x Packaging box for display

Image: Package contents showing the ESP32 display module, USB cable, 4-pin connector cable, and touch pen.

Image: The ESP32 display module and accessories neatly packed in its protective plastic box.
3. Product Features
- Controller: Adopts ESP32-32E module, dual-core MCU, integrated Wi-Fi and Bluetooth, main frequency up to 240MHz, memory of 520KB SRAM and 448KB ROM, 4MB flash memory.
- Touch Screen: 3.5-inch LCD color screen, resolution of 320x480, supports 16-bit RGB 65K color display, with resistive touch function.
- Rich Expansion Interface: Equipped with TF card slot, serial port interface, temperature and humidity sensor interface (DHT11 interface) and reserved IO interface.
- Multi-function: Contains LCD display, backlight control circuit, touch screen control circuit, speaker drive circuit, photosensitive circuit and RGB-LED control circuit.
- Convenient Development: Provides compatible Arduino library functions and sample programs, supports one-click download of programs, and supports Arduino IDE, ESP IDE, Micropython and Mixly development.
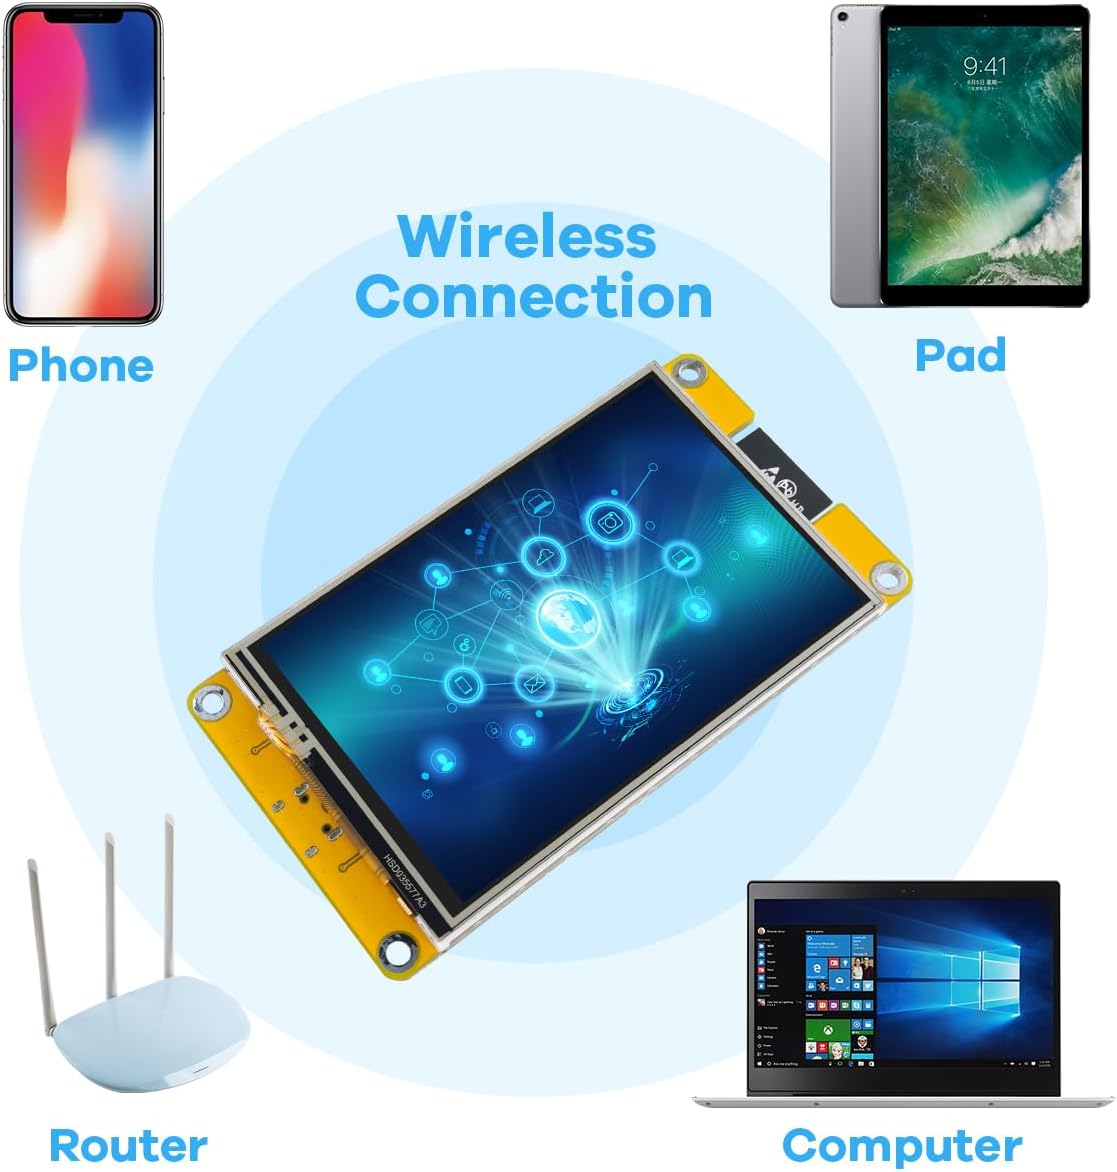
Image: Wireless connectivity diagram showing the module interacting with various devices.
4. Setup Guide
4.1 Hardware Overview
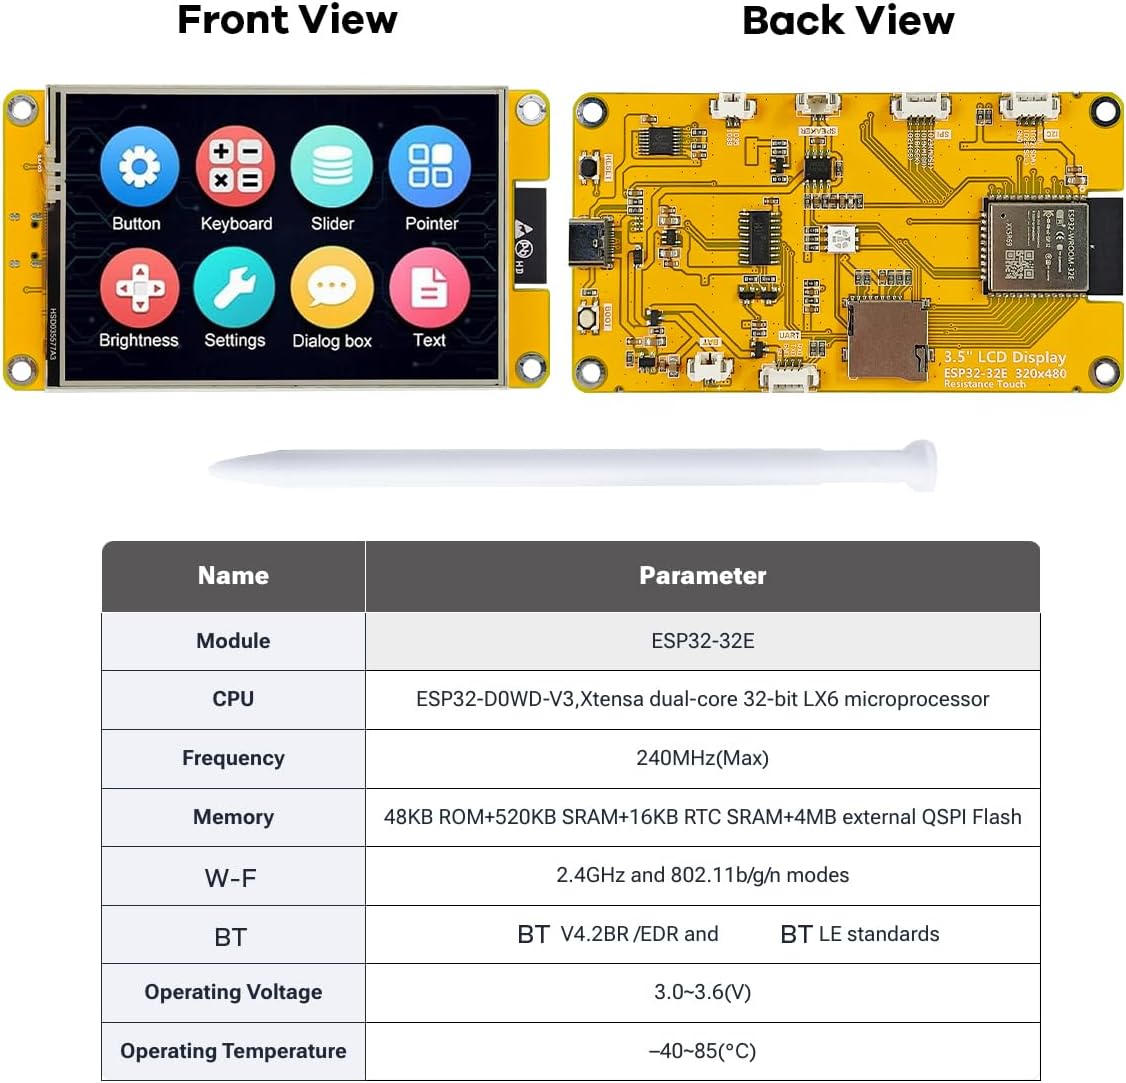
Image: Front and back views of the ESP32 Display Module.

Image: Detailed back view of the module with labeled components and interfaces.
4.2 Initial Connection
- Connect Power: Use the provided USB Type-C cable to connect the module to a power source (e.g., computer USB port, USB wall adapter). The module will power on and may display a pre-programmed demo.
- Optional: Connect Peripherals: If using external components, connect them to the appropriate interfaces (e.g., 4-pin connector cable for UART, I2C, SPI, or DHT11 sensor).
- Insert TF Card: If storage expansion is desired, gently insert a MicroSD card into the TF card slot until it clicks into place.
4.3 Software Setup
The Hosyond ESP32 Display Module is compatible with several development environments. For detailed instructions and sample programs, refer to the official documentation and WIKI provided by Hosyond. This typically involves:
- Installing the Arduino IDE, ESP IDE, or setting up Micropython/Mixly.
- Installing the necessary ESP32 board definitions and libraries.
- Downloading and compiling sample code.
- Uploading firmware to the module via the USB-C port (often a one-click download feature is supported).
5. Operating Instructions
5.1 Basic Touch Screen Operation
The module features a resistive touch screen. Use the provided touch pen or a similar stylus for optimal interaction. Light pressure is usually sufficient to register touches. The responsiveness and accuracy may vary compared to capacitive touch screens.
Video: Demonstration of the 3.5-inch ESP32 Display's resistive touchscreen functionality, showing interaction with various graphical elements and data displays.

Image: The display module showcasing a sample analytics interface.
5.2 Using the TF Card Slot
The integrated TF card slot allows for easy expansion of storage. This can be used for storing images, data logs, or even firmware updates. Ensure the TF card is formatted correctly (e.g., FAT32) before use with the module. Refer to your chosen development environment's documentation for specific code examples on reading from and writing to the TF card.
5.3 Battery Power Operation
The module supports external lithium battery power supply and includes a built-in charging and discharging management circuit. Connect a compatible lithium battery to the designated battery interface. The module will automatically manage charging when connected to USB power and switch to battery power when disconnected, providing portable operation.
6. Specifications
| Feature | Specification |
|---|---|
| Module | ESP32-32E |
| CPU | ESP32-D0WD-V3, Xtensa dual-core 32-bit LX6 microprocessor |
| Frequency | 240MHz (Max) |
| Memory | 48KB ROM + 520KB SRAM + 4MB external QSPI Flash |
| Wi-Fi | 2.4GHz and 802.11b/g/n modes |
| Bluetooth | BT V4.2BR/EDR and BT LE standards |
| Display Color | RGB 65K color |
| Display Size | 3.5 inch |
| Display Type | TFT |
| Driver Chip | ST7796 |
| Resolution | 320*480 (Pixel) |
| Effective Display Area | 55.2*85 (mm) |
| Module Size | 55.34*101.5 (mm) |
| View Angle | >60° |
| Operating Temperature | -20℃ ~ 70℃ |
| Storage Temperature | -30℃ ~ 80℃ |
| Operating Voltage | 5V |
| Power Consumption | About 115mA |
| Product Weight | About 50g |
7. Troubleshooting
- Display Not Turning On:
- Ensure the USB-C cable is securely connected to both the module and a working power source.
- Try a different USB-C cable and power adapter.
- Verify the power source provides sufficient current (e.g., standard USB 2.0 port provides 500mA).
- Touch Screen Unresponsive:
- Ensure you are using the provided touch pen or a suitable stylus. Resistive touch screens require slight pressure.
- Calibrate the touch screen if your firmware supports it.
- Check your software for correct touch driver initialization.
- Firmware Upload Failure:
- Confirm the correct COM port is selected in your IDE.
- Ensure all necessary drivers for the USB-to-serial chip are installed on your computer.
- Press and hold the BOOT button (if available) while initiating the upload, then release.
- Verify your development environment settings match the ESP32-32E module.
- Wi-Fi/Bluetooth Connectivity Issues:
- Check your code for correct Wi-Fi/Bluetooth initialization and credentials.
- Ensure the module is within range of the Wi-Fi network or Bluetooth device.
- Verify antenna connections if applicable (though typically integrated).
8. Maintenance
- Cleaning: Use a soft, dry, lint-free cloth to clean the display and module. Avoid abrasive cleaners or solvents.
- Storage: Store the module in a cool, dry place, away from direct sunlight and extreme temperatures. Use the provided packaging box for protection when not in use.
- Handling: Handle the module by its edges to avoid touching sensitive components or the display surface.
- Firmware Updates: Regularly check the manufacturer's website or community forums for firmware updates and new library versions to ensure optimal performance and access to new features.
9. Warranty and Support
For warranty information, technical support, or further assistance, please refer to the documentation included with your product or visit the official Hosyond website. You can also contact the seller directly through the platform where the product was purchased.
Hosyond is committed to providing comprehensive usage information and reliable service to enhance your experience with their display screens and modules.


