
1. Safety Information
Please read all safety instructions carefully before operating the dehumidifier. Failure to do so may result in injury or damage to the unit.
- Ensure the unit is placed on a stable, level surface to prevent tipping.
- Do not block the air inlet or outlet. Maintain adequate clearance around the unit for proper airflow.
- Do not operate the dehumidifier near water or in excessively humid environments (other than its intended use).
- Unplug the unit from the power outlet before cleaning, performing maintenance, or when not in use for extended periods.
- Keep out of reach of children and pets.
- This appliance uses A2L refrigerant. Do not puncture the refrigerant circuit.
2. Package Contents
Verify that all items are included in the package:
- SF-Dehumidifier (with Power Cord) x 1
- Connecting Components x 1
- Air Duct x 1
- Temp/Humidity Sensor Wire x 1
- Drain Pipe x 1

3. Setup
3.1 Unpacking
Carefully remove the dehumidifier and all accessories from the packaging. Retain packaging for future storage or transport.
3.2 Placement
The SF-Dehumidifier is uniquely designed for grow tents. It can be placed outside the grow tent to prevent adding heat that could affect plant growth inside. Ensure the unit is on a stable surface.

3.3 Air Duct Connection
Attach the connecting components onto the dehumidifier's top outlet. Then, connect one end of the air duct to the connecting component and the other end to your grow tent's designated port. This allows dry air to be directed into the tent.
3.4 Humidity Sensor Connection
Connect the temperature/humidity sensor wire to the designated port on the dehumidifier. Place the sensor inside your grow tent, near the plants, for accurate humidity readings. Avoid placing it directly in the path of the air duct outlet.
3.5 Drainage Setup
The dehumidifier offers two drainage methods:
- Water Tank: The unit has a built-in 2.1-liter water tank. When the tank is full, the 'full water' indicator will light up, an alarm will sound, and the unit will automatically stop. Empty the tank and reinsert it to resume operation.
- Continuous Drain: For continuous operation, connect the provided drain pipe to the drainage outlet on the back of the unit. Route the hose to a suitable drain or a larger collection container.

4. Operating Instructions
4.1 Control Panel Overview
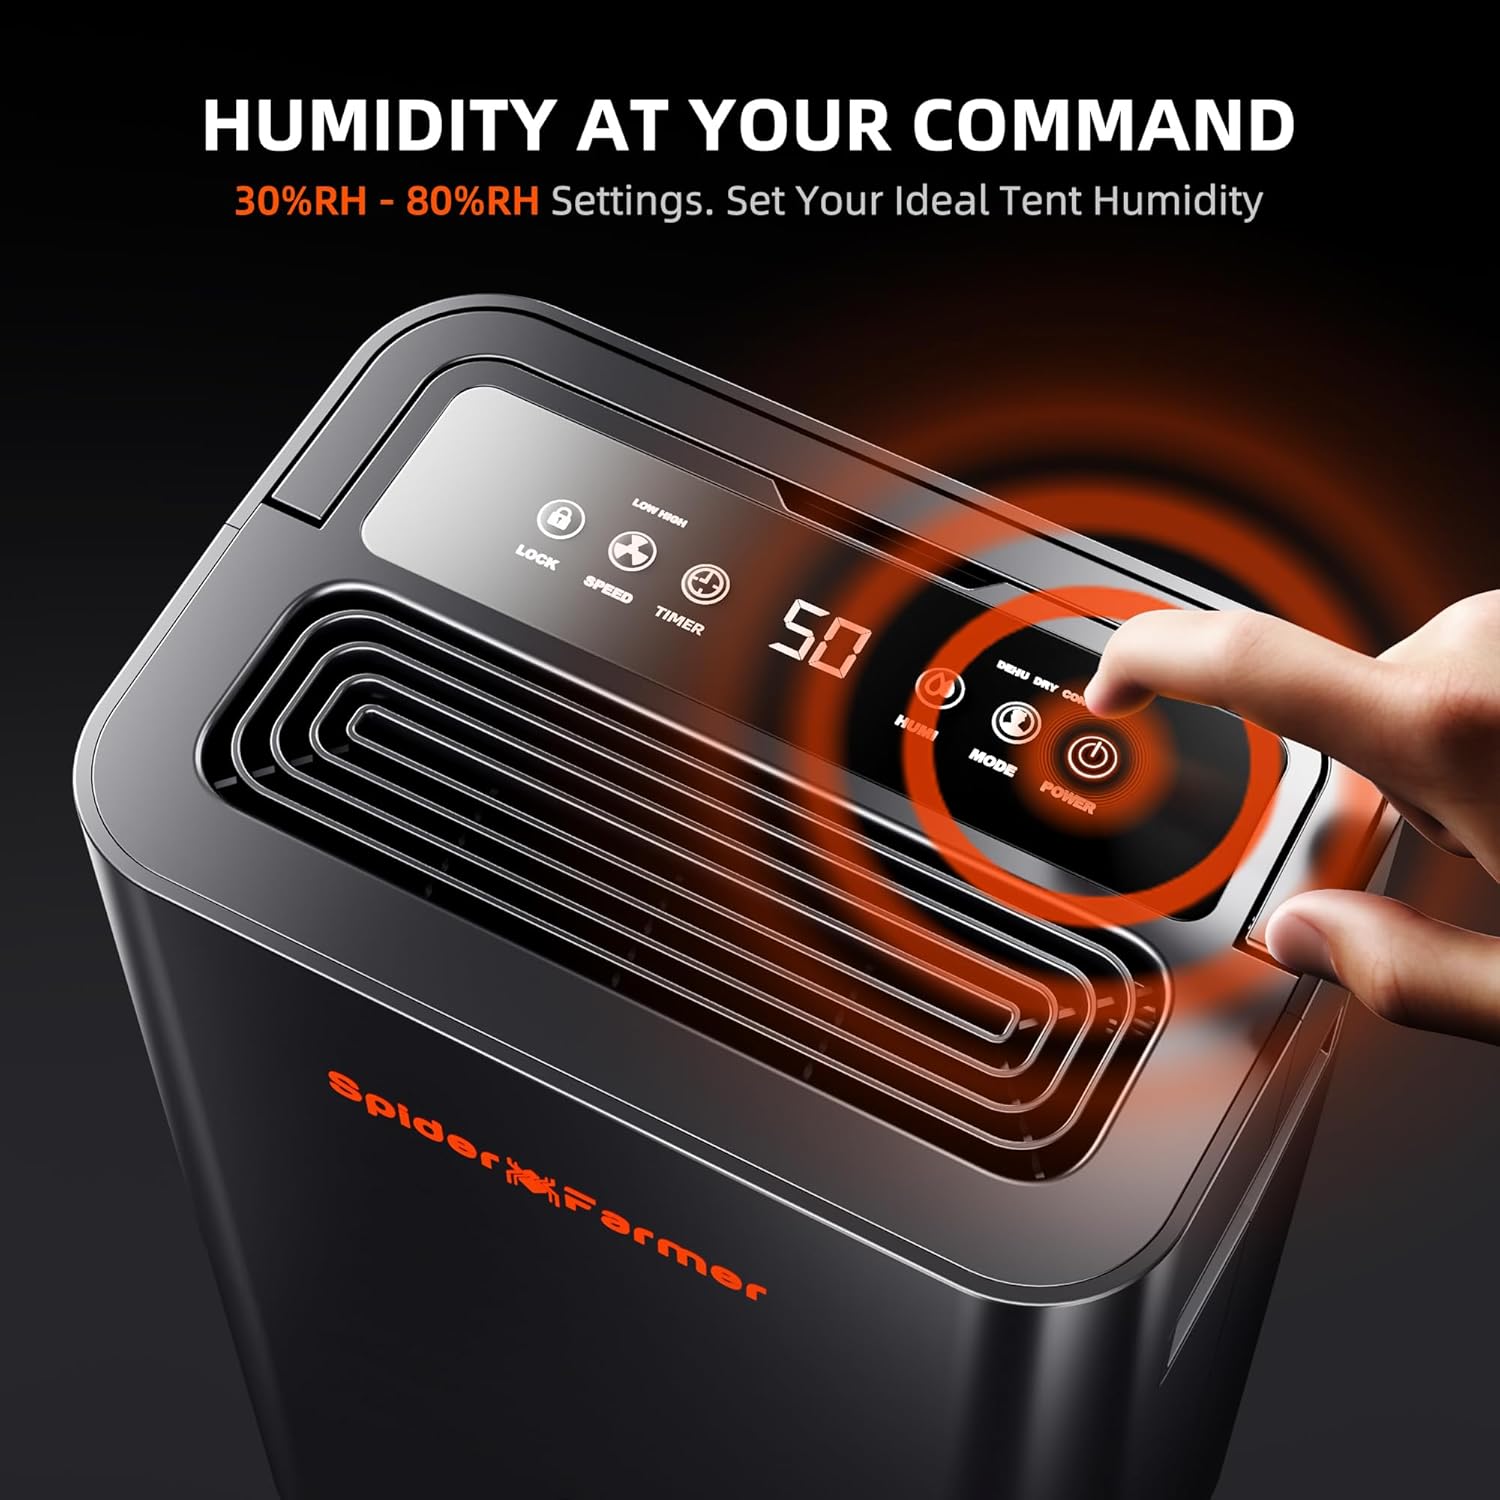
The digital display screen and control buttons are located on the top of the unit for easy operation.

4.2 Power On/Off
Press the 'Power' button to turn the unit on or off.
4.3 Setting Desired Humidity
Press the 'Humi' button to adjust the target humidity level from 30% to 80%. The unit will automatically stop when the target humidity is reached and restart when the humidity rises above the set level.
4.4 Mode Selection
Press the 'Mode' button to cycle through the three available modes:
- DEHU (Custom Mode): Humidity and fan speed can be adjusted.
- DRY (Dry Clothes Mode): Fixed humidity and speed, ideal for drying.
- CONT (Continuous Dehumidifier Mode): Operates continuously, fixed humidity.
4.5 Timer Function
Use the 'Timer' button to set a 24-hour timer program in 1-hour increments, allowing for scheduled operation and reduced energy consumption.
4.6 Fan Speed Adjustment
Press the 'Speed' button to switch between Low and High fan speeds.
4.7 Lock Function
Press the 'Lock' button to lock the control panel, preventing accidental changes to settings. Press again to unlock.
4.8 Official Product Video
Video 4.1: Official Spider Farmer Dehumidifier overview, demonstrating features and setup.
5. Maintenance
5.1 Filter Cleaning
The dehumidifier is equipped with a washable filter. Regularly clean the filter to ensure optimal performance and air quality. Remove the filter, rinse it under running water, and allow it to air dry completely before reinserting.
5.2 Water Tank Care
Periodically clean the water tank to prevent mold and mildew buildup. Use a mild detergent and water, rinse thoroughly, and dry before reinserting.
5.3 Automatic Defrosting
The unit features an automatic defrosting function to prevent ice buildup on the coils, ensuring continuous efficient operation and extending the machine's lifespan.
6. Troubleshooting
If you encounter issues with your dehumidifier, refer to the following common problems and solutions:
| Problem | Possible Cause | Solution |
|---|---|---|
| Dehumidifier does not turn on | No power; Water tank full; Temperature too low | Check power connection; Empty water tank; Ensure room temperature is above 41°F (5°C) |
| Unit not collecting water | Humidity setting too high; Air filter clogged; Room temperature too low | Lower humidity setting; Clean air filter; Ensure room temperature is adequate |
| Unit is noisy | Unit not level; Air filter clogged; Obstruction in fan | Place on a level surface; Clean air filter; Check for obstructions |
| Error codes on display | Internal malfunction | Refer to the user manual for specific error codes or contact customer support. |
7. Specifications
- Brand: Spider Farmer
- Model Name: SF-Dehumidifier
- Dehumidification Capacity: 32 Pints per Day
- Coverage Area: Up to 2000 sq.ft
- Tank Volume: 2.1 Liters
- Product Dimensions: 11.81"D x 7.87"W x 19.4"H
- Item Weight: 24.9 Pounds
- Wattage: 230 watts
- Humidity Setting Range: 30% - 80% RH
- Special Features: Continuous Draining, Digital Display, Adjustable Humidity Control, Automatic Restart, Timer, Automatic Moisture Removal, Automatic Shutoff, Washable Filter
8. Warranty and Support
Spider Farmer is committed to customer satisfaction. We offer comprehensive support for our products.
- 1-Year Product Warranty: This product is covered by a 1-year warranty from the date of purchase against defects in materials and workmanship.
- 30-Day Return or Exchange Policy: Eligible for return or exchange within 30 days of delivery, provided the product is in its original condition.
- Customer Service: For any questions, concerns, or support needs, please contact our professional customer service team. We are dedicated to providing high-quality assistance before and after your purchase.