
Introduction
Thank you for choosing the Yes4All Dip Stand, Model V7WI. This manual provides essential information for the safe and effective assembly, operation, and maintenance of your new dip stand. Please read this manual thoroughly before use and retain it for future reference.
Safety Information
- Ensure all components are securely fastened before each use.
- Do not exceed the maximum weight capacity of 500 lbs (226.8 kg).
- Consult a physician before starting any new exercise program.
- Use the dip stand on a flat, stable surface.
- Keep children and pets away from the equipment during use.
Package Contents
Carefully unpack all items and ensure you have received the following components:
- Dip Stand Station components
- Instruction Manual (this document)
- Wrench Support
- All necessary hardware (bolts, nuts, washers)

Figure 1: Overview of Dip Stand Components. This image illustrates the main parts of the dip stand, including the NBR foam non-slip dip handles, easy-adjustable hand screws, support bars for steady movements, rubber foot base for floor protection and stability, and integrated push-up handles for comfort.
Setup and Assembly
Assembly is required for the Yes4All Dip Stand. Follow these steps carefully:
- Identify all components from the package contents list.
- Attach the base supports to the main uprights using the provided hardware. Ensure all bolts are finger-tightened initially.
- Insert the adjustable dip bars into the uprights.
- Adjust the width of the dip bars to your desired setting using the hand screws. The stand offers 10 width adjustment levels, ranging from a minimum of 21¾ inches to a maximum of 28⅝ inches.
- Adjust the height of the dip bars to your desired setting. The stand offers 8 height adjustment levels, ranging from a minimum of 41⅜ inches to a maximum of 52 inches.
- Once height and width are set, securely tighten all bolts and hand screws using the provided wrench support.
- Verify that the rubber foot bases are properly installed to ensure stability and floor protection.
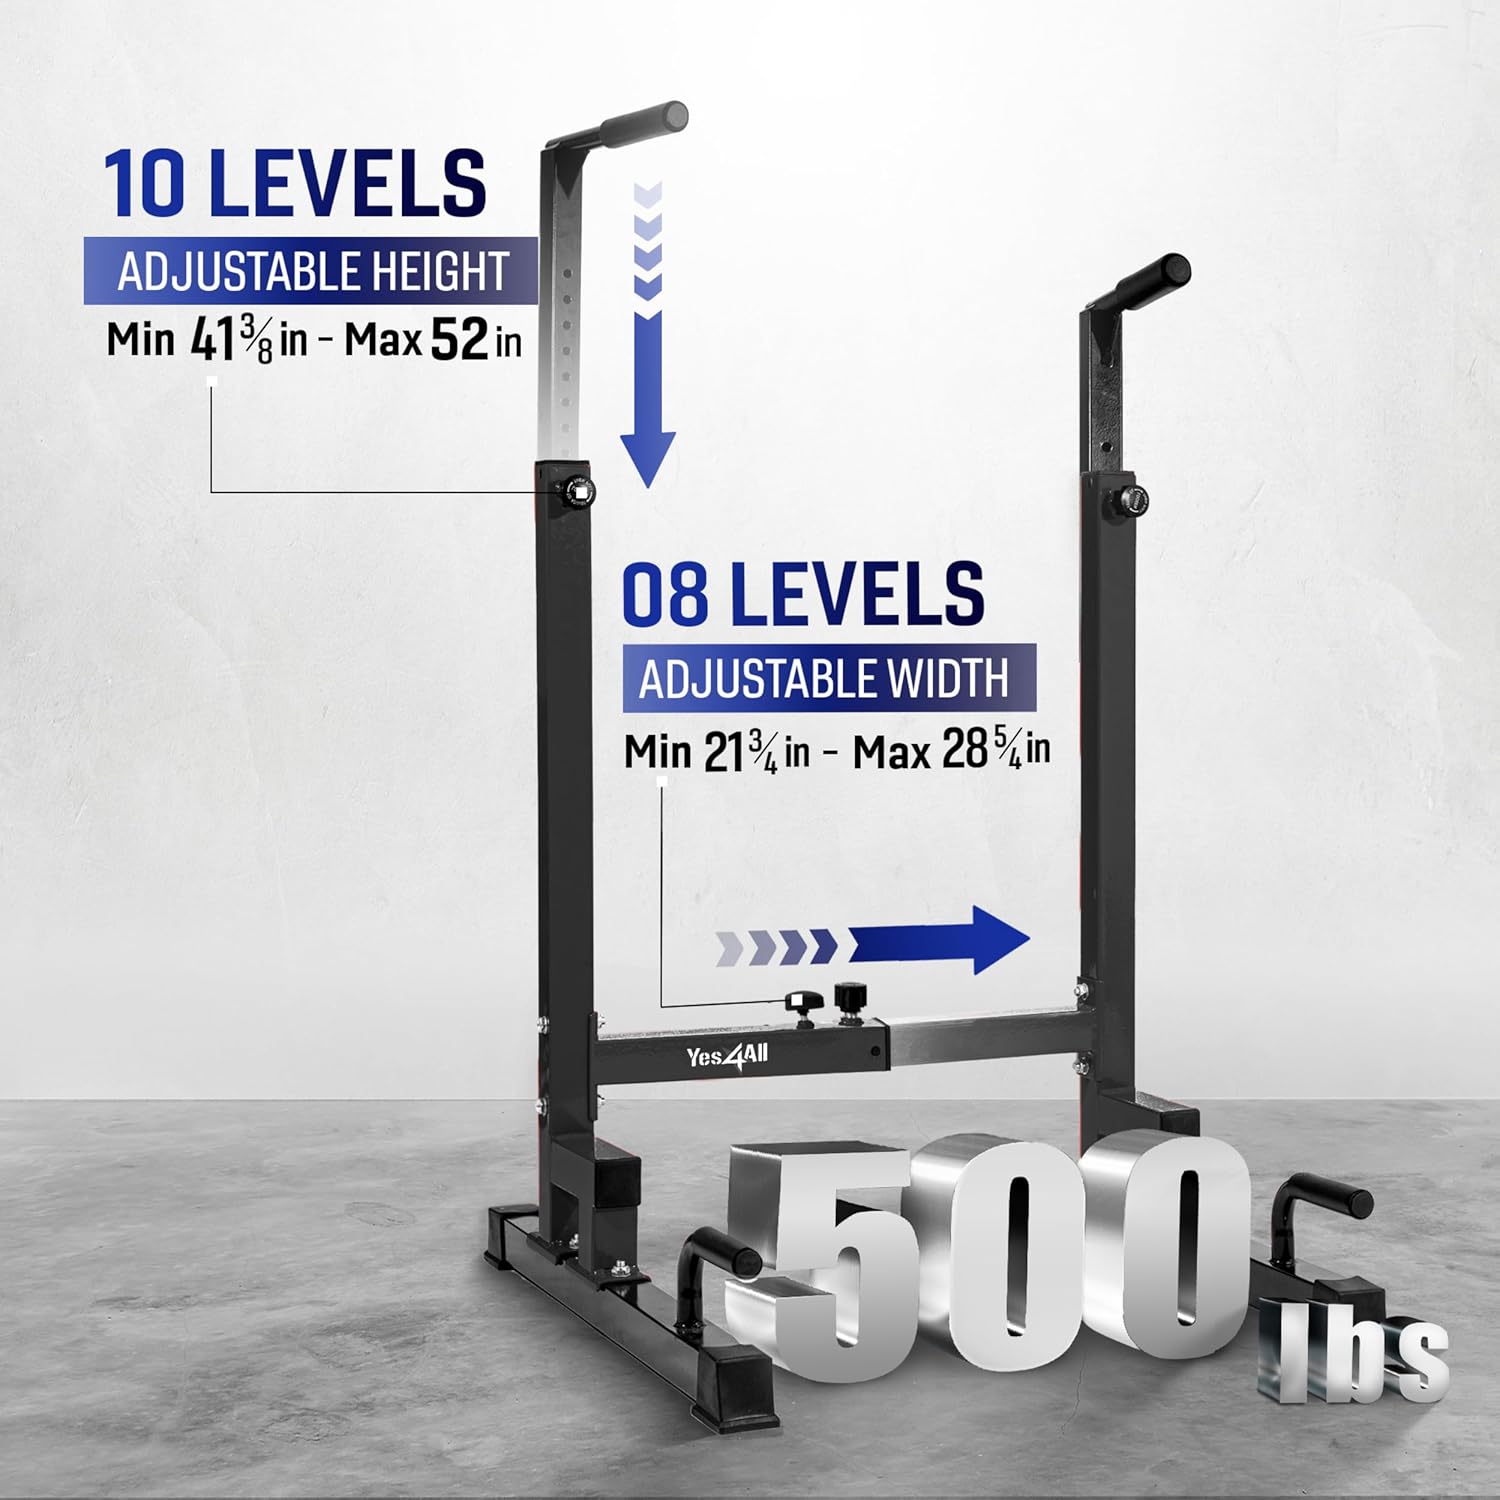
Figure 2: Adjustable Dimensions. This image highlights the 10 adjustable height levels (41⅜ in - 52 in) and 8 adjustable width levels (21¾ in - 28⅝ in) of the dip stand, along with its 500 lbs weight capacity.
Operating Instructions
The Yes4All Dip Stand is designed for a variety of bodyweight exercises. Always perform a warm-up before exercising and ensure the stand is stable.
Adjusting Height and Width
- To adjust height: Loosen the hand screws on the uprights, slide the dip bars to the desired height, and re-tighten the screws securely.
- To adjust width: Loosen the hand screws connecting the dip bars to the main frame, slide the bars to the desired width, and re-tighten the screws securely.
Recommended Exercises
The versatile design allows for multiple exercises, including but not limited to:
- Dips (Tricep Dips, Chest Dips, Narrow Grip Dips): Position yourself between the bars, grip the handles, and lower your body.
- L-Sit Holds: Sit on the floor between the bars, grip the handles, and lift your body and legs into an 'L' shape.
- Push-Ups: Utilize the integrated push-up handles on the base for a deeper range of motion.
- Inverted Rows: Position yourself under the bars, grip them, and pull your chest towards the bars.
- Leg Raises: Grip the bars, support your body, and raise your legs.

Figure 3: Exercise Demonstrations. This image displays various exercises that can be performed with the dip stand, including Tricep Dips, L-Sit Holds, Push-Ups using the integrated handles, and Mountain Climbers.
Maintenance
Regular maintenance ensures the longevity and safety of your dip stand.
- Cleaning: Wipe down the frame and handles with a damp cloth after each use to remove sweat and dirt. Avoid abrasive cleaners.
- Inspection: Periodically check all bolts, nuts, and screws for tightness. Re-tighten as necessary.
- Wear and Tear: Inspect the NBR foam handles and rubber foot bases for any signs of wear, cracks, or damage. Replace components if necessary.
- Storage: Store the dip stand in a dry environment away from direct sunlight and extreme temperatures.
Troubleshooting
| Problem | Possible Cause | Solution |
|---|---|---|
| Stand feels unstable or wobbly. | Loose bolts or uneven surface. | Ensure all bolts and hand screws are securely tightened. Place the stand on a flat, level surface. Check rubber foot bases. |
| Difficulty adjusting height or width. | Hand screws not fully loosened or components misaligned. | Fully loosen hand screws before attempting adjustment. Ensure components are aligned correctly before sliding. |
| Squeaking noises during use. | Friction between metal parts. | Apply a small amount of silicone-based lubricant to contact points if necessary, after ensuring all connections are tight. |
Specifications
- Model: V7WI
- Brand: YES4ALL
- Material: Metal
- Color: Black
- Maximum Weight Capacity: 500 lbs (226.8 kg)
- Adjustable Height: Min 41⅜ in - Max 52 in (8 levels)
- Adjustable Width: Min 21¾ in - Max 28⅝ in (10 levels)
- Handle Type: NBR Foam
- Item Weight: 15.4 Kilograms
- UPC: 810151677392
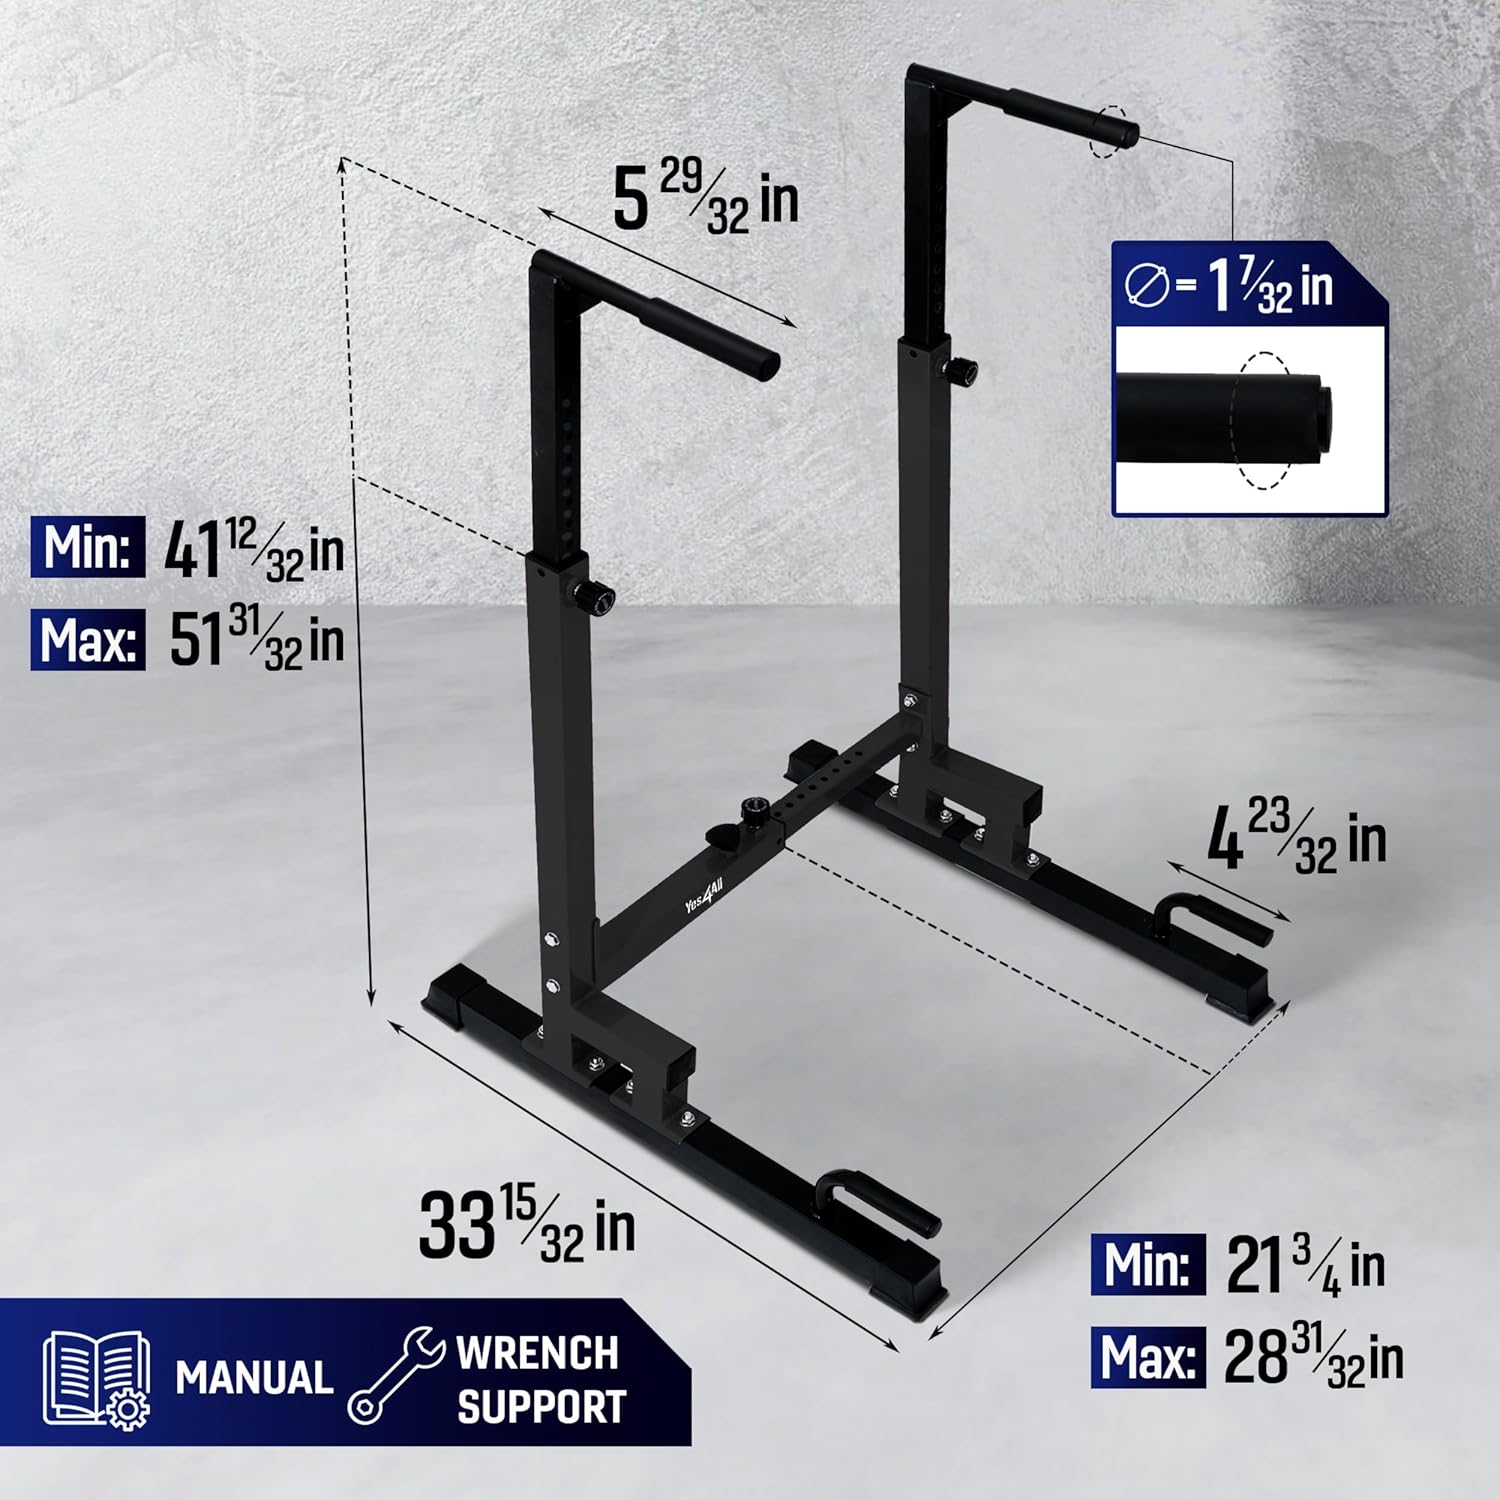
Figure 4: Detailed Product Dimensions. This image provides precise measurements for the dip stand, including its overall height, width, depth, and the diameter of the dip handles.
Warranty Information
The Yes4All Dip Stand (Model V7WI) comes with a Limited Warranty. For specific terms and conditions, please refer to the warranty documentation included with your purchase or contact Yes4All customer support.
Customer Support
If you have any questions, require assistance with assembly, or need to report a missing or damaged part, please contact Yes4All customer support. For the most up-to-date contact information, please visit the official Yes4All website or refer to your purchase documentation.
You can also visit the YES4ALL Store on Amazon for more product information.