
1. Introduction
Thank you for choosing the johgee 4-Zone Watering Timer. This programmable garden outdoor hose faucet timer is designed to automate your irrigation system, providing precise control over watering schedules for up to four independent zones. With features like rain delay, child-lock mode, and manual watering, it offers flexibility and efficiency for various watering needs, including drip irrigation, lawn sprinklers, and greenhouse systems.
Please read this manual thoroughly before installation and operation to ensure proper use and longevity of your device.
2. Important Safety Information
- Battery Safety: Use only two 1.5V AA alkaline batteries. Do not use lithium batteries. Ensure correct polarity when inserting batteries. Remove batteries if the timer will not be used for an extended period to prevent leakage.
- Water Pressure: The timer is designed to withstand water pressure between 0.05-0.8Mpa. Exceeding this range may cause damage or leaks.
- Temperature: Do not expose the timer to freezing temperatures. Remove the timer from the faucet and store indoors during winter months to prevent damage from ice.
- Installation: Ensure all connections are tight to prevent leaks. Do not overtighten.
- Child-Lock: Utilize the child-lock feature to prevent accidental changes to programming or unintended water usage by children or pets.
- Disassembly: Do not attempt to disassemble or repair the timer yourself. Refer all servicing to qualified personnel.
3. Package Contents
Please verify that all components are present:
- 1 x johgee 4-Zone Watering Timer Unit
- 1 x User Manual
Note: 1.5V AA alkaline batteries are not included and must be purchased separately.
4. Installation and Initial Setup
4.1. Battery Installation
- Locate the battery compartment on the back of the timer unit.
- Slide the battery cover open. The cover is designed with a seal to protect against water ingress.
- Insert two (2) new 1.5V AA alkaline batteries, ensuring the correct positive (+) and negative (-) orientation as indicated inside the compartment.
- Securely close the battery cover until it clicks into place, ensuring the seal is properly seated.

Figure 4.1: Inserting 2 AA batteries into the timer's battery compartment.
4.2. Connecting the Timer to a Faucet
- Ensure your outdoor faucet is turned off.
- Screw the timer's inlet connector (top part) onto your standard outdoor garden faucet. Hand-tighten only. The connector is made of reinforced nylon material for durability.
- Ensure the connection is secure but do not overtighten, as this can damage the threads or internal components.

Figure 4.2: The johgee 4-Zone Watering Timer ready for connection.
4.3. Connecting Hoses/Irrigation Lines
- Connect your garden hoses or irrigation lines to the four independent outlets at the bottom of the timer. Each outlet corresponds to a specific zone (A, B, C, D).
- Hand-tighten each connection to ensure a leak-free seal.

Figure 4.3: Timer connected to faucet and irrigation lines.
5. Operating Instructions
5.1. LCD Display Overview
The large LCD screen provides all necessary information for programming and monitoring. Familiarize yourself with the display elements:

Figure 5.1: LCD Display Elements.
- NOW: Displays the current time.
- Battery Indicator: Shows remaining battery life.
- A, B, C, D: Indicators for the four independent watering zones.
- START TIME: The programmed start time for irrigation.
- HOW LONG: The duration of each watering cycle (1 second to 360 minutes).
- HOW OFTEN: The frequency of watering (1 hour to 15 days).
- NEXT START: Time remaining until the next scheduled watering cycle.
- Lock Icon: Indicates Child-Lock mode is active.
- Rain Drop Icon: Indicates Rain Delay mode is active.
5.2. Button Functions
- NOW: Press to view or set the current time.
- ABCD: Press to cycle through and select individual watering zones (A, B, C, D) for programming.
- ESC/OFF: Exits the current setting mode or turns off the selected zone's watering.
- OK: Confirms selection or enters setting mode.
- - / +: Adjusts values (decrease/increase).
- DELAY: Activates or deactivates the Rain Delay function.
- Gear Icon (under OK): Enters programming mode for watering schedules.
- Faucet Icon (under OK): Activates or deactivates Manual Watering.
- Lock Icon (side): Press and hold to activate/deactivate Child-Lock.
5.3. Setting Current Time
- Press the NOW button. The time display will flash.
- Use the + and - buttons to adjust the hour.
- Press OK to confirm the hour and move to minutes.
- Use + and - buttons to adjust the minutes.
- Press OK to save the current time.
5.4. Programming Watering Schedules (Zones A, B, C, D)
Each of the four zones can be programmed independently.
- Press the ABCD button to select the zone you wish to program (A, B, C, or D). The selected zone indicator will flash.
- Press the OK button (or the Gear icon) to enter programming mode for the selected zone. The 'START TIME' will begin flashing.
- Set Start Time: Use + and - to set the desired start time for watering. Press OK to confirm.
- Set Watering Duration (HOW LONG): The 'HOW LONG' display will flash. Use + and - to set the watering duration from 1 second to 360 minutes. Press OK to confirm.
- Set Watering Frequency (HOW OFTEN): The 'HOW OFTEN' display will flash. Use + and - to set the watering frequency from 1 hour to 15 days. Press OK to confirm.
- The timer will now display the 'NEXT START' time, indicating when the next watering cycle for this zone will begin.
- Repeat steps 1-5 for other zones (B, C, D) as needed.

Figure 5.2: Independent programming for each zone.
5.5. Manual Watering Mode
Manual watering allows you to water immediately without affecting your programmed schedules.
- Press the ABCD button to select the zone you wish to water manually.
- Press the Faucet Icon (under the OK button). The display will show a default manual watering duration.
- Use + and - to adjust the desired manual watering duration.
- Press OK to start manual watering for the selected zone.
- To stop manual watering, press the Faucet Icon again or ESC/OFF.

Figure 5.3: Activating Manual Watering.
5.6. Rain Delay Function
The rain delay function allows you to pause your watering schedule for a set period, preventing overwatering during rainy weather.
- Press the DELAY button. The display will show a default delay period (e.g., 24H).
- Use + and - to adjust the rain delay duration (e.g., 24H, 48H, 72H).
- Press OK to confirm the rain delay. The rain drop icon will appear on the screen, and the 'NEXT START' time will update accordingly.
- To cancel rain delay, press the DELAY button again and set the delay to 0, or press ESC/OFF.
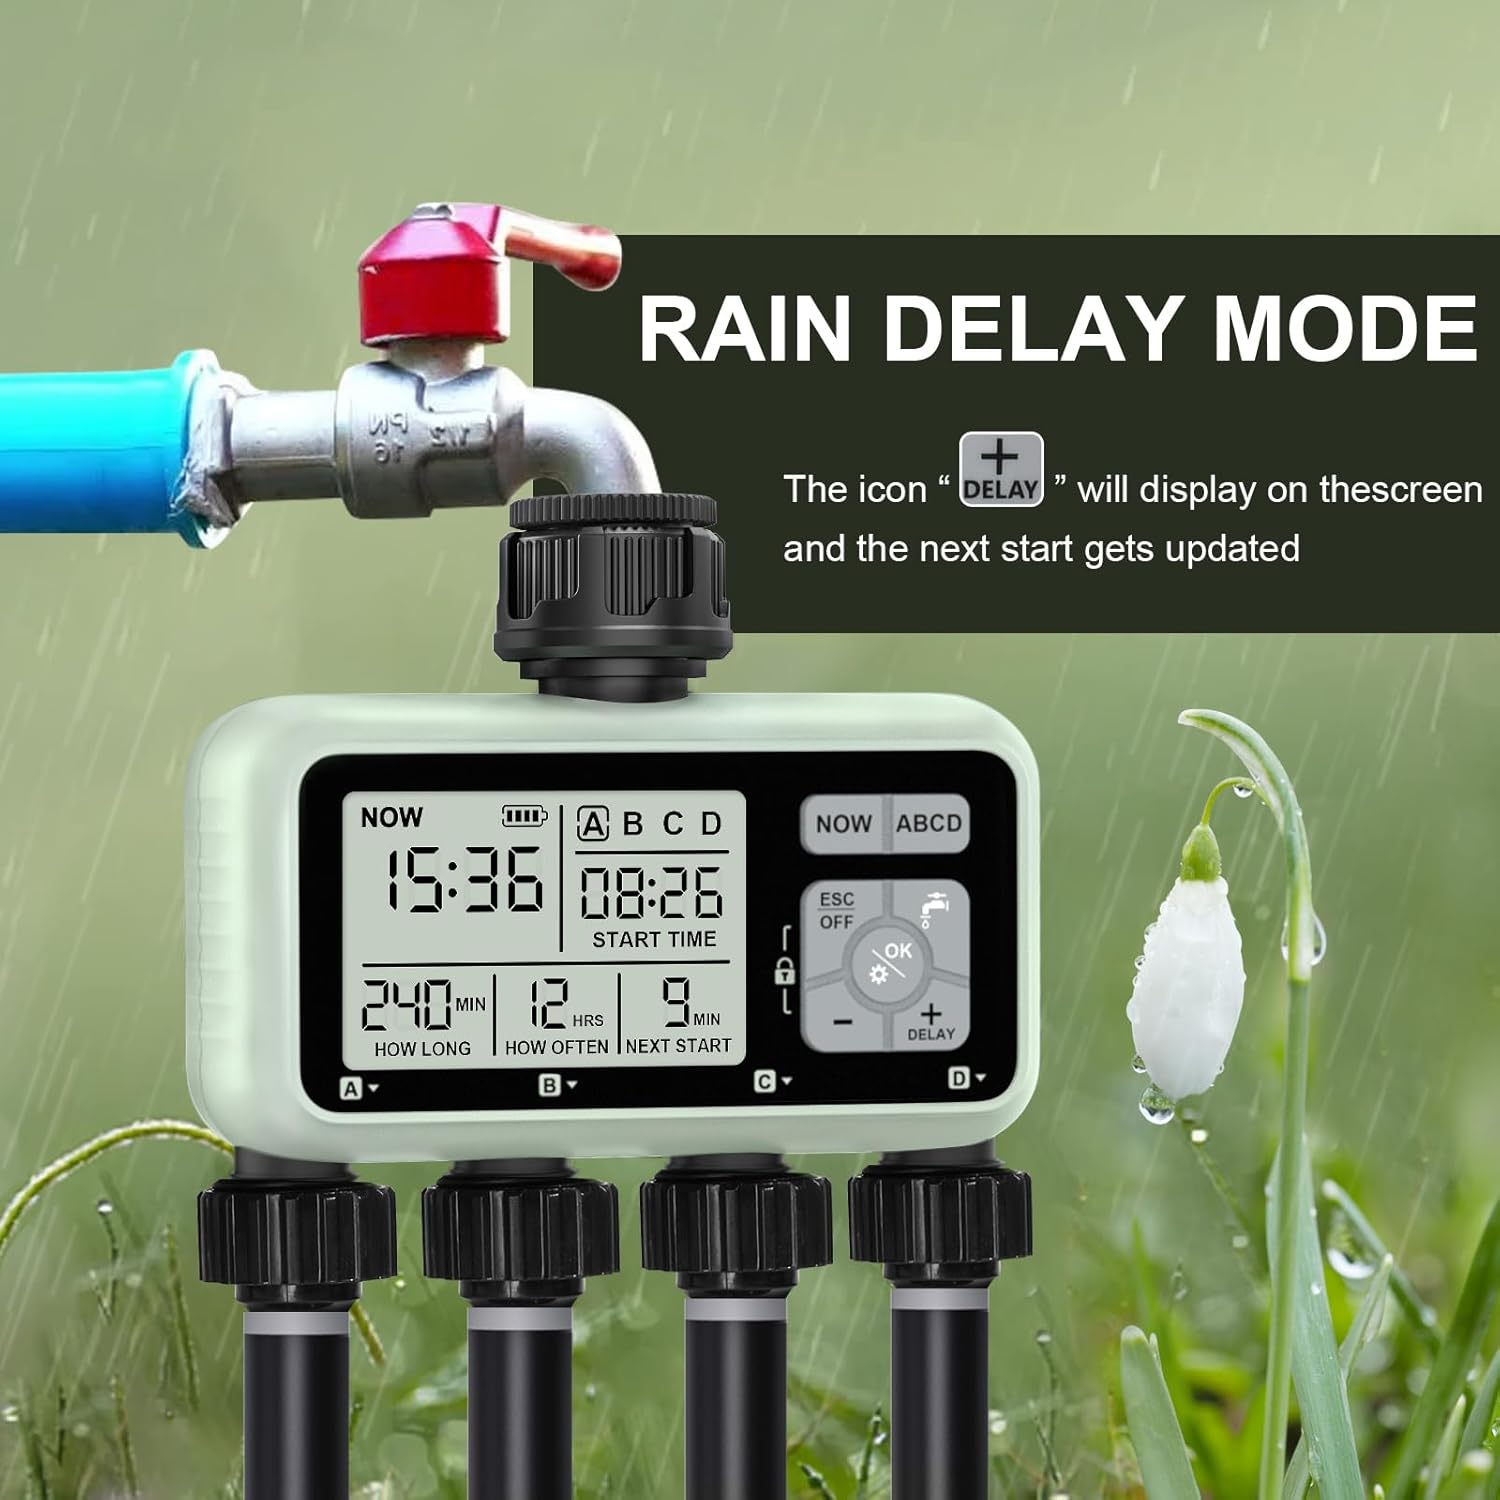
Figure 5.4: Activating Rain Delay Mode.
5.7. Child-Lock Mode
The child-lock mode prevents accidental changes to your programmed settings.
- To activate Child-Lock, press and hold the Lock Icon button on the side of the timer for 3 seconds. A lock icon will appear on the display.
- When Child-Lock is active, no buttons will respond to presses.
- To deactivate Child-Lock, press and hold the Lock Icon button again for 3 seconds. The lock icon on the display will disappear.
6. Care and Maintenance
- Cleaning: Wipe the timer with a damp cloth to remove dirt or debris. Do not use abrasive cleaners or immerse the unit in water.
- Battery Replacement: Replace batteries when the low battery indicator appears on the display. Always use fresh 1.5V AA alkaline batteries.
- Leak Prevention: Periodically check all connections for tightness. The timer features an upgraded leakproof design with reinforced nylon material and a durable aluminum alloy filter to prevent leakage.
- Winterization: Before the first frost, remove the timer from the faucet, drain any remaining water, remove the batteries, and store the unit indoors in a dry, protected area. Freezing water inside the timer can cause irreparable damage.

Figure 6.1: Durable and Waterproof Design Features.
7. Troubleshooting
| Problem | Possible Cause | Solution |
|---|---|---|
| Timer display is blank or dim. | Low or dead batteries; incorrect battery insertion. | Replace with fresh 1.5V AA alkaline batteries. Ensure correct polarity. |
| No water flow from outlets. | Faucet is off; low water pressure; timer not programmed; manual mode not activated; clogged filter. | Turn on faucet. Check water pressure. Verify programming or activate manual mode. Check and clean the inlet filter. |
| Timer not turning off. | Stuck valve; programming error; manual mode still active. | Press ESC/OFF. Check programmed duration. If issue persists, contact customer support. |
| Water leaking from connections. | Loose connections; damaged washer/seal; excessive water pressure. | Tighten connections. Check rubber washers for damage and replace if necessary. Ensure water pressure is within specified limits (0.05-0.8Mpa). |
| Timer not watering at scheduled time. | Incorrect programming; rain delay active; child-lock active; low battery. | Review and correct programming (start time, duration, frequency). Check if rain delay or child-lock is active. Replace batteries. |
8. Specifications
- Brand: johgee
- Model: 4-Zone Watering Timer
- Color: Green
- Material: Acrylonitrile Butadiene Styrene, Aluminum
- Product Dimensions: 6.5"D x 2.6"W x 5.2"H
- Item Weight: 14.4 ounces (0.9 Pounds)
- Number of Settings: 12 (referring to programming options)
- Screen Size: 6.5 Inches (LCD display)
- Water Pressure Range: 0.05 - 0.8 Mpa
- Watering Duration: 1 second to 360 minutes
- Watering Frequency: 1 hour to 15 days
- Waterproof Rating: IPX5
- Power Source: 2 x 1.5V AA Alkaline Batteries (not included)
9. Warranty Information
This johgee product comes with a limited manufacturer's warranty. For specific details regarding warranty coverage, duration, and terms, please refer to the warranty card included with your product or contact johgee customer support directly. Please retain your proof of purchase for warranty claims.
10. Customer Support
If you encounter any issues or have questions not covered in this manual, please contact johgee customer support for assistance. You can typically find contact information on the product packaging, the official johgee website, or through the retailer where you purchased the product.
For more information about johgee products, visit the official johgee store: johgee Store on Amazon.
