
1. Introduction
Thank you for choosing the Briidea BR-134 Temperature Controlled Outlet. This device is designed to automatically regulate the temperature in your environment by controlling connected heating or cooling appliances. It features both heating and cooling modes, a wide temperature range, and a power failure memory function for convenience and efficiency. Please read this manual carefully before use to ensure proper operation and safety.
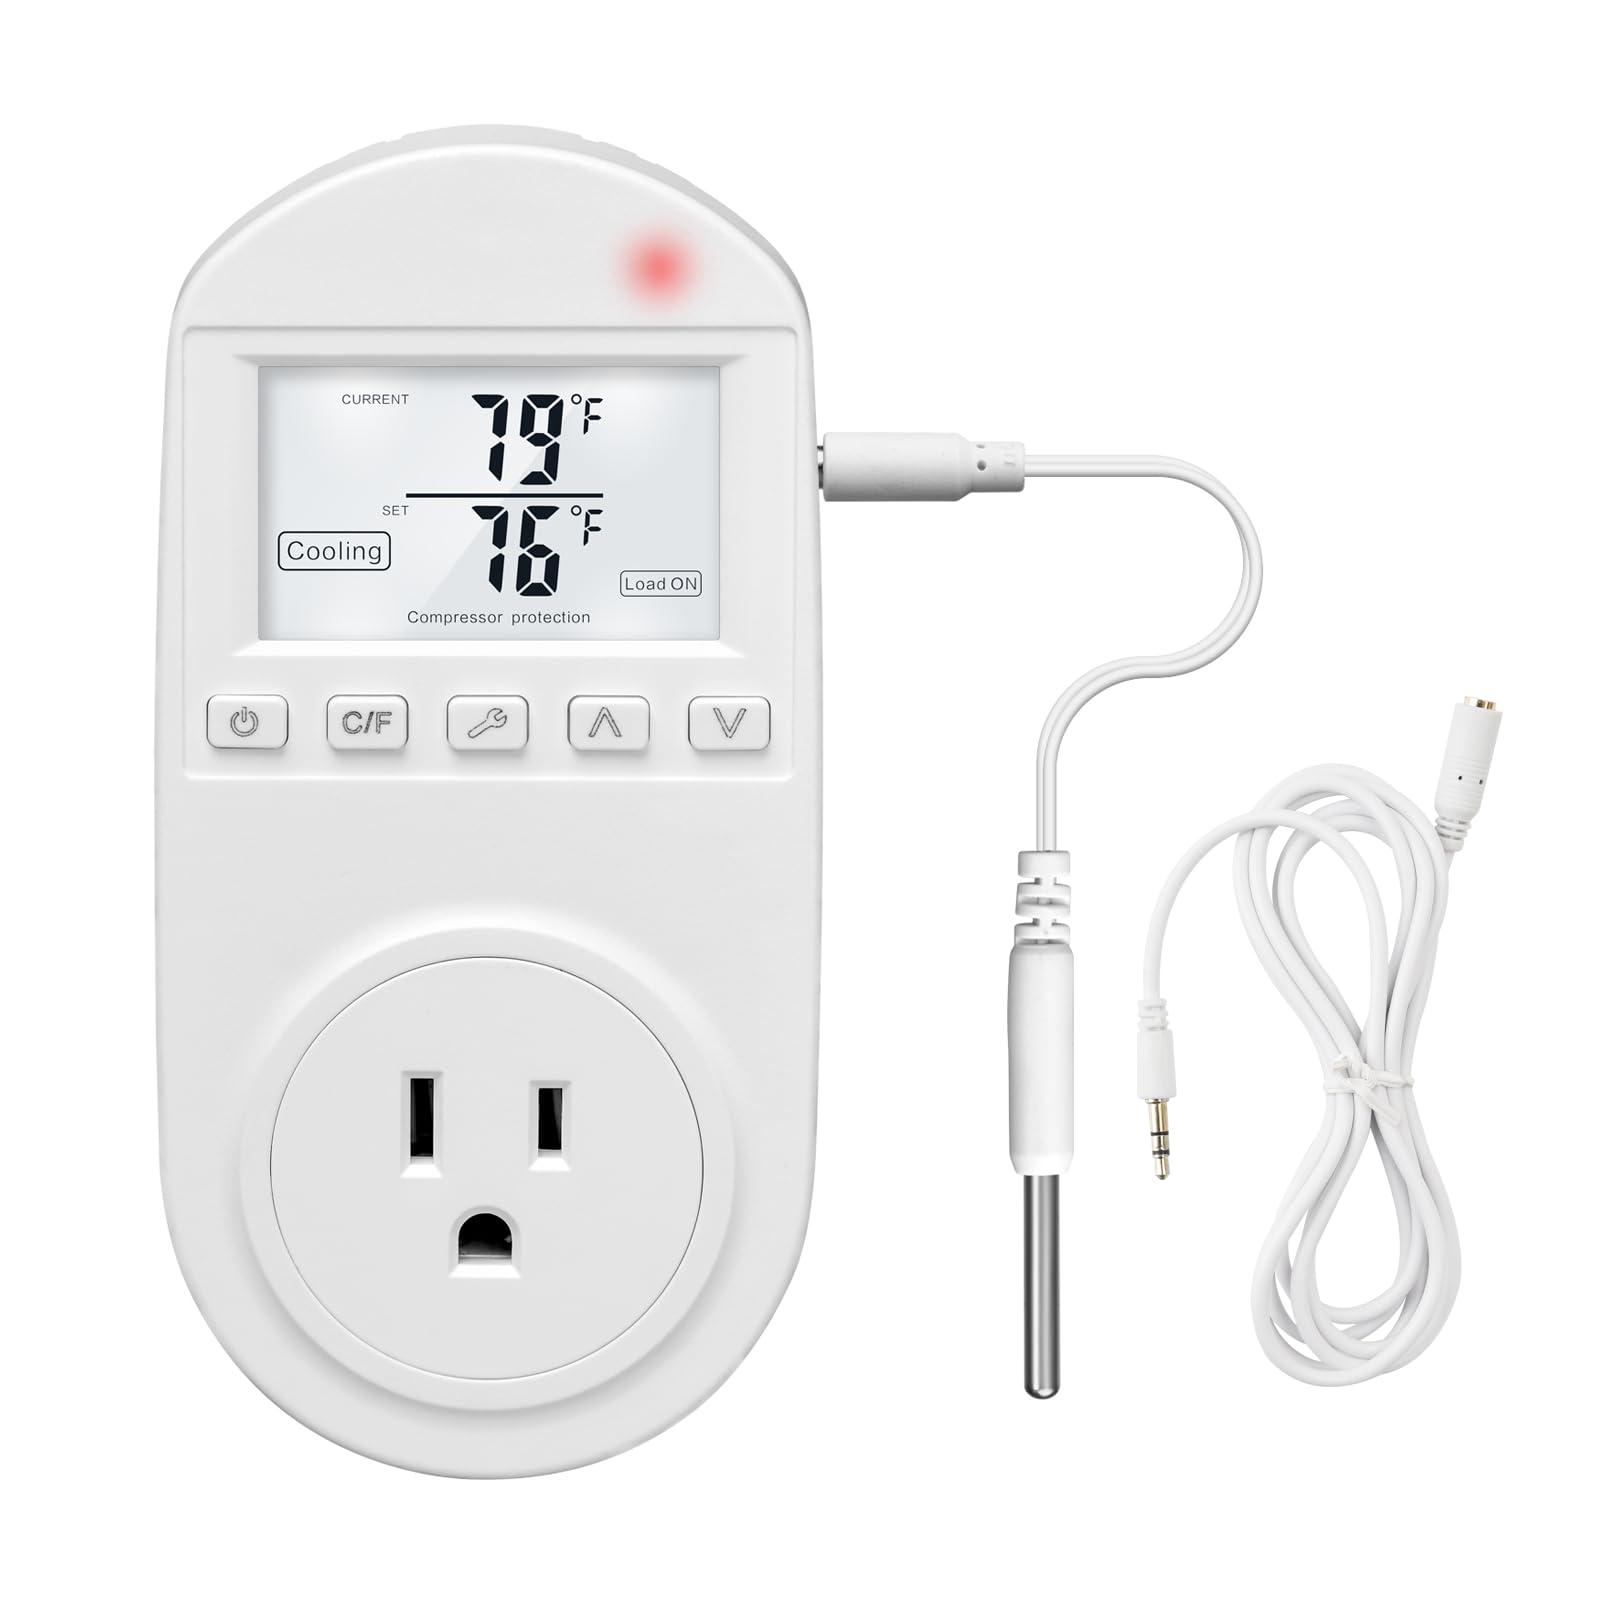
Figure 1: Briidea BR-134 Temperature Controlled Outlet
2. Safety Information
- Read all instructions before operating the device.
- This device is intended for indoor use only. Do not expose to water or high humidity.
- Do not exceed the maximum electrical ratings of 110V, 15A.
- Ensure the device is securely plugged into a grounded outlet.
- Do not disassemble or attempt to repair the device. Contact customer support if service is required.
- Keep out of reach of children.
3. Package Contents
- 1 x Briidea BR-134 Thermostat Outlet
- 2 x 5ft Temperature Sensor Wires
- 1 x Instruction Manual (this document)
4. Product Features
- Dual Sensor Wires: Includes two 5ft sensor wires for versatile placement.
- Heat and Cool Modes: Supports both heating and cooling applications with a temperature range of 0-100℃ (32-212℉).
- Automatic Activation: Automatically turns connected equipment on or off to maintain a stable set temperature.
- Energy Saving: Activates appliances only when necessary, contributing to reduced electricity consumption.
- High-Precision Temperature Sensor: Provides accurate temperature readings.
- Power Failure Memory: Retains all settings during power outages, eliminating the need for reprogramming.
- Plug-and-Play Design: Simple to use by plugging directly into an outlet.
- Large LCD Screen: Displays current and set temperatures clearly.
- Advanced Compressor Protection: (In cooling mode) Helps extend the lifespan of connected air conditioners.

Figure 2: Key Features Overview

Figure 3: Detailed Feature Explanations

Figure 4: Advanced Compressor Protection

Figure 5: Device Compatibility
5. Specifications
| Specification | Value |
|---|---|
| Model Number | BR-134 |
| Input Voltage | 110V |
| Max Current | 15A |
| Temperature Range | 0-100℃ / 32-212℉ |
| Item Weight | 7.8 ounces |
| Package Dimensions | 5.51 x 2.95 x 2.52 inches |
| Control Type | Button Control |

Figure 6: Product Dimensions
6. Setup
- Unpack: Carefully remove the Briidea BR-134 thermostat outlet and its components from the packaging.
- Connect Sensor: Plug one of the provided temperature sensor wires into the dedicated port on the side of the thermostat outlet.
- Plug into Wall: Insert the Briidea BR-134 into a standard 110V wall outlet.
- Position Sensor: Place the temperature sensor in the area where you wish to monitor and control the temperature. Ensure it is not directly exposed to heat sources, cold drafts, or moisture, which could affect accuracy.
- Connect Appliance: Plug your heating or cooling appliance (e.g., space heater, window air conditioner, fan) into the outlet located on the front of the BR-134.

Figure 7: Thermostat Outlet Setup
7. Operating Instructions
7.1 Power On/Off
Press the Power button () once to turn the device on or off. The LCD screen will illuminate when powered on.
7.2 Setting Temperature Units (℃/℉)
Press the C/F button to toggle between Celsius (℃) and Fahrenheit (℉) temperature displays.
7.3 Selecting Operating Mode (Heating/Cooling)
Press the Mode button (wrench symbol) to switch between Heating Mode and Cooling Mode. The selected mode will be indicated on the LCD screen.

Figure 8: Heating and Cooling Modes

Figure 9: Mode Selection Visual
7.4 Setting Target Temperature
Use the Up (▲) and Down (▼) arrow buttons to adjust the desired target temperature. The set temperature will be displayed on the LCD screen. The device will automatically activate or deactivate the connected appliance to maintain this set temperature.

Figure 10: Thermostat Control Interface

Figure 11: Large LCD Screen Display
7.5 Power Failure Memory Function
The Briidea BR-134 is equipped with a power failure memory function. In the event of a power outage, the device will retain all your previously set configurations (mode, target temperature, units) and resume operation automatically once power is restored.
8. Wide Application
The Briidea BR-134 Thermostat Outlet is suitable for a variety of applications, including but not limited to:
- Controlling space heaters and window air conditioners in households.
- Regulating temperature in greenhouses for plant growth.
- Maintaining optimal conditions for reptiles and incubators.
- Temperature control for aquariums and terrariums.
- Managing temperatures for home brewing and fermentation processes.
- Controlling heat mats and pharmaceutical storage.

Figure 12: Diverse Applications of the Thermostat Outlet

Figure 13: Additional Application Examples
9. Maintenance
- Cleaning: Wipe the device with a soft, dry cloth. Do not use abrasive cleaners, solvents, or immerse the device in water.
- Storage: When not in use for extended periods, unplug the device and store it in a cool, dry place away from direct sunlight and extreme temperatures.
- Sensor Care: Keep the temperature sensor clean and free from debris to ensure accurate readings. Avoid bending or damaging the sensor wire.
10. Troubleshooting
- Device not turning on:
- Ensure the thermostat outlet is securely plugged into a live wall outlet.
- Check if the wall outlet is functioning correctly by plugging in another device. - Connected appliance not activating:
- Verify that the appliance is correctly plugged into the Briidea BR-134 outlet.
- Confirm that the thermostat is in the correct operating mode (Heating for a heater, Cooling for an AC/fan).
- Check if the set temperature is appropriate for activation. For heating, the set temperature should be higher than the current temperature to activate. For cooling, the set temperature should be lower than the current temperature to activate. - Inaccurate temperature readings:
- Ensure the temperature sensor is properly connected to the device.
- Reposition the sensor away from direct heat sources, cold drafts, or areas with poor air circulation.
- Clean any dust or debris from the sensor tip. - Settings are lost after a power outage:
- The Briidea BR-134 features a power failure memory function. If settings are consistently lost after power interruptions, please contact customer support.
11. Warranty and Support
For warranty information, technical support, or any questions not covered in this manual, please refer to the official Briidea website or contact their customer service department. Contact details can typically be found on the product packaging or the manufacturer's website.