
1. Introduction
This manual provides detailed instructions for the assembly, operation, and maintenance of your Benass 10x20 Heavy Duty Carport. Please read this manual thoroughly before beginning assembly or use to ensure proper installation and safe operation. Retain this manual for future reference.
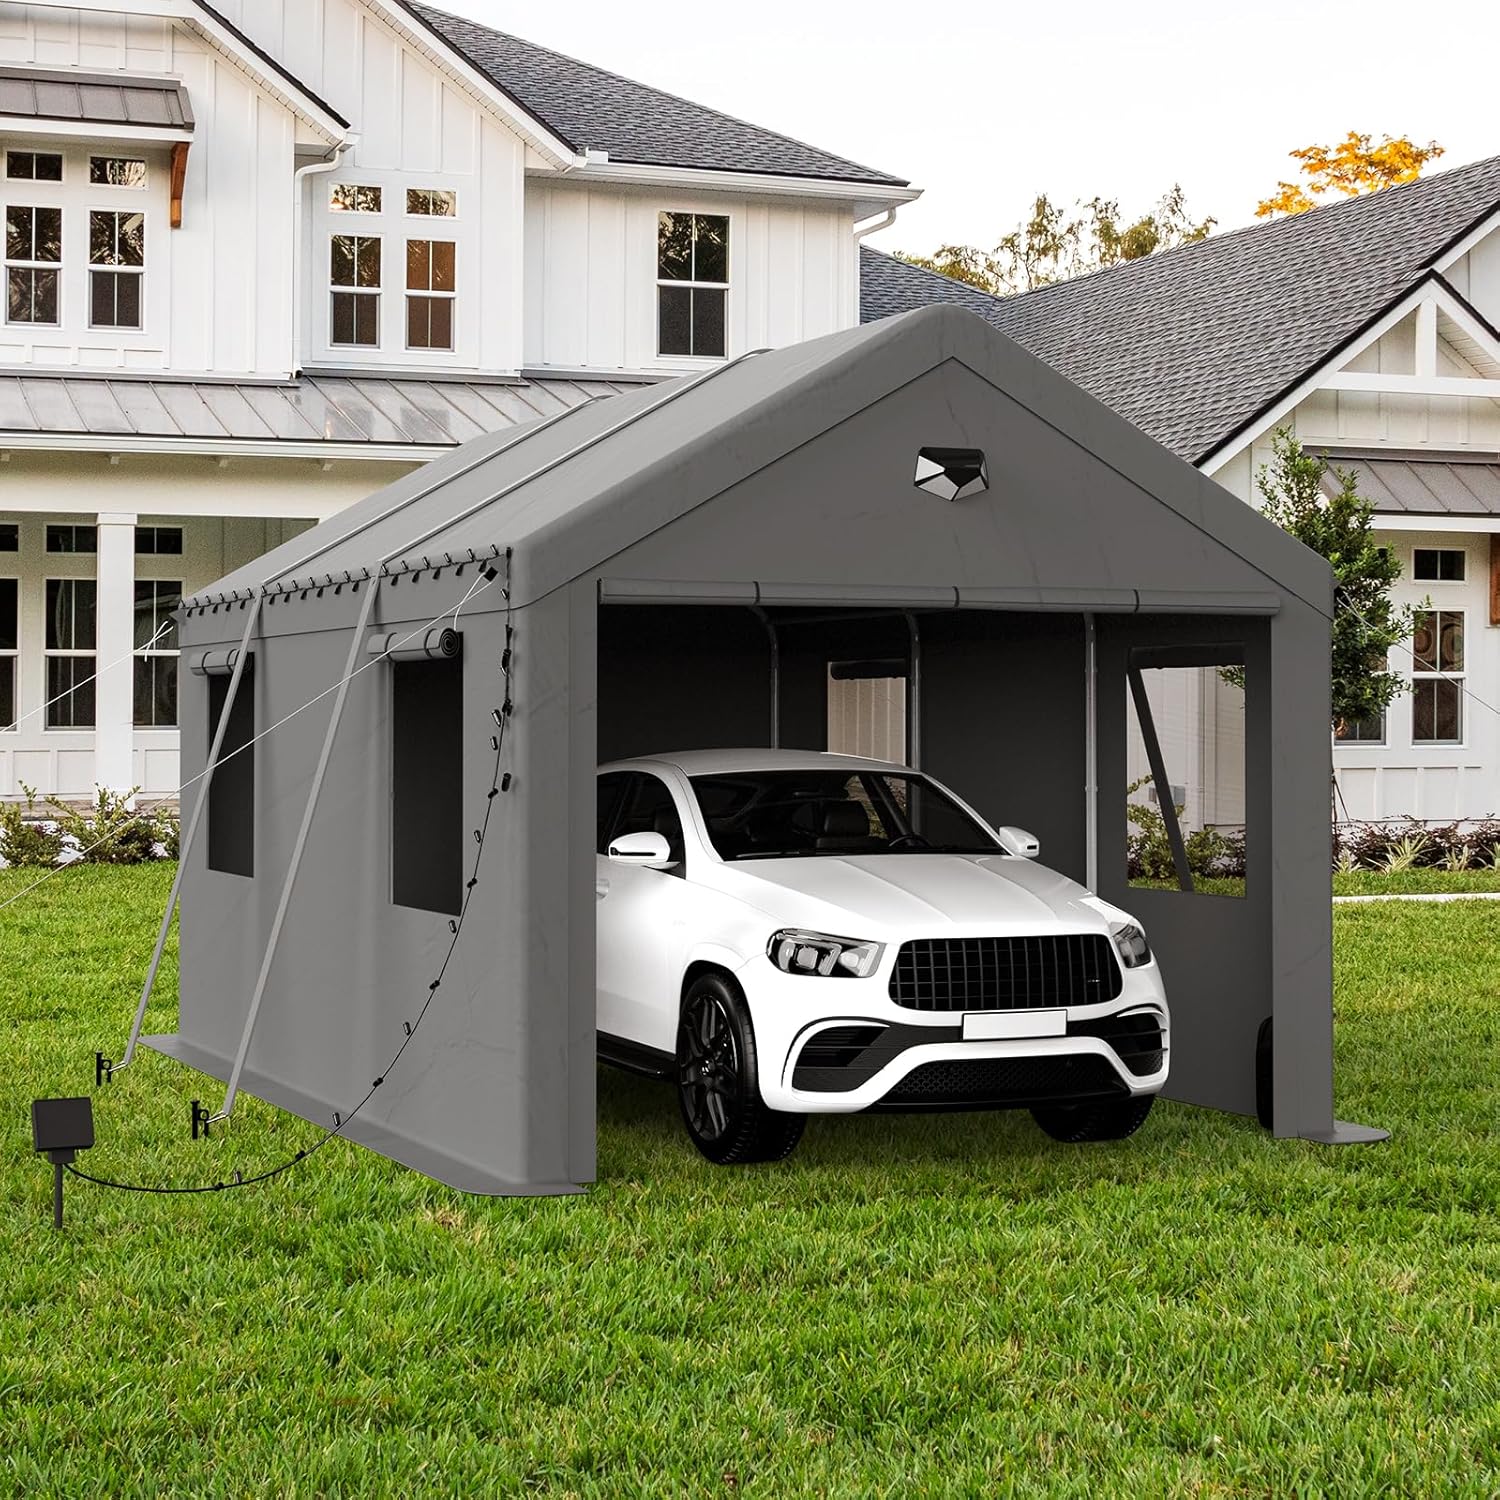
Image 1.1: The Benass 10x20 Heavy Duty Carport, showcasing its primary function as a vehicle shelter.
2. Safety Information
Important Safety Precautions:
- Always ensure the carport is securely anchored to the ground using the provided sandbags and ropes.
- Do not use the carport in high winds or severe weather conditions. Disassemble if extreme weather is anticipated.
- Always follow the assembly instructions carefully to avoid injury.
- Keep children and pets away from the carport when it is being assembled or disassembled.
- Ensure the installation area is level and clear of obstructions.
3. Product Components and Dimensions
Before assembly, verify that all components listed in your packing list are present and undamaged. The carport measures 20 feet (610 cm) in length, 10 feet (304 cm) in width, and 9.45 feet (288 cm) in height at its peak.

Image 3.1: Product dimensions for the Benass 10x20 Carport.
Included Accessories:
The package includes a full set of accessories to enhance stability and functionality:
- 2 Wind Ropes
- 2 Binding Straps
- 4 Sandbags
- 2 Sidewalls
- 1 Solar Light
- 1 Light Strip
- 6mm Nylon Rope
- 3.75" PE Binding
- Reinforced Support Bars
- Ø9 Alloy Ground Nails with Hocks
- Ø6 Alloy Screwed Base Nails
- Highly Extensible Buckles (max 23LBS)

Image 3.2: Overview of included accessories for enhanced stability and functionality.
4. Setup and Assembly
Due to its large size, it is recommended that 2-3 people assist in the installation process for safety and efficiency.

Image 4.1: Visual representation of the assembly steps.
- Step 1: Assemble the Top Frame. Begin by connecting the horizontal and vertical pipes to form the top rectangular frame of the carport.
- Step 2: Install the Top Reinforced Steel Pipes. Attach the reinforced steel pipes to the top frame, ensuring they are securely fastened to provide structural integrity.
- Step 3: Assemble Small Support Beams. Connect the smaller support beams that will provide additional stability to the roof structure.
- Step 4: Install the Cover and Secure It. Carefully drape the PE canopy cover over the assembled frame. Ensure it is aligned correctly and begin securing it to the frame.
- Step 5: Install Steel Pipes at Four Corners. Insert the main vertical steel pipes into the corner connectors of the top frame.
- Step 6: Install Supporting Legs and Side Fabric. Attach the remaining supporting legs and then install the side fabric panels, ensuring they are properly aligned and secured.
- Step 7: Install Base and Fix it with Nails. Secure the base of the carport to the ground using the provided alloy screwed base nails and ground nails.
- Step 8: Secure the Perimeter and Fix the Carport. Use the wind ropes, binding straps, and sandbags to further secure the carport to the ground, especially in windy conditions.

Image 4.2: Detail of the internal support bar system for improved stability.
5. Operating the Carport
The Benass 10x20 Carport is designed for versatile use, providing ample space for vehicles or as a temporary storage solution.
Air Circulation and Access:
The carport features a roll-up zipper door at the front for easy vehicle access and four side mesh roll-up windows to ensure proper air circulation. This design helps prevent stuffiness and maintains a comfortable environment inside the carport.
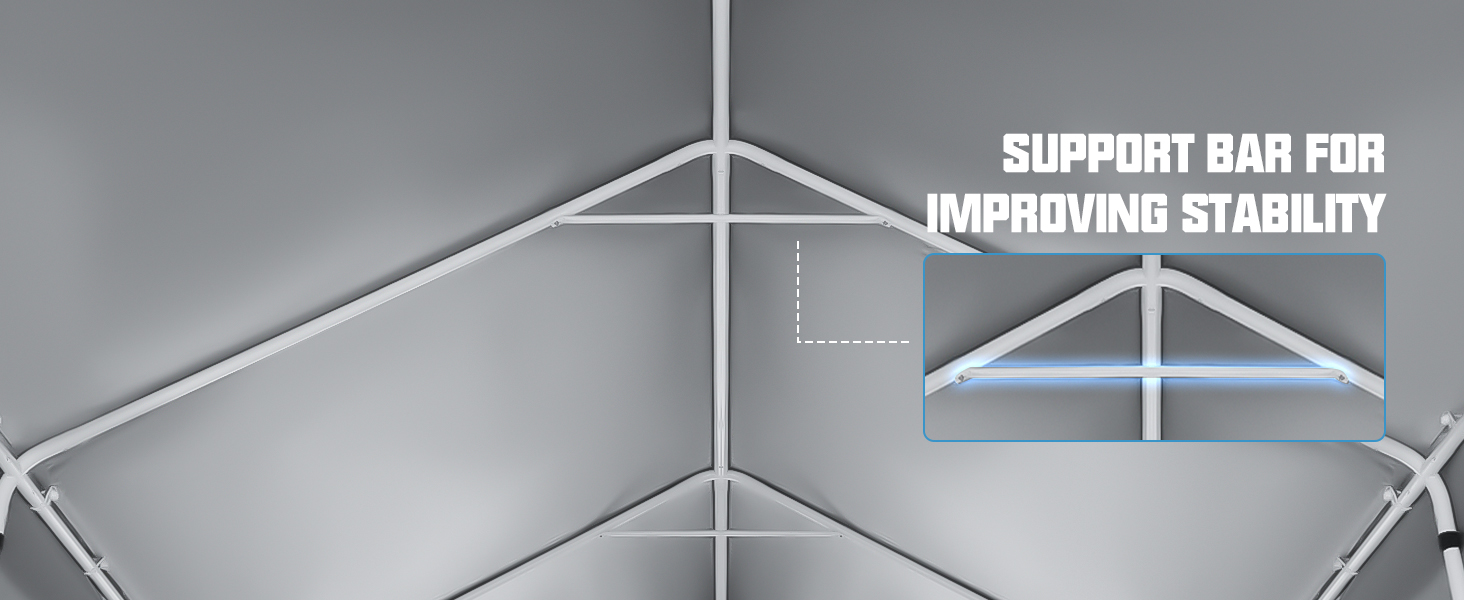
Image 5.1: Roll-up mesh windows for ventilation.
Night Illumination:
For convenience and safety during nighttime, the carport includes a solar light and a light strip. Position the solar light to maximize sun exposure for charging.

Image 5.2: Carport at night, showcasing the solar light and light strip.
Versatile Use:
The large capacity of the carport allows it to accommodate various vehicles, including cars, boats, or even small tractors, making it a versatile outdoor shelter.

Image 5.3: Carport accommodating a boat.

Image 5.4: Carport accommodating a tractor.
6. Maintenance
Regular maintenance will extend the lifespan of your Benass Carport.
Canopy Care:
The carport features a 170gms PE canopy top with 3 layers of coating, providing excellent waterproof performance and UV protection (80+). This effectively blocks UV rays and sunlight, helping to keep the internal temperature cool.

Image 6.1: Carport canopy demonstrating waterproof and UV protection features.
- Cleaning: Clean the canopy regularly with mild soap and water. Avoid harsh chemicals or abrasive cleaners that could damage the PE material.
- Inspection: Periodically inspect the canopy for any tears, punctures, or signs of wear. Repair small damages promptly to prevent them from worsening.
Frame Care:
The carport utilizes a 1.5" galvanized steel frame, which is designed for durability.
- Stability Check: Regularly check all connections and anchoring points (ropes, straps, sandbags, ground nails) to ensure they are secure, especially after strong winds or heavy rain.
- Rust Prevention: While galvanized, inspect the steel frame for any signs of rust, particularly at joints. Address any rust spots with appropriate rust-inhibiting paint or treatment.
7. Troubleshooting
This section addresses common issues you might encounter with your carport.
- Issue: Carport feels unstable or sways in wind.
Solution: Ensure all ground anchors (sandbags, ground nails, ropes, and binding straps) are properly installed and tightened. Verify that the frame connections are secure. Consider adding additional anchoring points in extremely windy areas. - Issue: Water pooling on the canopy.
Solution: Check if the canopy is stretched tautly over the frame. Adjust tension if necessary. Ensure the frame is assembled correctly and not sagging. Clear any debris from the canopy that might be obstructing water runoff. - Issue: Zipper on door or windows is stuck or difficult to operate.
Solution: Apply a silicone-based lubricant or zipper wax to the zipper teeth. Ensure the fabric is not caught in the zipper mechanism. Avoid forcing the zipper. - Issue: Solar light or light strip not working.
Solution: Ensure the solar panel is clean and receiving direct sunlight for charging. Check connections for the light strip. Verify that the solar light switch is in the 'ON' position.
8. Specifications
| Feature | Detail |
|---|---|
| Brand | Benass |
| Model Number | 1020pe |
| Product Dimensions | 240"L x 120"W x 113.4"H (20'L x 10'W x 9.45'H) |
| Frame Material | 1.5" Galvanized Alloy Steel |
| Canopy Material | 170gms PE with 3-layer coating |
| Water Resistance Level | Waterproof |
| UV Protection Level | 80+ |
| Assembly Required | Yes |
| Color | Roll-Up Zipper Ends Doors (Grey) |
9. Warranty and Support
Benass offers a one-year 100% satisfactory after-sales service for this product. If you encounter any problems upon receiving the carport or during its use, please contact Benass customer support for assistance. We are committed to serving you as soon as possible.
For support, please refer to the contact information provided with your purchase or visit the official Benass website.