
1. Important Safety Information
WARNING: Always wear protective goggles and gloves to prevent eye and hand injuries. Ensure bystanders and children are kept at a safe distance from the operating area. Be aware of flying debris during operation. Do not use the trimmer near flammable materials. Read and understand all instructions before operating the tool.
2. Product Overview
The BEEDECK Cordless String Trimmer and Edger (Model WW-029) is a versatile 2-in-1 tool designed for lawn maintenance. It functions as both a string trimmer and a wheeled edger, offering convenience and efficiency for various yard tasks.

Figure 2.1: Overview of the BEEDECK Cordless String Trimmer and Edger.
Key Features:
- 2-in-1 Functionality: Easily converts from a lawn trimmer to a wheeled edger by rotating the head.
- Efficient Cutting: Features a 12-inch cutting path and a motor speed of 9400 RPM for effective grass trimming.
- User-Friendly Design: Lightweight construction and ergonomic grip reduce strain during prolonged use.
- Battery Powered: Equipped with a 20V/2.0Ah lithium-ion battery, providing approximately 30-60 minutes of working time per charge. A fast charger is included.
- Adjustable Length: The pole length is adjustable between 44 and 58 inches for user comfort.

Figure 2.2: The 2-in-1 design allows for easy conversion between trimming and edging modes.
3. Setup and Assembly
Carefully unpack all components and ensure all parts are present before beginning assembly. Refer to the following steps for proper setup.
3.1 Attaching the Guard and Handle:
Attach the safety guard to the trimmer head using the provided screws. Ensure it is securely fastened. Then, attach the auxiliary handle to the main shaft. The handle is adjustable for optimal comfort and control. Some users may find it easier to attach the handle with assistance to hold the buttons in place while sliding the handle on.

Figure 3.1: Securely attach the safety guard and auxiliary handle.
3.2 Adjusting Pole Length:
The trimmer features a telescopic pole for adjustable length. Locate the telescopic switch on the shaft. Loosen the switch, adjust the pole to your desired length (between 44-58 inches), and then securely tighten the switch to lock the pole in position. Ensure the pole is firmly locked before operation to prevent movement during use.
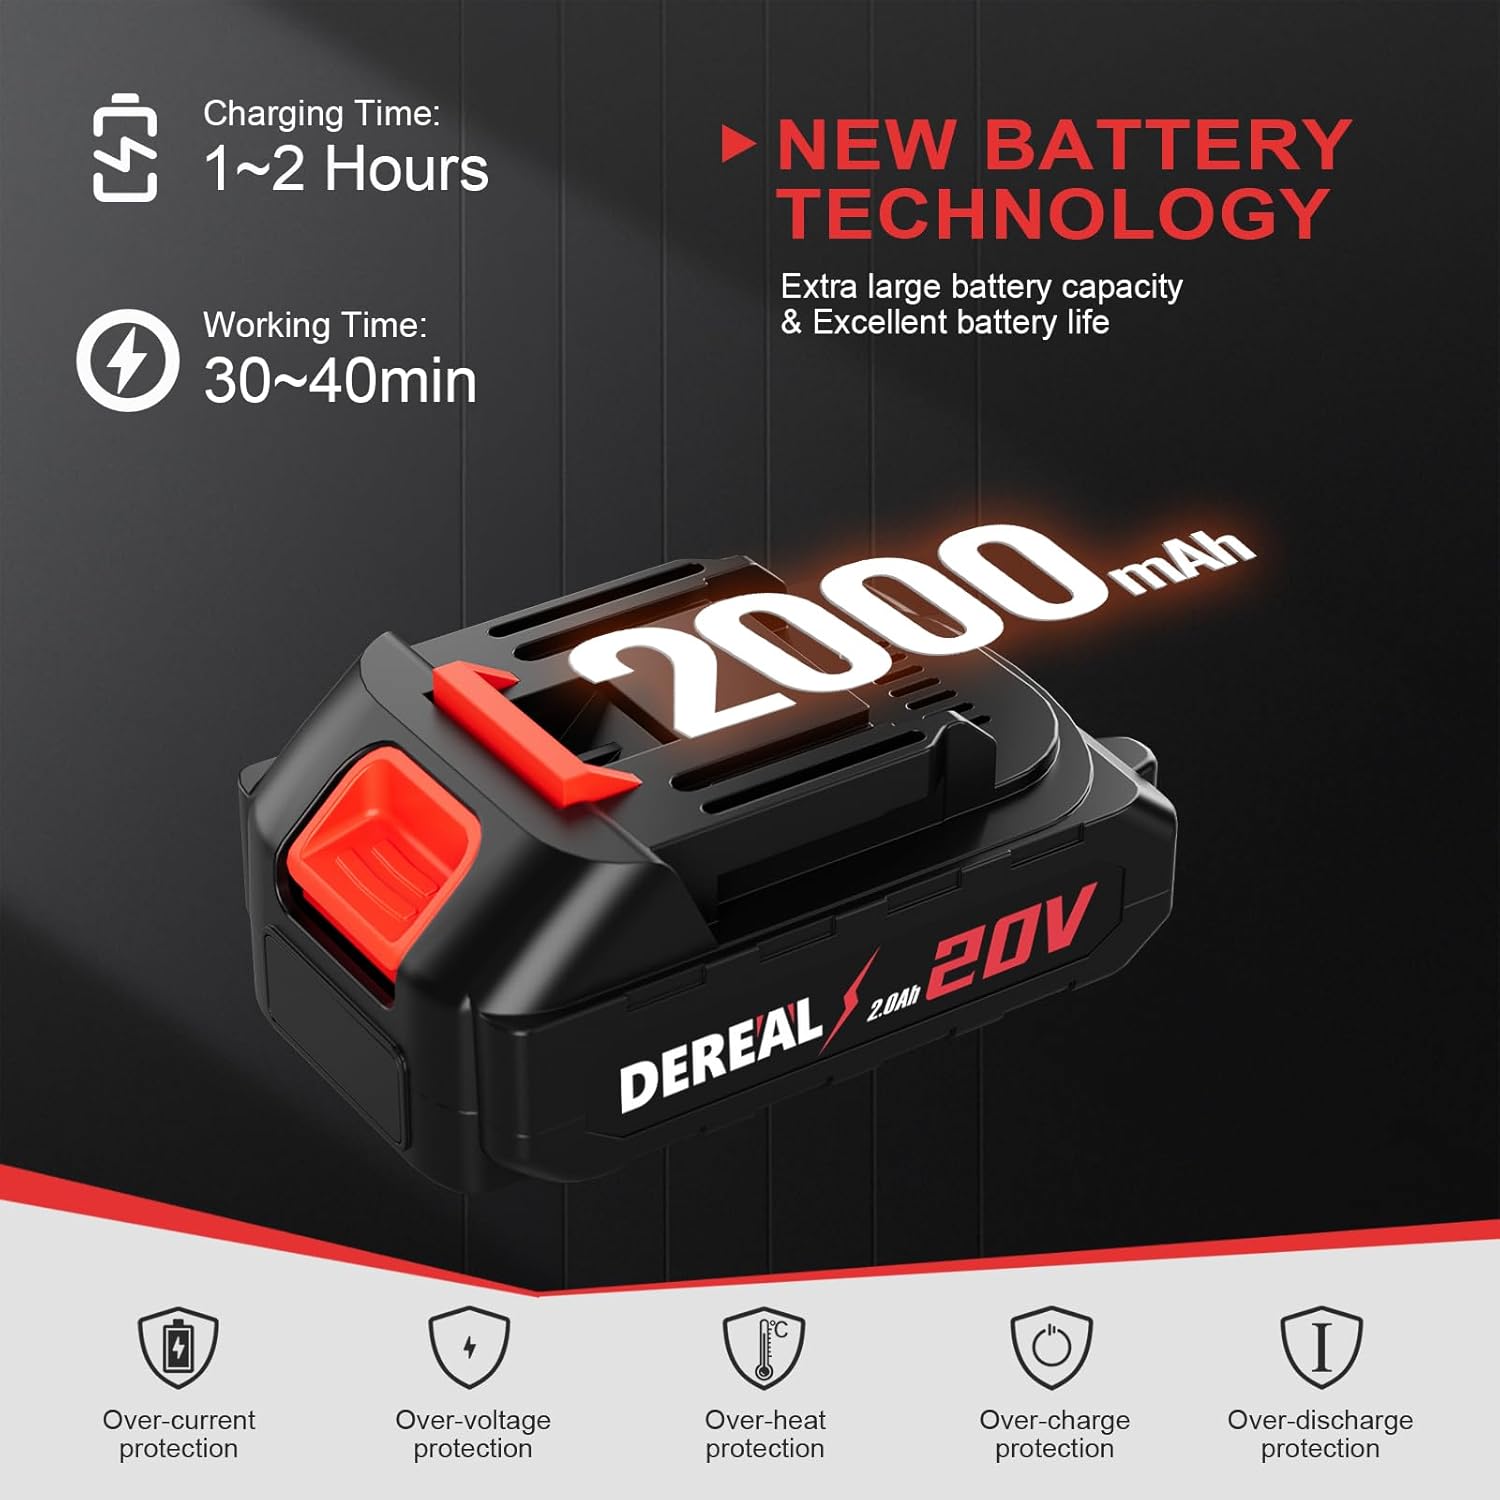
Figure 3.2: Adjusting the pole length for comfortable operation.
3.3 Battery Installation and Charging:
Insert the fully charged 20V/2.0Ah lithium-ion battery into the battery compartment until it clicks into place. To charge the battery, connect the charger to a power outlet and then to the battery. The charging time is typically 1-2 hours. Ensure the battery is cool before charging to optimize battery life and safety.

Figure 3.3: The 20V 2.0Ah battery and its charging specifications.
3.4 Video Guide: Adjustments
Video 3.1: This video demonstrates how to adjust the telescopic pole length, head angle, and handle position for optimal use.
4. Operating Instructions
Follow these guidelines for safe and effective operation of your BEEDECK Cordless String Trimmer and Edger.
4.1 Trimming Grass:
Hold the trimmer firmly with both hands. Position the trimmer head parallel to the ground and move it in a sweeping motion across the grass. The 12-inch cutting path allows for efficient coverage. For optimal results, avoid forcing the trimmer through dense vegetation; allow the string to do the work.

Figure 4.1: The trimmer in action, demonstrating its 12-inch cutting swath.
4.2 Edging Lawns:
To convert to an edger, rotate the trimmer head until it is perpendicular to the ground. The integrated wheeled edge guide will assist in maintaining a consistent cutting depth along sidewalks, driveways, and flowerbeds. Walk slowly and steadily to create clean, precise edges.

Figure 4.2: Using the trimmer in edger mode along a sidewalk.
4.3 Bump Feed System:
The trimmer utilizes a bump feed system to advance the cutting line. To extend the line, gently tap the trimmer head on a firm surface while the motor is running. This will release additional line. Avoid excessive bumping to prevent unnecessary line consumption.
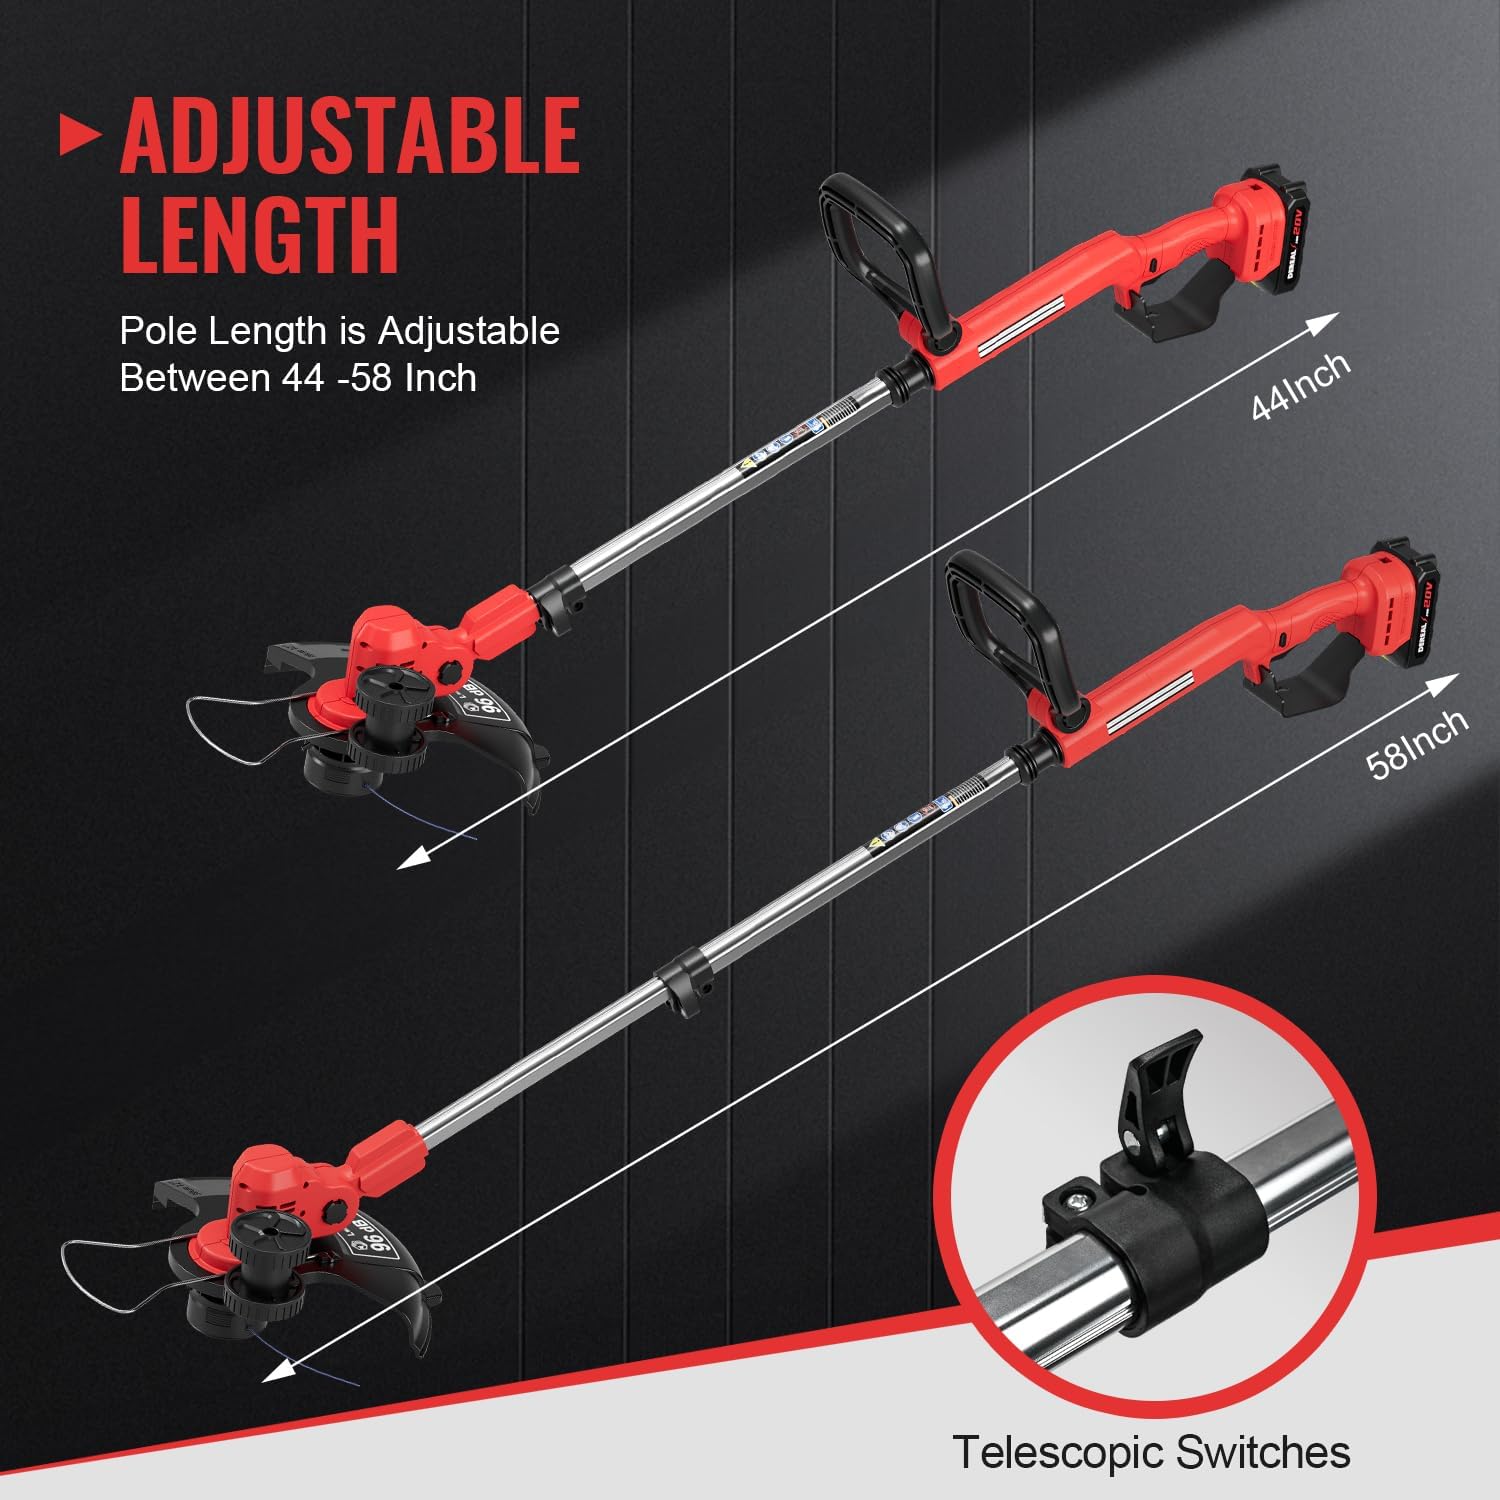
Figure 4.3: Detail of the bump feed mechanism for line advancement.
4.4 Video Guide: Trimmer & Edger 2-in-1
Video 4.1: This video illustrates the seamless conversion and operation of the trimmer in both trimming and edging modes.
5. Maintenance
Regular maintenance ensures the longevity and optimal performance of your trimmer.
5.1 Cleaning:
After each use, disconnect the battery and clean the trimmer head, guard, and shaft with a damp cloth. Remove any accumulated grass, dirt, or debris to prevent buildup and ensure smooth operation. Do not use harsh chemicals or abrasive cleaners.
5.2 Replacing the Cutting Line:
When the cutting line becomes too short or breaks, it needs to be replaced. The trimmer comes with five replacement spools. To replace, remove the old spool from the trimmer head and carefully wind the new line onto the spool, following the directional arrows if present. Ensure the line is properly seated before reassembling the head.
5.3 Battery Care:
Store the battery in a cool, dry place away from direct sunlight and extreme temperatures. Do not store the battery in a discharged state for extended periods. Charge the battery fully before long-term storage and periodically recharge it every few months to maintain its health.
6. Troubleshooting
This section addresses common issues you might encounter with your trimmer.
| Problem | Possible Cause | Solution |
|---|---|---|
| Trimmer does not start | Battery not charged or improperly installed. | Ensure the battery is fully charged and securely inserted until it clicks. |
| Cutting line does not advance | Line is tangled or too short; bump feed mechanism is stuck. | Replace the cutting line spool. Clean the trimmer head to remove debris that might be obstructing the bump feed. |
| Telescopic pole or handle moves after adjustment | Adjustment clamp not tightened sufficiently. | Ensure the telescopic switch/clamp is tightened firmly after adjusting the pole length or handle position. If the issue persists, inspect the clamp for damage. |
| Reduced cutting performance | Dull or worn cutting line; motor overload. | Replace the cutting line. Avoid cutting overly thick or woody vegetation to prevent motor strain. |
7. Specifications
- Brand: BEEDECK
- Model Number: WW-029
- Power Source: Battery Powered
- Battery: 20V/2.0Ah Lithium-Ion (1 included)
- Charging Time: 1-2 Hours
- Working Time: 30-60 minutes (no-load runtime)
- Item Weight: 6.2 Pounds
- Cutting Width: 12 Inches
- Speed: 9400 RPM
- Adjustable Pole Length: 44-58 Inches
- Assembly Required: Yes
- UPC: 810147640898
8. Warranty and Support
BEEDECK offers a 12-month warranty for the motor and battery of this product. For any questions, concerns, or assistance, please contact our customer service team. We provide 24-hour friendly customer service to address your after-sales needs.
For further support, please visit the BEEDECK Store on Amazon.