
1. Introduction
This manual provides essential information for the safe and efficient operation and maintenance of your agreilduite Fiber Optic Arc Fusion Splicer. This device is engineered for precise splicing of fiber optic cables, featuring automatic alignment and focus, a digital LCD screen, and compatibility with various fiber types including SM, MM, DS, and NZDS. Please read this manual thoroughly before using the splicer to ensure optimal performance and safety.
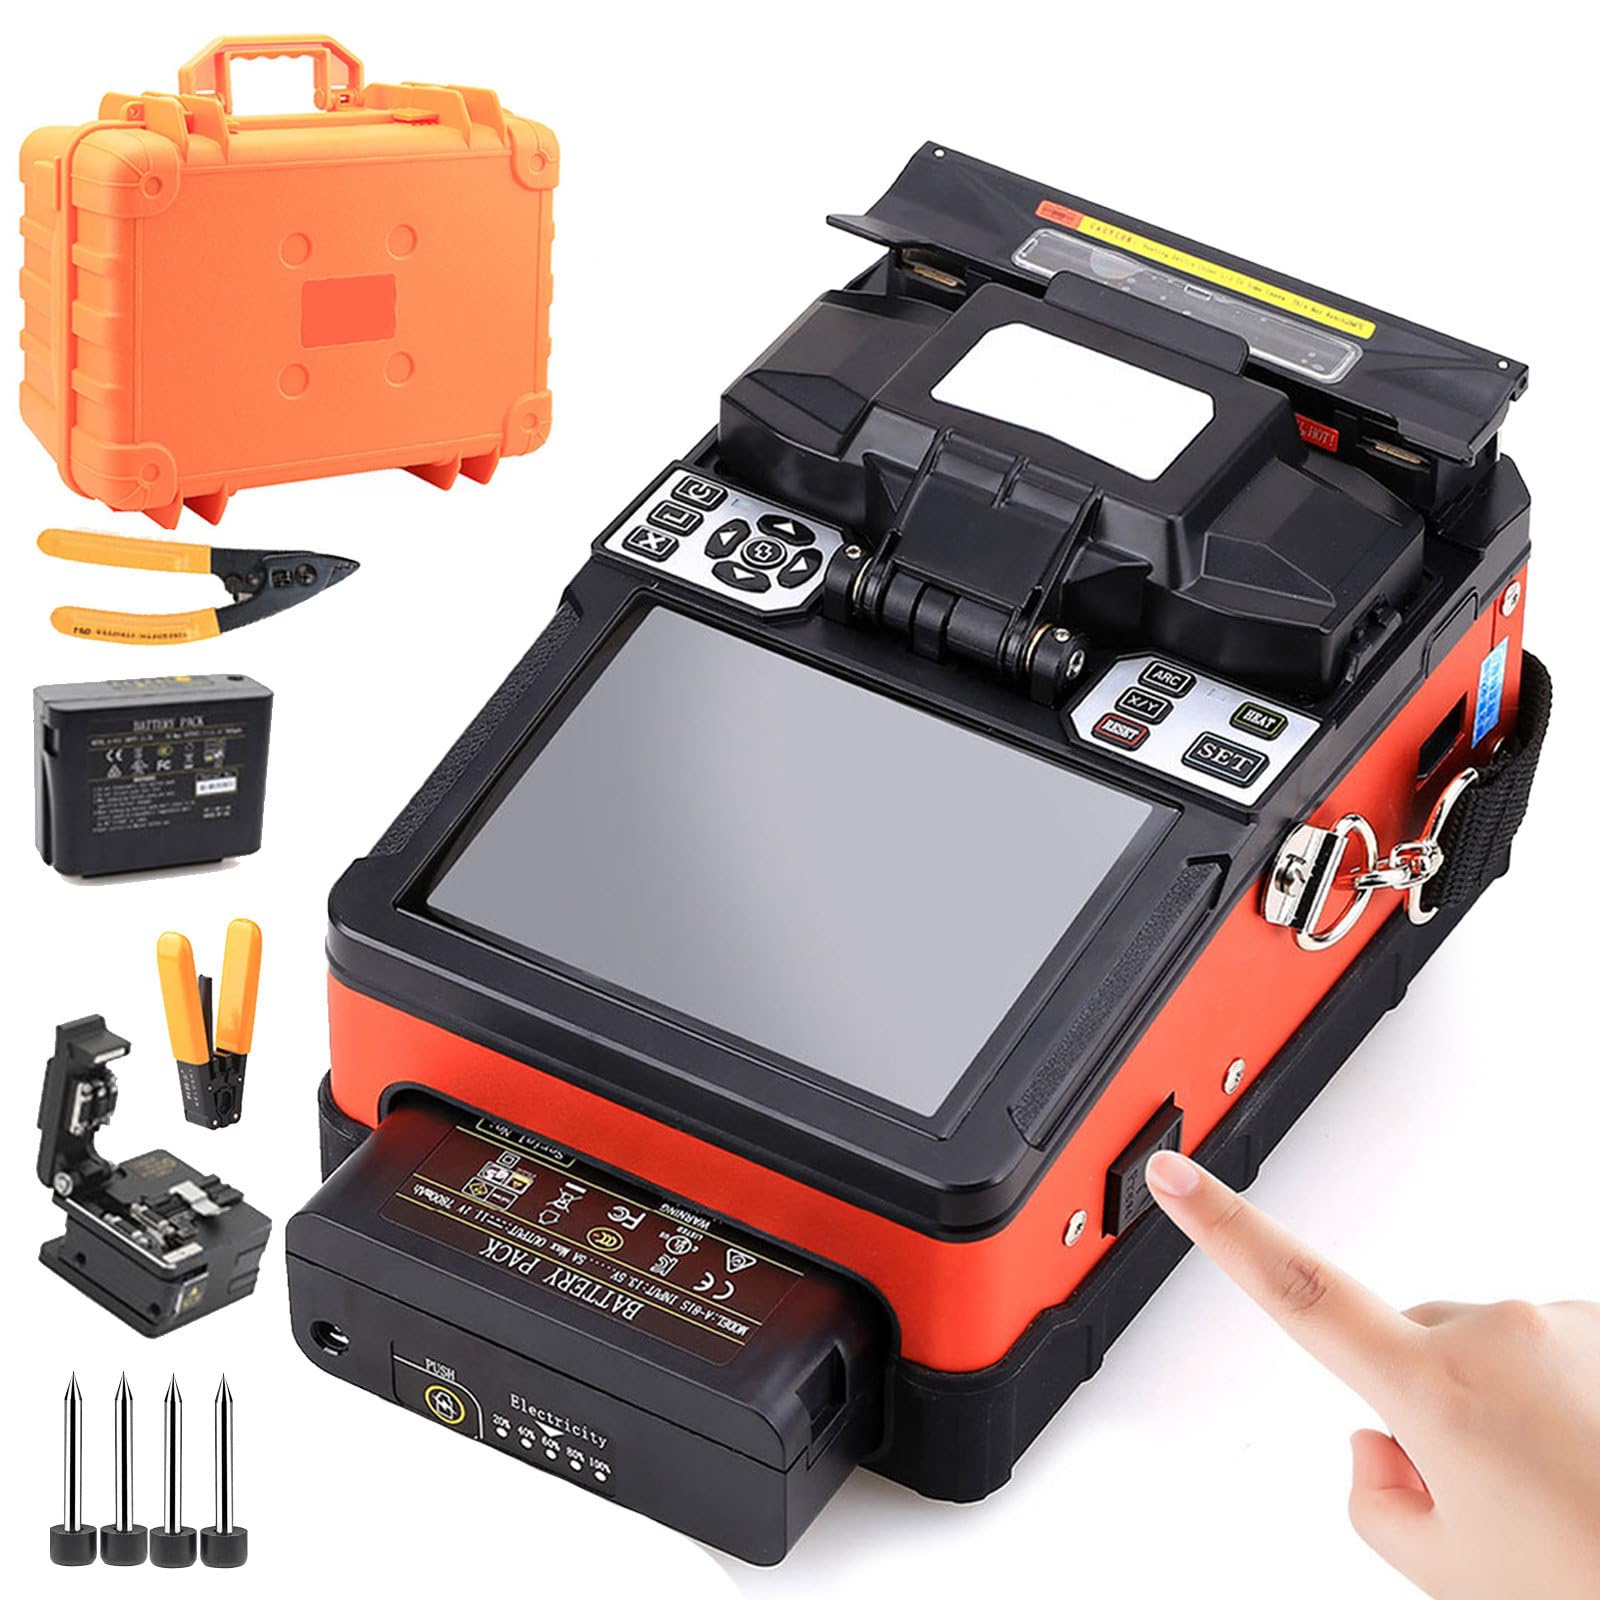
Image 1: agreilduite Fiber Optic Arc Fusion Splicer. This image displays the splicer with its protective lid open, revealing the fiber holders, electrodes, and the internal mechanism. The screen is visible on the left side of the device.
2. Safety Information
- Always operate the splicer in a clean, dry, and well-ventilated environment.
- Do not expose the device to rain, moisture, or extreme temperatures.
- Ensure the power adapter and battery are used according to specifications to prevent electrical hazards.
- Avoid direct eye exposure to the arc discharge during splicing, as it emits intense light.
- Handle optical fibers with care. Fiber shards are extremely sharp and can cause injury. Dispose of fiber scraps properly.
- Only use approved replacement parts and accessories.
- Keep the device away from children and unauthorized personnel.
3. Setup and Package Contents
3.1 Package List
Verify that all items listed below are present in your package:
- Automatic Focus Fusion Splicer (1)
- Spare Electrodes (2 pairs)
- Wire Stripper (1)
- Fiber Stripper (1)
- Fiber Cleaver (1)
- Shoulder Strap (1)
- Battery (1)
- Fiber 2-in-1 Tool (1)
- Cleaning Tool (1)
- Tweezers (1)
- Folding Stool (1)
- Carrying Case (1)
- Power Adapter (1)
- Alcohol Bottle (empty) (1)
- Fiber Optic Tray (1)
- Cutting Knife Bag (1)

Image 2: Product List. This image visually confirms the contents of the package, including the splicer, various tools like strippers and cleavers, spare electrodes, battery, power adapter, and carrying case.
3.2 Battery Installation and Charging
The splicer is equipped with a rechargeable battery. Before initial use, ensure the battery is fully charged.
- Locate the battery compartment on the side of the splicer.
- Insert the battery pack, ensuring it clicks securely into place.
- Connect the external adapter to the splicer's power input and then to a power outlet. The battery requires approximately 3.5 hours for a full charge, providing over 200 continuous splicing/heating cycles.
- To remove the battery, press the 'PRESS TO POP UP' button as indicated on the device.

Image 3: Large Capacity Rechargeable Battery. This image illustrates the battery pack and its insertion point on the splicer, along with details of the external power adapter.
4. Operating Instructions
4.1 Fiber Preparation
Proper fiber preparation is crucial for successful splicing.
- Using the wire stripper and fiber stripper, carefully remove the outer jacket and coating layers of the fiber optic cable to expose the bare fiber.
- Clean the exposed bare fiber with an alcohol wipe (not included) and the cleaning tool to remove any contaminants.
- Use the fiber cleaver to achieve a precise, clean, and perpendicular fiber end face. The cut length should be 8-16mm for coating layers below 250um, and 16mm for coating layers 250-1000um.
4.2 Splicing Process
The splicer automates most of the splicing process:
- Open the splicer lid and place the prepared fibers into the V-grooves, ensuring the fiber ends are positioned correctly between the electrodes. The built-in LED lighting at the welding position assists in accurate placement.
- Close the lid. The splicer will automatically initiate the alignment process, using its automatic focus and core alignment features.
- Once aligned, the arc fusion process will begin, typically completing in 7 seconds. The 5-inch LCD screen provides real-time magnification (up to 300 times) for monitoring the connection process and inspecting the fiber ends.
- After splicing, the heat shrink sleeve is applied over the splice point and placed in the heating oven. The heating process typically takes 18 seconds (heating time and temperature are adjustable).
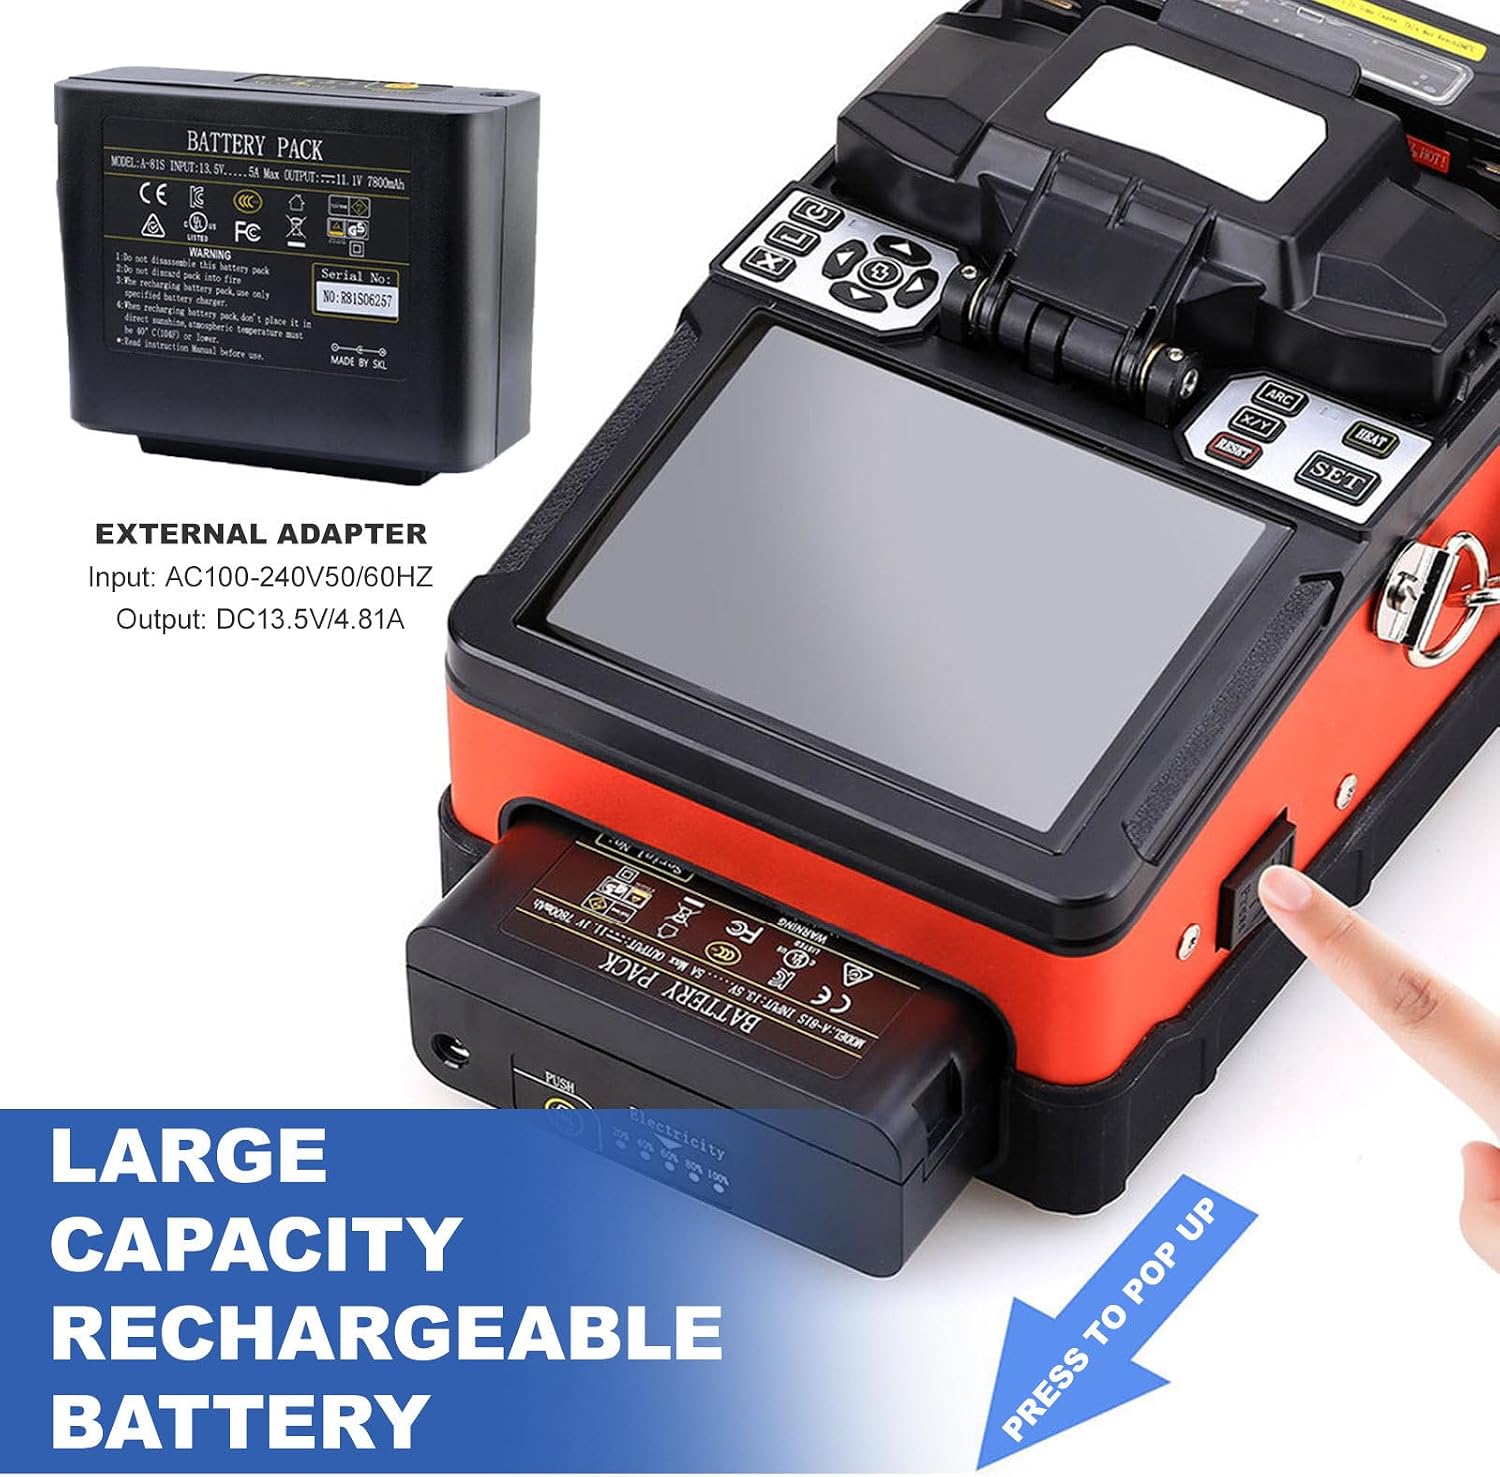
Image 4: Fully Automatic Fiber Splicing. This image provides a detailed view of the splicing chamber, highlighting the LED lighting and the electrodes where the fiber fusion occurs. A note regarding electrode replacement is also visible.

Image 5: Real-Time Fiber Amplification. This image shows the splicer's LCD screen interface, displaying magnified views of fiber ends during inspection and after splicing, along with splicing loss measurements.
4.3 Applicable Fiber Types and Splicing Loss
The splicer is compatible with a wide range of fiber types:
- SM (Single-Mode): G.652 & G.657
- MM (Multi-Mode): G.651
- DS (Dispersion-Shifted): G.653
- NZDS (Non-Zero Dispersion-Shifted): G.655
- Custom fiber types
Typical splicing loss values are:
- SM: 0.02dB
- MM: 0.01dB
- DS/NZDS: 0.04dB
5. Maintenance
5.1 Electrode Replacement
The electrodes are critical components for arc fusion. Their performance degrades over time.
- When the electrodes have been used for approximately 3000 times, the welding loss will increase significantly.
- It is recommended to replace the electrodes at this interval to maintain optimal splicing performance and prevent increased splicing loss.
- Refer to the 'PRODUCT LIST' image (Image 2) for the appearance of spare electrodes.
5.2 Cleaning
Regular cleaning ensures the longevity and accuracy of the splicer.
- Use the provided cleaning tool and an alcohol wipe to clean the V-grooves, objective lenses, and the splicing chamber regularly.
- Ensure no dust or fiber debris accumulates on optical components.
5.3 Battery Care
- Store the battery in a cool, dry place when not in use.
- Avoid fully discharging the battery frequently to prolong its lifespan.
- If storing for extended periods, charge the battery to approximately 50% capacity.
6. Troubleshooting
This section addresses common issues you might encounter.
- High Splicing Loss: Check electrode condition and replace if necessary (refer to Section 5.1). Ensure fiber ends are clean and properly cleaved. Verify fiber type settings.
- Splicer Not Powering On: Check battery charge level. Ensure the power adapter is correctly connected if operating on external power.
- Fiber Not Aligning: Ensure V-grooves are clean. Verify fiber preparation (stripping and cleaving).
- Heating Element Not Working: Check for any error messages on the LCD screen. Ensure the heat shrink sleeve is correctly placed.
For issues not covered here, please refer to the support information in Section 8.
7. Specifications
Detailed technical specifications for the agreilduite Fiber Optic Arc Fusion Splicer:
| Feature | Specification |
|---|---|
| Product Name | Optical Fiber Fusion Splicer |
| Applicable Fiber | SM (G.652&G.657), MM (G.651), DS (G.653), NZDS (G.655) and custom fiber types |
| Fiber Diameter | Cladding diameter 80~150um, coating layer diameter 100~1000um |
| Cut Length | Coating layer below 250um: 8~16mm; coating layer 250~1000um: 16mm |
| Splicing Loss | 0.02dB (SM) / 0.01dB (MM) / 0.04dB (DS/NZDS) |
| Splicing Loss Storage | Built-in memory supports saving 5000 latest connection results |
| Typical Splicing Time | 7 seconds |
| Typical Heating Time | 18 seconds (adjustable) |
| Built-in Battery | Can continuously weld and heat for no less than 200 times per charge |
| Operating Temperature | -10~+50°C |
| Humidity | <95%RH (no condensation) |
| Working Altitude | 0~5000m |
| Maximum Wind Speed | 15m/s |
| Package Dimensions | 17.72 x 13.78 x 11.81 inches |
| Item Weight | 14.3 pounds |
| Manufacturer | agreilduite |
| ASIN | B0D8Q7JX69 |
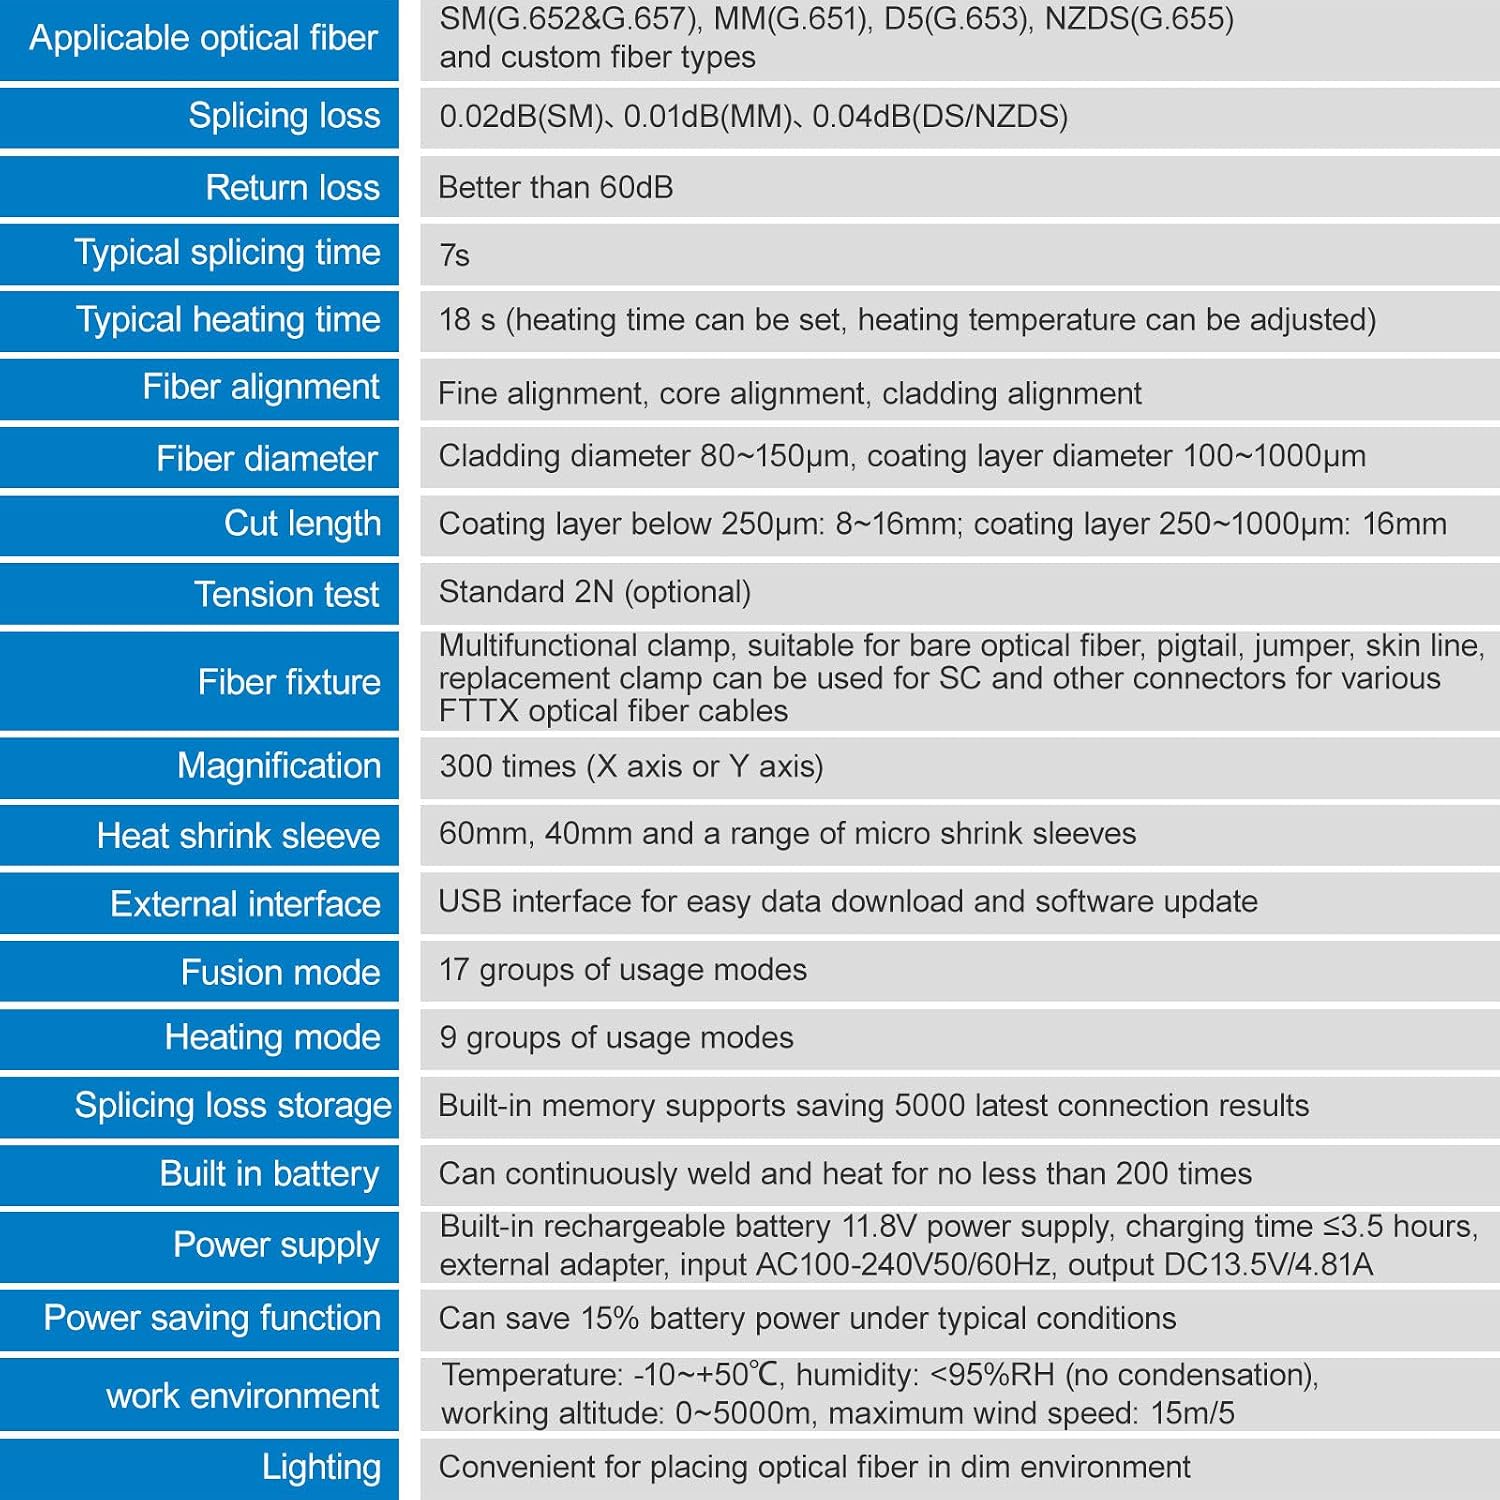
Image 6: Specifications Table. This image presents a comprehensive table detailing various technical specifications of the fusion splicer, including fiber types, splicing loss, and environmental conditions.
8. Warranty and Support
For warranty information, technical support, or service inquiries, please contact the manufacturer or your point of purchase. Keep your purchase receipt as proof of purchase for any warranty claims.