
Introduction
The Geevon Wireless Weather Station (Model 24258) is a comprehensive indoor and outdoor monitoring system designed to provide accurate and real-time weather information. Featuring a large, high-definition color VA display, it offers clear visibility of time, date, temperature, humidity, barometric pressure, and weather forecasts. This device is equipped with an atomic clock for precise timekeeping and supports multiple remote sensors for monitoring various locations.

Image: The main display unit of the Geevon Weather Station alongside its wireless outdoor sensor.
What's in the Box
- 1 x Geevon Atomic Clock Weather Station (Main Unit)
- 1 x TX19 Remote Outdoor Sensor
- 1 x AC Power Adapter
- 1 x User Instructions Manual
Setup
1. Powering the Main Unit and Sensor
The main unit can be powered by either the included AC power adapter or 3 AAA batteries (not included). The outdoor sensor requires 2 AAA batteries (not included).
- Install Batteries in Outdoor Sensor: Open the battery compartment on the TX19 Remote Outdoor Sensor and insert 2 AAA batteries, ensuring correct polarity. Close the compartment securely.
- Install Batteries in Main Unit (Optional for backup): Open the battery compartment on the back of the main unit and insert 3 AAA batteries, ensuring correct polarity. This provides backup power and temporary backlight when not plugged in.
- Connect AC Power Adapter: Plug the AC power adapter into the main unit's power port and then into a standard electrical outlet. The display will light up.
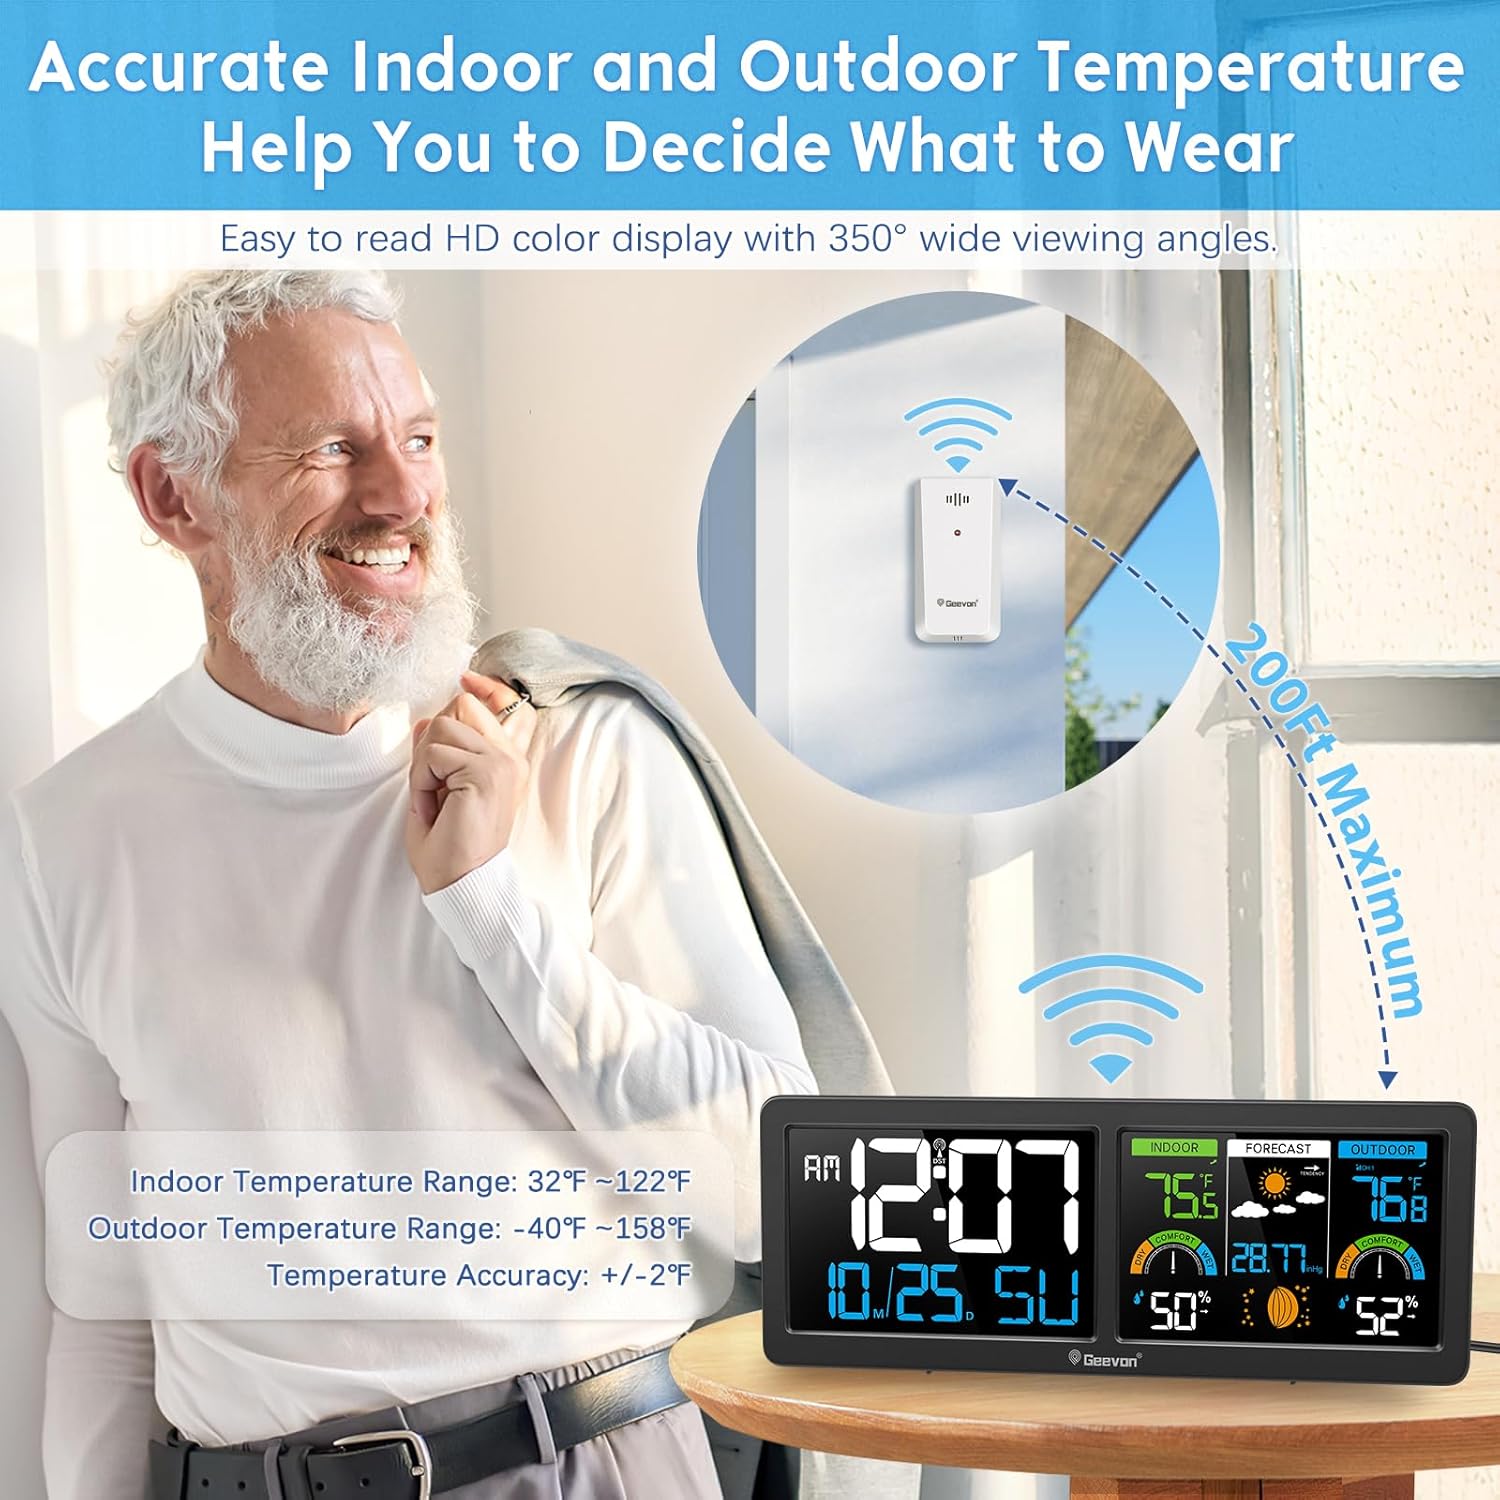
Image: Illustration showing the wireless outdoor sensor placed outside, transmitting data to the main unit.
2. Sensor Placement
Place the TX19 Remote Outdoor Sensor in a location that is protected from direct sunlight and precipitation for accurate readings. Ensure it is within 200 feet (60 meters) of the main unit for optimal wireless transmission. Avoid placing it near large metal objects or strong electromagnetic interference.

Image: Detailed view of the weather station's display and rear panel, highlighting buttons and features.
For a visual guide on setting up your Geevon Weather Station, please watch the official setup video below:
Video: Official setup guide for the Geevon 24258 Weather Station with Atomic Clock, demonstrating battery installation and initial synchronization.
Operating Instructions
1. Atomic Clock and Time Setting (WWVB)
The weather station automatically synchronizes with the WWVB atomic clock signal for precise time and date. Ensure you set the correct time zone and enable Daylight Saving Time (DST) if applicable.
- The clock has 7 time zones: AST(-4), EST(-5), CST(-6), MST(-7), PST(-8), AKST(-9), HST(-10).
- Leave the clock plugged in overnight after initial setup; it will automatically sync to the correct time during the night.
- The backlight will temporarily turn off when receiving the RCC signal.

Image: Visual representation of the weather station's atomic clock feature, showing signal reception from the WWVB station in the USA.
2. Temperature and Humidity Monitoring
The large color VA display provides comprehensive information about indoor and outdoor temperature and humidity, including Max/Min records and trend arrows.
- High/Low Temperature Alert: Customize temperature alerts to be notified of significant changes.
- Air Comfort Indicator: A visual indicator shows the current air comfort level (Dry, Comfort, Wet) based on humidity.
- The unit supports up to 3 remote sensors for monitoring different locations (additional sensors sold separately).
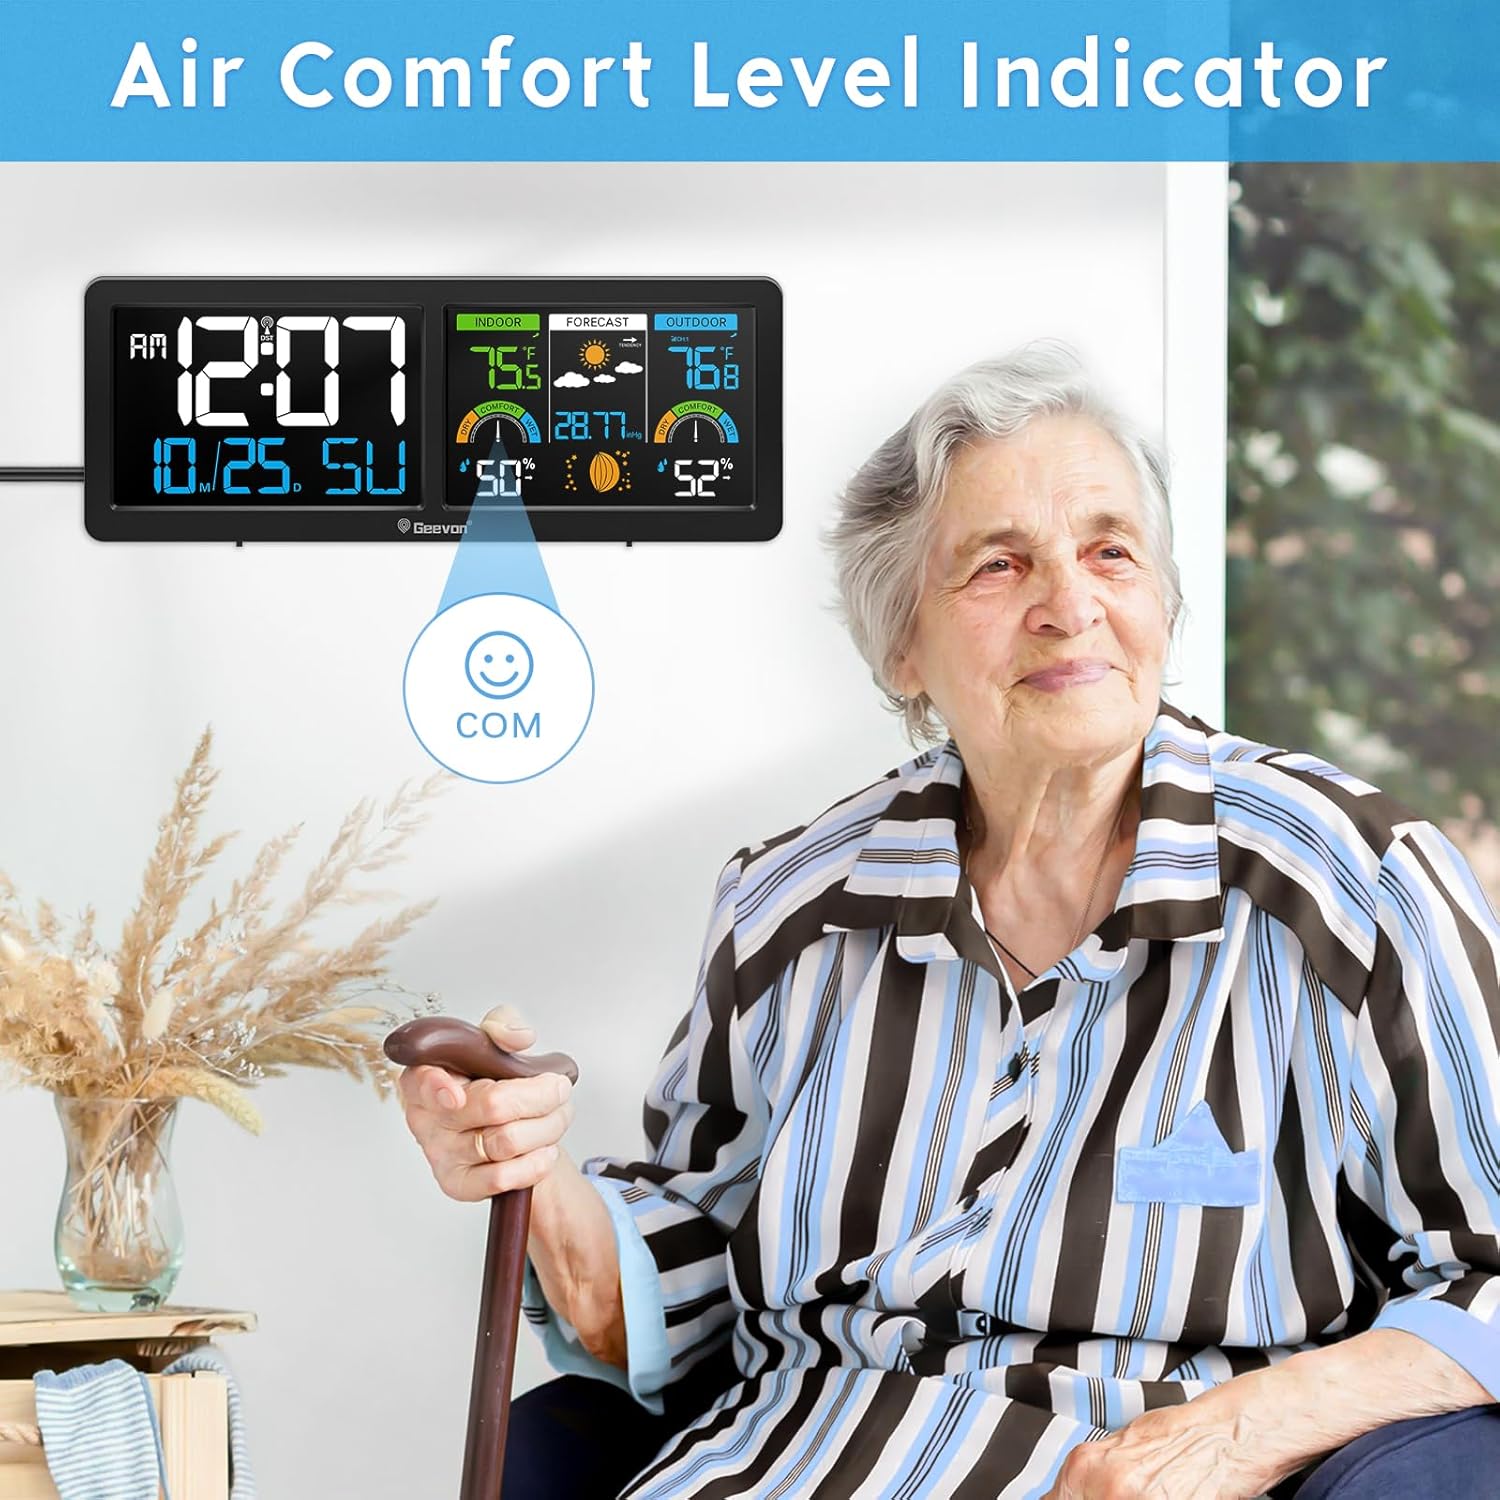
Image: The weather station display showing the air comfort level indicator, with a happy face icon for 'Comfort'.
3. Weather Forecast
The weather station predicts the weather conditions for the next 12 hours based on changes in atmospheric pressure. Icons will display Sunny, Partly Sunny, Cloudy, or Rainy conditions.
4. Alarm Clock with Snooze
The unit functions as an alarm clock with a 5-minute snooze function.

Image: The weather station displaying the alarm time and snooze button icon, with a person sleeping in the background.
5. Adjustable Backlight
The display offers 3 levels of adjustable brightness (High, Medium, Low) when plugged in with the AC power cord. This ensures readability day or night, indoors or outdoors.
- If using only AAA batteries, the backlight will illuminate temporarily for 15 seconds to conserve power.

Image: Three panels illustrating the weather station's display at different backlight levels: Off, Low, and High.
See the adjustable backlight feature in action:
Video: Demonstration of the Geevon Color Display Weather Station's adjustable backlight feature, showing transitions between brightness levels.
Maintenance
- Cleaning: Wipe the display and unit with a soft, dry cloth. Do not use abrasive cleaners or solvents.
- Battery Replacement: Replace batteries in both the main unit and outdoor sensor when the low battery indicator appears on the display. Ensure to use fresh AAA batteries.
- Sensor Protection: Periodically check the outdoor sensor for debris or obstructions that might affect its readings. Ensure it remains protected from extreme weather conditions.
Troubleshooting
| Problem | Possible Cause | Solution |
|---|---|---|
| No display or dim display. | No power or low batteries. | Ensure AC adapter is securely plugged in. Replace AAA batteries in main unit. |
| Outdoor temperature/humidity not displayed or inaccurate. | Sensor out of range, low sensor batteries, or interference. | Move sensor closer to main unit. Replace batteries in outdoor sensor. Reduce interference from other electronic devices. |
| Atomic clock not syncing. | Weak WWVB signal, incorrect time zone, or interference. | Ensure correct time zone is set. Place unit near a window overnight. Avoid electronic interference. |
| Weather forecast inaccurate. | Unit needs time to learn local atmospheric pressure. | Allow 7-10 days for the unit to calibrate and provide accurate forecasts. |
Specifications
- Product Dimensions: 1 x 11.2 x 4.2 inches; 1 Pound
- Item Model Number: 24258
- Power Source: Corded Electric & Battery Powered (3 AAA batteries required for main unit, 2 AAA batteries for sensor)
- Display Type: Large Color VA Display
- Special Features: Large Display, Customizable Alert, Alarm, Adjustable Brightness, Atomic Clock, Barometric Pressure, Moon Phases, Comfort Indicator
- Connectivity Technology: Wireless (433 MHz or 868 MHz)
- Indoor Temperature Range: 32°F ~ 122°F
- Outdoor Temperature Range: -40°F ~ 158°F
- Temperature Accuracy: +/- 2°F
- Wireless Transmission Range: Up to 200ft/60m
Warranty and Support
Geevon offers a 30-day money-back guarantee, a 12-month warranty, and lifetime consulting services for this product. For additional remote sensors (ASIN: B0BMTNC9DR/B0C3VSXW7F/B0963DKBQP), please visit our store.
For further assistance or inquiries, please contact Geevon customer support.


