Introduction
Thank you for choosing the BRINKS Smart Electronic Door Lock with Deadbolt. This manual provides essential information for the proper installation, operation, and maintenance of your new security device. Please read these instructions carefully before beginning installation or use to ensure optimal performance and security.

Figure 1: BRINKS Smart Electronic Door Lock with Deadbolt, Matte Black.
Key Features
- Advanced Security: PRO-GUARD technology, anti-tamper alarm, anti-pry shield, and hardened steel pin for robust protection.
- Multiple Access Options: Up to 50 fingerprints, 50 user codes, 10 single-use codes, and traditional key access.
- Convenient Operation: One-touch locking and automatic relocking capabilities.
- Durable Design: ANSI Grade 3 certified and weather-resistant construction.
- Extended Battery Life: Over 24 months of power from 4 AA batteries with low battery indicators.

Figure 2: Overview of BRINKS Smart Electronic Door Lock features.
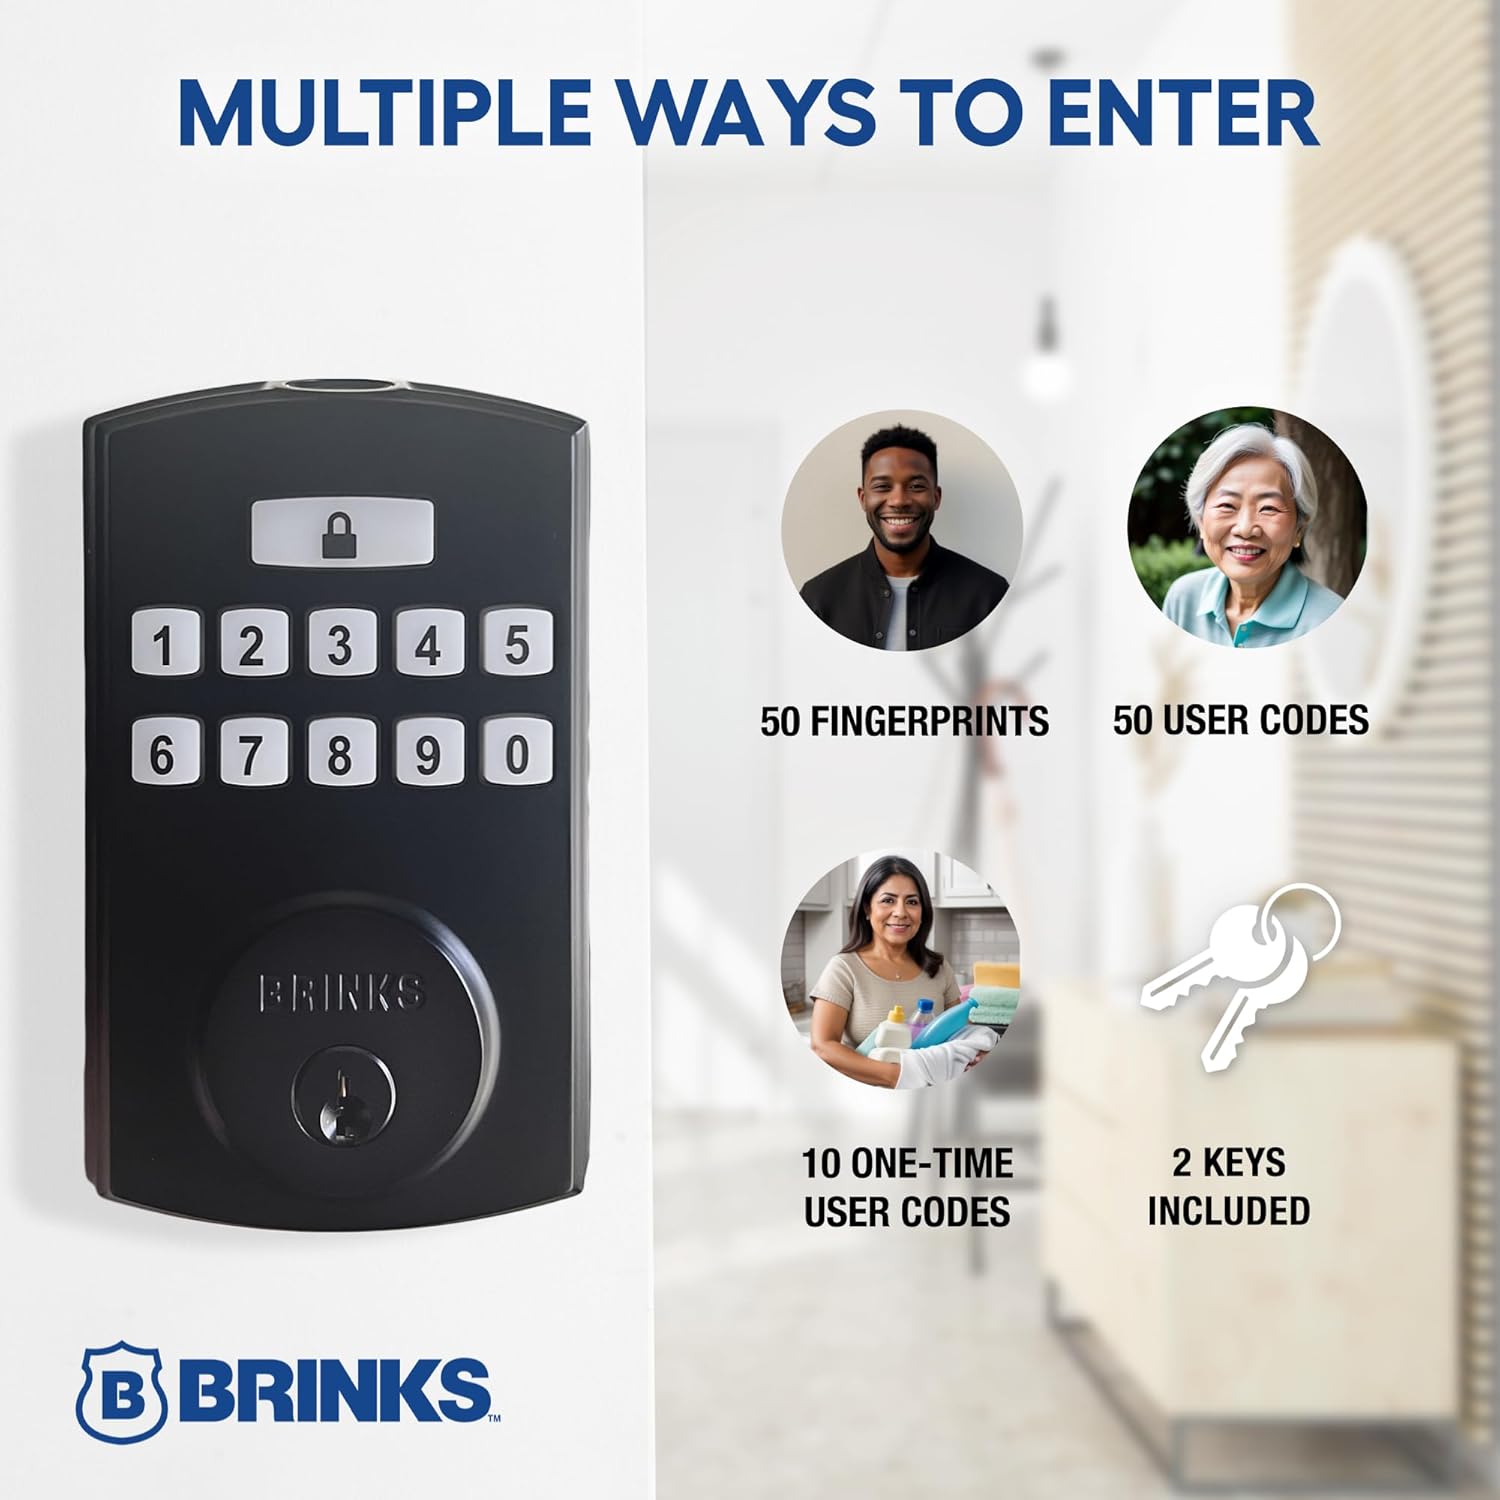
Figure 3: Multiple secure access options for the deadbolt.
Video 1: Official video demonstrating the features and functionality of the BRINKS Fingerprint and Keypad Electronic Deadbolt, including various access methods and security aspects.
Setup and Installation
Door Compatibility
The BRINKS Smart Electronic Door Lock is designed for effortless installation on most standard doors. It fits door thicknesses from 1-3/8" to 1-3/4" and features an adjustable latch for 2-3/8" or 2-3/4" backsets. No additional wiring is required, making it suitable for DIY installation with a Phillips screwdriver.

Figure 4: Door compatibility and dimensions.
Battery Installation
The lock requires 4 AA batteries for operation. To install, remove the battery cover on the interior unit, insert the batteries according to the polarity indicators, and replace the cover. Ensure batteries are fresh for optimal performance and to avoid low battery warnings.
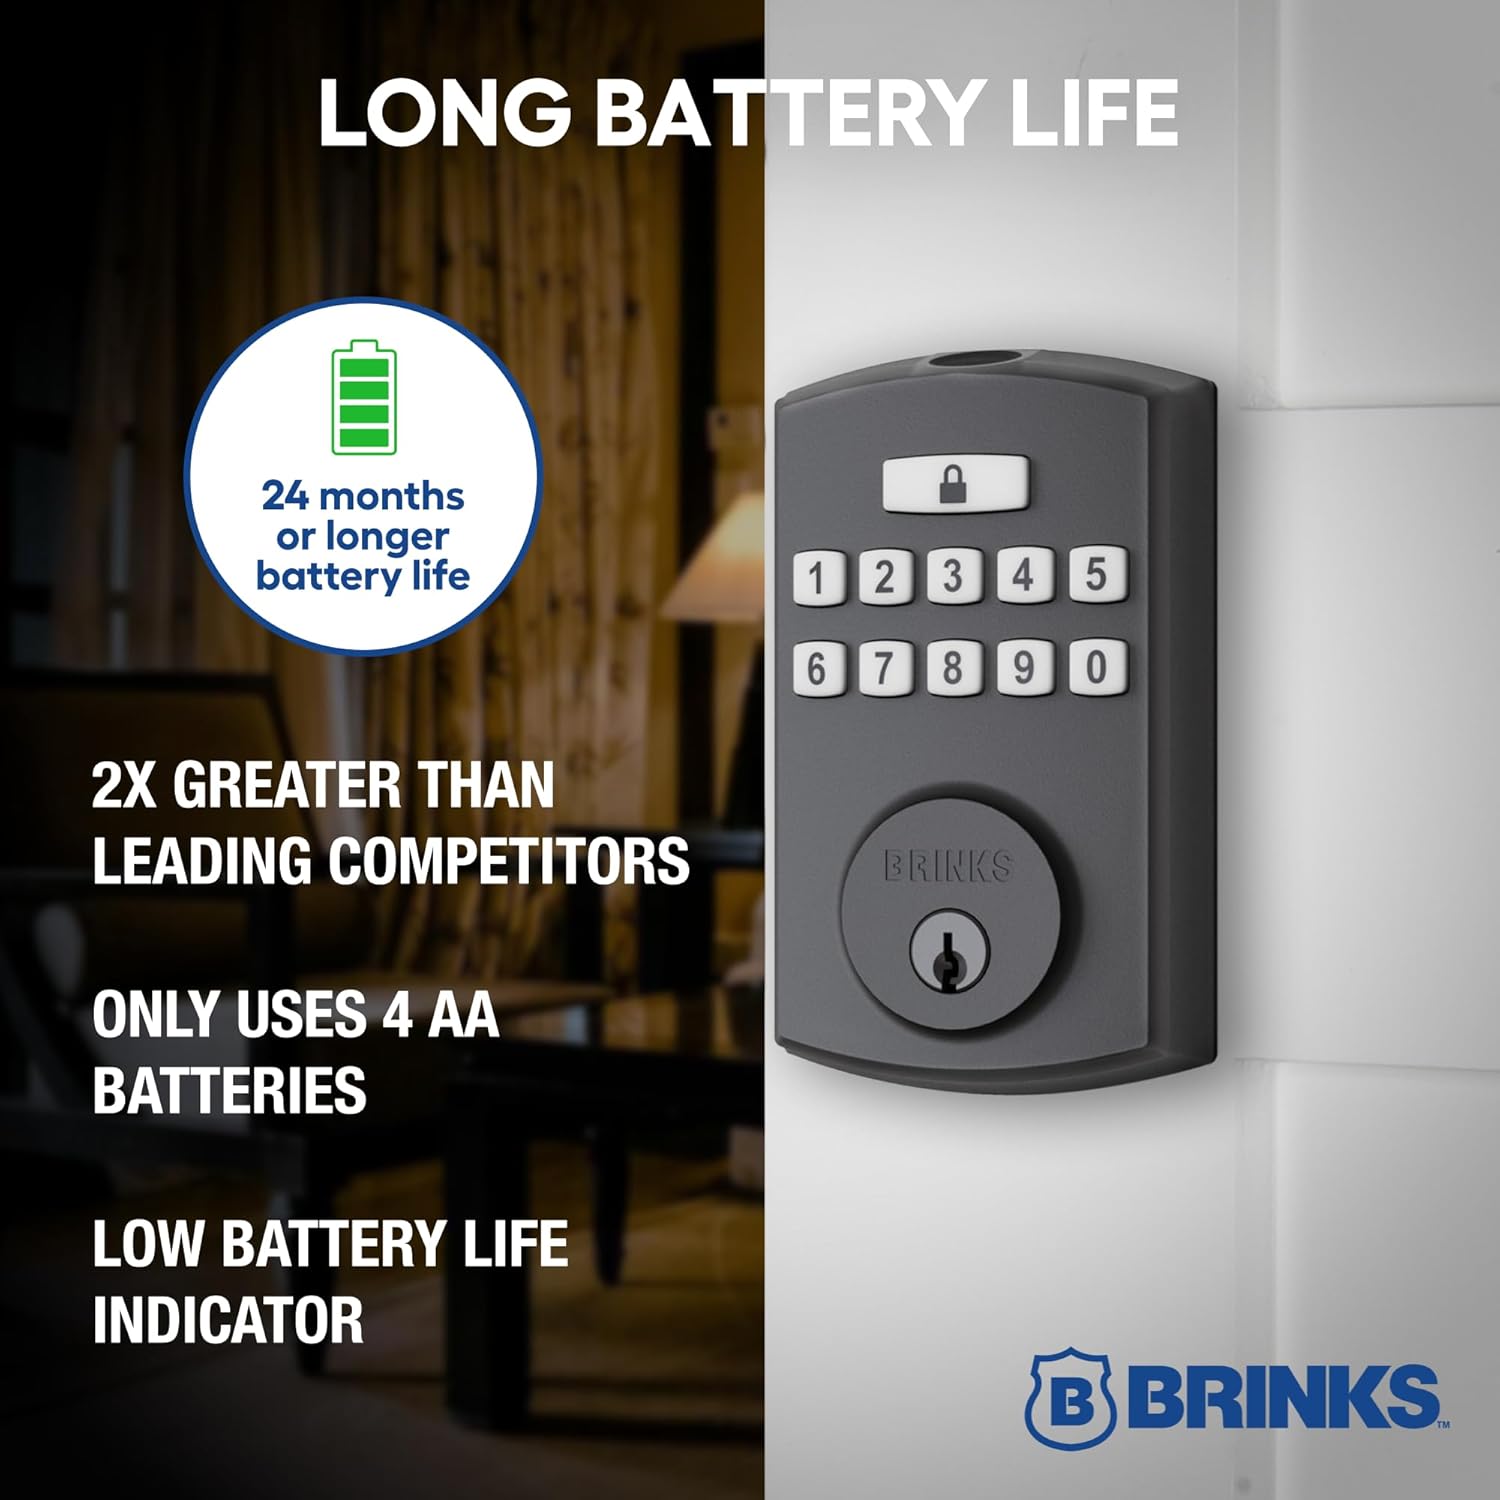
Figure 5: Battery life and power source.
Initial Programming
Follow the detailed instructions provided in the included quick start guide for initial programming. This typically involves a 'key dance' sequence to set up master codes, user codes, and register fingerprints. It is recommended to set up at least one user code and one fingerprint immediately after installation.
Operating Instructions
Keypad Entry
- Press the lock button (padlock icon).
- Enter your programmed user code.
- Press the lock button again to unlock the deadbolt.
Fingerprint Entry
- Place your registered finger on the fingerprint sensor located at the top of the keypad unit.
- The lock will verify your fingerprint and unlock the deadbolt.
Manual Locking/Unlocking
From the interior, the deadbolt can be manually locked or unlocked by rotating the thumb turn. From the exterior, use the physical key provided in the event of battery depletion or if preferred.
One-Touch Locking
To lock the door from the exterior, simply press the lock button (padlock icon) on the keypad. The deadbolt will extend, securing the door.
Automatic Relocking
The lock can be configured to automatically relock after a set period once it has been unlocked. Refer to the programming guide for instructions on enabling and adjusting this feature.

Figure 6: Installed BRINKS Smart Electronic Door Lock on a door.
Maintenance
Battery Replacement
The lock is equipped with a low battery indicator. When the batteries are low, replace all 4 AA batteries promptly to ensure continuous operation. Refer to the 'Battery Installation' section for guidance.
Cleaning
Clean the keypad and fingerprint sensor regularly with a soft, dry cloth. Avoid using abrasive cleaners or solvents, as these can damage the finish and electronic components.
Troubleshooting
- Lock Not Responding: Check battery levels and replace if necessary. Ensure the lock is properly installed and aligned with the strike plate.
- Fingerprint Reader Issues: Ensure your finger is clean and dry. Try re-registering your fingerprint if issues persist. Multiple attempts may be needed in some cases.
- Keypad Code Not Working: Verify the code is entered correctly. Ensure the lock button is pressed before and after entering the code. Re-program the user code if needed.
- Deadbolt Jams: Ensure the door frame and strike plate are properly aligned. Any binding or rubbing can prevent the deadbolt from extending or retracting smoothly.
- Programming Difficulty: Refer to the detailed programming instructions in your quick start guide. If issues persist, contact BRINKS customer support for assistance.
Specifications
| Feature | Detail |
|---|---|
| Brand | BRINKS |
| Model Name | 4392-122 |
| Lock Type | Deadbolt, Keypad |
| Special Feature | Anti-Bump |
| Material | Alloy Steel |
| Color | Matte Black |
| Item Dimensions (L x W x H) | 1.1 x 3 x 5 inches |
| Item Weight | 2.96 pounds |
| Power Source | 4 AA Batteries (not included) |
| Control Method | Touch, Hand Control, Mechanical Knob |
| Included Components | Installation Hardware |

Figure 7: Available finishes for the BRINKS Electronic Deadbolt.
Warranty Information
BRINKS products are known for their durability and security. This product is backed by a Lifetime Warranty, as indicated on the product packaging. For specific terms and conditions of the warranty, please refer to the documentation included with your purchase or contact BRINKS customer support.
Customer Support
Should you require assistance with installation, programming, or troubleshooting, please contact BRINKS customer service. Contact information can typically be found in the product packaging or on the official BRINKS website. Have your model number (4392-122) ready when contacting support.


