
1. Introduction
The Ubiquiti UniFi G5 Bullet camera is a versatile 2K HD PoE (Power over Ethernet) camera designed for both indoor and outdoor surveillance. It features a durable bullet-shaped form factor, advanced imaging capabilities, and seamless integration with the UniFi Protect ecosystem for comprehensive security management. This manual provides essential information for the proper installation, operation, and maintenance of your UniFi G5 Bullet camera.
2. What's in the Box
Verify that all components are present in your package:
- UniFi G5 Bullet Camera
- Mounting Base
- Mounting Screws (x3)
- Wall Anchors (x3)
- Cable Gland (for Ethernet cable waterproofing)
- Quick Start Guide

Figure 2.1: Included components for the UniFi G5 Bullet camera, showing the camera body, mounting base, screws, anchors, and cable gland.
3. Product Overview
Familiarize yourself with the physical features and connections of your UniFi G5 Bullet camera.
3.1 Camera Views

Figure 3.1: Front-side view of the UniFi G5 Bullet camera, highlighting its compact bullet design.
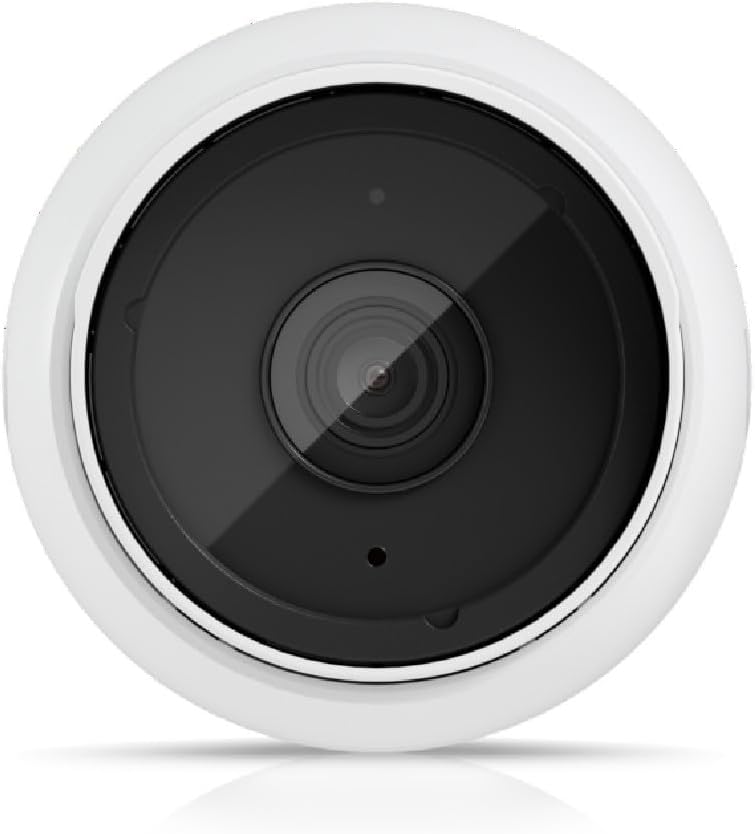
Figure 3.2: Close-up front view of the camera lens, showing the integrated IR LEDs for night vision.

Figure 3.3: Side profile of the UniFi G5 Bullet camera, illustrating its adjustable mounting mechanism.
3.2 Labeled Features and Dimensions

Figure 3.4: Detailed diagram showing key features such as the microphone, IR LED, 2K (4MP) 30 FPS resolution, 84.4° viewing angle, light sensor, 100 MbE PoE RJ45 port, reset button, weatherproof IP55 rating, and adjustable three-axis mount for wall, ceiling, or pole installation. Dimensions are also indicated.
3.3 Rear Connections

Figure 3.5: Rear view of the camera, displaying the PoE IN port for power and data, and the reset button. Model number and power specifications are also visible.
4. Setup & Installation
4.1 Mounting the Camera
- Select a suitable mounting location (wall, ceiling, or pole) that provides the desired field of view and is within reach of an Ethernet cable.
- Use the included mounting base as a template to mark drill holes.
- Drill pilot holes and insert the wall anchors if mounting on drywall or masonry.
- Secure the mounting base to the surface using the provided screws.
- Attach the camera to the mounting base and adjust its angle using the three-axis mount for optimal positioning.
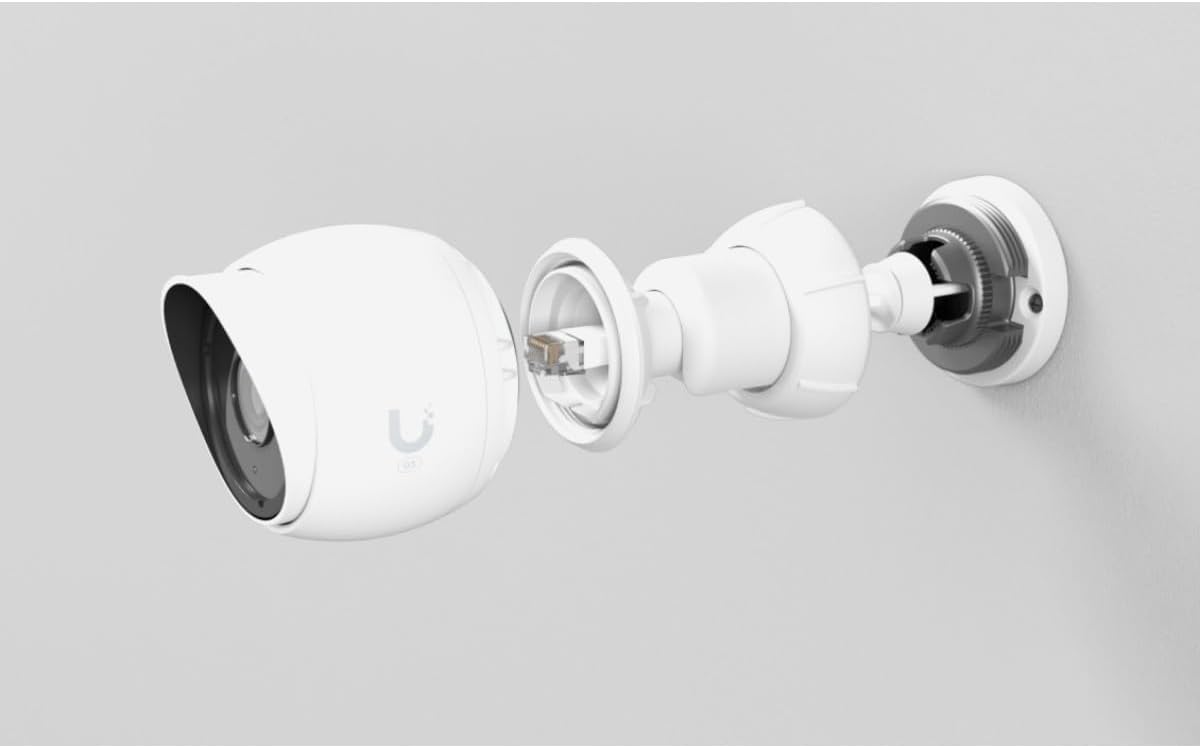
Figure 4.1: Visual representation of the camera's components during the mounting process, showing how the camera attaches to the base and the base to the surface.
4.2 Power over Ethernet (PoE) Connection
The UniFi G5 Bullet camera is powered via Power over Ethernet (PoE). It requires a PoE switch or injector (not included) that complies with 802.3af standards.
- Thread the Ethernet cable through the included cable gland before terminating the RJ45 connector.
- Connect the terminated Ethernet cable to the PoE IN port on the rear of the camera.
- Ensure the cable gland is firmly seated to maintain the IP67 waterproof rating, especially for outdoor installations.
- Connect the other end of the Ethernet cable to a PoE-enabled port on your UniFi switch or PoE injector.
4.3 Initial Setup with UniFi Protect
To manage your UniFi G5 Bullet camera, you will need a UniFi Protect controller (e.g., UniFi Dream Machine Pro, Cloud Key Gen2 Plus). Ensure your controller is set up and accessible.
- Open the UniFi Protect application or access the UniFi Protect interface via a web browser.
- The system should automatically detect new UniFi devices on the network. Follow the on-screen prompts to adopt the UniFi G5 Bullet camera.
- Once adopted, the camera will appear in your device list, and you can begin configuring its settings.
5. Operating Instructions
5.1 Accessing Live View and Recordings
From the UniFi Protect interface, you can view live feeds from your camera, review recorded footage, and manage events. The intuitive interface allows for easy navigation through your surveillance data.
5.2 Camera Settings
The UniFi Protect software provides extensive options to customize your camera's performance:
- Image Adjustments: Control brightness, contrast, saturation, and sharpness.
- Optical Zoom: Utilize the camera's optical zoom feature to focus on specific areas without losing image quality.
- Microphone: Adjust microphone sensitivity or disable it as needed.
- Orientation: Adjust image orientation if the camera is mounted in an unconventional position.
5.3 Smart Detections
The UniFi G5 Bullet supports advanced smart detection features to enhance your surveillance:
- Person Detection: Identifies human figures within the camera's field of view.
- Vehicle Detection: Recognizes vehicles, helping to filter out irrelevant motion events.
These detections can be configured to trigger alerts or recordings, providing more relevant security notifications.
5.4 Night Vision
Equipped with IR LEDs, the camera provides clear night vision up to 30 feet, ensuring continuous surveillance even in low-light or no-light conditions.
6. Maintenance
To ensure optimal performance and longevity of your UniFi G5 Bullet camera, follow these maintenance guidelines:
- Cleaning: Regularly clean the camera lens and housing with a soft, damp cloth. Avoid abrasive cleaners or solvents that could damage the surface or lens coating.
- Firmware Updates: Keep your UniFi Protect controller and camera firmware updated to the latest versions to benefit from new features, security enhancements, and bug fixes. Updates are managed through the UniFi Protect interface.
- Environmental Protection: While designed for outdoor use with an IP55 rating, ensure the camera is installed in a location that minimizes direct exposure to extreme weather conditions where possible, to extend its lifespan.
7. Troubleshooting
If you encounter issues with your UniFi G5 Bullet camera, consider the following troubleshooting steps:
- No Power/Connectivity: Verify the Ethernet cable is securely connected to both the camera and the PoE source. Ensure the PoE source is active and providing power. Check the network connection status in UniFi Protect.
- Camera Not Appearing in UniFi Protect: Confirm the camera is powered on and connected to the same network as your UniFi Protect controller. Try restarting the camera by briefly disconnecting and reconnecting its PoE cable. Ensure the UniFi Protect controller is running and up-to-date.
- Poor Image Quality: Check the camera lens for dirt or obstructions and clean if necessary. Ensure the camera's resolution settings in UniFi Protect are appropriate for your network bandwidth and storage capacity. Verify adequate lighting for optimal image capture, especially at night.
- Resetting the Camera: If the camera is unresponsive or you need to reset it to factory defaults, locate the reset button (refer to Figure 3.5) and press and hold it for approximately 10 seconds until the camera's LED indicator changes.
8. Specifications
| Feature | Specification |
|---|---|
| Model Name | G5 Bullet |
| Item Model Number | UVC-G5-Bullet-3 |
| Indoor/Outdoor Usage | Outdoor |
| Power Source | Corded Electric (PoE) |
| Connectivity Protocol | Wi-Fi (for management, wired for data/power) |
| Mounting Type | Wall Mount / Pole Mount |
| Video Capture Resolution | 1920p (2K HD) |
| Maximum Webcam Image Resolution | 5 MP |
| Frame Rate | 30 frames_per_second |
| Night Vision Range | 30 Feet |
| Light Source Type | Infrared (IR) |
| Alert Type | Motion Only |
| Photo Sensor Technology | CMOS |
| Wattage | 4 watts |
| Item Dimensions (L x W x H) | 5.9 x 2.9 x 2.9 inches |
| Item Weight | 11.3 ounces (0.32 Kilograms) |
| UPC | 810084690192 |
9. Warranty & Support
For detailed warranty information, please refer to the official Ubiquiti Networks website or the warranty card included with your product. Ubiquiti Networks provides technical support for their products. For assistance, visit the Ubiquiti support portal or contact their customer service.