
SMALLRIG 4519
SmallRig Z6 III Camera Cage User Manual
Model: 4519
1. Introduction
The SmallRig Z6 III Camera Cage is a full-frame aluminum alloy cage specifically designed for the Nikon Z6 III camera. It provides robust protection for your camera while offering versatile expansion options without obstructing interfaces. This manual will guide you through the installation, operation, and maintenance of your camera cage.

Image 1.1: The SmallRig Z6 III Camera Cage (Model 4519) attached to a Nikon Z6 III camera body, showcasing its protective design and integrated mounting points.

Image 1.2: Overview of various SmallRig cage configurations for the Nikon Z6 III, including the single cage (ID: 4519), normal cage kit (ID: 4520), 'Night Eagle' cage kit (ID: 4522), and L-bracket (ID: 4523).
2. Package Contents
Please verify that all items are present in your package:
- Camera Cage (Model 4519) x 1
- User Manual x 1

Image 2.1: Visual representation of the SmallRig Z6 III Camera Cage package contents and key specifications.
3. Setup and Installation
Follow these steps to properly install the SmallRig Z6 III Camera Cage onto your Nikon Z6 III camera:
- Prepare the Camera: Before installation, it is essential to remove the split D-rings located on both sides of your Nikon Z6 III camera. This ensures a proper and secure fit for the cage.
- Position the Camera: Carefully place your Nikon Z6 III camera into the SmallRig cage, aligning the camera's mounting points with the cage's attachment points.
- Secure with Base Screw: Use the integrated 1/4"-20 screw at the base of the cage to firmly attach the camera. The cage features a built-in magnetic wrench for convenient tightening and loosening.
- Secure with Side Screws: Utilize the two M2.5 screws on the sides of the cage to further secure the camera. This three-point locking system provides enhanced stability and prevents any twisting of the camera within the cage.

Image 3.1: Illustration of the three-point locking system, showing the 1/4"-20 screw at the base and two M2.5 screws on the sides for secure camera attachment. Note: D-rings must be removed.
4. Operating and Features
The SmallRig Z6 III Camera Cage enhances your camera's functionality and versatility:
4.1. Unobstructed Access
The cage is designed to ensure full access to all camera controls, buttons, and ports. It allows for unobstructed screen rotation and easy access to the battery compartment, enabling quick battery changes without removing the cage.

Image 4.1: The cage design ensures full 360-degree screen rotation and easy access to the camera's battery compartment.
4.2. Quick Release Plate for Arca-Swiss
The bottom of the cage features a built-in quick-release plate compatible with Arca-Swiss standards. This allows for rapid transitions between tripod and handheld shooting, and quick installation onto stabilizers such as DJI RS 2, RSC 2, RS 3, RS 3 Pro, RS 4, and RS 4 Pro.
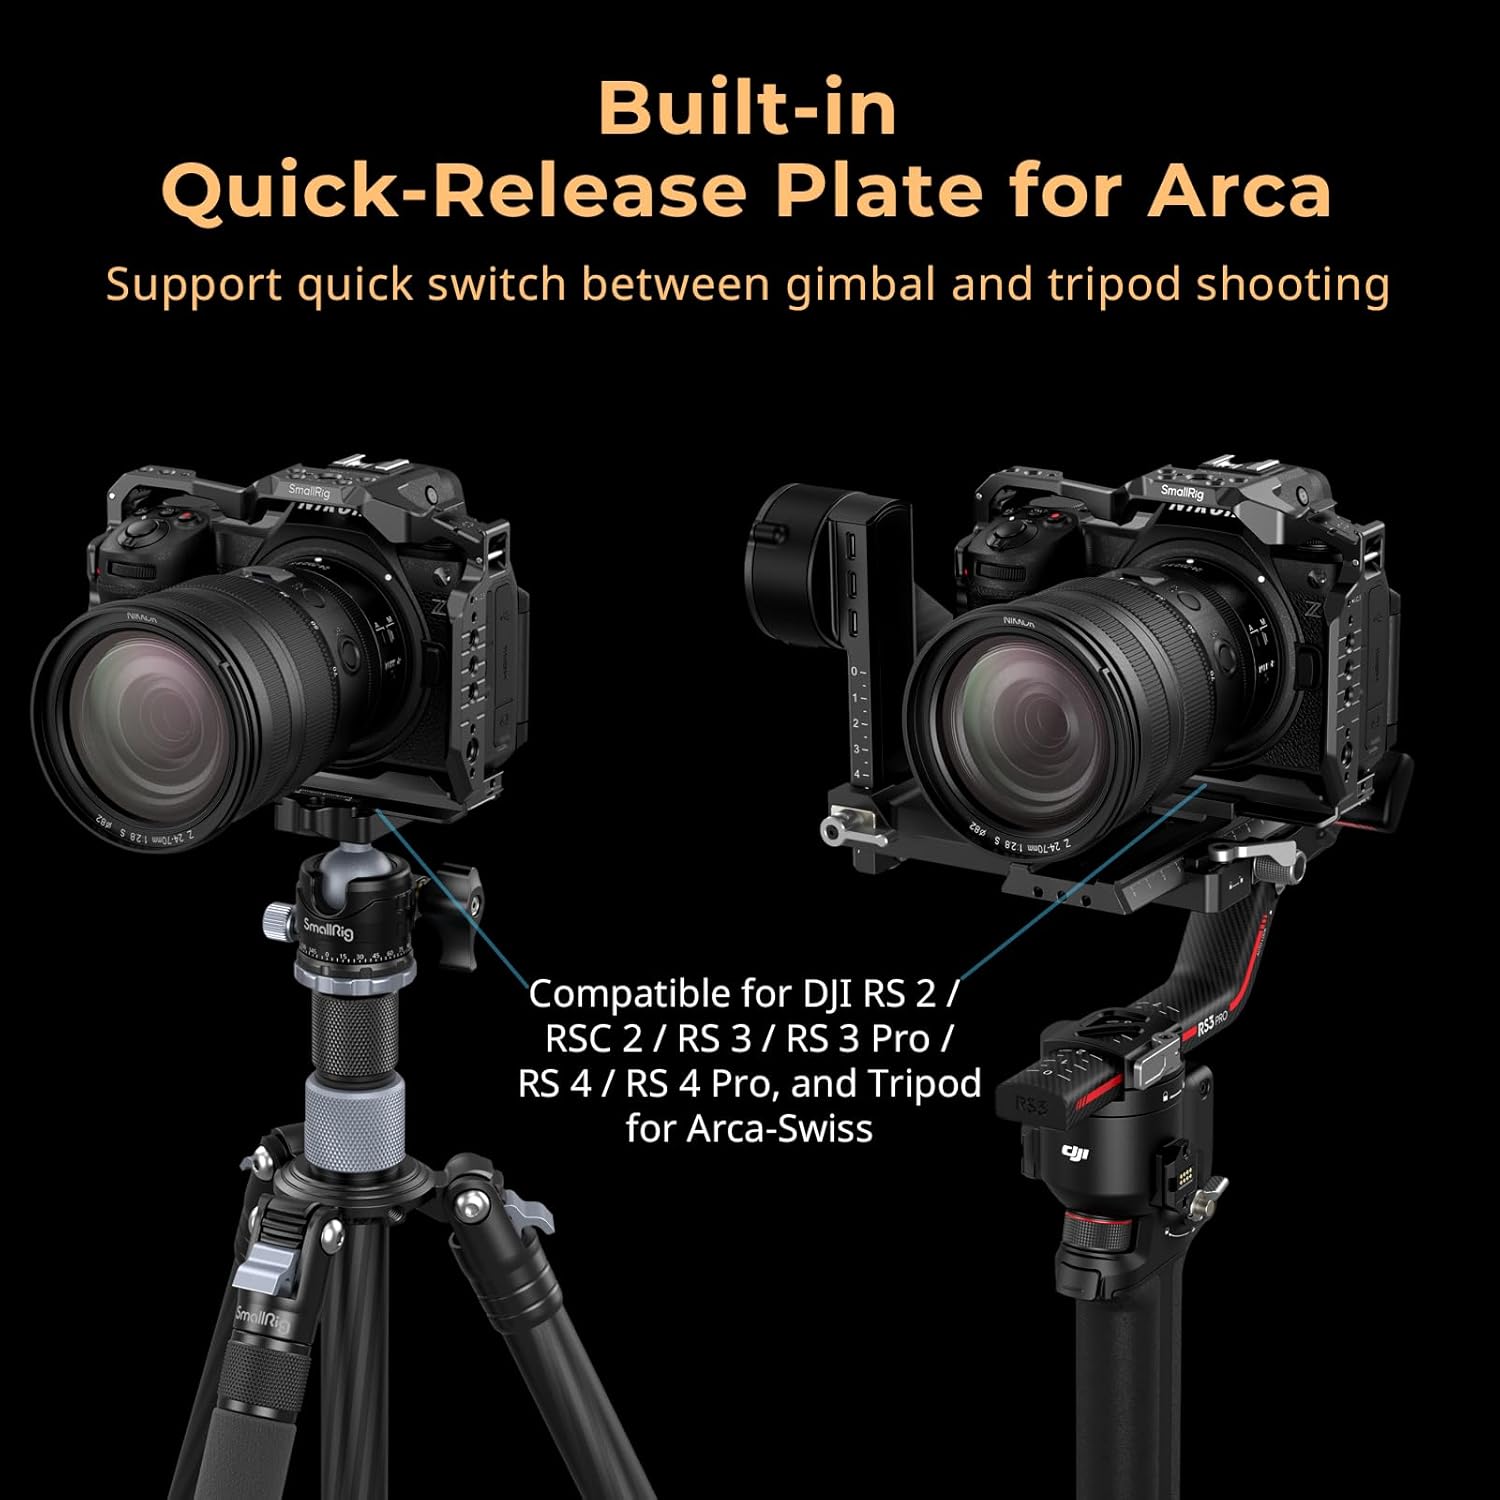
Image 4.2: The integrated Arca-Swiss quick-release plate facilitates fast transitions between tripod and gimbal setups.
4.3. Multiple Mounting Points
The cage is equipped with numerous mounting points for attaching various accessories:
- 1/4"-20 Threaded Holes: For attaching accessories like top handles (e.g., SmallRig 3765), side handles (e.g., SmallRig 2093), monitor mounts, and more.
- 3/8"-16 ARRI Locating Holes: Provides anti-twist mounting points for ARRI-standard accessories.
- Cold Shoe Mounts: Ideal for attaching SSD mount brackets (e.g., SmallRig 2343) or LED video lights (e.g., SmallRig 3286B).
- NATO Rail (Left Side): Allows for quick attachment and detachment of NATO rail compatible accessories, such as side handle 4017.
- QD Socket & Wrist Strap Holes: Built-in wrist strap holes are compatible with hand straps (e.g., SmallRig 3848 & 2456), and a bottom QD socket allows for QD strap buckle attachment.

Image 4.3: Detailed view of the various mounting points available on the cage, including threaded holes, cold shoe mounts, NATO rail, and strap slots.
4.4. Product Video Overview
Watch the official product video for a comprehensive overview of the SmallRig Z6 III Camera Cage and its features:
Video 4.4: Official product video showcasing the SmallRig Camera Accessories for Nikon Z6 III, demonstrating its features and use cases in various shooting environments.
5. Maintenance
To ensure the longevity and optimal performance of your SmallRig Z6 III Camera Cage, follow these maintenance guidelines:
- Cleaning: Wipe the cage regularly with a soft, dry cloth to remove dust and fingerprints. For stubborn dirt, use a slightly damp cloth and then dry thoroughly. Avoid abrasive cleaners or solvents.
- Inspection: Periodically check all screws and mounting points for tightness. Re-tighten if necessary using the built-in magnetic wrench or appropriate tools.
- Storage: Store the cage in a dry, clean environment when not in use. Avoid extreme temperatures or high humidity.
- Avoid Impact: While the cage provides protection, avoid dropping or subjecting it to severe impacts, which could damage both the cage and your camera.
6. Troubleshooting
Here are solutions to common issues you might encounter:
- Cage Does Not Fit Properly:
- Ensure you have removed the split D-rings from both sides of your Nikon Z6 III camera. These must be removed for the cage to seat correctly.
- Verify that the camera is correctly aligned with the 1/4"-20 screw and the two M2.5 side screws before tightening.
- Difficulty Accessing Battery Door:
- The cage is designed for unobstructed battery access. Ensure the battery compartment door is fully swung out. If the cage's bottom frame is obstructing, gently swing out the section of the bottom frame designed to clear the battery door.
- Accessories Not Mounting Securely:
- Check that the accessory's screw type matches the cage's mounting point (e.g., 1/4"-20, 3/8"-16 ARRI, cold shoe).
- Ensure screws are fully tightened. Use the magnetic wrench for the main camera screw.
7. Specifications
| Feature | Detail |
|---|---|
| Model Number | 4519 |
| Material | Aluminum Alloy |
| Product Dimensions | 152.2 x 113.0 x 62.7 mm (6.0 x 4.4 x 2.5 inches) |
| Product Weight | 170.0 ± 5.0 g (6.0 ± 0.2 oz) |
| Color | Black |
| Compatible Devices | Nikon Z6 III Camera |
| Mounting Points | 1/4"-20 Threaded Holes, 3/8"-16 ARRI Locating Holes, Cold Shoe Mounts, NATO Rail, QD Socket, Strap Slots |
| Quick Release Plate | Arca-Swiss Compatible |
8. Warranty and Support
SmallRig products are manufactured to high-quality standards. For warranty information, technical support, or any inquiries regarding your SmallRig Z6 III Camera Cage, please contact SmallRig customer service directly or visit their official website. Keep your purchase receipt for warranty claims.
Official SmallRig Store: Visit the SmallRig Store on Amazon
Related documents4519


Ask a question about this manual
Ask about setup, troubleshooting, compatibility, parts, safety, or missing instructions. Manuals+ will review the question and use this page’s manual context to help answer it.