Introduction
This user manual provides comprehensive instructions for the cartrend Digital Parking Disc, Model 692536. This electronic parking disc is designed to simplify parking in designated zones by automatically displaying the correct arrival time. It features official KBA approval, ensuring compliance with regulations, and includes additional functionalities such as a night parking mode and an SOS emergency light. Please read this manual carefully before installation and operation to ensure proper use and longevity of your device.

Image: The cartrend Digital Parking Disc, a blue rectangular device with a digital display showing "13:30" and "Ankunftszeit" (Arrival Time) at the top. It also shows the KBA approval number E1 10R-0610067.
1. Setup
1.1 Package Contents
Before you begin, please verify that all items are present in the package:
- 1x Electronic Parking Disc
- 1x User Manual (this document)
- 1x CR2450 Battery
- 3M Adhesive Pads (for mounting)
- 1x Cleaning Cloth

Image: A collage showing the unboxing of the cartrend Digital Parking Disc and the steps for battery installation. The top left shows the product box, top right shows the back of the device with the battery compartment open, bottom left shows a hand inserting the battery, and bottom right shows the battery compartment closed.
1.2 Battery Installation
The cartrend Digital Parking Disc requires one CR2450 battery for operation. The battery is included in the package.
- Locate the battery compartment on the back of the device.
- Open the battery compartment cover.
- Insert the CR2450 battery with the positive (+) side facing up.
- Close the battery compartment cover securely.
1.3 Initial Time and Date Setting
After battery installation, you will need to set the current time and date. Use a small, pointed object (like a pen tip or the provided tool) to press the buttons located on the back of the device.

Image: A two-part image showing the back of the cartrend Digital Parking Disc. The top left shows a hand using a pointed object to press a button, with the display showing "10:05". The top right shows the display after adjustment, showing "25.04.23". The bottom image highlights two buttons on the back, indicating to press the button for 2-3 seconds to set the hour.
- Press and hold the button labeled "1" (usually the left button) for approximately 2-3 seconds until the hour display starts flashing.
- Press button "1" repeatedly to adjust the hour to the current time.
- Once the hour is set, press and hold button "1" again for 2-3 seconds to confirm and move to minute setting.
- Repeat the process for setting the minutes and then the date.
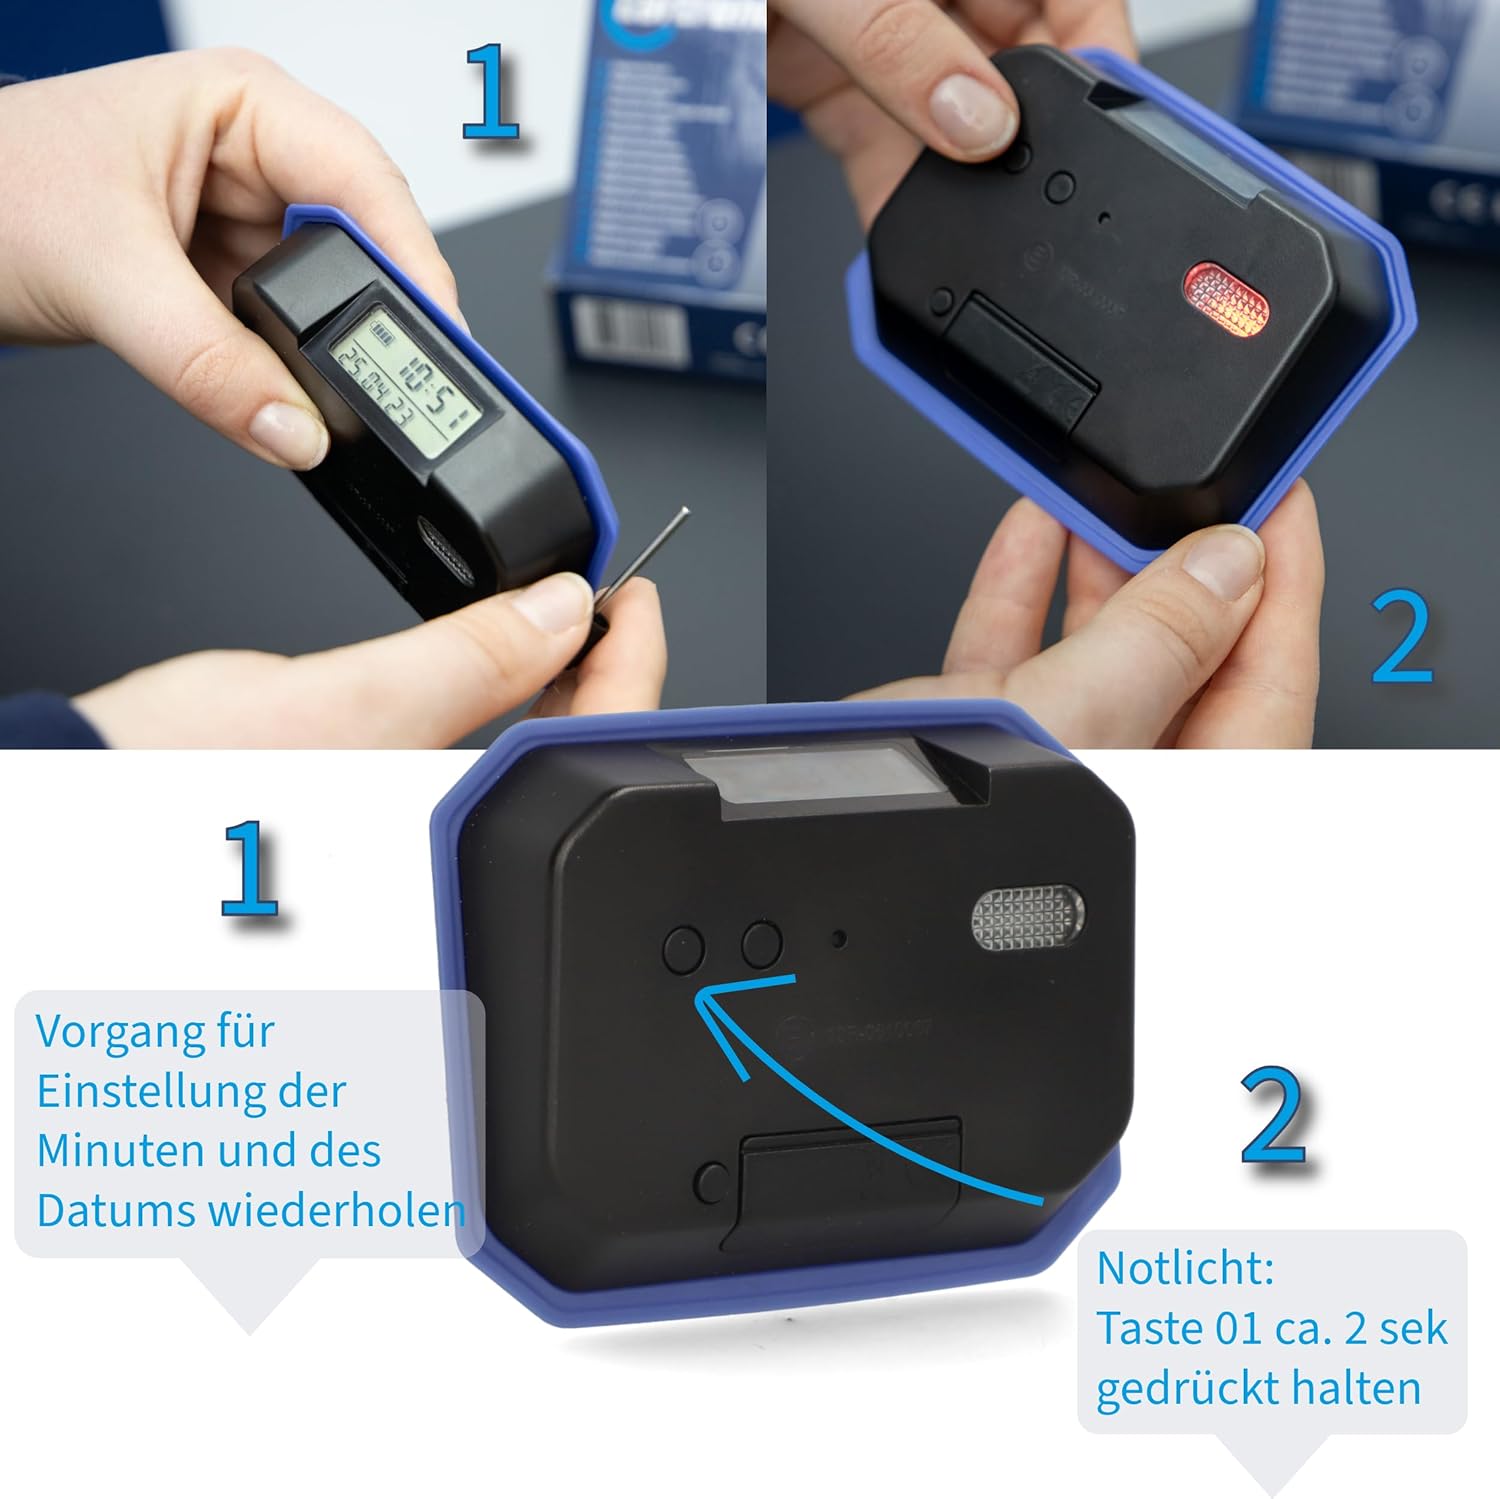
Image: A two-part image showing the back of the cartrend Digital Parking Disc. The top left shows a hand using a pointed object to press a button, similar to the previous image. The top right shows the back of the device with a red light illuminated, indicating the SOS light. The bottom image highlights the buttons, instructing to repeat the process for minutes and date, and to hold button "1" for 2 seconds to activate the SOS light.
1.4 Mounting the Parking Disc
The parking disc should be mounted on the inside of your vehicle's windshield, preferably in the lower right corner, ensuring it is clearly visible from the outside.
- Clean the chosen area on the windshield thoroughly with the provided cleaning cloth to ensure a strong adhesive bond.
- Peel off the protective film from the 3M adhesive pads.
- Attach the adhesive pads to the designated spots on the back of the parking disc.
- Press the parking disc firmly onto the cleaned area of the windshield for several seconds to secure it.

Image: The cartrend Digital Parking Disc is shown mounted on the inside of a car's windshield, displaying "14:30". The image emphasizes "Einfache Anbringung an der Windschutzscheibe" (Easy mounting on the windshield).
2. Operating Instructions
2.1 Automatic Arrival Time Setting
The cartrend Digital Parking Disc features an integrated motion sensor that automatically detects when your vehicle comes to a standstill. After approximately 30-50 seconds of no movement, the device will automatically set the arrival time, rounded up to the next half hour, as required by parking regulations.

Image: The cartrend Digital Parking Disc is shown on a parking lot background with a large "P" marking. The text overlay states "Parkzeit stellt sich ca. 50 sek nach Halten automatisch ein" (Parking time sets automatically approx. 50 sec after stopping).
The displayed arrival time remains visible until the vehicle moves again. No manual adjustment is needed for standard parking situations.
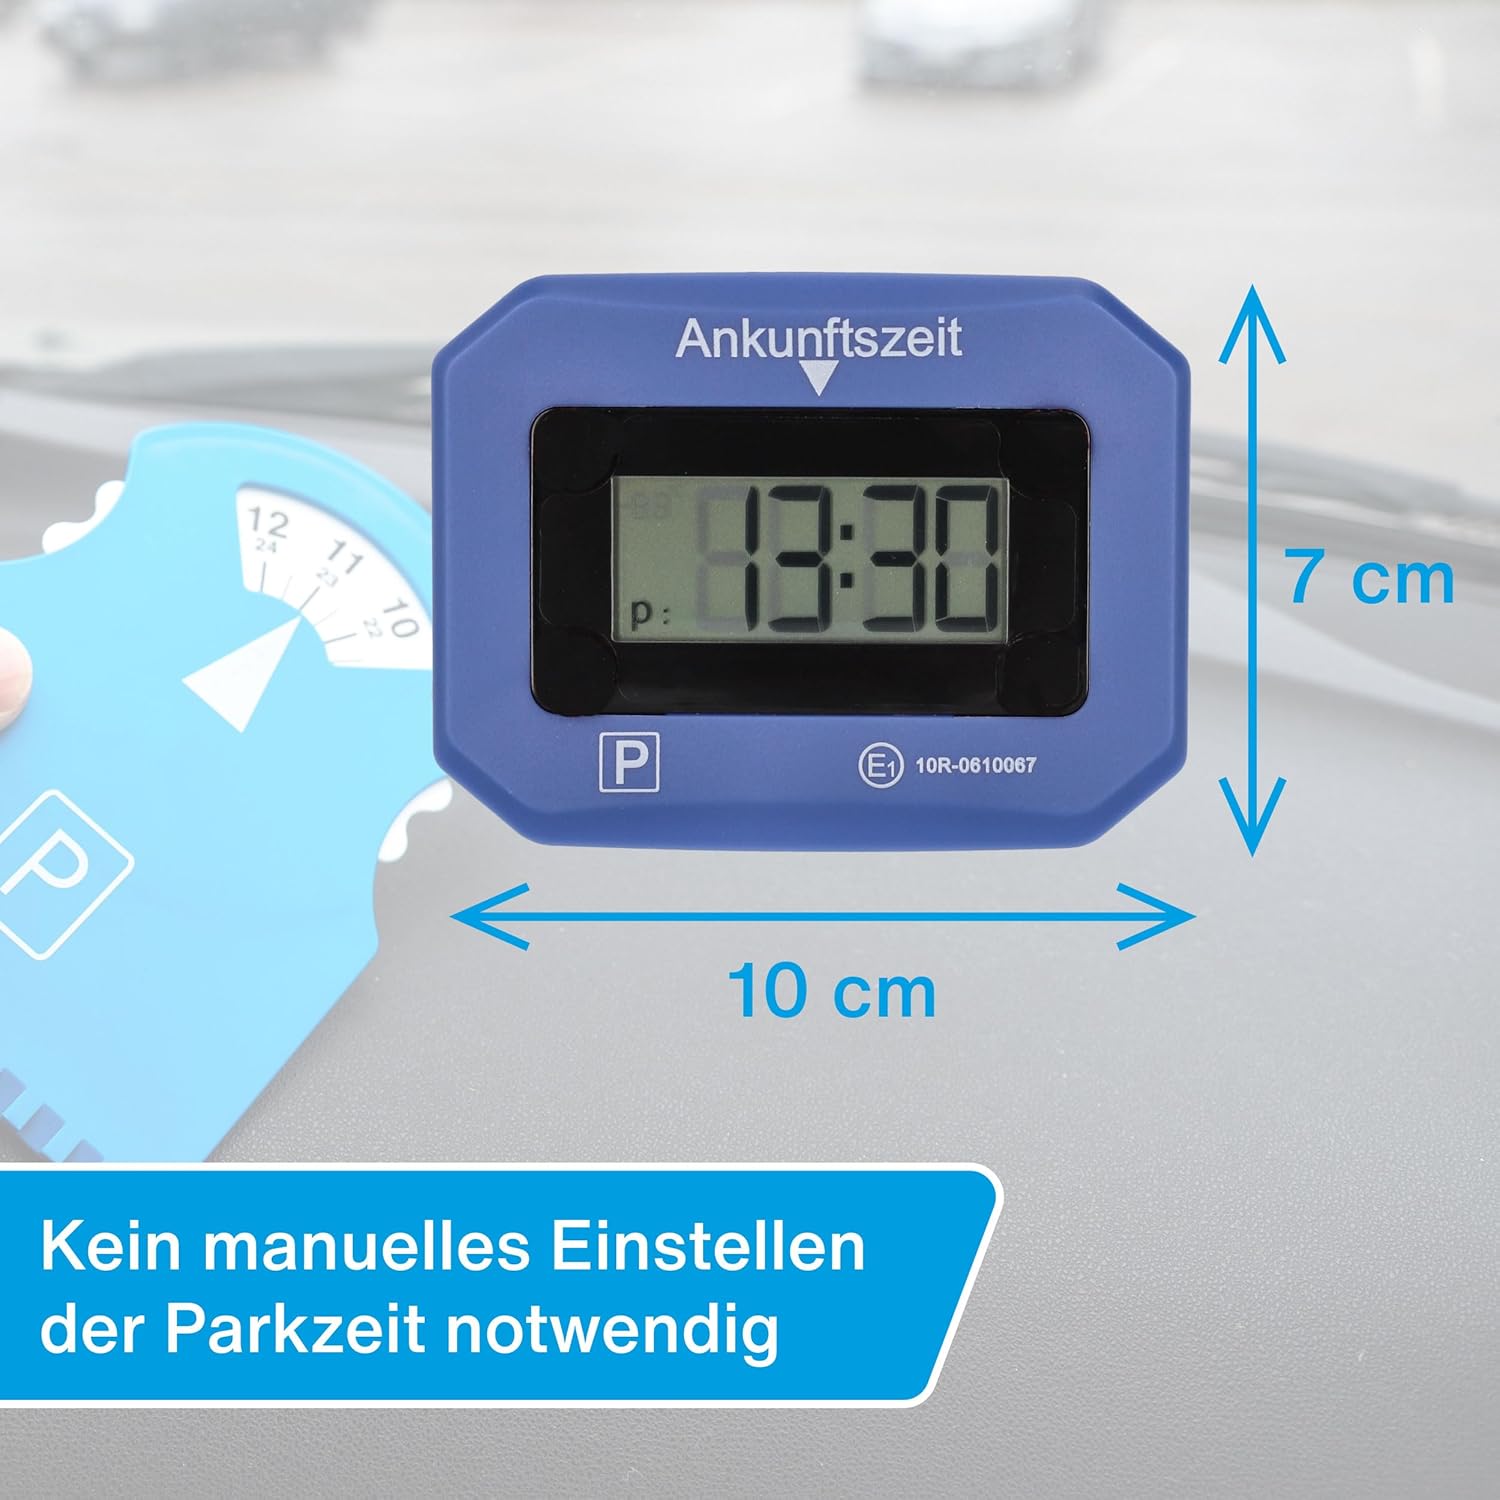
Image: The cartrend Digital Parking Disc is shown next to a traditional parking disc, with dimensions indicated as 10 cm width and 7 cm height. The text states "Kein manuelles Einstellen der Parkzeit notwendig" (No manual setting of parking time necessary).
2.2 Night Parking Function
If a parking zone's regulations begin on the following morning, you can manually set the parking disc to the desired start time for the next day. This function allows you to pre-set the disc for overnight parking.
- While the vehicle is stationary, press and hold the appropriate button (refer to section 1.3 for button identification) to enter manual time adjustment mode.
- Adjust the time to the desired start time for the next morning.
- Confirm the setting. The disc will then display this pre-set time until motion is detected again.
2.3 SOS Emergency Light
The cartrend Digital Parking Disc is equipped with an integrated SOS emergency light to enhance visibility in emergency situations, such as a breakdown at night.
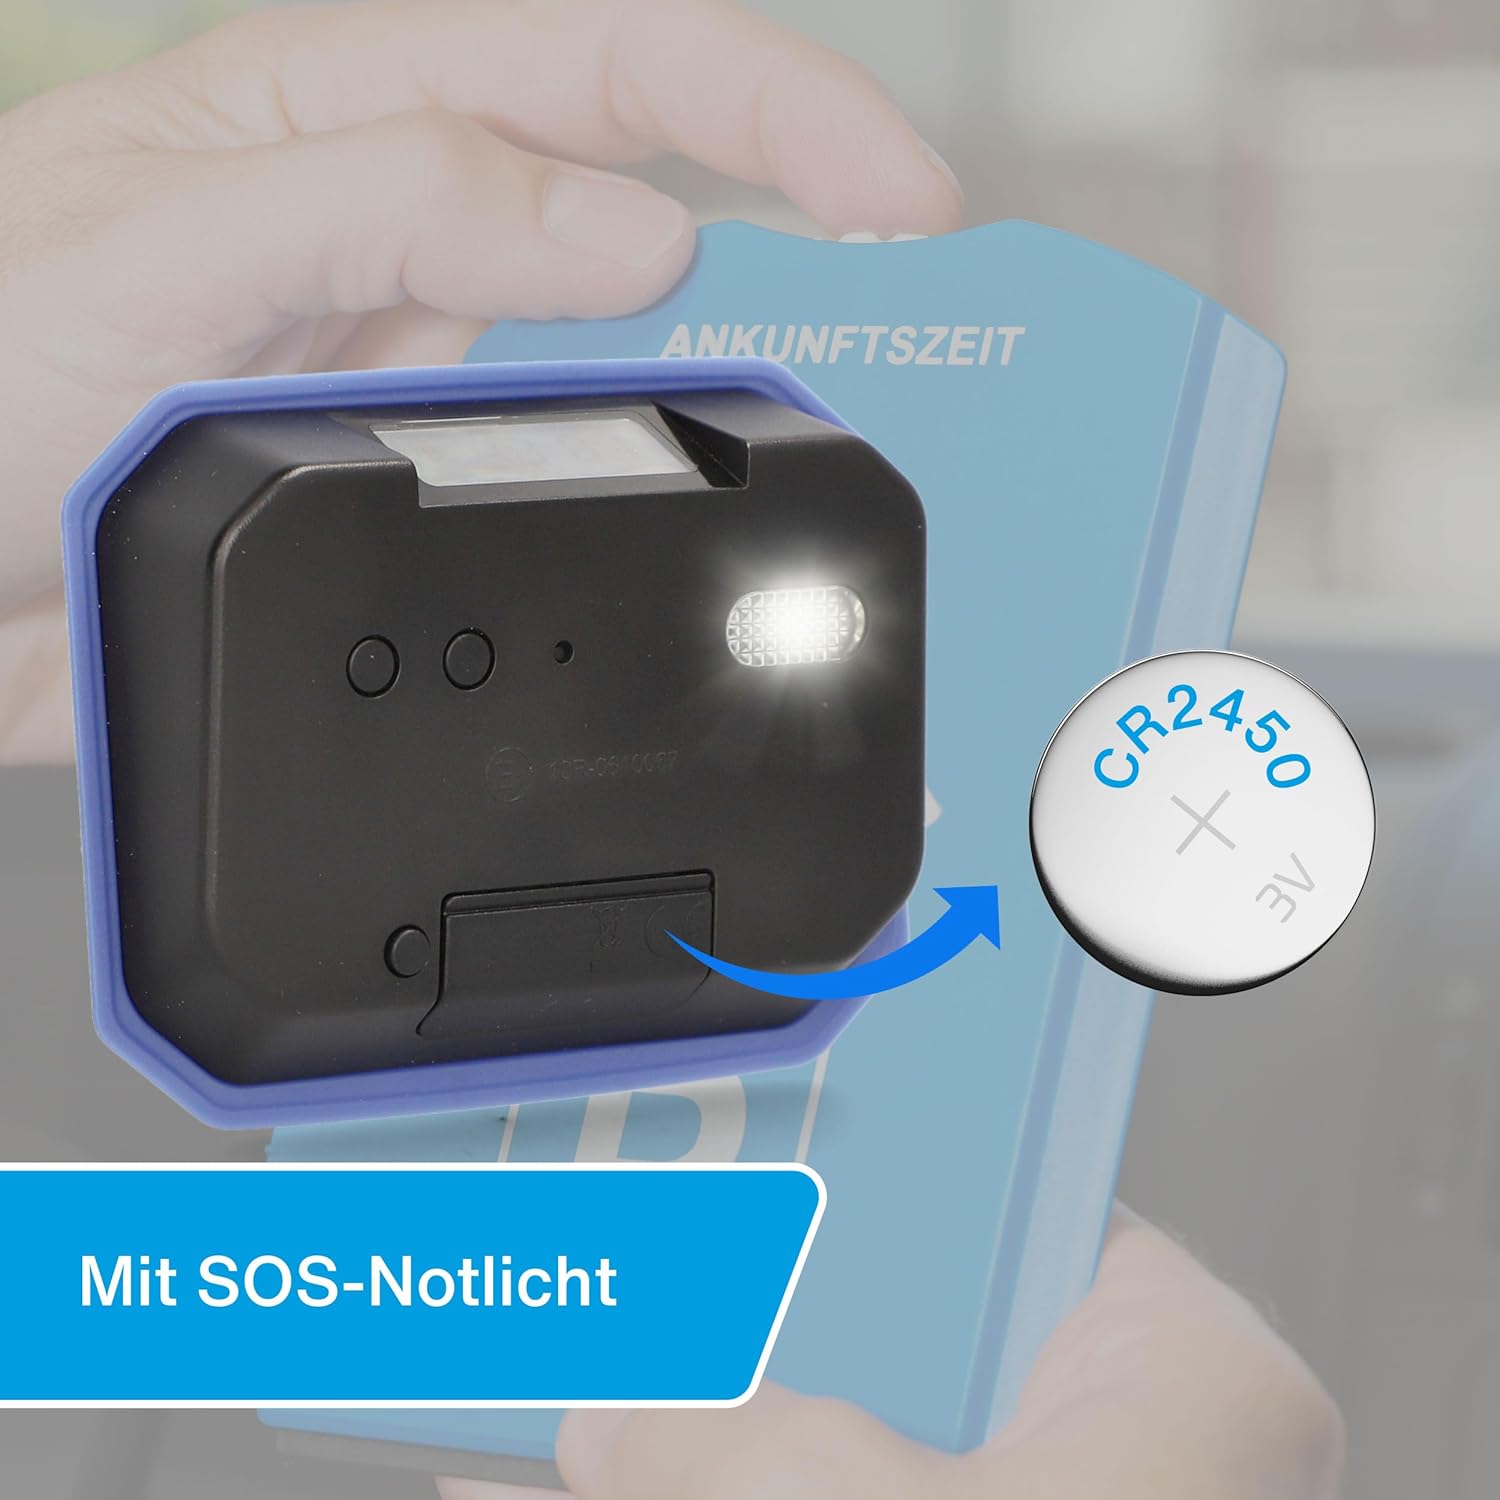
Image: The back of the cartrend Digital Parking Disc is shown with its SOS emergency light illuminated. A CR2450 battery is depicted next to it, with an arrow pointing towards the battery compartment. The text states "Mit SOS-Notlicht" (With SOS Emergency Light).
To activate the SOS emergency light, press and hold button "1" (as described in section 1.3) for approximately 2 seconds. The light will begin to flash. To deactivate, press and hold the button again.
2.4 Automatic Summer/Winter Time Adjustment
The device automatically adjusts for daylight saving time (summer time) and standard time (winter time), eliminating the need for manual adjustments during these transitions.

Image: A clock face with a tree split into summer and winter halves, illustrating the automatic time change. An arrow indicates the clock moving forward for summer time. The text states "Automatische Umstellung Sommer- und Winterzeit" (Automatic adjustment Summer and Winter time).
3. Maintenance
3.1 Battery Replacement
The included CR2450 button cell battery has an estimated lifespan of up to 3 years. When the battery level is low, the display may dim or the device may stop functioning correctly. Replace the battery as described in section 1.2.
Caution:
- Ensure correct battery polarity during installation.
- Dispose of used batteries responsibly according to local regulations.
- Do not expose batteries to excessive heat or direct sunlight.
3.2 Cleaning
To maintain optimal visibility and function, clean the display and the exterior of the parking disc regularly.
- Use a soft, dry, or slightly damp cloth for cleaning.
- Do not use abrasive cleaners, solvents, or strong chemicals, as these can damage the display or casing.
- Ensure the windshield area where the disc is mounted is clean for proper adhesion.
4. Troubleshooting
| Problem | Possible Cause | Solution |
|---|---|---|
| Device does not turn on or display is blank. | Battery is dead or incorrectly inserted. | Check battery insertion. Replace CR2450 battery (see Section 3.1). |
| Time is not setting automatically. | Motion sensor obstructed or device not stationary long enough. | Ensure the device is securely mounted and the vehicle remains stationary for at least 30-50 seconds. Check for obstructions around the sensor. |
| Incorrect time displayed. | Initial time/date not set correctly or battery was removed/replaced without re-setting. | Manually re-set the time and date (see Section 1.3). |
| Adhesive pads losing grip. | Windshield surface was not clean during installation or extreme temperature changes. | Clean the windshield thoroughly and use new 3M adhesive pads for re-mounting. |
5. Specifications
| Feature | Detail |
|---|---|
| Model Number | 692536 |
| Dimensions (L x W x H) | 13.5 x 3.5 x 13 cm (approx. 10 x 7 cm display area) |
| Weight | 140 g |
| Battery Type | 1x CR2450 (included) |
| Battery Life | Up to 3 years |
| Approval | KBA-Zulassung (Kraftfahrt-Bundesamt approval), Regulation No. 219, E1 10R-0610067 |
| Features | Motion sensor for automatic time setting, Night parking function, SOS emergency light, Automatic summer/winter time adjustment, Battery/Date/Time display |

Image: A side view of the cartrend Digital Parking Disc, showing its digital display with battery indicator, current time (13:16), and date (25.04.23). The text states "Mit Batterie-, Datums- und Uhrzeitanzeige" (With Battery, Date, and Time Display).

Image: The cartrend Digital Parking Disc is shown next to a parking sign, with an overlay of the Kraftfahrt-Bundesamt (KBA) logo and approval number E1*10R06/02*10067*00, indicating official approval.
6. Warranty and Support
cartrend products are manufactured to high quality standards. In the unlikely event that you encounter an issue with your Digital Parking Disc, please refer to the troubleshooting section first.
For warranty claims or further technical support, please contact the retailer from whom you purchased the product or visit the official cartrend website for customer service information. Please retain your proof of purchase for warranty purposes.
For more information about cartrend products, you can visit the official store: cartrend Store on Amazon.


