1. Introduction
Welcome to the Cornelius Nitro Pro Mini Cold Brew Beverage Dispenser. This compact, self-contained unit is designed to provide both nitro-infused and still cold brew beverages with ease and consistency. Featuring onboard nitro generating technology, programmed post-mix ratios, and a versatile dual tap design, the Nitro Pro Mini simplifies beverage service. This manual provides essential information for the safe and efficient operation, maintenance, and care of your new dispenser.
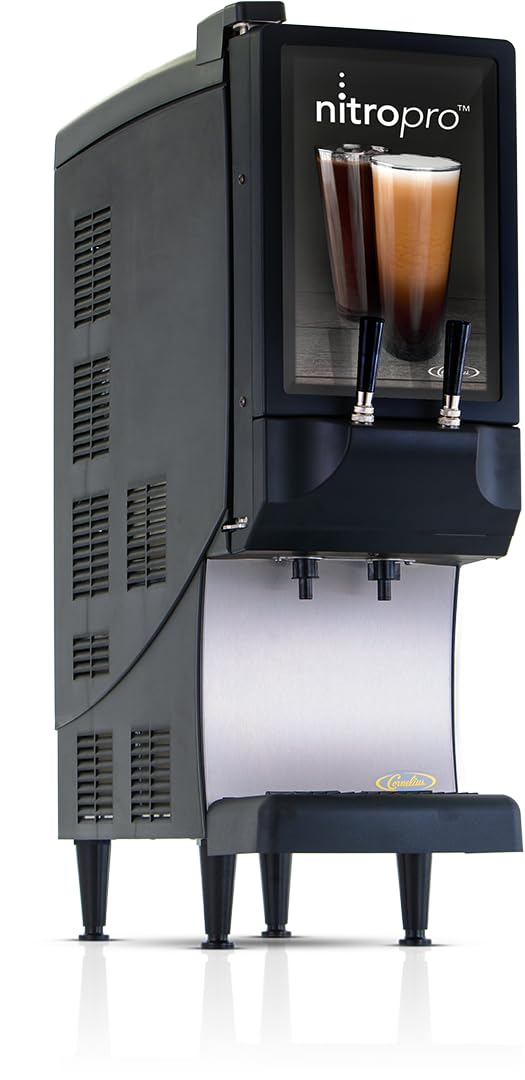
Image 1.1: The Cornelius Nitro Pro Mini Cold Brew Beverage Dispenser. This image shows the compact design of the dispenser, ready for use on a countertop.
Key Features:
- Nitro Infusion Technology: Onboard nitro generation eliminates the need for external nitrogen sources or additional equipment.
- Dual Tap Design: Dispenses both nitro-infused and still products from the same unit. Tap handles are replaceable to align with branding.
- Programmed Post-Mix Ratios: Ensures consistent beverage accuracy and saves time, eliminating manual setting requirements.
- Compact Footprint: Designed to conserve counter space.
- Customizable Aesthetics: Easily change graphics, tap handles, and cup rest to match your brand.
2. Safety Information
Please read all instructions carefully before operating the Cornelius Nitro Pro Mini. Failure to follow these instructions may result in electric shock, fire, or serious injury. Keep this manual for future reference.
- Ensure the unit is connected to a properly grounded electrical outlet (115v/60/1-ph, 5.0 amps).
- Do not immerse the unit, cord, or plug in water or other liquids.
- Unplug the unit from the outlet when not in use, before cleaning, or before performing any maintenance.
- Do not operate the unit with a damaged cord or plug, or after the unit malfunctions or has been damaged in any manner.
- Use only manufacturer-recommended attachments and accessories.
- Keep hands and foreign objects away from moving parts during operation.
- This appliance is for commercial use only.
3. Package Contents
Verify that all items are present and in good condition upon unpacking.
- Cornelius Nitro Pro Mini Beverage Dispenser Unit
- Drip Tray and Cup Rest
- Dispense Nozzles (2)
- Mixing Chambers (2)
- Power Cord
- Instruction Manual
4. Setup
Follow these steps for initial setup of your Nitro Pro Mini dispenser.
- Placement: Position the dispenser on a stable, level countertop with adequate ventilation around the unit. Ensure the unit is within reach of a grounded electrical outlet and a water source.
- Electrical Connection: Plug the power cord into the unit and then into a grounded 115v/60/1-ph, 5.0 amps electrical outlet.
- Water Connection: Connect the unit to a potable water supply as per local plumbing codes.
- Install Bag-in-Box (BIB): Open the unit's cabinet door. Connect the product output connector from the BIB to the unit's internal connection point. Ensure a secure, clockwise rotation until fully seated. Place the BIB box securely inside the cabinet.
- Install Nozzles and Mixing Chambers: Insert the mixing chambers into their designated slots inside the cabinet. Attach the dispense nozzles by rotating them 90 degrees and pushing them upwards until they click into place.
- Initial Priming: Before first use, prime the system by dispensing approximately 16 ounces of product from the left tap and 8 ounces from the right tap to ensure all air is purged and the system is filled with beverage.
Video 4.1: This video provides an overview of the Cornelius Nitro Pro Mini Cold Brew Beverage Dispenser, demonstrating its features and basic operation, including the ease of setup and dispensing.
5. Operating Instructions
The Nitro Pro Mini is designed for simple and consistent beverage dispensing.
- Dispensing Nitro-Infused Beverages: Place a cup under the left dispense nozzle. Pull the left tap handle forward to dispense nitro-infused cold brew. Release the handle to stop dispensing.
- Dispensing Still Beverages: Place a cup under the right dispense nozzle. Pull the right tap handle forward to dispense still cold brew. Release the handle to stop dispensing.
- Customization: The unit allows for easy changes to graphics, tap handles, and cup rests to match your establishment's branding.

Image 5.1: A user dispensing a nitro-infused beverage from the dispenser.

Image 5.2: A user dispensing a cold brew beverage from the dispenser.
6. Maintenance
Regular cleaning and maintenance are crucial for the longevity and optimal performance of your Nitro Pro Mini.
Daily Cleaning:
- External Surfaces: Use a clean, damp cloth to wipe down all external cabinet surfaces and splash areas, including the inside of the door gasket.
- Drip Tray and Cup Rest: Remove and clean the drip tray and cup rest with mild soap and water. Rinse thoroughly and dry before re-installing.
- Dispense Nozzles and Mixing Chambers: Remove both dispense nozzles by rotating 90 degrees and pulling straight down. Remove the two mixing chambers by pulling them straight forward from inside the cabinet. Wash these parts with a mild dish soap solution, rinse, and dry. Reinstall them after cleaning.
IMPORTANT: DO NOT wash nozzles or mixing chambers in a dishwasher. This will distort the plastic and damage the O-rings.
Weekly Cleaning (Dispensing System):
The unit's dispensing system should be cleaned weekly using a cold brew equipment cleaner (e.g., Ornex Clearly Cold) and a sanitizer (e.g., K5 Sanitizer). Always follow the manufacturer's mixing instructions for these products. Local codes may require more frequent cleaning.
- Flush Product: Disconnect the product output connector from the BIB. Connect the white cleaning screw adapter to the black output connector of the tube assembly. Place the tube assembly into a container with approximately 0.5 gallons of warm water. Set the dispense motor switch to 'CLEAN'. Dispense 0.25 gallons of water from each tap to flush out coffee product. Dispose of the water.
- Clean with Solution: Prepare 1 gallon of cleaning solution (e.g., Clearly Cold) according to label instructions. Submerge the BIB adapter into the cleaning solution container and place it inside the cabinet. Close the door. Dispense 0.25 gallons of cleaner from each tap. Allow the cleaner to soak for 5 minutes.
- Rinse Cleaning Solution: After 5 minutes, dispense another 0.25 gallons of cleaner from each tap. Remove the container and dispose of the remaining cleaner.
- Sanitize System: Prepare 1 gallon of sanitizing solution (e.g., K5 Sanitizer) at 330 parts per million of available chlorine, following manufacturer instructions. Submerge the BIB adapter into the sanitizer container and place it inside the cabinet. Close the door. Dispense 0.25 gallons of sanitizer from each tap. Allow the sanitizer to soak for 20 minutes.
- Rinse Sanitizer: After 20 minutes, dispense another 0.25 gallons of sanitizer from each tap. Remove the container with remaining sanitizer.
- Sanitize Nozzles & Chambers: Remove both nozzles and mixing chambers. Place them in the container with the remaining sanitizer and allow them to soak for 2 minutes.
IMPORTANT: DO NOT soak nozzles and mixing chambers in sanitizer longer than 2 minutes. This will cause damage to the plastic and the O-rings.
- Reassemble and Prime: Reassemble the nozzles and mixing chambers onto the unit. Retrieve the product BIB from refrigerated storage. Connect the tube assembly BIB connector to the concentrate bag mating connector using a clockwise rotation until fully seated. Position the BIB box and tube assembly as shown in the setup section. Pull the left dispense tap handle and pour 16 ounces of product. Then pull the right dispense tap handle and pour 8 ounces of product to prime the system with cold brew.
Video 6.1: This video demonstrates the detailed cleaning process for the Cornelius Nitro Pro Mini, including daily and weekly maintenance steps for optimal hygiene and performance.
7. Troubleshooting
If you encounter issues with your Nitro Pro Mini, refer to the following common problems and solutions.
| Problem | Possible Cause | Solution |
|---|---|---|
| No dispense from tap. | Unit unplugged; BIB empty; clogged line; dispense motor switch OFF. | Check power connection; replace BIB; clean lines/nozzles; ensure dispense motor switch is ON. |
| Poor nitro cascade/flat beverage. | Improper priming; air in system; mixing chamber issues. | Re-prime the system; check for loose connections; ensure mixing chambers are clean and correctly installed. |
| Leakage. | Loose connections; damaged O-rings; cracked components. | Check all connections; inspect O-rings and components for damage and replace if necessary. |
| Unit not cooling. | Poor ventilation; power issue; compressor malfunction. | Ensure adequate space around unit; check power; contact customer support if issue persists. |
For issues not listed here or if troubleshooting steps do not resolve the problem, please contact Cornelius Customer Support.
8. Specifications
| Feature | Detail |
|---|---|
| Brand | Cornelius |
| Model Name | Nitro Pro Mini Cold Brew Beverage Dispenser |
| Item Model Number | CNB |
| Product Dimensions | 24.5"D x 10.5"W x 34"H |
| Item Weight | 140 pounds |
| Color | Black |
| Special Feature | Programmable |
| Coffee Maker Type | Coffee Infuser |
| Style | Beverage Dispenser |
| Specific Uses For Product | Cold Brew Beverage Dispenser |
| Recommended Uses For Product | Preparing and serving nitro-infused and still cold brew coffee |
| Exterior Finish | Stainless Steel |
| Included Components | Milk Frother (Note: This component's function may vary or be supplementary to the primary nitro infusion.) |
| Operation Mode | Fully Automatic |
| Wattage | 575 watts |
| Unit Count | 1.0 Count |
| Coffee Input Type | Bag-in-box (BIB) |
| Is Dishwasher Safe | Yes (for removable parts like nozzles and mixing chambers, but refer to cleaning instructions for specifics) |
| Power Source | AC adapter |
| Capacity | 1 Gallons (BIB capacity) |
9. Warranty Information
For detailed warranty information regarding your Cornelius Nitro Pro Mini Cold Brew Beverage Dispenser, please refer to the warranty card included with your product or visit the official Cornelius website. Keep your proof of purchase for warranty claims.
10. Customer Support
Should you require further assistance, technical support, or have questions about your Cornelius Nitro Pro Mini, please contact Cornelius Customer Support.
- Online Support: Visit the Cornelius Store on Amazon for product information and resources.
- Phone Support: Refer to your product packaging or the official Cornelius website for contact numbers.