
1. Introduction
Thank you for choosing the JUSUOX Portable Tire Inflator. This device is designed for convenient and efficient inflation of various items, including car, motorcycle, and bicycle tires, as well as sports balls. It features a maximum pressure of 150 PSI, dual power options (cordless battery and 12V DC), a digital pressure gauge with auto shut-off, and an integrated LED light for emergency use.
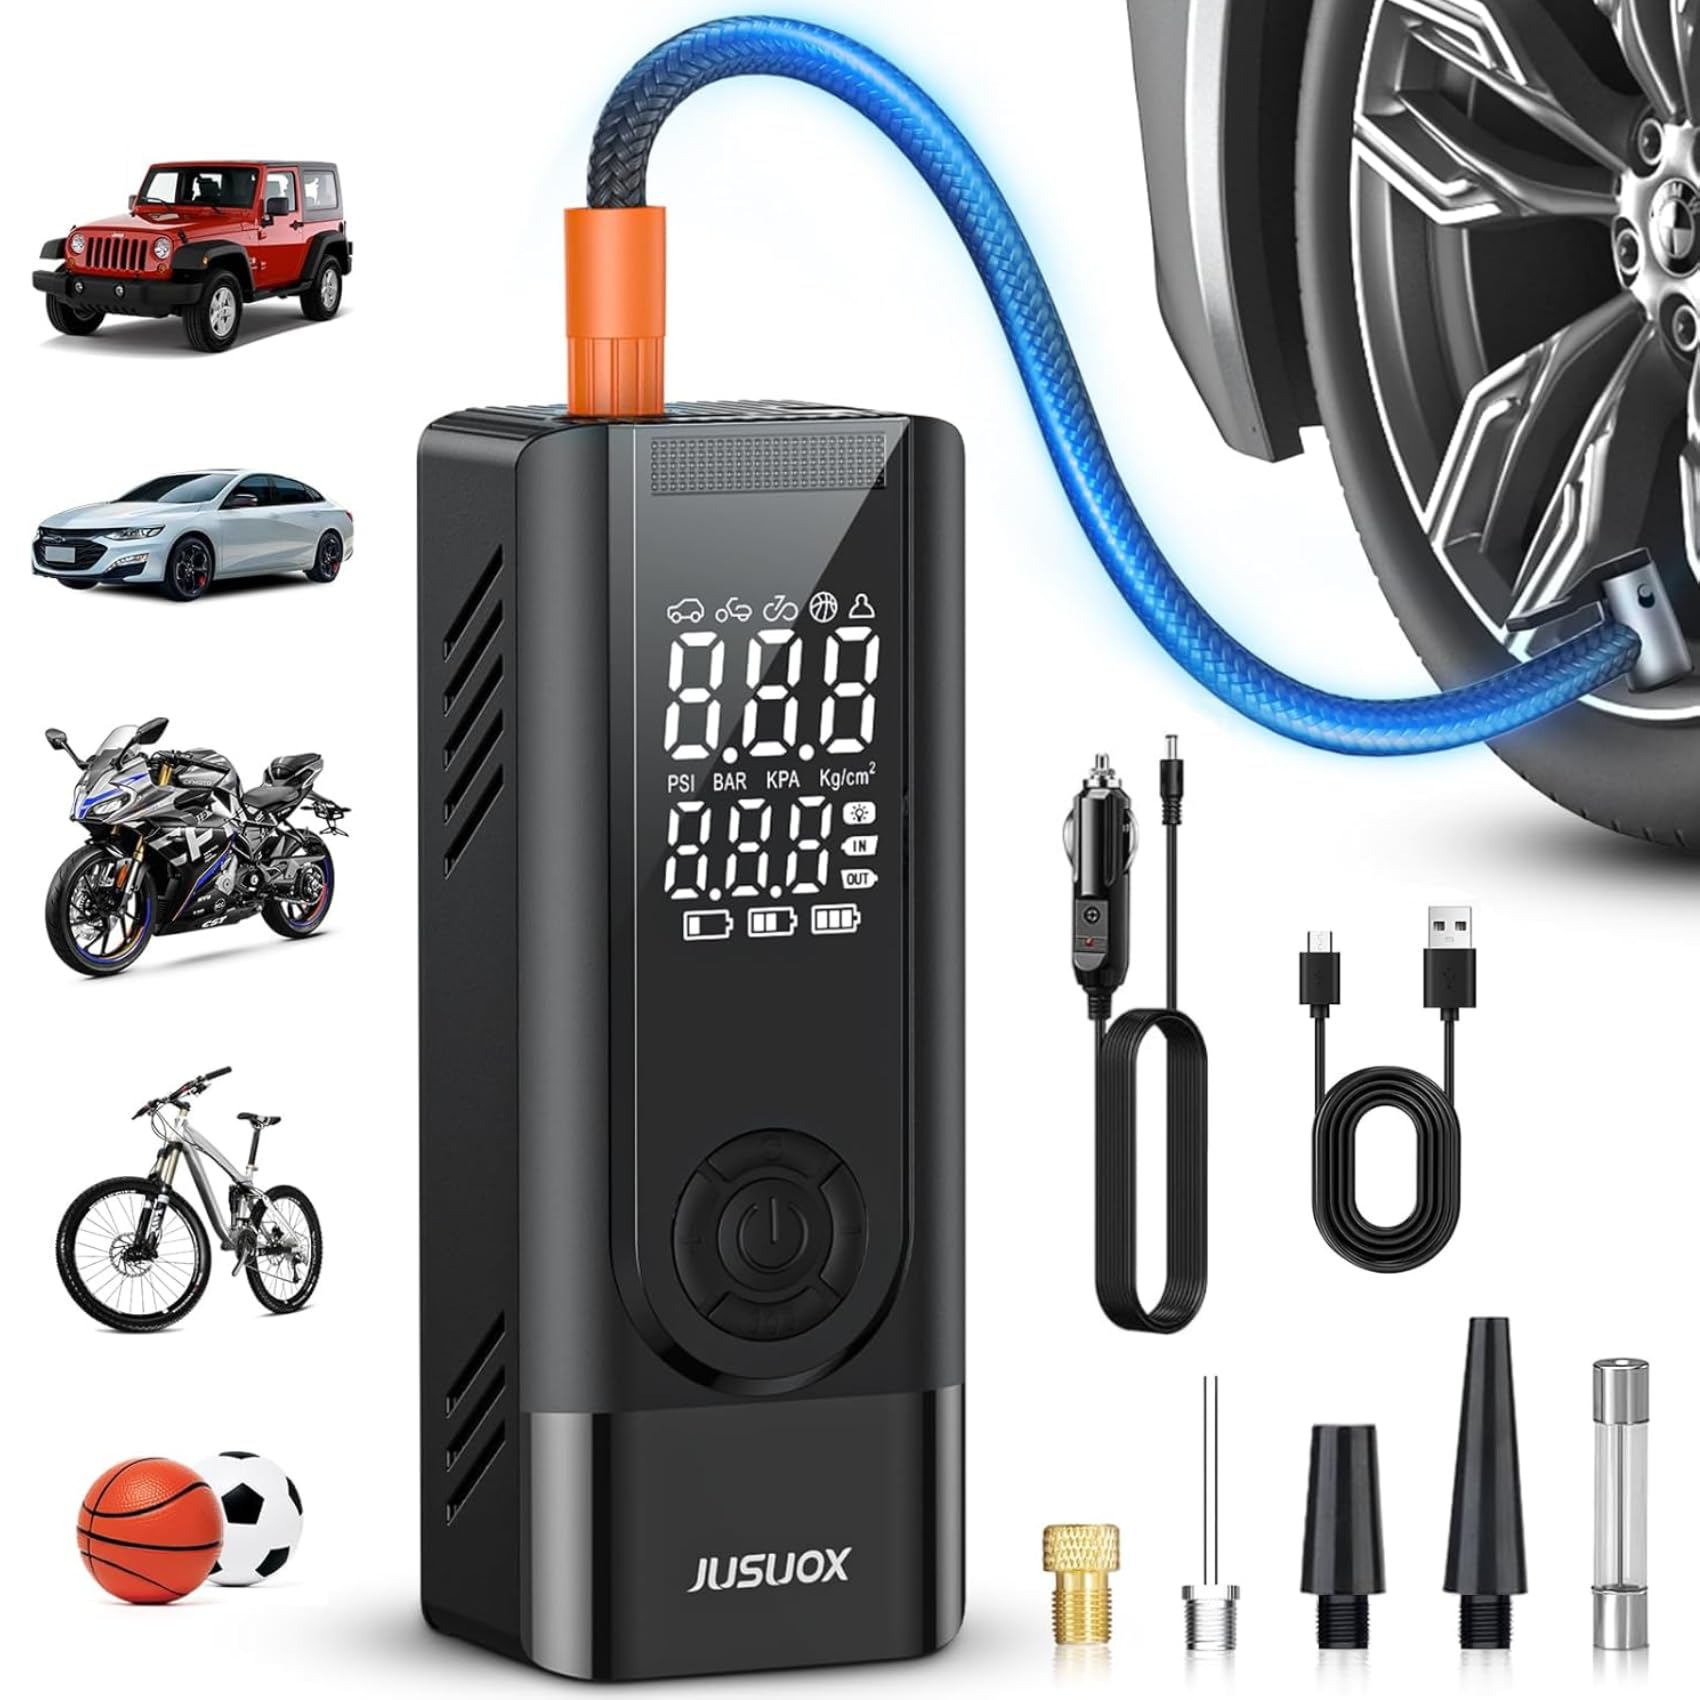
Image 1.1: JUSUOX Portable Tire Inflator.
2. Safety Information
- Read all instructions before use.
- Keep out of reach of children.
- Do not operate the inflator in wet conditions or near flammable liquids/gases.
- Do not leave the inflator unattended while in operation.
- Avoid over-inflating. Always check the recommended pressure for your item.
- The air hose and nozzle may become hot during prolonged use. Handle with care.
- Do not point the air nozzle at people or animals.
- Store the device in a cool, dry place when not in use.
3. Package Contents
Verify that all items listed below are included in your package:

Image 3.1: Contents of the JUSUOX Portable Tire Inflator package.
- Portable Tire Inflator
- User Manual
- Type C Charging Cable
- Cigarette Lighter Power Cord (12V DC)
- Air Nozzle (Pre-attached to air tube)
- Long Tapered Nozzle
- Ball Air Nozzle
- Presta Valve Needle
- Fuse
- Cloth Storage Bag
- Air Tube
- Packaging Box
4. Setup
4.1 Charging the Device
Before first use, fully charge the inflator's internal battery using the provided Type C charging cable. Connect the Type C cable to the inflator and a suitable USB power source. The battery indicator on the digital display will show charging status.
4.2 Connecting to 12V DC Power
For continuous operation or when the internal battery is low, you can power the inflator using the 12V DC cigarette lighter power cord. Plug the cord into your vehicle's 12V outlet and connect the other end to the inflator's DC input port.

Image 4.1: The inflator supports both cordless battery and 12V DC corded power.
4.3 Attaching the Air Hose and Nozzles
Screw the air tube securely into the inflator's air outlet. Select the appropriate nozzle for your item and attach it to the end of the air tube. The standard air nozzle is suitable for car and motorcycle tires. Use the long tapered nozzle for inflatables, the ball air nozzle for sports balls, and the Presta valve needle for Presta bicycle valves.
5. Operating Instructions
5.1 Powering On/Off
Press and hold the power button (U) for 3 seconds to turn the inflator on or off.
5.2 Setting Pressure Units
With the device powered on, short press the unit button (R) to cycle through available pressure units: PSI, KPA, BAR, and KG/CM².

Image 5.1: The digital display shows real-time and preset pressure values.
5.3 Selecting Inflation Modes
Press the mode button (M) to select from preset inflation modes: Car, Motorcycle, Bicycle, or Ball. Each mode has a default pressure setting, which can be adjusted.
5.4 Setting Target Pressure
After selecting a mode, use the plus (+) and minus (-) buttons to adjust the target pressure. The preset value will flash while adjusting.
5.5 Starting and Stopping Inflation (Auto Shut-Off)
Once the target pressure is set, press the power button (U) to begin inflation. The inflator will automatically stop when the preset pressure is reached. You can manually stop inflation at any time by pressing the power button again.

Image 5.2: Simple three-step process for inflation.
5.6 Using the LED Light
Press the light button (SOS) to turn on the LED flashlight. Press again to switch to SOS strobe mode. Press a third time to turn off the light.

Image 5.3: The integrated LED light provides illumination for nighttime use or emergencies.
5.7 Inflation Examples
- Car Tire: Connect the air nozzle to the tire valve. Select 'Car' mode and set the desired PSI (e.g., 36 PSI). Start inflation.
- Bicycle Tire: Use the Presta valve needle if applicable, or the standard air nozzle. Select 'Bicycle' mode and set the desired PSI (e.g., 30 PSI). Start inflation.
- Sports Ball: Attach the ball air nozzle. Select 'Ball' mode and set the desired PSI (e.g., 8 PSI). Start inflation.
Video 5.4: Official JUSUOX video demonstrating the portable tire inflator in use.
6. Maintenance
- Cleaning: Wipe the exterior of the inflator with a soft, damp cloth. Do not use harsh chemicals or abrasive cleaners.
- Storage: Store the inflator and its accessories in the provided cloth storage bag in a cool, dry place, away from direct sunlight and extreme temperatures.
- Battery Care: For optimal battery life, charge the device at least once every three months if not in regular use.
7. Troubleshooting
| Problem | Possible Cause | Solution |
|---|---|---|
| Inflator does not turn on. | Low battery or no power connection. | Charge the battery or connect to 12V DC power. |
| Inflator runs but no air comes out. | Air hose not securely attached or blocked. | Ensure air hose is tightly screwed in and clear of obstructions. |
| Inaccurate pressure reading. | Nozzle not properly connected to valve, or sensor issue. | Ensure nozzle is firmly attached. If problem persists, contact support. |
| Inflator stops prematurely. | Target pressure reached, or overheating. | Check preset pressure. If due to overheating, allow device to cool down before resuming. |
8. Specifications
| Feature | Detail |
|---|---|
| Brand | JUSUOX |
| Model Number | CZK-5642 |
| Maximum Pressure | 150 PSI |
| Power Source | Cordless (Battery) & 12V DC Corded |
| Inflation Speed (Car Tire 28-33 PSI) | Approx. 1 minute |
| Digital Display | LCD Dual Screen (Real-time & Preset values) |
| Pressure Units | PSI, KPA, BAR, KG/CM² |
| Auto Shut-Off | Yes |
| LED Light | Normal & SOS Emergency modes |
| Noise Level | 70 dB |
| Hose Length | 14.96 inches |
| Item Dimensions (L x W x H) | 2"L x 2"W x 3"H |
| Material Type | Plastic Or Lightweight Alloy |
9. Warranty and Support
JUSUOX products are manufactured to high-quality standards. For warranty information or technical support, please refer to the contact details provided on the product packaging or visit the official JUSUOX website. Please retain your proof of purchase for warranty claims.