
1. Introduction
Thank you for choosing the DANOPLUS Sound Level Meter, Model DP390R2. This portable decibel meter is designed for accurate noise measurement, featuring a wide measurement range of 30 to 130 dB, A/C/Z frequency weighting, and data recording capabilities. This manual provides essential information for the safe and effective operation of your device.
2. Package Contents
Please check the package contents upon receipt to ensure all items are present:
- 1 x DANOPLUS Sound Level Meter (DP390R2)
- 1 x USB Cable
- 3 x AAA Batteries
- 1 x Carrying Pouch
- 1 x User Manual (English)
3. Product Overview
Familiarize yourself with the components and controls of your DANOPLUS Sound Level Meter.

Figure 3.1: Front and back view of the DANOPLUS Sound Level Meter with key components labeled. The front shows the sensor, LCD screen, and control buttons. The back shows the battery compartment and tripod mounting point.
- Sensor: Microphone for sound detection.
- LCD Screen: Displays measurement values, settings, and indicators.
- Alarm Indicator: Visual alert for sound level thresholds.
- REC Button: Initiates data recording.
- Power Button: Turns the device on/off.
- RANGE Button: Adjusts measurement range.
- FAST/SLOW Button: Toggles between fast and slow time weighting.
- MAX/AVG/MIN Button: Cycles through maximum, average, and minimum readings.
- A/C/Z Button: Selects frequency weighting (A, C, or Z).
- HOLD/MODE Button: Freezes the current reading or enters mode settings.
- USB Interface: For PC connection and external power.
- Battery Compartment: Houses 3 AAA batteries.
- Tripod Mounting: Standard thread for tripod attachment.
4. Setup
4.1. Battery Installation
The device operates on 3 AAA 1.5V batteries (included).
- Locate the battery compartment on the back of the device.
- Open the battery cover.
- Insert 3 AAA batteries, ensuring correct polarity (+/-).
- Close the battery cover securely.
4.2. USB Power Connection
Alternatively, the device can be powered via a 5V micro USB cable (included).
- Connect the micro USB end of the cable to the USB interface on the device.
- Connect the other end of the USB cable to a 5V USB power adapter or a computer USB port.

Figure 4.1: Dual power options: AAA batteries and micro USB connection.
4.3. Initial Power On/Off
Press the Power button to turn the device on. Press and hold the Power button again to turn it off. The device features an Automatic Power Off (APO) function to conserve battery life, which can be deactivated if needed (refer to the 'Operating Instructions' for details).
5. Operating Instructions
5.1. Basic Measurement
After powering on, the device will immediately begin measuring sound levels. The current decibel reading will be displayed on the large color LCD screen, along with an analog bar scale for visual representation.

Figure 5.1: The sound level meter displaying a measurement.
5.2. Frequency Weighting (A/C/Z)
Press the A/C/Z button to cycle through the available frequency weighting options:
- A-Weighting (dBA): Mimics the human ear's response to sound, suitable for environmental noise detection.
- C-Weighting (dBC): Provides a flatter response, useful for analyzing the acoustic pressure of engines or machinery.
- Z-Weighting (dBZ): Offers a flat frequency response from 20 Hz to 20 kHz, for unweighted measurements.

Figure 5.2: Explanation of A, C, and Z frequency weighting.
5.3. Time Weighting (FAST/SLOW)
Press the FAST/SLOW button to switch between response times:
- FAST (0.125 s): For capturing rapidly changing noise levels.
- SLOW (1 s): For measuring average noise levels over time.
5.4. MAX/MIN/AVG/HOLD Functions
These functions allow for advanced data analysis:
- MAX: Displays the maximum sound level recorded since the function was activated.
- MIN: Displays the minimum sound level recorded.
- AVG: Displays the average sound level recorded.
- HOLD: Freezes the current display reading. Press the HOLD/MODE button to activate/deactivate.
5.5. Data Recording
The DP390R2 offers two methods for data recording:
- On-Device Recording: The sound level meter can store up to 1999 groups of data internally. Press the REC button to start/stop recording.
- PC Connection: For unlimited data recording and analysis, connect the device to a PC via the USB cable. Use the provided software (compatible with Windows 7, 8, 10, and 11 64-bit operating systems) to view, record, and export data in CSV, PDF, or note formats.
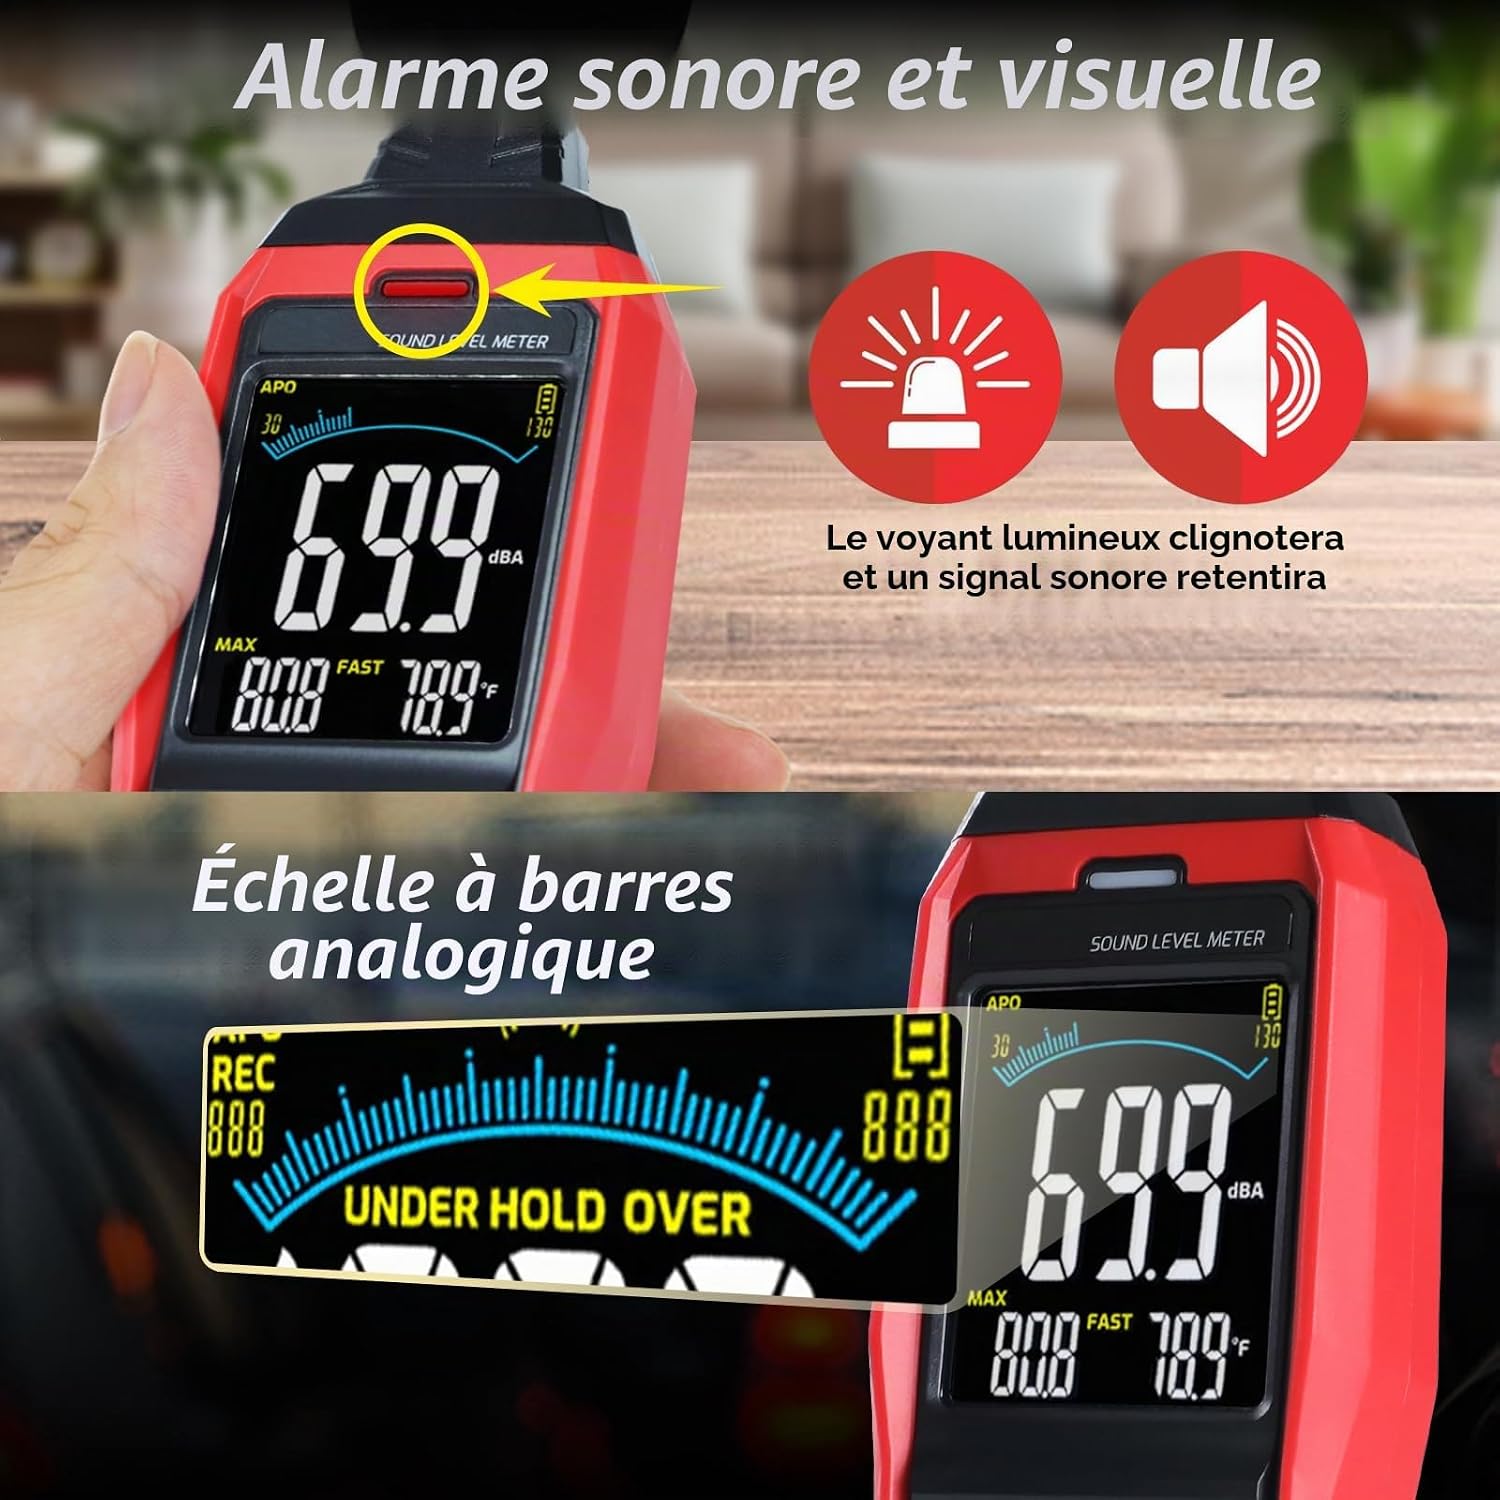
Figure 5.3: Sound level meter connected to a PC for data recording and analysis.
5.6. Alarm Function
The device features a visual and audible alarm to alert you when sound levels exceed a set threshold. You can manually set upper and lower decibel limits.
- Enter the alarm setting mode (refer to the device's on-screen menu or specific button combination, usually via MODE button).
- Adjust the upper and lower decibel thresholds using the navigation buttons.
- Confirm your settings. When the sound level exceeds the set limit, the alarm indicator will flash, and a buzzer will sound.

Figure 5.4: Visual and audible alarm indicators.
5.7. Unit Switching (Fahrenheit/Celsius)
The device can display temperature in both Fahrenheit and Celsius. Use the appropriate button (often combined with A/C/Z or HOLD/MODE) to switch between units.
5.8. Calibration Adjustment
The DP390R2 includes a calibration adjustment function. For precise calibration, it is recommended to use a professional sound calibrator. Refer to the on-screen menu for calibration steps.
6. Maintenance
6.1. Cleaning
Wipe the device with a soft, dry cloth. Do not use abrasive cleaners or solvents, as they may damage the casing or screen. Keep the microphone free from dust and debris.
6.2. Storage
When not in use for extended periods, remove the batteries to prevent leakage. Store the device in its carrying pouch in a cool, dry place, away from direct sunlight and extreme temperatures.
6.3. Battery Replacement
Replace batteries when the low battery indicator appears on the screen. Follow the battery installation steps in Section 4.1.
7. Troubleshooting
If you encounter issues with your DANOPLUS Sound Level Meter, refer to the following common problems and solutions:
| Problem | Possible Cause | Solution |
|---|---|---|
| Device does not power on. | Low or dead batteries; incorrect battery polarity; loose USB connection. | Replace batteries; check battery polarity; ensure USB cable is securely connected to a power source. |
| Inaccurate readings. | Microphone obstructed; device not calibrated; external interference. | Ensure microphone is clear; perform calibration (if possible); move away from strong electromagnetic fields. |
| PC software not detecting device. | Incorrect USB driver; software not installed correctly; incompatible operating system. | Install the correct USB driver; reinstall software; ensure PC meets system requirements (Windows 7/8/10/11 64-bit). |
| Alarm not functioning. | Alarm thresholds not set; alarm function deactivated. | Set appropriate upper and lower alarm thresholds; ensure alarm function is enabled in settings. |
8. Specifications
| Feature | Specification |
|---|---|
| Model | DP390R2 |
| Measurement Range | 30 ~ 130 dB |
| Accuracy | ±1.5 dB |
| Frequency Weighting | A, C, Z |
| Time Weighting | FAST (0.125s), SLOW (1s) |
| Microphone | 1/2 inch condenser microphone |
| Data Storage (On-device) | Up to 1999 groups |
| PC Connectivity | USB interface, unlimited data recording with PC software |
| Software Compatibility | Windows 7, 8, 10, 11 (64-bit OS) |
| Power Source | 3 x AAA 1.5V batteries or 5V Micro USB |
| Auto Power Off (APO) | Yes (deactivatable) |
| Dimensions (L x W x H) | 23.01 x 7.01 x 3.51 cm (approx. 9.06 x 2.76 x 1.38 inches) |
| Weight | 208.65 grams (approx. 0.46 lbs) |
9. Warranty and Support
9.1. Warranty Information
For warranty details, please refer to the specific terms provided by your retailer or the DANOPLUS official website. Keep your purchase receipt as proof of purchase.
9.2. Customer Support
If you have any questions or require technical assistance, please contact DANOPLUS customer support through their official channels. Additional resources, including a digital version of this manual and software downloads, may be available at https://cd50.net/390/.


