Elcometer A415CFBI
Elcometer 415 Paint & Powder Coating Thickness Gauge User Manual
Model B Ferrous (A415CFBI)
1. Introduction
The Elcometer 415 Industrial Paint & Powder Thickness Gauge is designed to provide simple, fast, and accurate coating thickness measurements on smooth and thin industrial paint and powder coatings. This manual provides essential information for the safe and effective operation, maintenance, and troubleshooting of your device.
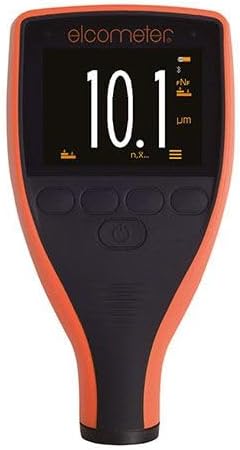
Figure 1: The Elcometer 415 Paint & Powder Coating Thickness Gauge, showing its display and control buttons.
2. Safety Information
Please read and understand all safety instructions before operating the gauge. Failure to do so may result in injury or damage to the instrument.
- Do not expose the gauge to extreme temperatures, direct sunlight, or high humidity.
- Avoid dropping the instrument or subjecting it to severe impacts.
- Keep the gauge away from strong magnetic fields.
- Do not attempt to disassemble or repair the gauge yourself. Refer all servicing to qualified personnel.
- Ensure the measurement surface is clean and free from debris to prevent damage to the probe and ensure accurate readings.
- The gauge has an IP64 rating, indicating protection against dust ingress and splashing water from any direction. However, it is not waterproof and should not be submerged.
3. What's in the Box
Upon unboxing, please verify that all components are present:
- Elcometer 415 Gauge
- Check Piece
- Foil Set
If any items are missing or damaged, please contact your supplier immediately.
4. Setup
4.1. Initial Power On
The Elcometer 415 Gauge is typically supplied with batteries pre-installed. To power on the device, press and hold the power button located on the front panel until the display illuminates.
4.2. Calibration
For accurate measurements, the gauge requires calibration. The Elcometer 415 supports both 1-point and 2-point calibration methods to ensure precision on smooth and thin coated substrates.
- 1-Point Calibration: This method is suitable for most applications. Place the gauge on a known uncoated substrate (e.g., the supplied check piece) and follow the on-screen prompts to set the zero point.
- 2-Point Calibration: For enhanced accuracy, especially on specific materials or thickness ranges, use the supplied foil set. First, perform a 1-point calibration. Then, place a foil of known thickness on the uncoated substrate and calibrate the second point according to the gauge's instructions.
Refer to the on-screen menu for detailed calibration procedures.
5. Operating the Gauge
5.1. Taking a Measurement
Once calibrated, place the probe of the gauge firmly and perpendicularly onto the coated surface. The measurement will be displayed instantly on the screen. The gauge is capable of taking over 60 readings per minute, significantly reducing inspection times.

Figure 2: The Elcometer 415 Gauge being used to measure the thickness of a coating on a flat surface.
5.2. Display Interpretation
The large, clear display shows the measurement in micrometers (µm) or mils (mils). Additional icons indicate battery status, measurement mode, and connectivity status (e.g., Bluetooth if applicable).
5.3. Data Logging and Transfer
The Elcometer 415 features data logging capabilities. Measurements can be stored internally and transferred to a computer via USB. Use the ElcoMaster software for instant report generation and further analysis of your data.

Figure 3: The Elcometer 415 Gauge displaying a measurement, with a smartphone showing detailed data analysis via the ElcoMaster app.
6. Maintenance
6.1. Cleaning
To clean the gauge, wipe the exterior with a soft, damp cloth. Do not use abrasive cleaners or solvents, as these can damage the scratch, solvent, and powder resistant display. Ensure the probe tip is kept clean and free of debris for accurate readings.
6.2. Storage
When not in use, store the Elcometer 415 in its protective case in a dry, cool environment, away from direct sunlight and extreme temperatures. Remove batteries if the gauge will not be used for an extended period to prevent leakage.
7. Troubleshooting
This section addresses common issues you might encounter with your Elcometer 415 Gauge.
| Problem | Possible Cause | Solution |
|---|---|---|
| Gauge does not power on. | Low or dead batteries. | Replace batteries with new ones. Ensure correct polarity. |
| Inaccurate readings. | Improper calibration; dirty probe tip; unstable surface. | Recalibrate the gauge; clean the probe tip; ensure the surface is stable and flat. |
| Display is dim or flickering. | Low battery power. | Replace batteries. |
| Cannot transfer data via USB. | Incorrect cable; driver issue; ElcoMaster software not running. | Ensure correct USB cable is used; install necessary drivers; open ElcoMaster software. |
If the problem persists after attempting these solutions, please contact Elcometer customer support.
8. Specifications
| Feature | Detail |
|---|---|
| Model | Elcometer 415 (Model B Ferrous) |
| Part Number | A415CFBI |
| Measurement Range | Up to 1000µm (40mils) for cured paint & powder coatings |
| Measurement Speed | 60+ readings per minute |
| Environmental Protection | IP64 (Scratch, solvent, and powder resistant display) |
| Data Transfer | USB to ElcoMaster software |
| Calibration | 1-point and 2-point calibration |
9. Warranty
The Elcometer 415 Gauge is manufactured to high quality standards. For specific warranty terms and conditions, please refer to the documentation provided with your purchase or visit the official Elcometer website. Extended protection plans may also be available for purchase separately.
10. Support
For technical assistance, product inquiries, or service requests, please contact Elcometer customer support. You can find contact information and additional resources on the official Elcometer website:
Please have your model number (A415CFBI) and serial number ready when contacting support.
Related Documents - A415CFBI
 |
Elcometer 456 Coating Thickness Gauge: Features, Specifications, and Probes Comprehensive overview of the Elcometer 456 digital coating thickness gauge, including its separate and integrated models, features, technical specifications, probe compatibility, accessories, and calibration options. |
 |
Elcometer 415: 工业油漆和粉末涂层测厚仪 - 准确测量 Elcometer 415 工业油漆和粉末测厚仪提供简便、快速、准确的涂层厚度测量,适用于平滑及薄涂层基板,是工业质量控制的理想工具。 |
 |
Elcometer 415 Paint & Powder Gauge User Guide User guide for the Elcometer 415 Paint & Powder Gauge, detailing its features, operation, calibration, technical specifications, and accessories for measuring coating thickness on smooth surfaces. |
 |
Elcometer 456 Coating Thickness Gauge Operating Instructions Learn to use the Elcometer 456 Coating Thickness Gauge with this guide. Covers features, calibration, statistics, data transfer, and probe details for accurate coating inspection. |
 |
Elcometer 456 Miniature Probe Operating Instructions Operating instructions for the Elcometer 456 Miniature Probes, detailing their use, specifications, and accessories for coating thickness measurement. |
 |
Elcometer 456 Coating Thickness Gauge | Digital Film Thickness Measurement Discover the Elcometer 456, a versatile digital coating thickness gauge offering high accuracy, reliability, and efficiency for measuring dry film thickness on various substrates. Features include a large color display, multiple probes, data logging, and connectivity with ElcoMaster software. |
Ask a question about this manual
Ask about setup, troubleshooting, compatibility, parts, safety, or missing instructions. Manuals+ will review the question and use this page’s manual context to help answer it.