Introduction
The intelamp Solar Flood Light is designed to provide efficient and reliable outdoor illumination with advanced motion sensing capabilities. This manual provides essential information for the proper installation, operation, and maintenance of your solar flood light to ensure optimal performance and longevity.
Key features include a 270° wide-angle illumination, dual motion sensors for enhanced detection, a high-capacity 4000mAh lithium iron phosphate battery, and three distinct operating modes. Its IP65 waterproof rating ensures durability in various weather conditions.
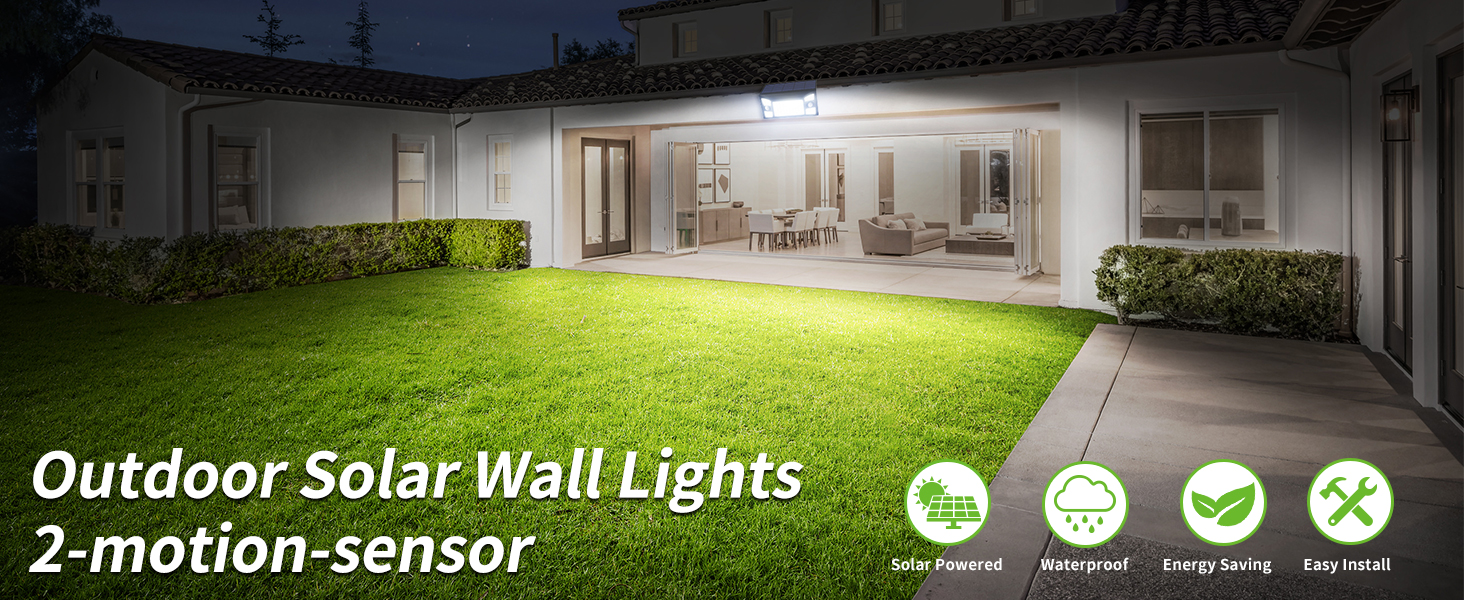
Image: Overview of the intelamp Outdoor Solar Wall Light highlighting its features.
What's in the Box
Please check the package contents to ensure all items are present:
- intelamp Solar Flood Light Unit
- Mounting Screws (2)
- Wall Anchors (2)
- Zip Ties (1 large)
- Instruction Manual
Specifications
| Brand | intelamp |
| Model Name | YL002-13A-1P-MANMU |
| Light Fixture Form | Floodlight |
| Power Source | Solar Powered |
| Brightness | 1300 Lumens |
| Battery Capacity | 4000mAh Lithium Iron Phosphate |
| Lighting Angle | 270° |
| Motion Sensor Detection Range | Up to 180°, Max 26ft |
| Water Resistance Level | IP65 Waterproof |
| Material | Acrylonitrile Butadiene Styrene (ABS) |
| Product Dimensions | 9.44"L x 5.11"W x 1.41"H |
| Solar Panel Size | 9.4" x 4.3" |
| Color Temperature | 6500 Kelvin |
Installation
For optimal performance, install the solar flood light in a location that receives direct sunlight for at least 5 hours daily. Ensure the solar panel is unobstructed.
Wall Mounting
- Choose a suitable wall location that receives ample sunlight.
- Mark the drilling points using the light's mounting holes as a template. The hole spacing is approximately 3.5 inches.
- Drill holes and insert the wall anchors.
- Align the light with the anchors and secure it with the provided screws.
- Adjust the lamp heads and solar panel angle for desired lighting coverage and maximum sun exposure. The solar panel can be tilted up to 60°.
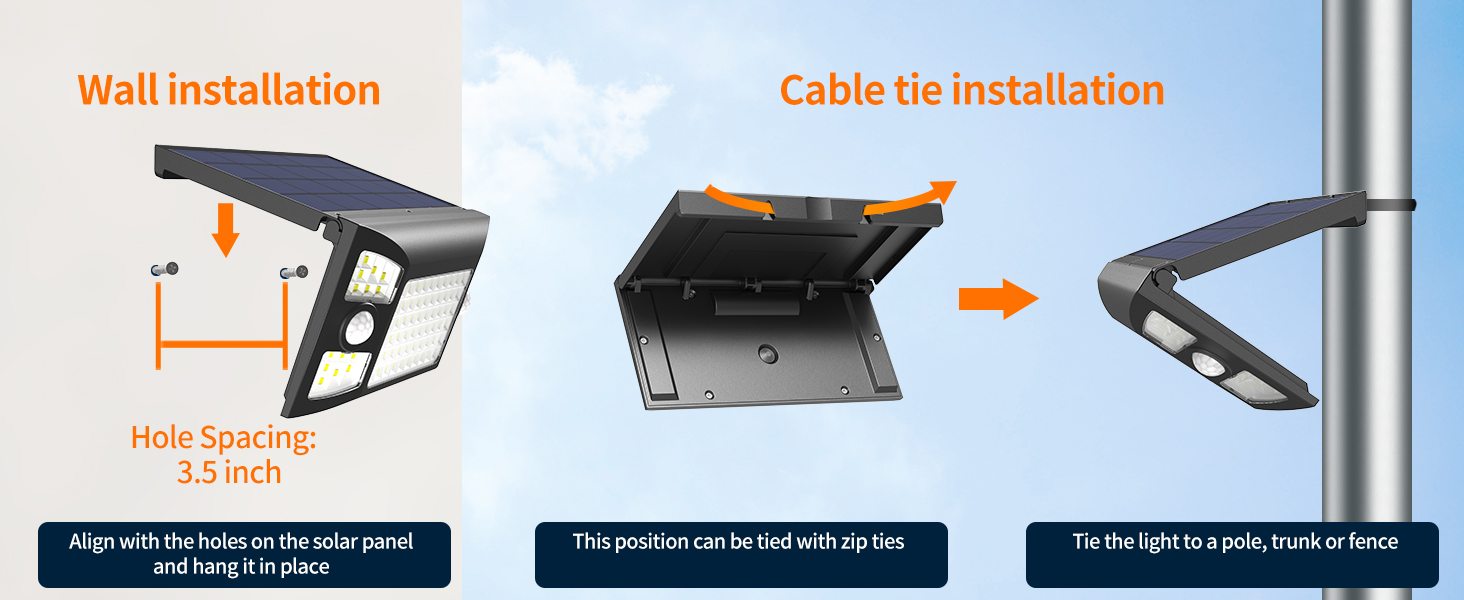
Image: Visual guide for wall installation, showing drilling points and securing the device.
Cable Tie Installation (for poles or fences)
- Identify the slots on the back of the solar light designed for zip ties.
- Thread the provided zip ties through these slots.
- Secure the light to a pole, tree trunk, or fence by tightening the zip ties.
- Adjust the light and solar panel angle as needed.

Image: Product dimensions and location of dual sensors for wider detection.
The recommended installation height is 13 feet for a maximum detecting distance of 26 feet.
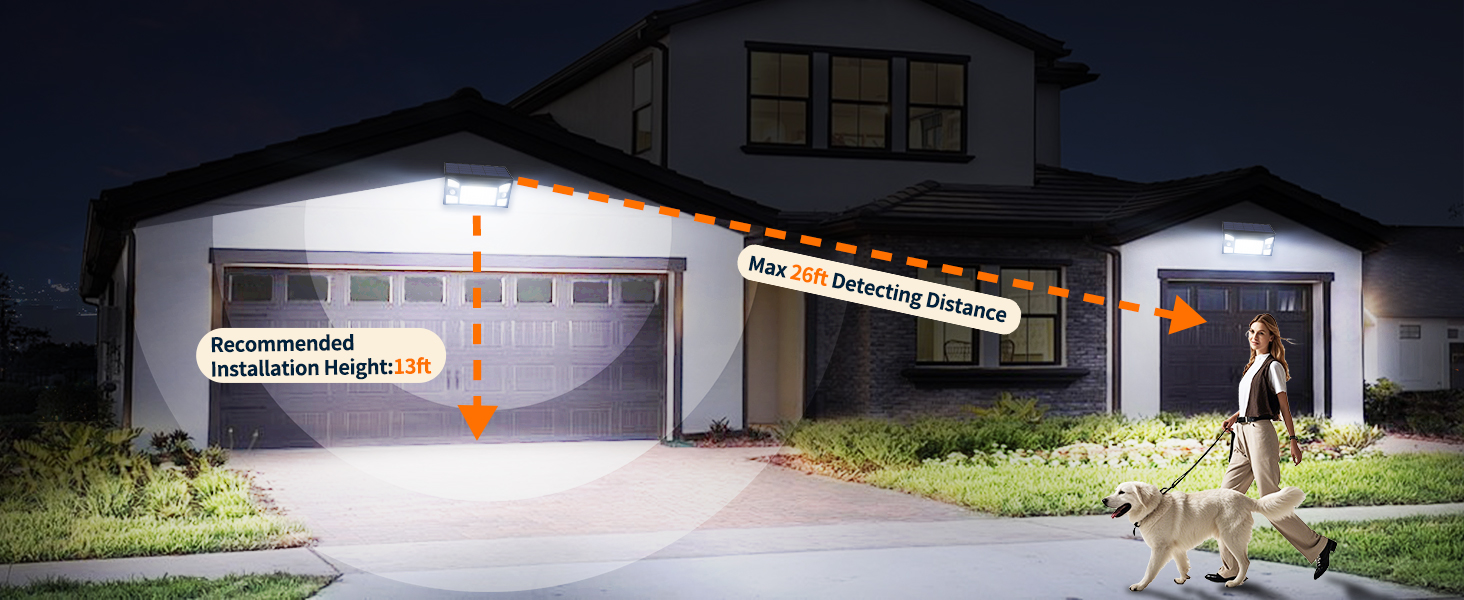
Image: Recommended installation height and motion detection range.
Operating Modes
The intelamp Solar Flood Light features a 'MODE' button to cycle through three distinct lighting modes and an off state. Press the button to switch between modes:

Image: Location and function of the 'MODE' button.
Mode 1: Dim-to-Bright Sensor Mode
In this mode, the light maintains a low brightness. When motion is detected, it switches to high brightness. After approximately 30 seconds of no motion, it returns to low brightness.
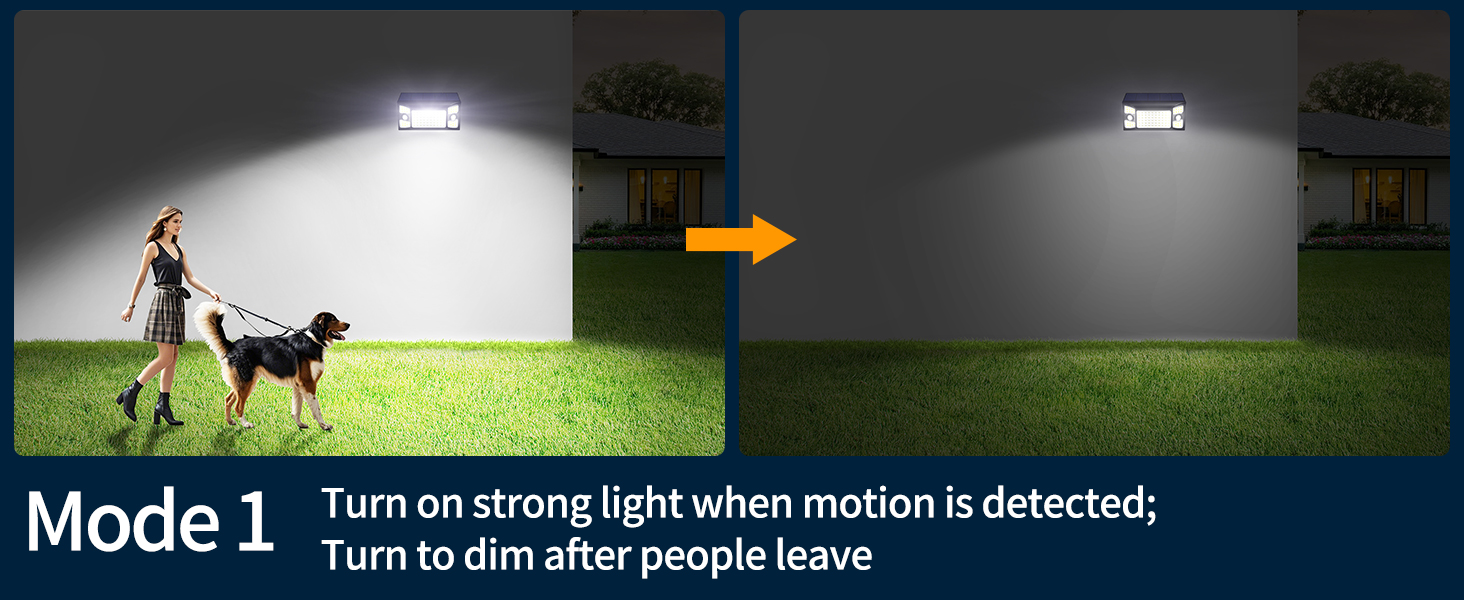
Image: Visual representation of Mode 1 operation.
Mode 2: Off-to-Bright Sensor Mode
The light remains off until motion is detected. Upon detection, it turns on at high brightness. After approximately 30 seconds of no motion, the light turns off completely.
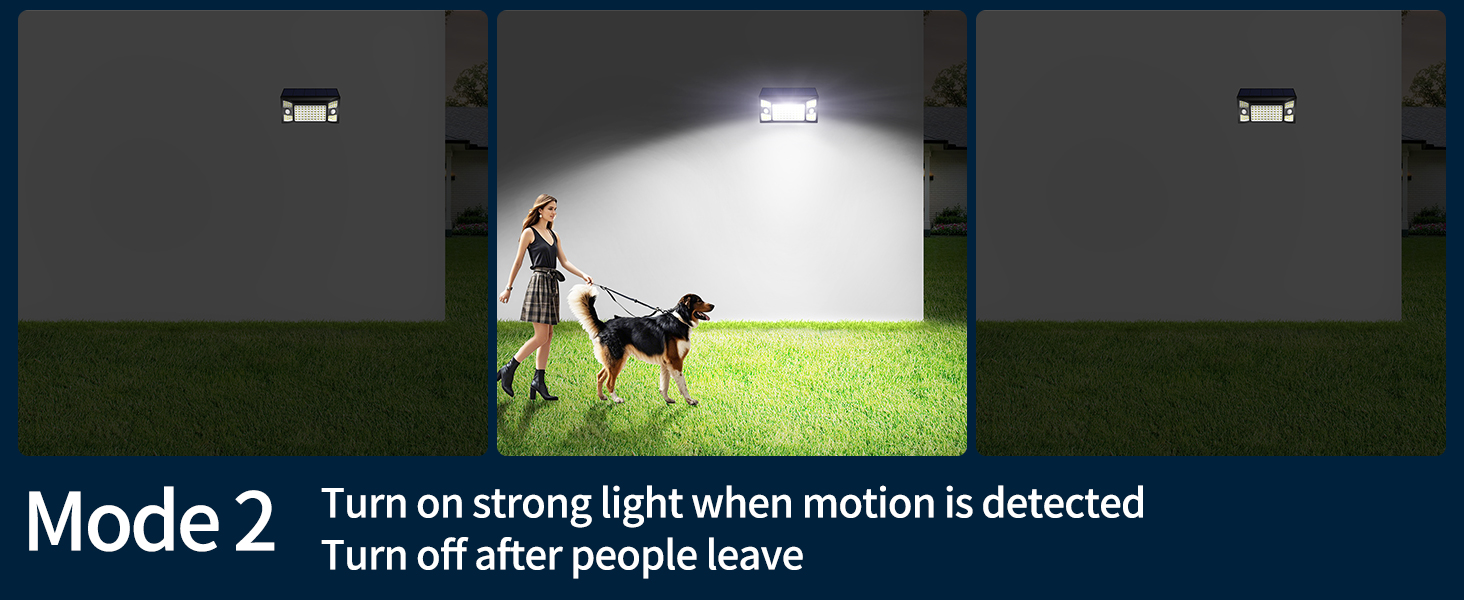
Image: Visual representation of Mode 2 operation.
Mode 3: Constant Medium Brightness (Dusk-to-Dawn)
In this mode, the motion sensor is deactivated. The light provides a constant medium brightness throughout the night, from dusk until dawn or until the battery is depleted.
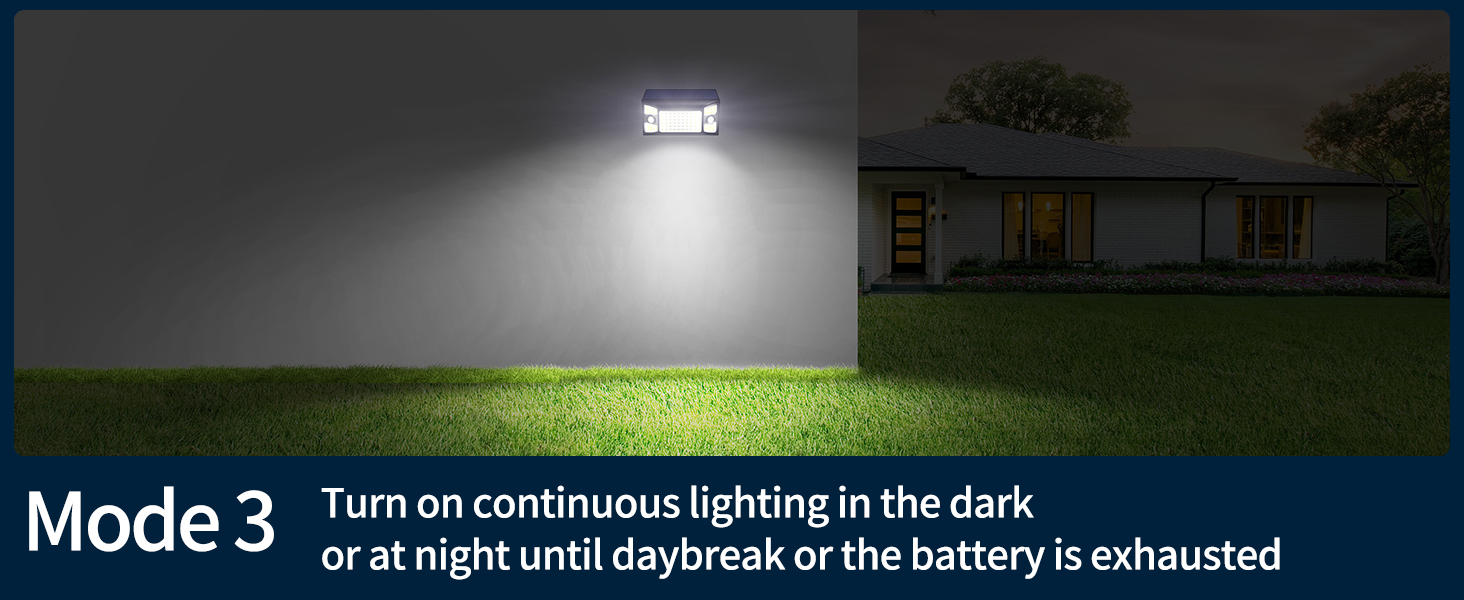
Image: Visual representation of Mode 3 operation.
Off State
Pressing the 'MODE' button a fourth time will turn the light off. It will not automatically turn on until a mode is selected again.
Maintenance
To ensure the longevity and optimal performance of your intelamp Solar Flood Light, follow these maintenance guidelines:
- Solar Panel Cleaning: Regularly wipe the solar panel with a soft, damp cloth to remove dust, dirt, and debris. A clean solar panel ensures maximum charging efficiency.
- Clear Obstructions: Periodically check that no trees, bushes, or other objects are obstructing the solar panel's exposure to direct sunlight.
- Battery Care: The integrated lithium iron phosphate battery is designed for long life. Avoid prolonged storage in extreme temperatures.
- Weather Resistance: The light is IP65 waterproof, providing protection against rain, snow, and frost. While designed for outdoor use, extreme weather conditions may temporarily affect performance.
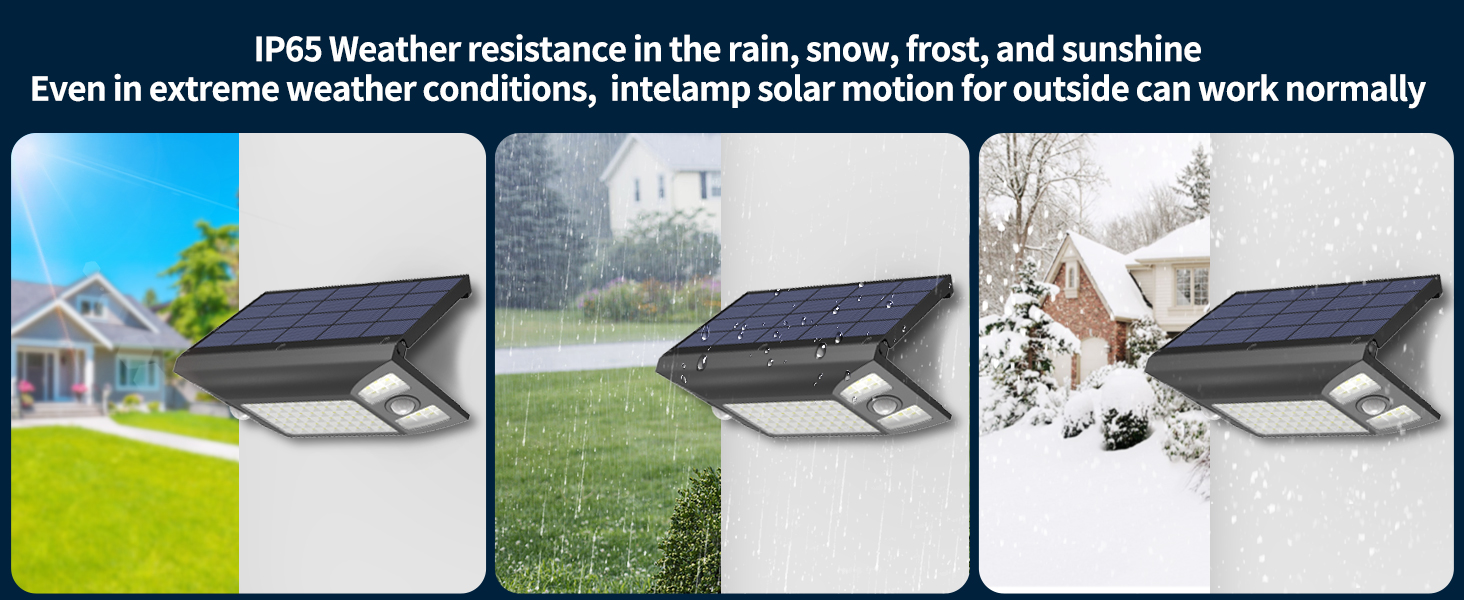
Image: The solar light demonstrating IP65 weather resistance in various conditions.
Troubleshooting
If you encounter any issues with your intelamp Solar Flood Light, refer to the common problems and solutions below:
| Problem | Possible Cause | Solution |
|---|---|---|
| Light not turning on at night | Insufficient solar charge; light installed in a shaded area; 'MODE' button not pressed to activate a mode. | Ensure solar panel receives 5+ hours of direct sunlight daily. Relocate if necessary. Press the 'MODE' button to select an operating mode. |
| Light is dim or on for a short time | Insufficient solar charge; dirty solar panel; low battery. | Clean the solar panel. Ensure optimal sun exposure. Allow several days for full charge. |
| Motion sensor not working | Sensor sensitivity too low; light installed too high; light in Mode 3 (motion sensor off). | Ensure light is installed at recommended height (around 13ft). Check that the light is not in Mode 3. |
| Flashing lights | Low battery. | Allow the solar panel to charge under direct sunlight for a full day. |
For further assistance, please refer to the detailed troubleshooting section in the included instruction booklet or contact customer support.
Warranty and Support
intelamp is committed to providing high-quality products and excellent customer service. If you encounter any problems or have technical questions regarding your solar flood light, please contact our customer support team. We value your feedback and are dedicated to ensuring your satisfaction.
Please retain your purchase receipt for any warranty claims. Specific warranty terms and conditions are detailed in the full instruction manual provided with your product.


