Introduction
This manual provides comprehensive instructions for the setup, operation, maintenance, and troubleshooting of your ASprink D520BT Bluetooth Thermal Label Printer. Designed for efficiency and ease of use, this printer is ideal for small businesses, supporting various platforms and label types. Please read this manual thoroughly to ensure optimal performance and longevity of your device.

Image: The ASprink D520BT printer in operation, demonstrating its compact design and label printing capability.
Package Contents
Upon unboxing, please verify that all the following items are included in your package:
- 1 x ASprink D520BT Label Printer
- 1 x Power Adapter & Cable
- 1 x USB Cable
- 1 x Roll of 4"x6" Roll Labels (for initial testing)
- 1 x User Manual (this document)

Image: An illustration showing all components included in the ASprink D520BT printer package.
Setup Guide
1. Power Connection
- Connect the power adapter to the printer's power port.
- Plug the power cable into a standard electrical outlet.
- Turn on the printer using the power switch. The LED indicator should light up.
2. Loading Labels
The D520BT printer supports both roll paper loaded internally and fanfold paper loaded from the rear.
For Roll Paper:
- Open the paper bin cover of the printer.
- Install the roll labels with the print face up.
- Adjust the paper guides to ensure the labels are straight and snug.
- Close the printer cover.
For Fanfold Paper:
- Insert the fanfold paper from the back of the printer.
- Ensure the paper is aligned correctly with the input slot.

Image: A visual guide demonstrating the four steps to properly install roll paper into the printer.

Image: An illustration showing how to load both folding (fanfold) paper and roll paper into the printer.
3. Initial Calibration (Automatic Label Identification)
After loading the labels, perform the automatic label identification to ensure proper alignment and detection.
- Turn on the printer.
- Press and hold the feed button (usually located on top of the printer) for approximately 3 seconds.
- Release the button. The printer will automatically detect the label size and calibrate.
- Double-click the feed button to print a test page and confirm calibration.
Operating Instructions
Connectivity Options
The ASprink D520BT offers versatile connectivity for various devices.
- Bluetooth Connection: Compatible with Android, iOS, Mac, and Windows devices. Requires the "Labelife" app for direct connection.
- USB Connection: Supports all computer systems, including Chrome OS, Mac, and Windows.

Image: The printer's compatibility with various operating systems and devices for both Bluetooth and USB connections.
Platform Compatibility
The ASprink D520BT printer is designed to work with virtually all major shipping and e-commerce platforms. This includes, but is not limited to, USPS, UPS, eBay, Etsy, Shopify, Amazon, PayPal, Poshmark, Square, BigCommerce, Mercari, and Wix. For all platforms, you must first download the labels to be printed from the corresponding platform, then upload them to the "Labelife" editor app for printing.
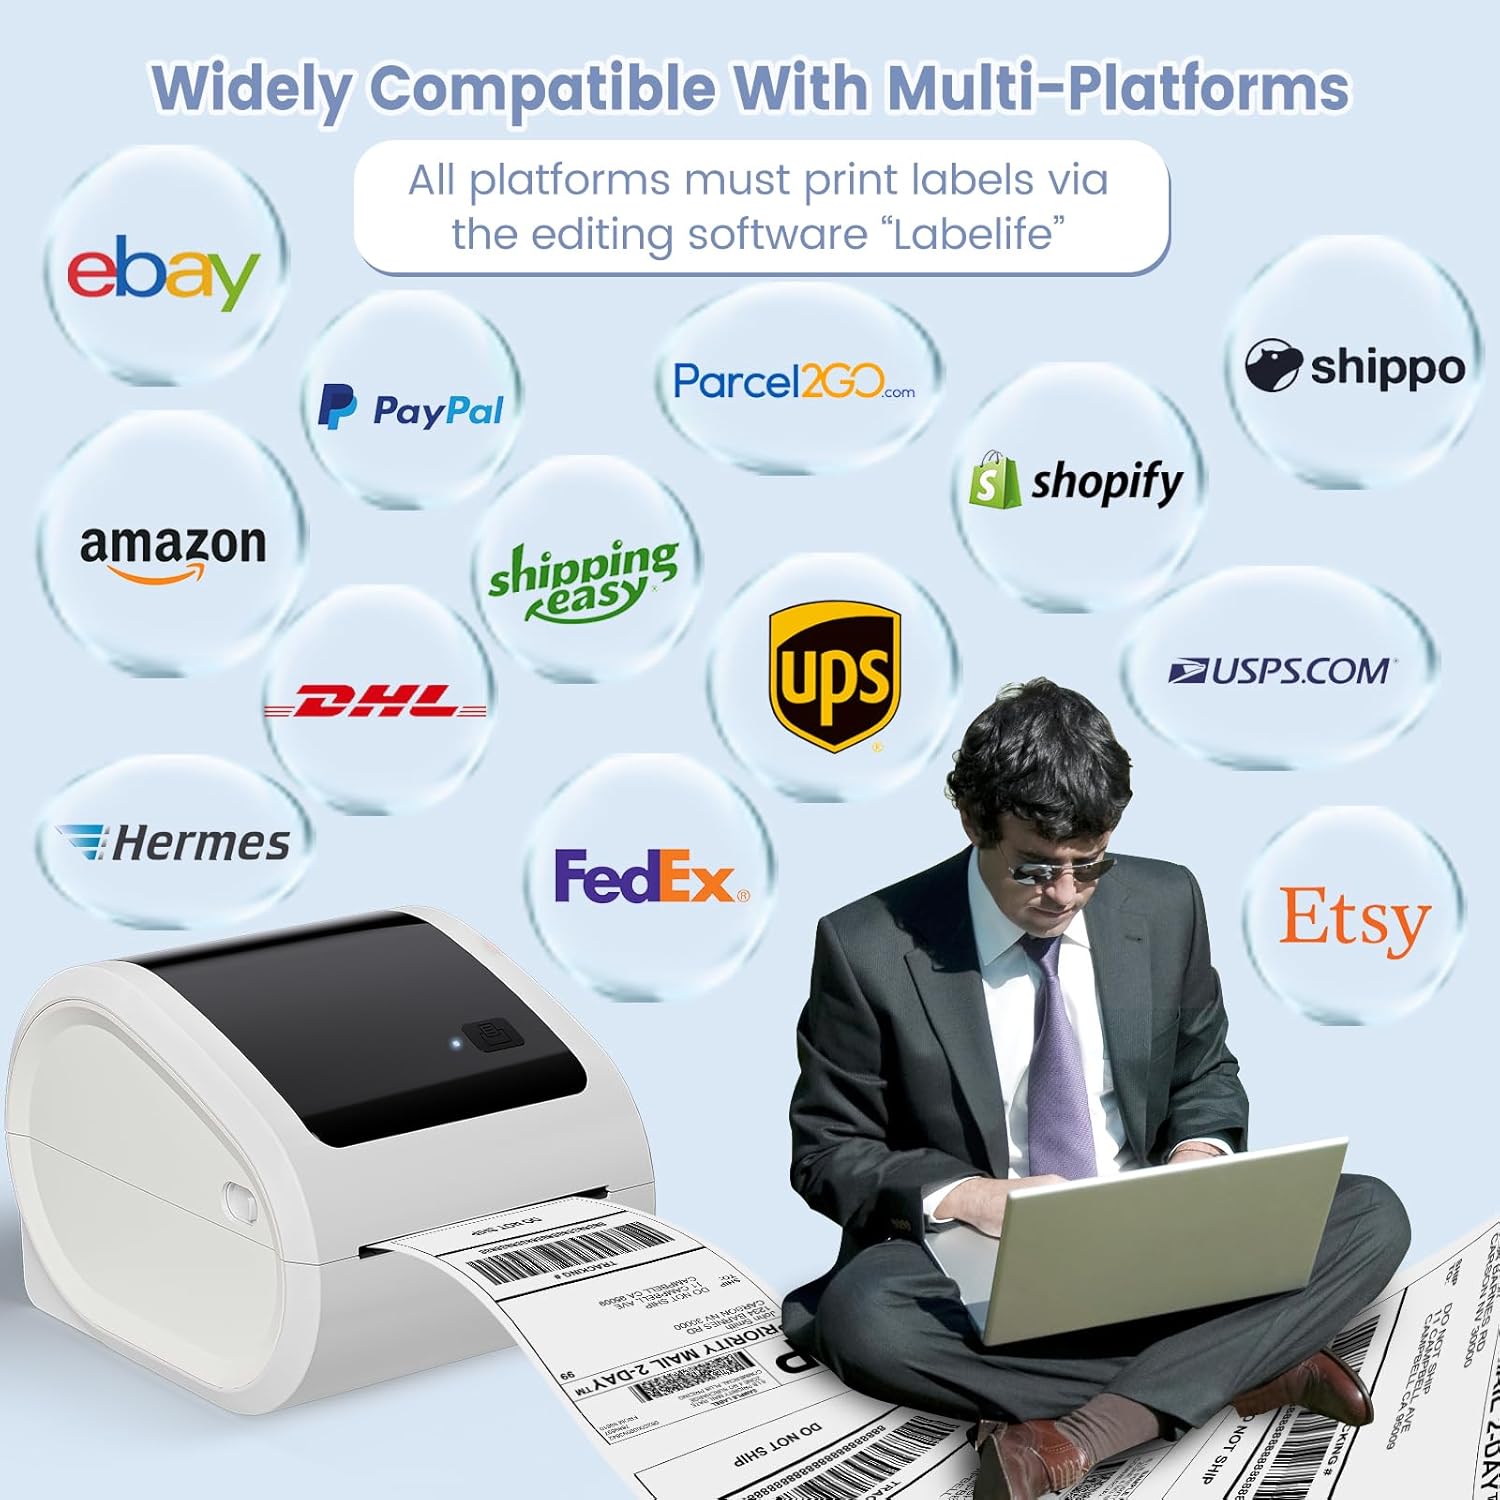
Image: An illustration demonstrating the wide compatibility of the ASprink D520BT printer with numerous e-commerce and shipping platforms.
Using the "Labelife" Application
The "Labelife" app is essential for Bluetooth connectivity and offers robust editing and printing features.
Printing with Phone via Bluetooth:
- Step 1: Scan the QR code or visit aimotech.com/labelife/analysis.html to download the "Labelife" app from Google Play or the App Store.
- Step 2: Turn on your phone's Bluetooth and connect to your label printer within the "Labelife" app. Note: Devices cannot be directly connected to Bluetooth outside the app.
- Step 3: Import your label file (e.g., PDF) into the app. You can also upload labels from other platforms (USPS, Shopify, Amazon, etc.) to the editor for printing. Choose the size and crop your label, then click to print.

Image: A step-by-step visual guide on how to print labels using a smartphone and the Labelife app via Bluetooth.
Printing with PC via Bluetooth:
- Step 1: Plug in the power cord of the printer and turn it on.
- Step 2: Download the "Labelife" application from the official website onto your PC.
- Step 3: Connect the printer's Bluetooth in the "Labelife" app instead of setting it up in the PC's Bluetooth settings.
- Step 4: Edit your printed labels on the app and start printing.

Image: A visual guide detailing the process of printing labels from a PC using Bluetooth connectivity and the Labelife application.
Printing with PC via USB:
- Step 1: Connect the printer and your PC simultaneously with the USB cable.
- Step 2: Download the printer driver from the official website and install it on your PC.
- Step 3: Open the document you want to print directly and select "Print." You do not need to print in the app for USB connections.
- Step 4: Set and edit the label settings in your print dialogue and start printing.

Image: A visual guide outlining the steps for printing labels from a PC using a USB connection.
Supported Label Types and Sizes
The ASprink D520BT printer is compatible with thermal labels ranging from 1 inch to 4.6 inches in width. This includes standard shipping labels (e.g., 4"x6"), as well as smaller labels for various applications.

Image: An illustration showcasing the versatility of the D520BT printer, capable of printing various label sizes from 1" to 4.6" in width, including shipping labels, barcodes, and small product labels.

Image: The printer's internal mechanism with an adjustable baffle, highlighting its compatibility with a wide range of thermal labels from 1" to 4.6" in width, including circular and square labels.
The printer features a built-in large label bin, which can accommodate roll paper inside, eliminating the need for an external label holder and saving desk space. It also includes an adjustable guide rail and automatic location detection for precise label feeding.

Image: A detailed view of the printer's internal design, emphasizing the built-in label bin, automatic location detection, and adjustable guide rail for various label sizes.
Maintenance
Cleaning the Printer
Regular cleaning ensures optimal print quality and extends the life of your thermal printer.
- Print Head: Use an alcohol swab or a specialized thermal printer cleaning pen to gently wipe the print head. Ensure the printer is off and cooled down before cleaning.
- Platen Roller: Rotate the platen roller and wipe it with an alcohol swab to remove any adhesive residue or dust.
- Exterior: Wipe the exterior of the printer with a soft, damp cloth. Avoid using harsh chemicals or abrasive cleaners.
Storage
Store the printer in a cool, dry place away from direct sunlight and extreme temperatures. When not in use for extended periods, disconnect it from the power source.
Troubleshooting
LED Status Light Indicators
The LED light on your D520BT printer provides important status information:
- Solid Purple: Printing in progress.
- Blue Flashing: Printing is paused.
- Solid Red: Printer cover is not closed properly.
- Purple Flashing: Print head is overheating. Allow the printer to cool down.
- Solid Blue: The printer is in standby mode and ready for use.
- Red Flashing: Indicates a label jam, paper shortage, or label detection error.

Image: A comprehensive guide to understanding the different LED light indicators on the D520BT printer and their corresponding statuses.
Common Issues and Solutions
- No Power:
Ensure the power cable is securely connected to both the printer and the power outlet. Check if the power switch is in the 'On' position.
- Printer Not Responding:
Check the LED status light for error indications. Ensure the correct connection method (Bluetooth or USB) is selected and properly configured in your device's settings or the "Labelife" app.
- Poor Print Quality:
Clean the print head and platen roller as described in the Maintenance section. Ensure you are using high-quality thermal labels. Adjust print density settings in the "Labelife" app or printer driver if available.
- Labels Not Feeding Correctly / Jamming:
Ensure labels are loaded correctly and the paper guides are adjusted snugly against the label edges. Perform automatic label identification (hold feed button for 3 seconds). Check for any obstructions in the paper path.
- Bluetooth Connection Issues:
Ensure Bluetooth is enabled on your device. Make sure you are connecting through the "Labelife" app, not directly through your device's Bluetooth settings. Restart both the printer and your device. Ensure you are within the 5-8m Bluetooth range.
Specifications
| Feature | Specification |
|---|---|
| Model Name | D520BT LabelPrinter |
| Item Model Number | D520BT-WH |
| Printing Technology | Thermal |
| Connectivity Technology | Bluetooth, USB |
| Maximum Media Size | 4.6 inches |
| Sheet Size (Paper Width) | 1" - 4.6" (25.4-117mm) |
| Max Print Speed (Monochrome) | 72 ppm (pages per minute) / 150 mm/s |
| Print Resolution | 203 DPI |
| Max Input Sheet Capacity | 100 (for fanfold) |
| Product Dimensions | 7.1"D x 8.86"W x 6.65"H |
| Item Weight | 4.16 pounds |
| Color | White |
| Included Components | Printer |

Image: Illustrates the printer's speed (150 MM/S) and resolution (203 DPI), emphasizing its capability for fast and clear shipping label printing.
Warranty Information
The ASprink D520BT Thermal Label Printer comes with a limited warranty. For specific details regarding the warranty period and coverage, please refer to the warranty card included in your product packaging or contact ASprink customer support.
Customer Support
ASprink provides free and lifetime technical support to assist you with any issues or questions regarding your D520BT printer.
- Phone Call: (9:00-17:00 Mon-Fri EST)
- Email/Live Chat: (19:30-4:30 Mon-Fri EST)
You can find additional information, drivers, detailed videos, and text instructions on the official ASprink website.

Image: Details on how to contact ASprink U.S. Tech Support via phone, email, live chat, and remote control assistance.


