1. Introduction
The Waveshare PoE HAT (G) is a Power Over Ethernet (PoE) hardware attached on top (HAT) designed for the Raspberry Pi 5. This HAT enables the Raspberry Pi 5 to receive both power and network connectivity through a single Ethernet cable, provided it is connected to an IEEE 802.3af/at-compliant PoE router or switch. It offers a stable 5V 5A output and is compatible with the official Raspberry Pi 5 case, making it suitable for various embedded applications.
2. Package Contents
Verify that all items listed below are included in your package:
- PoE HAT (G) x1
- Standoffs pack x1 (includes brass standoffs and screws)

Image 2.1: The image displays the Waveshare PoE HAT (G) circuit board and the accompanying pack of standoffs, which includes three brass standoffs and six screws, representing the complete package contents.
3. Features
- Standard Raspberry Pi 40PIN GPIO header compatibility.
- IEEE 802.3af/at-compliant PoE capability.
- Onboard original IC solution for enhanced stable PoE power performance.
- Adopts non-isolated switched-mode power supply (SMPS).
- Compact design for easy assembly and integration.
- Provides 5V 5A output to the Raspberry Pi 5.

Image 3.1: A detailed view of the Waveshare PoE HAT (G) board, emphasizing its compatibility with Raspberry Pi 5, 5V 5A output, and support for the IEEE 802.3af/at network standard.
4. Specifications
| Parameter | Value |
|---|---|
| PoE Power Input | 38V – 57V DC in |
| Power Output | GPIO header: 5V 5A (MAX) |
| Dimensions | 56.5 × 64.98mm |
| Network Standard | IEEE 802.3af/at PoE |

Image 4.1: This image presents a table of technical specifications for the PoE HAT (G). Below the table, the HAT is shown installed on a Raspberry Pi 5, with an inset highlighting the 40-pin GPIO header connection.

Image 4.2: A technical drawing displaying the precise outline dimensions of the Waveshare PoE HAT (G) circuit board, with measurements provided in millimeters.
5. Setup and Installation
Follow these steps to install the Waveshare PoE HAT (G) onto your Raspberry Pi 5:
- Prepare the Raspberry Pi 5: Ensure your Raspberry Pi 5 is powered off and disconnected from any power source.
- Attach the Standoffs: Secure the included brass standoffs to the mounting holes on the Raspberry Pi 5 board.
- Mount the PoE HAT (G): Carefully align the 40-pin GPIO header of the PoE HAT (G) with the corresponding pins on your Raspberry Pi 5. Gently press down until the HAT is firmly seated.
- Secure the HAT: Use the provided screws to secure the PoE HAT (G) to the standoffs, ensuring a stable connection.
- Install in Official Case (Optional): If using the official Raspberry Pi 5 case, the compact design of the PoE HAT (G) allows it to fit inside. Follow the case's instructions for assembly after the HAT is installed.
- Connect Ethernet Cable: Connect an Ethernet cable from an IEEE 802.3af/at-compliant PoE router or switch to the Ethernet port on your Raspberry Pi 5. This cable will provide both power and network connectivity.

Image 5.1: This image displays the Waveshare PoE HAT (G) circuit board, along with the included brass standoffs and screws. An exploded diagram illustrates how the HAT is installed onto a Raspberry Pi 5, which is then housed within the official Raspberry Pi 5 case.
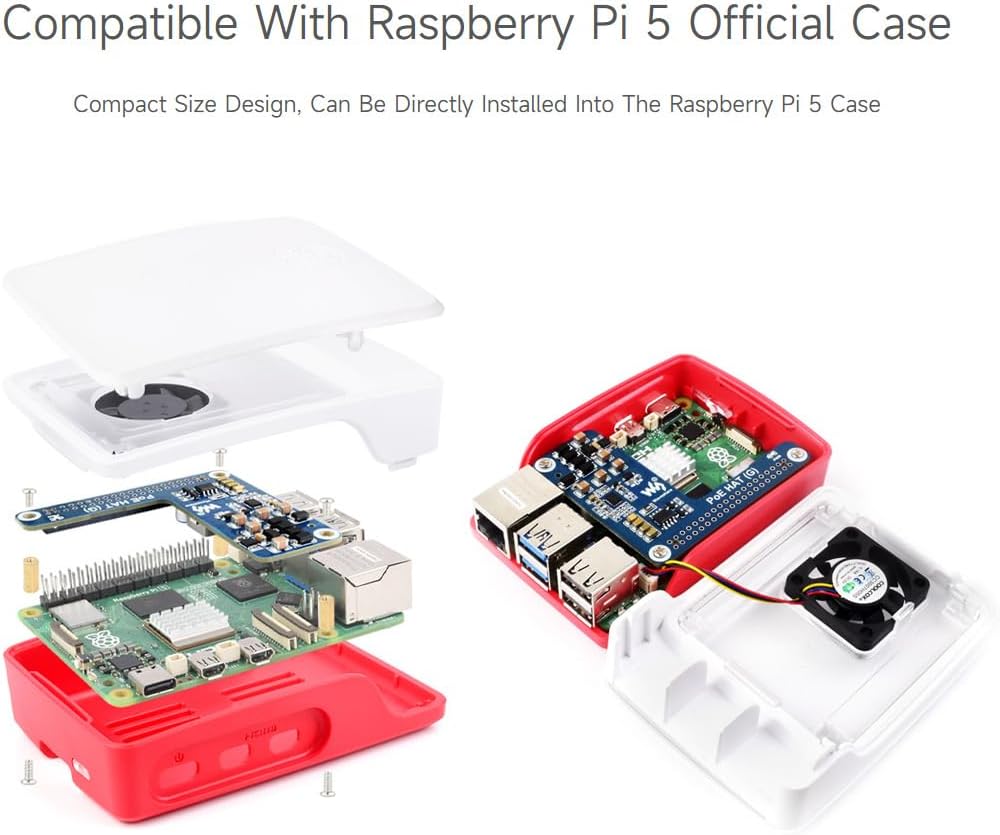
Image 5.2: This image provides an exploded view of the Waveshare PoE HAT (G) being installed onto a Raspberry Pi 5, which is then placed inside the official Raspberry Pi 5 case, demonstrating its compact size and compatibility.
6. Operation
Once the Waveshare PoE HAT (G) is correctly installed and connected to a compatible PoE switch or router, your Raspberry Pi 5 will receive power and network access through the single Ethernet cable. No additional power adapter is required for the Raspberry Pi 5 itself.

Image 6.1: A diagram demonstrating how the Waveshare PoE HAT (G) enables both network connectivity and power supply to a Raspberry Pi 5 through a single Ethernet cable, connected to an 802.3af/at compliant PoE router or switch.

Image 6.2: An example setup showing a Raspberry Pi 5 with the Waveshare PoE HAT (G) installed, connected to an external display, illustrating a typical use case.
7. Troubleshooting
- No Power/Network:
- Ensure your PoE router or switch is IEEE 802.3af/at compliant.
- Verify the Ethernet cable is securely connected at both ends.
- Check the PoE HAT (G) for proper seating on the Raspberry Pi 5's GPIO header.
- Low Power Warnings for USB Peripherals:
- The default Raspberry Pi OS may limit USB power when using PoE. To increase the power limit for USB ports (up to 1.6A), edit the
/boot/firmware/config.txtfile. - Add the line
usb_max_current_enable=1at the bottom of the file. Save and reboot your Raspberry Pi 5.
- The default Raspberry Pi OS may limit USB power when using PoE. To increase the power limit for USB ports (up to 1.6A), edit the
- Insufficient Power for High-Demand Applications:
- If your Raspberry Pi 5 and its peripherals require more than 15W, ensure your PoE router or switch can provide a 30W output (PoE+). Standard PoE switches typically provide 15W per port.
8. Maintenance
The Waveshare PoE HAT (G) requires minimal maintenance. To ensure optimal performance and longevity:
- Keep the HAT and Raspberry Pi 5 in a clean, dry environment, free from dust and moisture.
- Avoid exposing the device to extreme temperatures.
- Handle the HAT by its edges to prevent damage to electronic components.
- Periodically check connections to ensure they remain secure.
9. Support and Warranty
For technical support, please refer to the official Waveshare Wiki resources or contact Waveshare customer service directly. Specific warranty information may vary by region and retailer; please consult your purchase documentation for details.
For additional resources, visit the Waveshare Store on Amazon.


