
1. Introduction
This manual provides comprehensive instructions for the setup, operation, and maintenance of your Lemnoi 7 Inch Digital Dementia Clock, Model SG9. Please read this manual thoroughly before use to ensure proper functionality and longevity of the device.
2. Safety Information
- Use only the provided power adapter.
- Do not expose the device to water or excessive moisture.
- Avoid dropping or subjecting the device to strong impacts.
- Do not attempt to disassemble or repair the device yourself. Contact customer support for assistance.
- Keep out of reach of children.
3. Package Contents
Verify that all items are present in the package:
- Lemnoi 7 Inch Digital Dementia Clock (Model SG9)
- Power Adapter
- User Manual (this document)
- Stand

Image showing the Lemnoi SG9 clock, power adapter, user manual, and a stand.
4. Product Overview
The Lemnoi SG9 is a 7-inch digital clock designed for clarity and ease of use, particularly for seniors. It displays time, date, day of the week, and temperature.
4.1. Front Panel

This image displays the front of the clock with its large digital display and the control buttons located below the screen.
- Display Screen: 7-inch 1024x600 HD display.
- Control Buttons: Up, Down, Left, Right, OK, Menu/Return.
4.2. Rear Panel and Ports

This image shows the back of the clock, highlighting the wall mount holes, USB port, and Type-C power input.
- USB Port: For digital photo frame function.
- Type-C Power Input: For connecting the power adapter.
- Wall Mount Holes: For optional wall mounting.
5. Setup
5.1. Initial Placement
Place the clock on a stable, flat surface using the included stand, or mount it on a wall using appropriate hardware (not included).

Image illustrating the clock's versatility, showing it both on a desk and wall-mounted.
5.2. Power Connection
Connect the provided power adapter to the Type-C power input on the back of the clock and plug it into a standard electrical outlet. The clock will power on automatically.
Image showing the clock connected to a power source.
5.3. Screen Protector Removal
A protective film with a production serial number is applied to the screen. Gently peel off this film before use for optimal display clarity.
6. Operating Instructions
6.1. Basic Navigation
Use the Up, Down, Left, Right buttons to navigate through menus and adjust settings. Press the OK button to confirm selections and the Menu/Return button to go back or exit a menu.
6.2. Setting Time and Date
- Press the Menu/Return button to access the main menu.
- Navigate to "Date & Time" and press OK.
- Adjust the year, month, day, hour, and minute using the Up/Down buttons and Left/Right buttons to move between fields.
- Select 12-hour or 24-hour format.
- Select date format (MM-DD-YYYY or DD-MM-YYYY).
- Press OK to save changes.
6.3. Display Modes
The clock offers 6 display modes, including floral backgrounds that change daily.

This image illustrates the six available display modes and the five language options.
To change the display mode, use the Left or Right navigation buttons from the main time display.

Image showcasing different visual display options for the clock face.
6.4. Brightness Adjustment and Auto Dimming
The clock features 5 levels of brightness and an auto-dimming function.

This image demonstrates the five adjustable brightness levels of the clock's display.
- From the main menu, navigate to "Brightness".
- Adjust the brightness level (1-5) using the Up/Down buttons.
- To enable auto-dimming, select the "Auto Dimming" option. You can set a custom sleep time and sleep brightness percentage.

Image showing the settings interface for configuring custom auto-dimming, including sleep time and brightness.
6.5. Alarm Settings (Daily & Medication)
The clock supports up to 15 daily alarms and 15 medication alarms.
This image shows the clock's capability to set multiple medication reminders.
- From the main menu, navigate to "Alarm" or "Take Medicine".
- Select an alarm slot to set a new alarm or modify an existing one.
- Set the hour and minute for the alarm.
- Choose the alarm frequency (Every Day, Weekdays, Weekends, Specific Date).
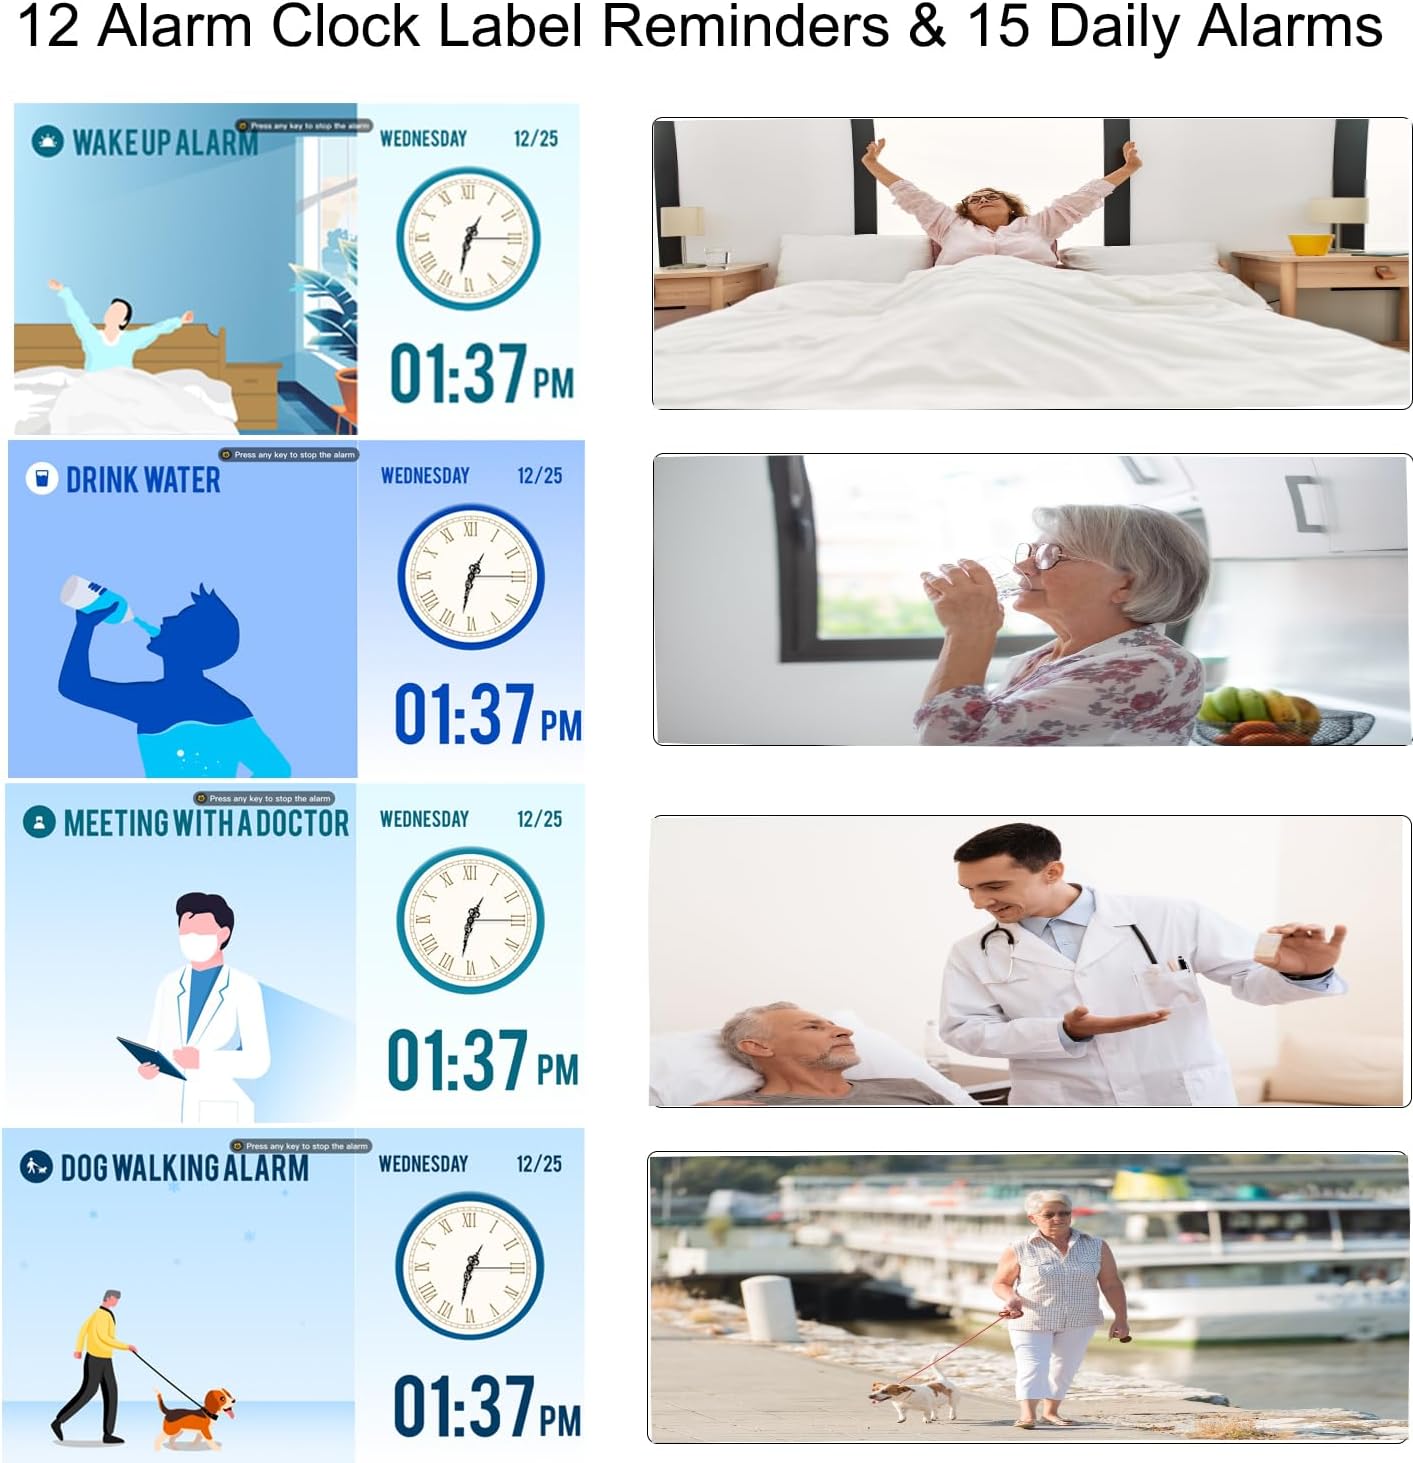
- For daily alarms, select from 12 pre-set labels (e.g., Wake Up, Drink Water, Meeting with Doctor, Dog Walking).
- For medication alarms, set morning, afternoon, or evening reminders.
- Press OK to save.

This image displays the 12 different alarm labels available for daily reminders, such as "Wake Up" and "Drink Water".

Image showing the menu for selecting alarm labels like "Wake Up" or "Meet With Doctor".
6.6. Daylight Saving Time (DST)
The clock features an automatic Daylight Saving Time adjustment function.
- From the main menu, navigate to "Daylight Saving".
- Enable or disable the automatic DST adjustment. When enabled, the clock will automatically adjust in March and October.

Image demonstrating how the clock automatically adjusts for summer and winter time changes due to Daylight Saving Time.
6.7. Language Settings
The clock supports 5 languages: English, German, French, Italian, Spanish.
- From the main menu, navigate to "Language".
- Select your preferred language.

Image displaying the clock's multi-language support, including flags for English, German, French, Italian, and Spanish.
6.8. Digital Photo Frame Function
The clock can function as an HD photo frame, playing pictures and videos from a USB flash drive.
- Insert a USB flash drive containing images or videos into the USB port on the back of the clock.
- From the main menu, navigate to "Photo Frame" or "Media Playback".
- Select the desired media to play.

Image showing the clock displaying family photos, highlighting its use as a digital photo frame.
7. Maintenance
- Clean the screen and casing with a soft, dry cloth. Do not use abrasive cleaners or solvents.
- Ensure the clock is unplugged before cleaning.
- Keep the device free from dust and debris.
8. Troubleshooting
| Problem | Possible Cause | Solution |
|---|---|---|
| Clock does not power on | Power adapter not connected or faulty. | Ensure the power adapter is securely connected to the clock and a working power outlet. Try a different outlet. |
| Display is too dim/bright | Brightness settings are incorrect or auto-dimming is active. | Adjust the brightness level in the settings menu. Check auto-dimming settings and adjust sleep brightness or disable it if not desired. |
| Alarms are not sounding | Alarm is disabled or volume is too low. | Ensure alarms are enabled and set correctly. Note that the alarm volume may not be adjustable and can be quiet. |
| Time is incorrect after power outage | Internal backup function may need to reset. | The clock has a backup function to reset to the correct time and date when power is restored. If issues persist, contact support. |
| Photo frame not displaying images | USB drive not inserted correctly or unsupported file format. | Ensure the USB drive is fully inserted. Check that image/video files are in a supported format (e.g., JPEG for images). |
9. Specifications
- Model: SG9
- Display Size: 7 inches
- Display Resolution: 1024x600 HD
- Dimensions: 6.2"W x 7.67"H
- Power Source: Corded Electric (Dedicated power adapter)
- Material: Acrylonitrile Butadiene Styrene (ABS)
- Languages: English, German, French, Italian, Spanish
- Special Features: Adjustable Brightness (5 levels), Auto Dimmable, Daylight Saving Time (Auto), Temperature Display, 15 Daily Alarms, 15 Medication Alarms, 12 Alarm Labels, Digital Photo Frame Function.
- Item Weight: 290 Grams (10.2 ounces)
- Batteries: 1 CR123A batteries required (for backup, not primary power).
10. Warranty and Support
This Lemnoi product comes with a limited warranty. For detailed warranty information, please refer to the documentation included with your purchase or contact Lemnoi customer support.
For technical assistance, troubleshooting, or warranty claims, please contact Lemnoi customer support through their official website or the retailer where the product was purchased.
Manufacturer: Lemnoi
Model: SG9