1. Important Safety Instructions
Read all instructions before using this humidifier. Failure to follow these instructions may result in electric shock, fire, or serious injury.
- Always place the humidifier on a firm, flat, waterproof surface at least 12 inches (30 cm) away from walls and appliances.
- Do not place the humidifier near heat sources such as stoves, ovens, radiators, or computers.
- Use only clean, cool tap water or distilled water. Do not use hot water.
- Never add essential oils directly into the water tank. Use the designated aroma box if available. Essential oils can damage the humidifier and void the warranty.
- Clean the humidifier regularly to prevent mineral buildup and bacterial growth.
- Do not immerse the base in water or other liquids.
- Unplug the humidifier before filling, cleaning, or moving it.
- Keep out of reach of children and pets.
2. Product Overview
2.1 Components
The Dreo HM311 humidifier consists of a base unit, a transparent water tank, and a top cover with an adjustable mist nozzle.

Figure 2.1: Front view of the Dreo HM311 humidifier, showing the transparent water tank and control panel.
2.2 Control Panel
The control panel is located on the front of the base unit and features touch-sensitive buttons for various functions.
- Power Button: Turns the humidifier on or off.
- Light Button: Toggles the night light on/off and adjusts brightness levels.
- Night Mode Button: Activates sleep mode, turning off all lights and operating at the lowest mist level.
- Mist Level Button: Cycles through low, medium, and high mist output settings.

Figure 2.2: Dimensions of the Dreo HM311 humidifier, illustrating its compact size.
3. Setup
- Unpack: Carefully remove all packaging materials and ensure all components are present.
- Placement: Place the humidifier on a flat, stable, and waterproof surface. Ensure it is at least 12 inches (30 cm) away from walls, furniture, and electronic devices to prevent moisture damage.
- Fill Water Tank: Remove the top cover. Fill the water tank directly from the top with cool, clean tap water or distilled water. Do not exceed the 'MAX' fill line indicated on the tank.
- Replace Cover: Securely place the top cover back onto the water tank.
- Plug In: Connect the power cord to a suitable electrical outlet. The humidifier will enter standby mode.

Figure 3.1: Demonstrating the easy top-fill design of the humidifier.
4. Operating Instructions
- Power On/Off: Press the Power Button (⏻) to turn the humidifier on. Press it again to turn it off.
- Adjust Mist Level: Press the Mist Level Button (∭) repeatedly to cycle through low, medium, and high mist output settings. The indicator lights will show the current level.
- Night Light Control: Press the Light Button (☀) to turn the night light on. Press again to adjust brightness or turn it off.
- Night Mode: Press the Night Mode Button (☾) to activate sleep mode. This will turn off all indicator lights and operate the humidifier at the lowest mist setting for undisturbed sleep. Press any button to exit night mode.
- Adjust Mist Direction: The mist nozzle on the top cover can be rotated to direct the mist in your desired direction.
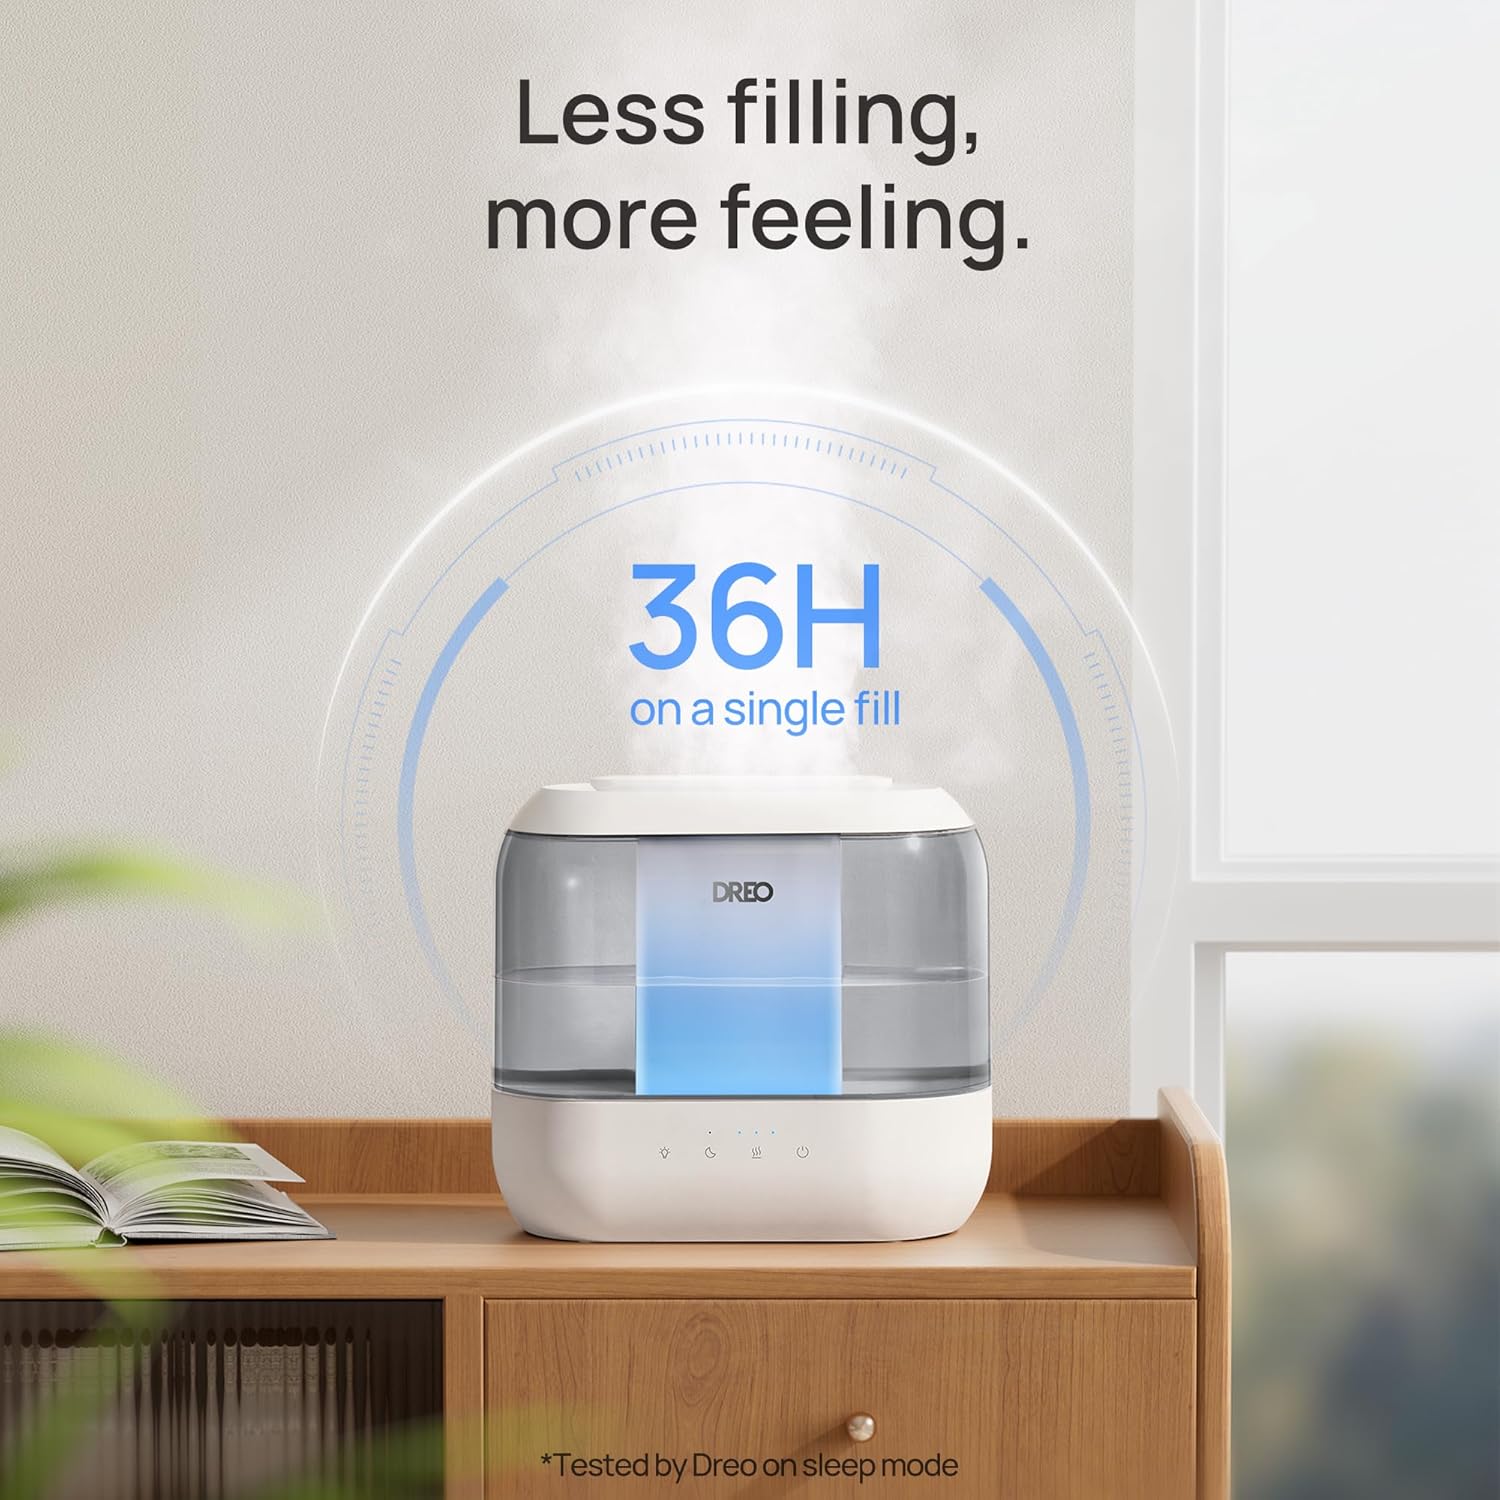
Figure 4.1: The humidifier producing a visible mist, demonstrating its humidification capability.
5. Maintenance and Cleaning
Regular cleaning is crucial for maintaining the efficiency and longevity of your humidifier and preventing the growth of mold and bacteria.
5.1 Daily Maintenance
- Empty and rinse the water tank and base daily.
- Wipe down all surfaces with a clean, dry cloth.
5.2 Weekly Cleaning
- Unplug: Always unplug the humidifier before cleaning.
- Disassemble: Remove the top cover and water tank from the base.
- Clean Tank: Fill the water tank halfway with water and add 2 tablespoons of white vinegar. Shake vigorously and let it sit for 30 minutes. Rinse thoroughly with clean water until the vinegar smell is gone.
- Clean Base: Gently wipe the inside of the base with a soft cloth or brush dipped in white vinegar. Pay attention to the nebulizer and water sensor. Ensure no water enters the air outlet or control panel area.
- Rinse and Dry: Rinse the base thoroughly with clean water. Dry all parts completely before reassembling or storing.
5.3 Demineralization Cartridge
If using tap water, a demineralization cartridge (included) can help reduce white dust caused by hard water minerals. Replace the cartridge every 4-6 months or as needed, depending on water hardness and usage.
6. Troubleshooting
| Problem | Possible Cause | Solution |
|---|---|---|
| No mist or low mist output | Low water level; mineral buildup on nebulizer; clogged mist nozzle. | Refill water tank; clean the nebulizer and mist nozzle; ensure proper assembly. |
| Water leaking from base | Overfilled water tank; improper placement of tank; damaged seal. | Do not fill above MAX line; ensure tank is seated correctly; contact support if seal is damaged. |
| White dust around humidifier | Using hard tap water. | Use distilled water or install a demineralization cartridge. |
| Controls not responding | Water in the electronics area; power issue. | Unplug and allow to dry completely (use a blow dryer on low if necessary); check power connection. |
7. Specifications
- Model Name: HM311
- Model Number: DR-HHM001
- Brand: Dreo
- Capacity: 4 Liters
- Runtime: Up to 36 hours (on lowest setting)
- Noise Level: 28dB Ultra-Quiet Operation
- Special Features: Adjustable Humidity Control, Aroma Diffuser, Easy Top-Fill, Night Light
- Color: Gray
- Floor Area: 300 Square Feet
- Operation Mode: Ultrasonic
- Product Dimensions: 5.51"D x 11.02"W x 10.16"H
- Item Weight: 3.12 Pounds
- Voltage: 120 Volts
- Wattage: 26 Watt-hours
- Included Components: Humidifier, Aroma Pad, Cleaning Guide, Cleaning Brush, Demineralization Cartridge, User Manual
8. Warranty and Support
For warranty information or technical support, please refer to the warranty card included with your product or visit the official Dreo website. Our customer service team is available to assist you with any questions or concerns regarding your Dreo HM311 humidifier.


