1. Introduction
The Core Innovations ANT100TCR Outdoor/Attic Amplified TV Antenna is designed to receive free over-the-air (OTA) high-definition television broadcasts. This antenna features a 100-mile reception range and 360-degree motorized rotation for optimal signal acquisition. It supports up to 4K Full HD resolution where available. This manual provides instructions for proper installation, operation, and maintenance of your antenna.

Image 1.1: The Core Innovations ANT100TCR Outdoor/Attic Amplified TV Antenna.
2. Package Contents
Verify that all items listed below are included in your package. If any items are missing or damaged, please contact customer support.
- Core Innovations ANT100TCR Amplified TV Antenna
- Mounting Pole
- Mounting Hardware (screws, anchors, U-bolts)
- 25-foot Coaxial Cable
- Power Adapter
- Wireless Remote Control
- Instruction Manual (this document)

Image 2.1: Illustration of antenna components and included accessories.
3. Setup and Installation
3.1. Choosing an Installation Location
The antenna can be installed outdoors or in an attic. For optimal reception, choose a location with a clear line of sight to broadcast towers, free from obstructions like large buildings or dense foliage. Higher elevation generally improves signal strength.
3.2. Mounting the Antenna
Outdoor Mounting:
- Assemble the mounting pole and attach it securely to a stable surface such as a roof, wall, or mast using the provided mounting hardware. Ensure the pole is vertical.
- Attach the antenna unit to the top of the mounting pole. Tighten all fasteners to prevent movement in windy conditions.
- Ensure the antenna's rotation mechanism is free to move.

Image 3.1: Example of outdoor antenna installation on a residential roofline.
Attic Mounting:
- Identify a suitable location in your attic, preferably near the roof peak and away from large metal objects or electrical wiring that could interfere with the signal.
- Secure the mounting pole to a wooden beam or other stable structure within the attic using the provided hardware.
- Attach the antenna unit to the top of the mounting pole.
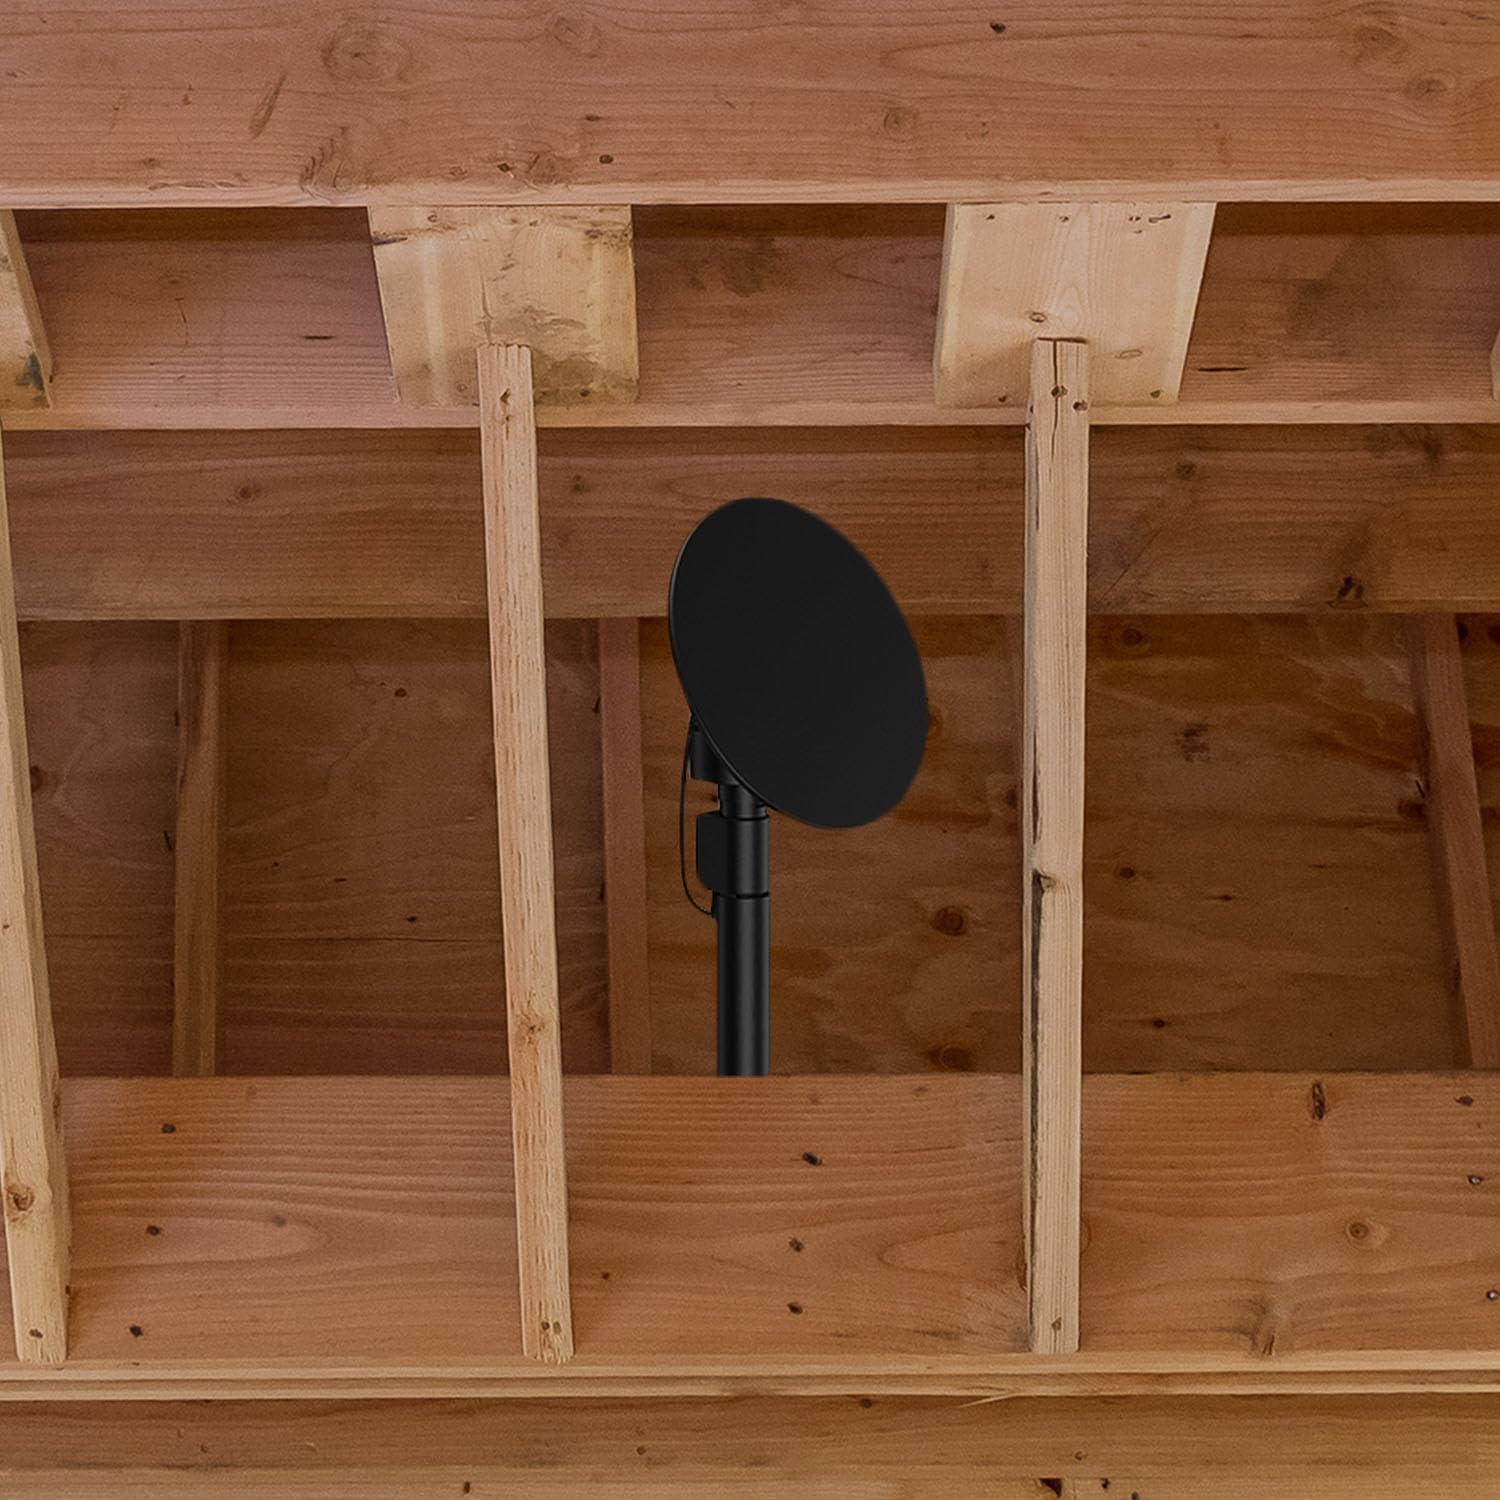
Image 3.2: Example of attic antenna installation.
3.3. Connecting the Antenna to Your TV
- Connect one end of the 25-foot coaxial cable to the antenna's output port.
- Route the coaxial cable from the antenna to your television. If installing outdoors or in an attic, ensure the cable is properly secured and protected from weather elements.
- Connect the other end of the coaxial cable to the 'ANT IN' or 'CABLE IN' port on your television or digital converter box.
- Connect the power adapter to the antenna's power input, then plug the adapter into a standard electrical outlet.
4. Operating Instructions
4.1. Powering On and Initial Scan
- Ensure the antenna is powered on and connected to your TV.
- Turn on your television and select the correct input source (e.g., TV, ANTENNA).
- Access your TV's menu and navigate to the 'Channel Setup' or 'Auto Program' section.
- Select 'Antenna' or 'Air' as the signal source, then initiate an 'Auto Scan' or 'Channel Scan'. This process will search for available over-the-air channels.
- Allow the scan to complete. The number of channels found will vary based on your location and signal conditions.
4.2. Using the Remote Control for Antenna Rotation
The included wireless remote control allows you to adjust the antenna's direction for optimal signal reception. If you experience poor signal quality on certain channels, use the remote to rotate the antenna.
- Point the remote control towards the antenna's receiver unit.
- Press the rotation buttons (usually left/right or directional arrows) to slowly rotate the antenna.
- Observe your TV screen for signal strength indicators or picture quality improvements as you rotate the antenna. Stop rotating when you achieve the best possible reception for your desired channels.
- Perform a new channel scan on your TV after significant antenna repositioning to ensure all available channels are detected.

Image 4.1: A user operating a television with a remote control, similar to how the antenna's remote functions.
5. Maintenance
The Core Innovations ANT100TCR antenna is designed to be weather-resistant and requires minimal maintenance.
- Regular Inspection: Periodically inspect the antenna and its mounting hardware for any signs of wear, corrosion, or loosening, especially after severe weather conditions.
- Cleaning: If necessary, gently clean the antenna's surface with a soft, damp cloth. Avoid using harsh chemicals or abrasive materials.
- Cable Check: Ensure the coaxial cable remains securely connected and free from damage. Replace any frayed or damaged cables to maintain optimal signal quality.
6. Troubleshooting
If you encounter issues with your antenna, refer to the following table for common problems and solutions.
| Problem | Possible Cause | Solution |
|---|---|---|
| No channels found or poor reception | Antenna not positioned correctly; loose cable connections; TV not set to antenna input; interference. | Ensure all cables are securely connected. Perform a channel scan on your TV. Use the remote to rotate the antenna for optimal signal. Check TV input source. Relocate antenna if possible to a higher, less obstructed area. |
| Remote control not working | Dead batteries; remote not pointed at receiver; obstruction. | Replace batteries in the remote control. Ensure a clear line of sight between the remote and the antenna's receiver unit. |
| Antenna not rotating | Power issue; motor malfunction; obstruction. | Check power connection to the antenna. Ensure no physical obstructions are preventing rotation. If the issue persists, contact customer support. |
| Picture pixelates or freezes | Weak signal; interference. | Rotate the antenna to fine-tune reception. Rescan channels. Check for potential sources of interference (e.g., other electronic devices). |
7. Specifications
- Model: ANT100TCR
- Brand: Core Innovations
- Reception Range: Up to 100 miles
- Frequency Range: VHF/UHF
- Impedance: 75 Ohm
- Rotation: 360-degree motorized
- Output Resolution: Up to 4K Full HD (where supported)
- Dimensions (Product): 8.85"L x 11.02"W x 27.36"H
- Weight: Approximately 5.1 pounds
- Color: Black
8. Warranty and Support
Core Innovations products are designed for reliability and performance. For specific warranty details, please refer to the warranty card included with your purchase or visit the official Core Innovations website. Keep your proof of purchase for warranty claims.
For technical support, troubleshooting assistance, or to inquire about replacement parts, please contact Core Innovations customer service. Contact information can typically be found on the product packaging or the brand's official website.
Website: www.coreinnovations.com (Example link, please verify official website)


