
1. Introduction
This manual provides comprehensive instructions for the installation, operation, and maintenance of your ASURE 9-inch Android Car Stereo Radio. Please read this manual thoroughly before using the product to ensure proper functionality and safety. Keep this manual for future reference.
2. Safety Information
- Ensure the vehicle is turned off and the battery is disconnected before installation to prevent electrical short circuits.
- Professional installation is recommended. Incorrect installation may damage the device or vehicle.
- Do not operate the device in a way that distracts you from driving. Always prioritize road safety.
- Avoid exposing the device to extreme temperatures, direct sunlight for prolonged periods, or excessive moisture.
- Use only approved accessories and cables with the device.
3. Package Contents
Verify that all items listed below are included in your package:
- 1x ASURE 9-inch Car Stereo Radio (CarPlay Android Auto Receiver)
- 1x Mounting Bezel (Frame Panel)
- 1x Wiring Harness Kit
- 1x CAN-BUS Box (if applicable to your vehicle model)
- 1x GPS Antenna
- 2x USB Cables
- 1x Audio Video Ports Cable
- 1x Microphone
- 1x Radio Cable
- 1x Screwdriver
- 1x User Manual

Image: Overview of included accessories and components.
4. Setup and Installation
4.1 Physical Installation
- Remove Original Bezel: Carefully remove the attached bezel kits from your vehicle's dashboard.
- Connect Wiring: Connect all necessary wiring harness cables to the car stereo unit. Ensure all connections are secure before proceeding.
- Install Screen into Frame: Place the car stereo screen into the provided frame. Secure it using the four screws.
- Mount Unit: Insert the assembled unit into your car's dashboard opening. Ensure it fits securely.

Image: Visual guide for removing the bezel and securing the screen into the frame.
4.2 Wiring Diagram
Refer to the following diagram for proper connection of all cables and accessories:

Image: Comprehensive wiring diagram showing connections for GPS antenna, camera input, USB, subwoofer, video out, AUX inputs/outputs, microphone, WiFi antenna, and Bluetooth antenna.
4.3 CAN-BUS Setup
The CAN-BUS system enables communication between your car stereo and vehicle's original systems, such as steering wheel controls. Follow these steps to configure the CAN-BUS:
- After powering up the radio, go to "Settings" on the main screen.
- Navigate to "Factory" settings and enter the password: 3368.
- Select "Car Model" and choose "RZC(Raise) -> GM/Chevrolet -> Cruze -> 2009-2017" to enable CAN-BUS functions for your Chevrolet Spark M300.
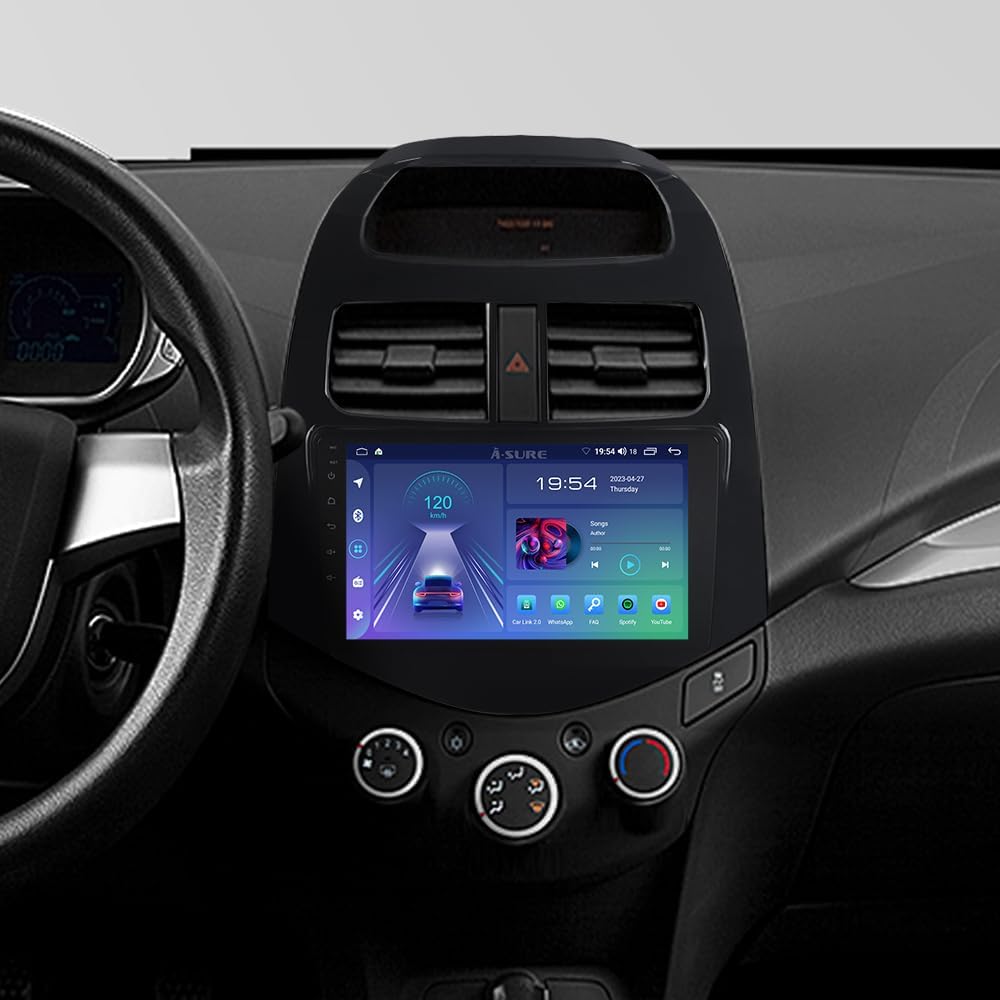
Image: Screenshot of the CAN-BUS settings interface, showing the selection of car model for proper integration.
4.4 Steering Wheel Control (SWC)
The device supports original steering wheel control buttons. If your SWC does not work after CAN-BUS setup, some cars may require manual wiring. Contact customer support if you encounter issues.
5. Operating Instructions
5.1 Power On/Off and Basic Navigation
Press the power button to turn the unit on or off. Navigate through the main menu by tapping the icons on the touchscreen. The 9-inch 1280x800 HD touchscreen provides a clear and responsive interface.

Image: The main user interface of the ASURE car stereo, displaying time, date, speed, and various application icons.
5.2 Wireless CarPlay & Android Auto
Connect your smartphone wirelessly via Bluetooth to access CarPlay or Android Auto. This allows for seamless integration of your phone's features, including navigation, music, and calls, directly on the car stereo screen.
- Wireless Connection: Connect via Bluetooth. Tap the 'CarLink' icon to initiate CarPlay or Android Auto.
- Wired Connection: Use the 6-pin USB cable for a wired connection.

Image: Illustration of wireless CarPlay and Android Auto connectivity with a smartphone.

Image: Examples of navigation interfaces within CarPlay and Android Auto on the car stereo screen.
5.3 Bluetooth Connectivity
The built-in Bluetooth allows for hands-free calling and audio streaming. Pair your phone with the car stereo for safer communication while driving. An external microphone is optional for enhanced call quality.
Video: Demonstrates Bluetooth pairing and other settings on the ASURE 4Core car stereo. This includes adjusting screen brightness, setting up CAN-BUS for steering wheel controls, and calibrating the touch screen.
5.4 GPS Navigation
The head unit supports both online and offline navigation. Utilize GPS satellite positioning for precise location tracking and route guidance. You can download offline maps via WiFi or hotspot function.
5.5 Digital Sound Processor (DSP)
The integrated DSP allows for customized audio output. Adjust sound playback effects for different seating positions to optimize your listening experience.
5.6 Screen Brightness Adjustment
If the screen brightness is too high, especially at night, you can adjust it through the factory settings. Refer to the video in section 5.3 for a visual guide on how to access and modify backlight current adjustment settings.
5.7 Customizing User Interface (UI)
The Android system allows for extensive UI customization. You can install third-party launchers from the Play Store to personalize the look and feel of your car stereo's interface, including themes, icons, and function layouts.
Video: Demonstrates how to install and customize a third-party launcher (AGAMA Car Launcher) on the car stereo, including changing themes, colors, and reassigning function icons.
6. Maintenance
- Cleaning: Use a soft, dry cloth to clean the screen and exterior. Avoid abrasive cleaners or solvents.
- Software Updates: Periodically check for software updates to ensure optimal performance and access to new features. Updates can typically be found on the manufacturer's website or through the device's settings.
- Avoid Extreme Conditions: Protect the device from extreme heat, cold, and direct prolonged sunlight.
7. Troubleshooting
- No Power: Check all power connections. Ensure the vehicle's ignition is on.
- No Sound: Verify speaker connections and volume settings. Check if the mute function is active.
- Touchscreen Unresponsive: Try restarting the device. If issues persist, recalibrate the touchscreen via settings (refer to video in section 5.3).
- CarPlay/Android Auto Not Connecting: Ensure Bluetooth is enabled on both the device and your phone. For wired connections, check the USB cable.
- Steering Wheel Controls Not Working: Re-verify CAN-BUS settings (refer to section 4.3). If necessary, check for manual wiring requirements or contact support.
- Screen Too Bright/Dim: Adjust backlight current settings in the factory menu (refer to video in section 5.3).
8. Specifications
| Item Weight | 5.39 pounds |
| Product Dimensions | 8.9 x 5.1 x 1.6 inches |
| Display Size | 9 Inches |
| Screen Resolution | 1280x800 HD |
| Operating System | Android 13 |
| CPU | 4-Core 1.2Ghz |
| RAM | 2GB |
| ROM | 32GB |
| Connectivity Technology | Bluetooth, USB, Wi-Fi |
| Special Features | Bluetooth, Touchscreen, Wireless CarPlay, Wired Android Auto, Wi-Fi, DSP |
| Map Type | Worldwide |
| Mounting Type | Dashboard Mount |
9. Warranty and Support
Your ASURE Car Stereo Radio comes with the following warranty and support:
- Warranty: 30 days free return/replacement, 1 year repair.
- Customer Support: For any technical assistance, troubleshooting, or warranty claims, please contact ASURE customer service. Refer to the product packaging or the ASURE brand store on Amazon for contact details.