
1. Introduction
Thank you for choosing DONGFXK Motorized Blackout Roller Shades. These shades are designed to provide privacy, light control, and energy efficiency for your home or office. Featuring a built-in solar panel for continuous charging and remote control capabilities, these shades offer convenience and modern functionality. This manual provides comprehensive instructions for installation, operation, and maintenance to ensure optimal performance and longevity of your product.
Key features include:
- Solar Charging & Cover Plate: Equipped with a complimentary solar panel for sustainable power, reducing the need for frequent battery replacements. An integrated cover plate provides a seamless and attractive appearance.
- Upgraded Blackout Fabric: The four-layer fabric construction includes a cooling layer, UV protection layer, and 100% opaque layer to effectively block light, reduce room temperature, and create a comfortable environment.
- Smart & Group Control: Control individual or multiple shades using the included remote control (up to 15 shades). For advanced smart features like voice and app control, an optional hub (smart bridge) is required, capable of managing up to 30 shades.

Image 1.1: DONGFXK Motorized Blackout Roller Shade (Gray, 27"W x 72"H).
2. Safety Information
Please read all safety instructions carefully before installation and operation. Failure to follow these instructions may result in injury or product damage.
- Keep children and pets away from the shades during operation.
- Do not allow children to play with the remote control.
- Ensure all mounting hardware is securely fastened to prevent the shades from falling.
- Do not attempt to manually force the shades up or down when the motor is engaged.
- Avoid exposing the motor unit or solar panel to excessive moisture or direct water spray.
- Use only the specified 1A charger for external charging if the solar panel is not sufficient.
- If any part of the shade is damaged, discontinue use and contact customer support.
3. Package Contents
Verify that all components are present in your package:
- Motorized Roller Shade Unit (with integrated motor)
- Remote Control (may be sold separately or included depending on package)
- Solar Panel
- Mounting Brackets and Screws
- User Manual (this document)
- Small accessories (e.g., cable clips, charging cable)

Image 3.1: Illustration of the motorized blind with solar panel and remote control.
4. Installation
4.1. Before You Begin
- Tools Required: Drill, screwdriver, measuring tape, pencil, level.
- Measure Accurately: Precise measurements are crucial for proper fit and function.
4.2. Inside Mount Installation
For an inside mount, the shade is installed within the window frame.
- Measure Window Dimensions:
- Measure the window width at three points (top, middle, bottom). Select the smallest measurement as the shade width.
- Measure the window height at three points (left, middle, right). Select the largest measurement as the shade height.
- Ensure the window depth is at least 2.5 inches (2½").
- Mark Bracket Positions: Hold the shade in place to determine the desired positions for the mounting brackets. Mark these spots with a pencil.
- Install Brackets: Drill pilot holes and secure the mounting brackets to the top of the window frame using the provided screws. Ensure they are level.
- Attach Shade: Carefully insert the roller shade into the installed brackets until it clicks securely into place.
4.3. Outside Mount Installation
For an outside mount, the shade is installed outside the window frame, typically on the wall above the window.
- Measure Window Dimensions:
- Measure the window width. Add at least 4 inches to this measurement to determine the required shade width for optimal coverage and to minimize light gaps.
- Measure the window height. Add at least 4 inches to this measurement to determine the required shade height.
- Mark Bracket Positions: Position the mounting brackets on the wall above the window, ensuring they are centered and level. Mark the drill points.
- Install Brackets: Drill pilot holes and secure the mounting brackets to the wall using appropriate anchors and screws.
- Attach Shade: Carefully insert the roller shade into the installed brackets until it clicks securely into place.
4.4. Solar Panel Installation
The solar panel should be positioned where it receives maximum direct sunlight throughout the day.
- Choose Location: Select a spot on the window frame or wall near the top of the shade that gets consistent sunlight.
- Mount Panel: Secure the solar panel using its adhesive backing or small screws (if provided) to the chosen location.
- Connect Cable: Plug the solar panel's cable into the charging port on the motorized shade unit. Ensure a snug connection.

Image 4.1: Detailed diagram for inside and outside mount measurements and installation.
5. Operating Instructions
5.1. Remote Control Functions
The remote control allows you to operate your motorized shades with ease. Ensure the remote has fresh batteries and is paired with your shade(s).
- UP Button: Press to raise the shade.
- DOWN Button: Press to lower the shade.
- STOP Button: Press to stop the shade at any desired position.
- Channel Selection: If your remote supports multiple channels, use the channel buttons to select the specific shade or group of shades you wish to control.
- Setting Limits: Refer to the remote control's specific manual for instructions on setting upper and lower travel limits for your shades.

Image 5.1: Remote control for operating the motorized shades.
5.2. Solar Charging
The included solar panel provides continuous charging to the shade's internal battery. For optimal performance, ensure the solar panel is clean and receives adequate sunlight.
- Keep the solar panel plugged into the shade at all times for continuous charging.
- In periods of low sunlight or heavy usage, the shade can be charged using an external 1A charger (not included) via the charging port.
5.3. Smart Control (Optional)
For advanced smart home integration, including voice control (e.g., Alexa, Google Assistant) and app control, an optional smart hub (smart bridge) is required. This hub is sold separately by DONGFXK.
- Purchase and install the DONGFXK smart hub according to its specific instructions.
- Pair your motorized shades with the smart hub.
- Follow the hub's instructions to connect to your preferred smart home platform (e.g., app, voice assistant).
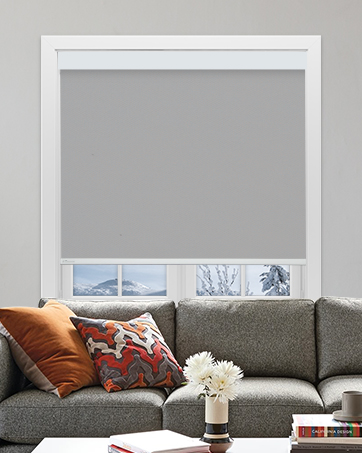
Image 5.2: Optional smart hub for advanced control (sold separately).
6. Maintenance
6.1. Cleaning
- Shade Fabric: Spot clean only. Use a soft, damp cloth with mild soap and water to gently wipe any soiled areas. Do not immerse the fabric in water or use harsh chemicals.
- Hardware: Wipe the headrail and bottom rail with a dry or slightly damp cloth.
6.2. Solar Panel Care
- Regularly wipe the surface of the solar panel with a soft, clean cloth to remove dust and debris. This ensures maximum sunlight absorption for efficient charging.
- Avoid scratching the solar panel surface.
7. Troubleshooting
If you encounter any issues with your motorized shades, refer to the table below for common problems and solutions.
| Problem | Possible Cause | Solution |
|---|---|---|
| Shade does not move. | Low battery, remote not paired, motor malfunction. | Charge the battery via solar panel or external charger. Re-pair the remote control. Contact support if motor is faulty. |
| Remote control not responding. | Dead batteries in remote, remote out of range, interference. | Replace remote batteries. Move closer to the shade. Check for obstructions. |
| Shade stops mid-way or does not reach limits. | Travel limits not set correctly, low battery. | Re-set the upper and lower travel limits (refer to remote manual). Charge the battery. |
| Wrinkles in fabric. | Transportation compression. | Use an iron for one second on the affected area, or allow the shade to hang for a week for wrinkles to naturally relax. |
8. Specifications
| Feature | Detail |
|---|---|
| Brand | DONGFXK |
| Model Number | 121 |
| Product Dimensions | 27"W x 72"H |
| Material | Polyester |
| Color | Rb-gray-rechargeable |
| Opacity | Blackout |
| Operation Mode | Automatic (Motorized) |
| Additional Features | UV Protection, Solar Charging |
| Closure Type | Cordless, Motorized |
| Mounting Type | Inside Mount / Outside Mount |
| Product Care Instructions | Spot Clean Only |
9. Warranty & Support
DONGFXK products are manufactured with quality and durability in mind. For specific warranty details, please refer to the warranty card included with your purchase or visit the official DONGFXK website. If you have any questions, require technical assistance, or need to report a defect, please contact DONGFXK customer support through the retailer where the product was purchased or via the contact information provided on the DONGFXK website.
Please have your model number (121) and purchase date available when contacting support.
