
Whirlpool WHAD501DW
Whirlpool 50-Pint Portable Dehumidifier User Manual
Model: WHAD501DW
Introduction
This manual provides essential information for the safe and efficient operation of your Whirlpool 50-Pint Portable Dehumidifier, Model WHAD501DW. This appliance is designed to remove excess moisture from the air in residential spaces up to 4500 square feet, such as basements, garages, and living rooms. Please read all instructions carefully before use and retain this manual for future reference.

Image: Front view of the Whirlpool 50-Pint Portable Dehumidifier.
Safety Information
To reduce the risk of fire, electric shock, or injury when using your dehumidifier, follow these basic precautions:
- Read all instructions before using the appliance.
- Plug into a grounded 3-prong outlet. Do not remove the ground prong.
- Do not use an adapter or extension cord.
- Do not operate the dehumidifier if the power cord or plug is damaged.
- Ensure the dehumidifier is placed on a level, stable surface to prevent tipping and water spills.
- Maintain at least 8 inches (20 cm) of clear space around the unit for proper airflow.
- Do not block air inlets or outlets.
- Always unplug the dehumidifier before cleaning or performing any maintenance.
- Do not use the dehumidifier near water or in excessively wet areas.
- This appliance is not intended for use by persons (including children) with reduced physical, sensory, or mental capabilities, or lack of experience and knowledge, unless they have been given supervision or instruction concerning use of the appliance by a person responsible for their safety.
Product Overview
Components and Features
Your Whirlpool dehumidifier is equipped with several features designed for effective moisture removal and user convenience.
- Control Panel: Located on the top of the unit, featuring an LED display and buttons for various settings.
- Air Outlet: Top grille for expelling dry air.
- Air Inlet: Rear grille for drawing in moist air.
- Water Bucket: A 14.8-pint capacity internal bucket for collecting condensed water. Features an audible alert and automatic shut-off when full.
- Washable Filter: Reusable, easy-access filter located at the air inlet. Includes a filter alert for cleaning reminders.
- Caster Wheels: Four multi-directional wheels for easy portability.
- Integrated Side Handles: For convenient lifting and moving.
- Continuous Drainage Port: Allows for direct drainage using a standard garden hose (not included).

Image: Key features including the water bucket, full alert, and auto shut-off.

Image: Control panel with LED display, fan speed options, and timer function.

Image: Illustration of the 4-way directional caster wheels and adjustable humidistat.
Setup
Unpacking and Placement
- Remove all packaging materials and tape from the unit.
- Place the dehumidifier on a firm, level surface that is strong enough to support the unit with a full water bucket.
- Ensure there is at least 8 inches (20 cm) of air space on all sides of the unit for proper air circulation. Do not place the unit against a wall or furniture that could obstruct airflow.
- Avoid placing the dehumidifier in direct sunlight or near heat sources.

Image: Dehumidifier positioned in a living room, demonstrating appropriate placement.
Power Connection
Plug the power cord into a grounded 115V, 60Hz electrical outlet. Do not use an extension cord or adapter.
Continuous Drainage Setup (Optional)
For continuous, low-level drainage without needing to empty the water bucket, you can connect a standard garden hose (not included) to the continuous drainage port.
- Locate the drainage port on the back or side of the unit.
- Remove the cap from the drainage port.
- Thread a standard garden hose onto the port, ensuring a secure connection to prevent leaks.
- Direct the other end of the hose to a floor drain or suitable receptacle, ensuring the hose is sloped downwards to allow gravity drainage.
Operating Instructions
Control Panel Functions
The control panel allows you to manage the dehumidifier's settings:
- Power Button: Turns the unit on or off.
- Mode Button: Cycles through preprogrammed humidity levels for Bedroom, Living Room, and Basement, or Continuous operation.
- Fan Speed Button: Selects between 2 fan speeds (High/Low).
- Timer Button: Sets a 24-hour on/off timer.
- Humidity Adjustment Buttons (Up/Down Arrows): Adjusts the desired humidity level (humidistat) between 35% and 80% relative humidity in 5% increments.
- LED Display: Shows current humidity level, set humidity, timer settings, and error codes.
Setting Desired Humidity
- Press the Power button to turn on the unit.
- Use the Up/Down arrow buttons to set your desired humidity level. The unit will operate until the room's humidity reaches the set level, then cycle off. It will restart when humidity rises above the set level.
- Alternatively, use the Mode button to select preprogrammed settings for Bedroom, Living Room, or Basement, which have optimized humidity targets.
Continuous Operation
Select 'Continuous' mode for maximum dehumidification, regardless of the ambient humidity level. This mode is ideal when using the continuous drainage option.
Timer Function
The 24-hour timer allows you to schedule the unit to turn on or off automatically.
- To set Auto-Off: With the unit running, press the Timer button. Use the Up/Down arrows to set the desired number of hours (1-24) after which the unit will turn off.
- To set Auto-On: With the unit off, press the Timer button. Use the Up/Down arrows to set the desired number of hours (1-24) after which the unit will turn on.
Maintenance
Regular maintenance ensures optimal performance and longevity of your dehumidifier.
Emptying the Water Bucket
When the water bucket is full, the unit will automatically shut off, and an audible alert will sound. The display may indicate 'P2' or 'Full'.
- Grasp the sides of the water bucket and carefully pull it out from the front of the unit.
- Empty the collected water into a sink or drain.
- Slide the empty bucket back into the unit until it clicks into place. The unit will resume operation.
Cleaning the Air Filter
The 'Filter' indicator light will illuminate when it's time to clean the air filter (approximately every 250 hours of operation).
- Turn off the dehumidifier and unplug it from the power outlet.
- Locate the air filter cover on the rear of the unit. Open the cover and gently pull out the filter.
- Wash the filter with warm, soapy water. Rinse thoroughly and allow it to air dry completely before reinserting. Do not use a dishwasher.
- Once dry, slide the filter back into its slot and close the cover.
- Plug in the dehumidifier and press the 'Filter' button (if available) or Power button to reset the filter timer.

Image: Accessing and removing the washable air filter for cleaning.
Storage
If storing the dehumidifier for an extended period:
- Empty the water bucket and ensure it is clean and dry.
- Clean the air filter.
- Wrap the power cord neatly.
- Store the unit upright in a cool, dry place, away from direct sunlight and extreme temperatures.
Troubleshooting
Review this section for common issues and their solutions before contacting customer support.
| Problem | Possible Cause | Solution |
|---|---|---|
| Dehumidifier does not turn on. | No power; Power cord unplugged; Water bucket full or not properly seated. | Check power connection; Ensure bucket is empty and correctly inserted. |
| No water collected. | Humidity level too low; Room temperature too low; Air filter clogged; Unit in continuous drainage mode. | Adjust desired humidity lower; Ensure room temperature is above 41°F (5°C); Clean air filter; Verify continuous drainage setup. |
| Unit runs constantly. | Desired humidity set too low; Unit in 'Continuous' mode; Room size too large for unit capacity; Doors/windows open. | Increase desired humidity; Select a specific mode (Bedroom, Living Room, Basement); Close doors and windows. |
| Loud noise during operation. | Unit not on a level surface; Air filter clogged; Fan obstruction. | Place on a level surface; Clean air filter; Check for obstructions in fan area. |
| Water leaks from the unit. | Water bucket not properly seated; Continuous drainage hose loose or improperly installed. | Re-seat water bucket; Check continuous drainage hose connection and slope. |
| Frost on coils. | Room temperature too low. | This is normal in low temperatures. The unit has an auto-defrost function. If frost persists, increase room temperature. |
Specifications
Detailed technical specifications for the Whirlpool 50-Pint Portable Dehumidifier, Model WHAD501DW.
| Feature | Specification |
|---|---|
| Brand | Whirlpool |
| Model Name | Energy Star 50-Pint Dehumidifier |
| Model Number | WHAD501DW |
| Dehumidification Capacity | 50 Pints per Day |
| Coverage Area | Up to 4500 Square Feet |
| Tank Volume | 14.8 Pints |
| Product Dimensions (DxWxH) | 12.01"D x 15.04"W x 25.2"H |
| Item Weight | 42 Pounds |
| Wattage | 520 watts |
| Number of Fan Speeds | 3 |
| Special Features | Automatic Shutoff, Bucket Storage, Continuous Draining, Portable, Washable Filter |
| Material | Plastic |
| Color | Bright White |
| UPC | 840148725515 |
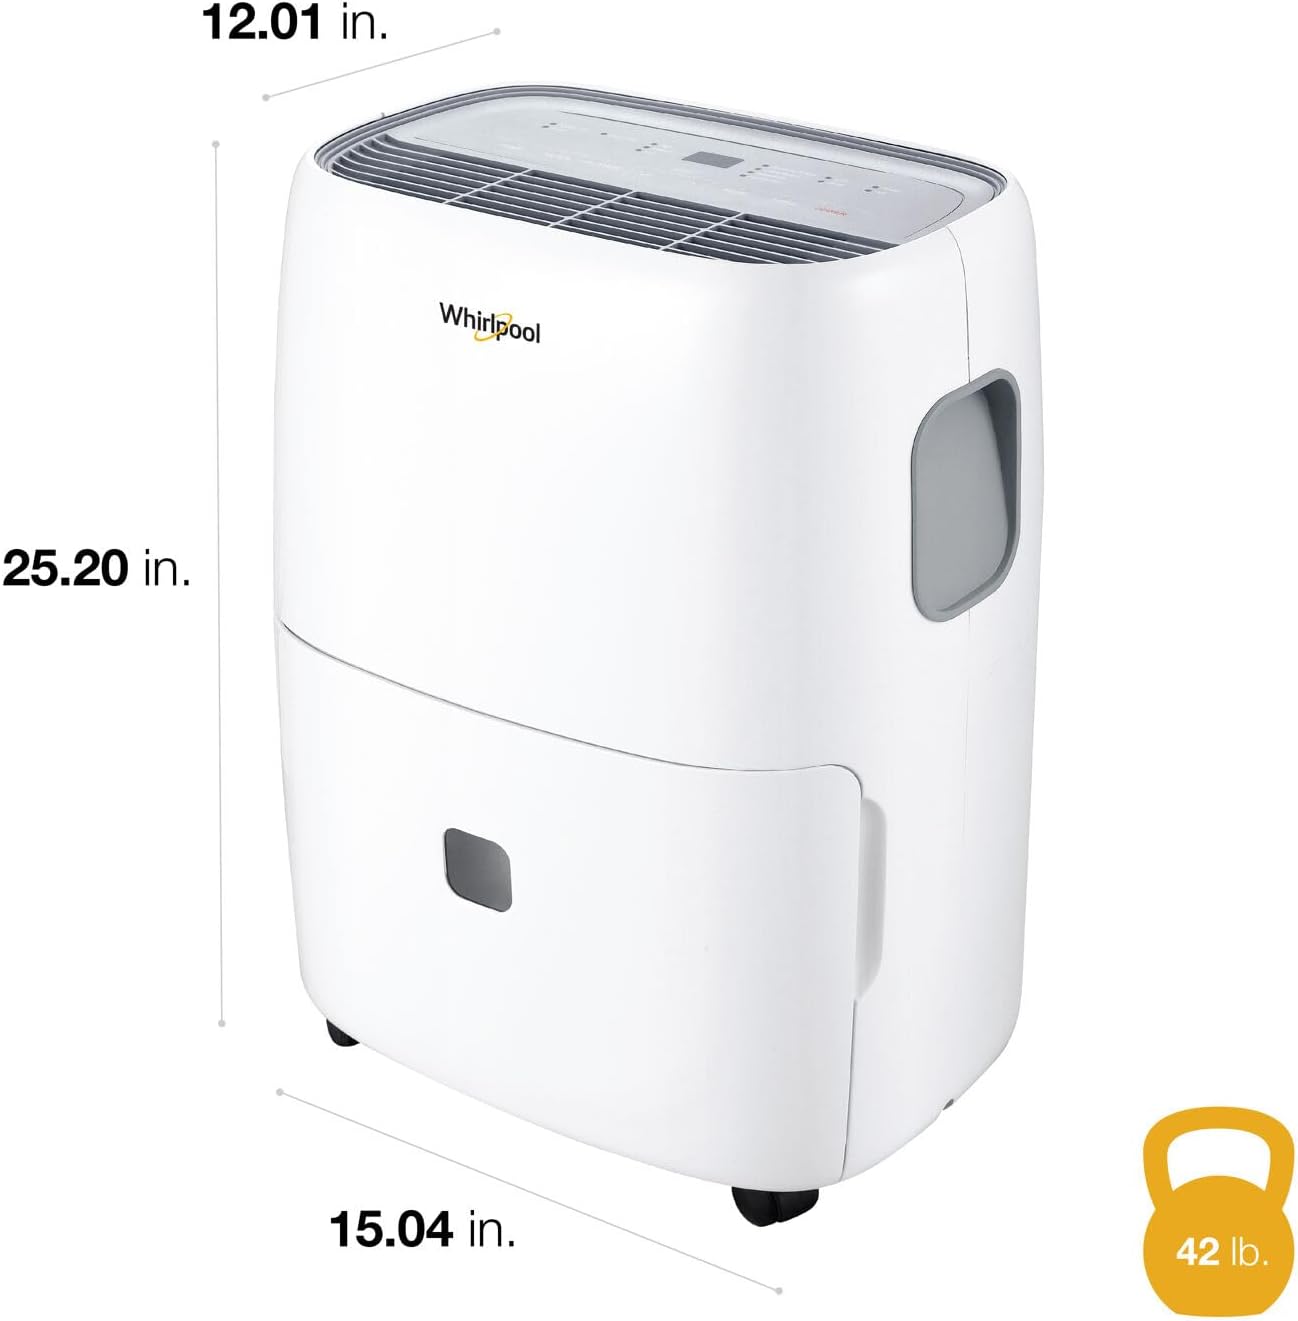
Image: Dehumidifier dimensions and weight.
Warranty and Support
For warranty information, please refer to the warranty card included with your product or visit the official Whirlpool website. For technical assistance, troubleshooting beyond this manual, or to inquire about service, please contact Whirlpool customer support.
Whirlpool Customer Service:
- Website: www.whirlpool.com
- Phone: Refer to your product documentation for the most current contact number for your region.
Please have your model number (WHAD501DW) and serial number ready when contacting support.
Related documentsWHAD501DW


Ask a question about this manual
Ask about setup, troubleshooting, compatibility, parts, safety, or missing instructions. Manuals+ will review the question and use this page’s manual context to help answer it.