
1. Introduction
Thank you for purchasing the wheelfun 1/14 HUINA RC Metal Excavator 580. This remote-controlled excavator is designed for realistic operation with its full metal construction, 2.4G radio control, smoke, LED display, light, and sound features. This manual provides essential information for setting up, operating, maintaining, and troubleshooting your new RC excavator to ensure a safe and enjoyable experience.
Please read this manual thoroughly before operating the product and retain it for future reference.
2. What's in the Box
Carefully unpack all components and verify that all items listed below are present and in good condition.
- 1/14 RC Excavator Model (with Light and Sound)
- 2.4G LED Display Radio Controller (Batteries not included for controller)
- 7.4V Battery for the Excavator
- USB Charging Cable
- English Manual Book
- Timber Grab Attachment
- Drill Attachment
- Screwdriver

Image: The complete set of the HUINA RC Metal Excavator 580, including the excavator, its 2.4G LED display radio controller, and the interchangeable timber grab and drill attachments.
3. Setup
3.1 Charging the Excavator Battery
- Connect the 7.4V excavator battery to the USB charging cable.
- Plug the USB charging cable into a standard USB power adapter (e.g., computer USB port, wall charger).
- The charging indicator on the USB cable will show the charging status (refer to the charger's specific light indications).
- Allow approximately 3-4 hours for a full charge. Do not overcharge the battery.
- Disconnect the battery once fully charged.
3.2 Installing Controller Batteries
- Locate the battery compartment on the back of the 2.4G LED Display Radio Controller.
- Open the battery compartment cover.
- Insert the required number of AA batteries (not included) into the compartment, ensuring correct polarity (+/-).
- Close the battery compartment cover securely.
3.3 Attaching Accessories
The excavator comes with a timber grab and a drill attachment. To change attachments:
- Ensure the excavator is powered off.
- Carefully remove the pre-installed bucket by detaching its pins.
- Align the desired attachment (timber grab or drill) with the excavator arm's connection points.
- Secure the attachment using the provided pins or screws with the screwdriver.

Image: A detailed view of the excavator's front arm and bucket, illustrating the robust metal construction and attachment points.
4. Operating Instructions
4.1 Powering On and Pairing
- Ensure the excavator battery is fully charged and installed.
- Turn on the excavator using its power switch.
- Turn on the 2.4G radio controller. The controller and excavator should automatically pair. The LED display on the controller will indicate successful pairing.
4.2 Basic Controls
Familiarize yourself with the controller layout. The 2.4G radio controller allows for precise and independent control of various functions.
- Forward/Backward: Use the left joystick to move the excavator forward or backward.
- Turning: Use the left joystick to turn the excavator left or right while moving, or pivot in place.
- Turret Rotation: The excavator features an infinitely rotating table. Use the designated controls (refer to controller diagram) to rotate the upper body 360 degrees in either direction.
- Arm/Bucket Control: The excavator's arm and bucket joints can be controlled independently via screw drive mechanisms. Use the right joystick and other buttons on the controller to raise/lower the main arm, extend/retract the forearm, and open/close the bucket or operate attachments.
- Light and Sound: Activate the realistic light and sound effects using the dedicated buttons on the controller.
- Smoke Function: If applicable, fill the designated reservoir with water (distilled water recommended) and activate the smoke function via the controller for realistic exhaust effects.

Image: The HUINA RC Metal Excavator demonstrating its ability to rotate its upper body 360 degrees, indicated by red arrows.

Image: A visual representation highlighting the independent control of each joint on the excavator arm, allowing for precise movements.
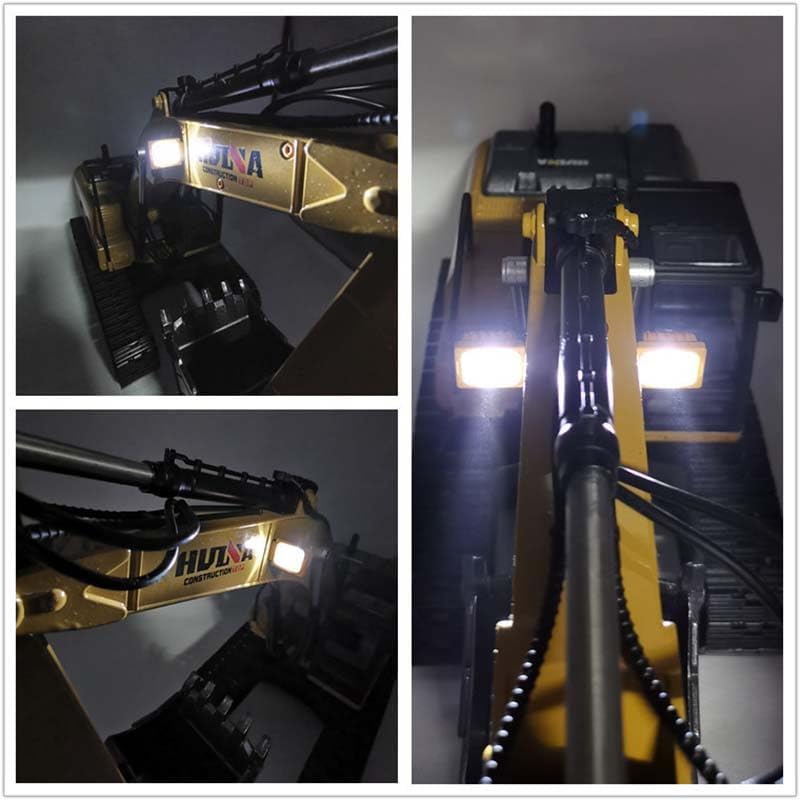
Image: Multiple close-up views showcasing the functional LED lights on the excavator, illuminating its path during operation.
5. Maintenance
- Cleaning: After each use, especially in dusty or dirty environments, gently wipe down the excavator with a dry or slightly damp cloth. Avoid using harsh chemicals or excessive water.
- Battery Care: Always fully charge the excavator battery before storage. If storing for extended periods, charge the battery every 2-3 months to maintain its health. Remove batteries from the controller when not in use.
- Storage: Store the excavator and controller in a cool, dry place away from direct sunlight and extreme temperatures.
- Inspection: Periodically check for loose screws, damaged wires, or worn parts. Tighten screws as needed and replace any damaged components.
6. Troubleshooting
| Problem | Possible Cause | Solution |
|---|---|---|
| Excavator does not turn on. | Battery is not charged or not connected properly. | Ensure the 7.4V battery is fully charged and securely connected. Check the excavator's power switch. |
| Controller does not respond. | Controller batteries are low or incorrectly installed. Not paired. | Replace controller batteries. Ensure correct polarity. Turn both excavator and controller off, then on again to re-pair. |
| Short play time. | Battery not fully charged or aging battery. | Ensure battery is fully charged before use. If battery life significantly degrades, consider replacing the battery. |
| Excavator moves slowly or erratically. | Low battery in excavator or controller. Interference. | Charge excavator battery and replace controller batteries. Operate in an open area away from other 2.4G devices. |
| Smoke function not working. | No water in reservoir or clogged nozzle. | Ensure the smoke reservoir is filled with water. Check for any blockages in the smoke nozzle. |
7. Specifications
| Feature | Detail |
|---|---|
| Model Number | TH18060-AMZUS2 |
| Scale | 1/14 |
| Material | Full Metal Construction |
| Frequency | 2.4Ghz |
| Remote Control Distance | 25-30 Meters |
| Play Time | About 30 Minutes |
| Product Dimensions | 24.4 x 16.4 x 10 inches |
| Recommended Age | 21 years and up |
| Features | Smoke, LED Display, Light, Sound, Working Spoker, Infinitely Rotating Table, Joint Control (Screw Drive) |

Image: The excavator positioned on a scale, illustrating its substantial weight due to its full metal construction, highlighting its "Heavy Machine" characteristic.
8. Safety Information
- This product is recommended for users aged 21 years and up. Adult supervision is recommended for all users.
- Do not operate the excavator near people, pets, or obstacles to prevent accidents.
- Avoid operating in wet conditions or near water to prevent electrical damage.
- Do not touch moving parts (tracks, arm, bucket) during operation.
- Use only the provided charging cable and battery. Do not attempt to charge non-rechargeable batteries.
- If the product is damaged, discontinue use immediately.
9. Warranty and Support
This product is sold by Wheelfun RC Hobby. For any issues or support, please contact the seller directly through the Amazon platform.
- Return Policy: A 30-day refund/replacement policy is typically offered from the date of purchase. Please refer to Amazon's return policy for specific details.
- Manufacturer: wheelfun
- Seller: Wheelfun RC Hobby
For more information about wheelfun products, you can visit the official wheelfun Store on Amazon.