Product Overview
The 70mai A800S Dash Cam is a high-performance vehicle recording device designed to capture driving footage in 4K Ultra HD. It features dual-camera recording capability, advanced night vision, 24-hour parking surveillance, an Advanced Driving-Assistance System (ADAS), and built-in GPS for route tracking.
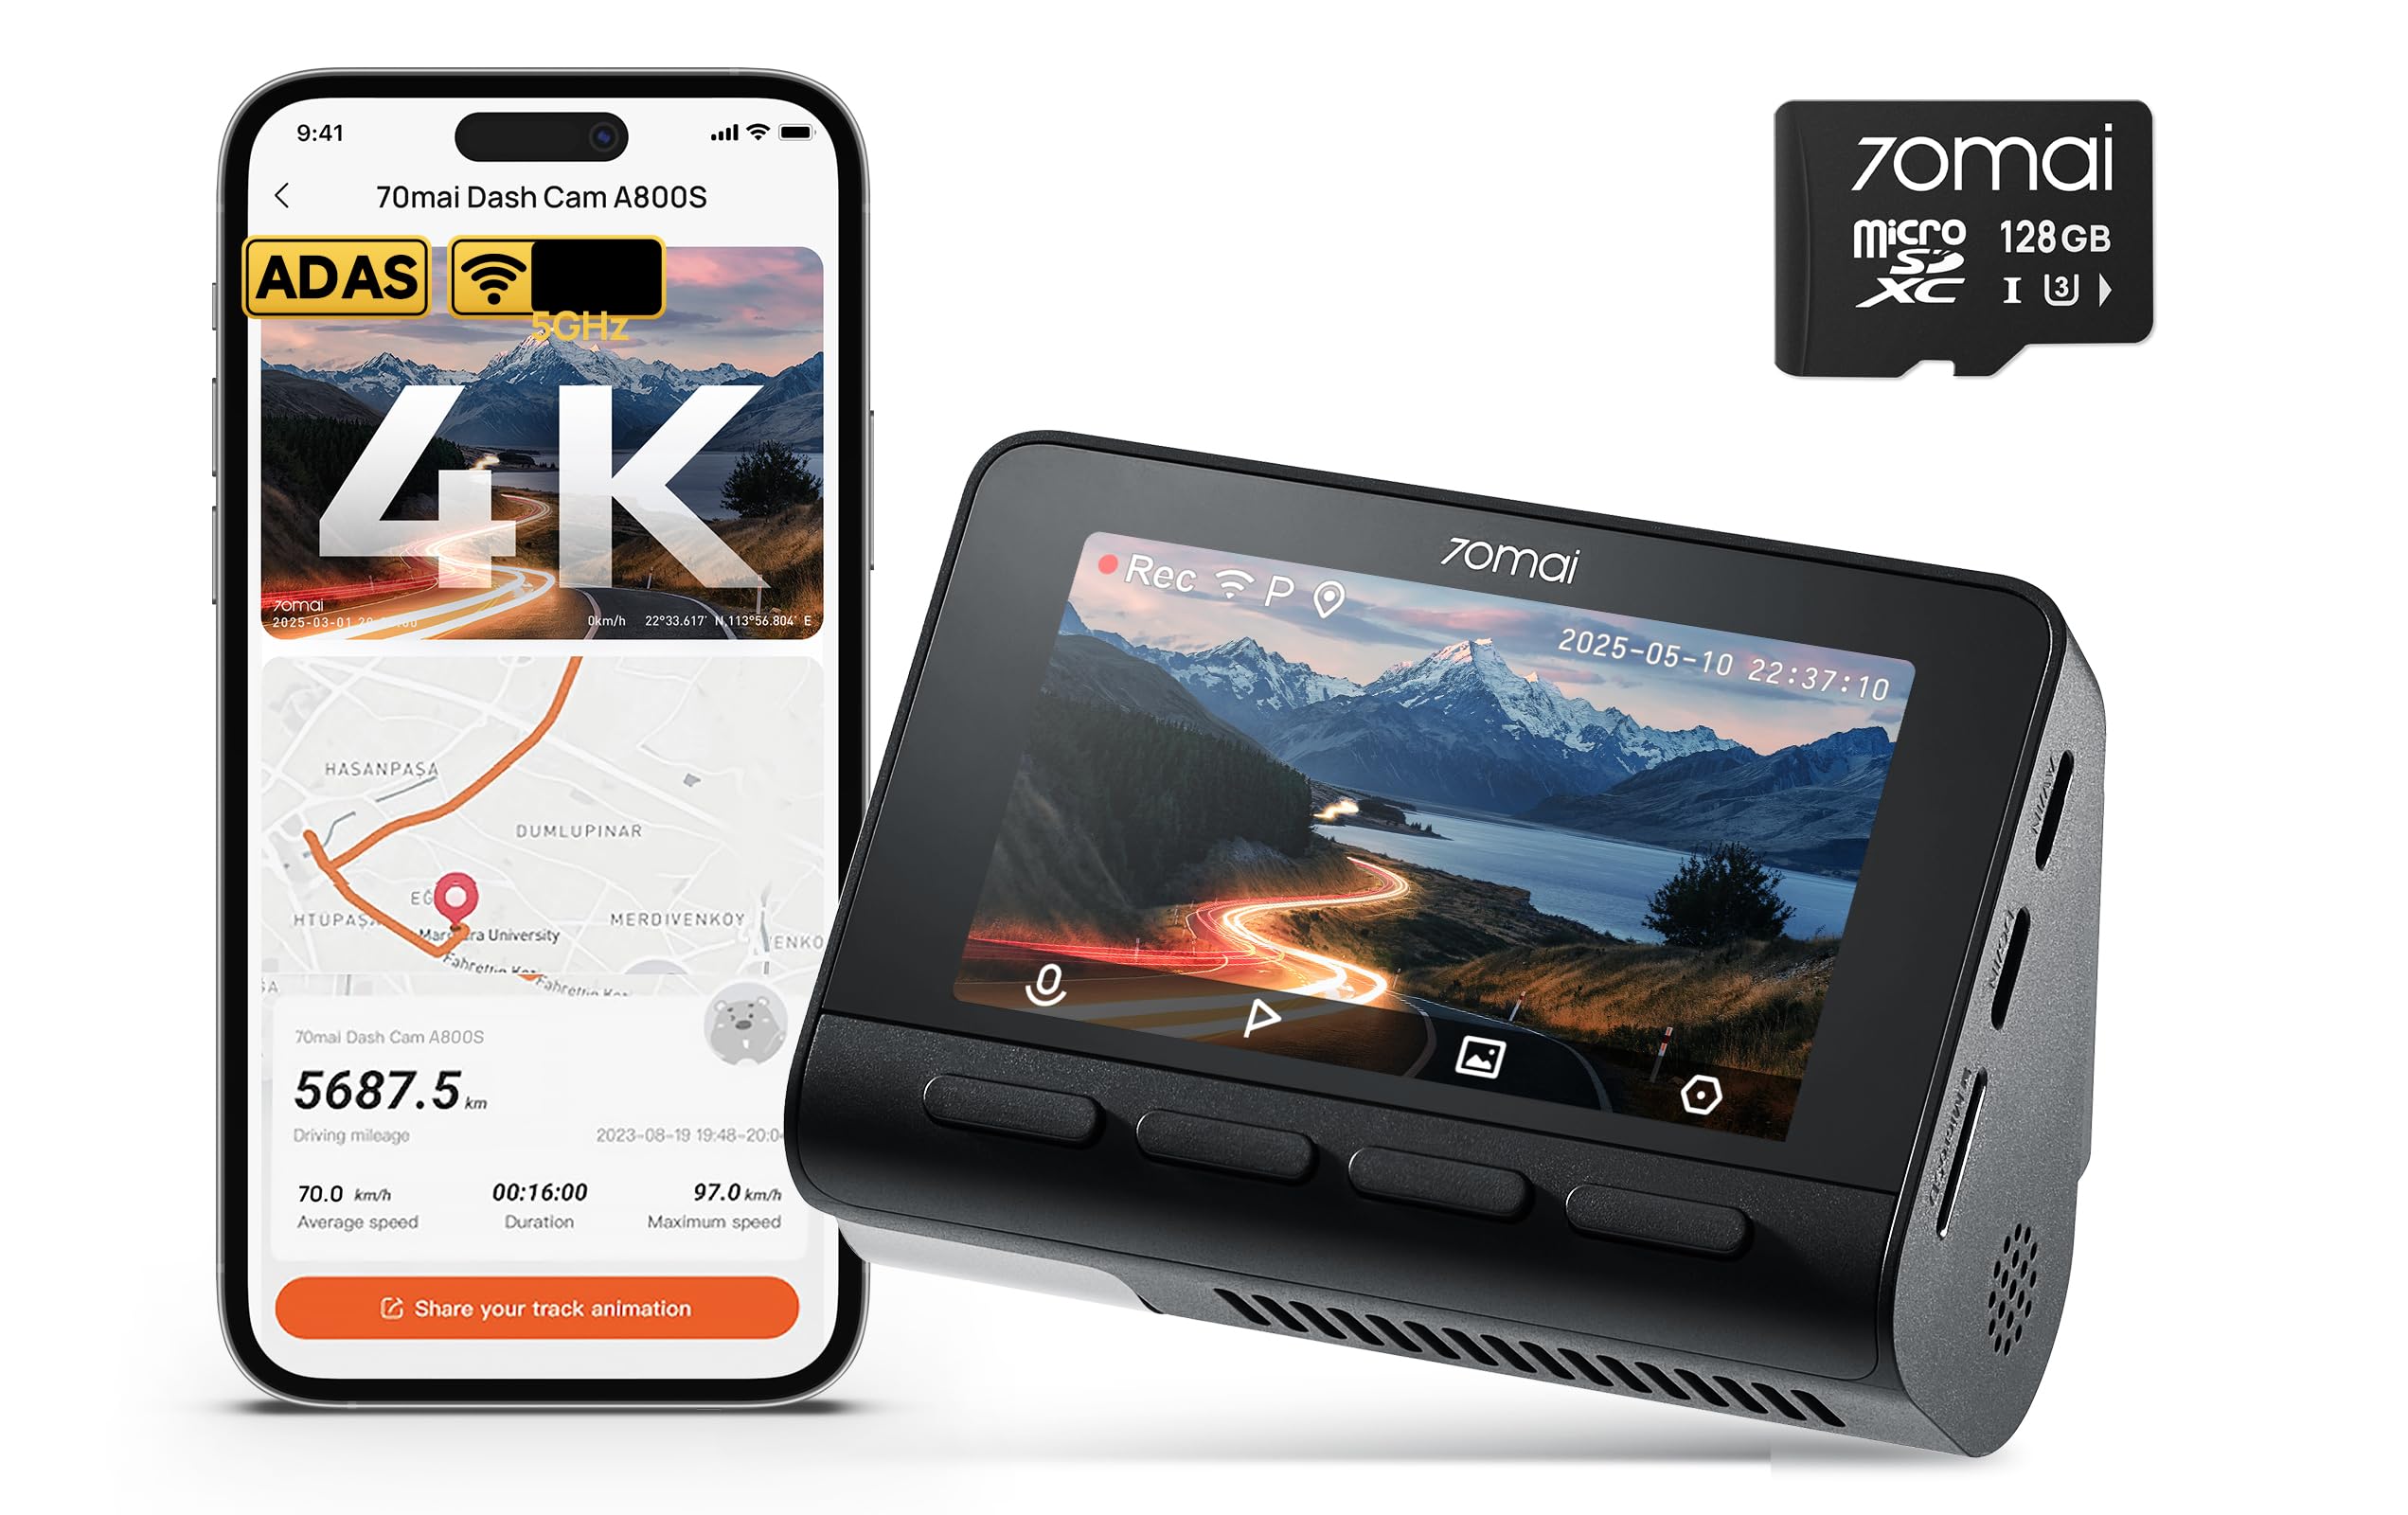
Image: 70mai A800S Dash Cam highlighting its main features.
Key Features:
- 4K Ultra HD Dual Camera: Records both front (4K) and rear (1080P) views simultaneously.
- Powerful Night Vision: Enhanced low-light performance with 3D DNR technology and F1.8 aperture lens.
- 24-Hour Parking Surveillance: G-sensor detects impacts and initiates recording while parked. Requires optional 70mai Hardwire Kit UP02.
- ADAS System: Provides real-time voice alerts for safety issues like lane departure and forward collision warnings.
- Built-in GPS & Route Tracking: Monitors and displays real-time trip data including time, speed, and coordinates.
- Wi-Fi & App Control: Connects to the 70mai app for easy control and footage management.
- Loop Recording: Automatically overwrites the oldest files when the SD card is full.
What's in the Box
Before starting the installation, please verify that all components are present in the package:

Image: Package contents of the 70mai A800S Dash Cam.
- Dash Cam x 1
- Rear camera x 1
- Mount x 1
- Power cord x 1
- Car charger x 1
- Wiring trim tool x 1
- Electrostatic sticker x 2
- Adhesive sticker x 2
- User manual x 1
- Rear cam User manual x 1
Setup and Installation
Follow these steps to properly install your 70mai A800S Dash Cam in your vehicle.
Installation Video Guide:
Video: Step-by-step installation guide for the 70mai A800S Dash Cam.
Step-by-Step Installation:
Step 1: Connect Power and Test
Connect the dash cam to the car's power source using the provided car charger and power cord. Ensure the A800S powers on normally before proceeding with permanent installation.

Image: Connecting the dash cam to power for initial power-on check.
Step 2: Apply Electrostatic Sticker
Clean the desired area on your windshield. Apply one of the electrostatic stickers to the windshield where the dash cam will be mounted. This sticker helps in easy removal and prevents residue.

Image: Applying the electrostatic sticker to the windshield.
Step 3: Insert Micro SD Card
Insert the Micro SD card into the designated slot on the A800S Dash Cam. Ensure it clicks into place. A high-quality Micro SD card (Class 10 or U1/U3 recommended) is essential for reliable recording.

Image: Inserting the Micro SD card into the dash cam.
Step 4: Mount the Dash Cam
Attach the A800S Dash Cam onto the electrostatic sticker. Press firmly to ensure a secure attachment. Adjust the camera angle for optimal view.

Image: Mounting the dash cam to the windshield.
Step 5: Route Power Cable
Use the included wiring trim tool to neatly tuck the power cable under the car's headliner and along the A-pillar down to the car cigarette lighter socket. This ensures a clean and safe installation.
Image: Routing the power cable for a tidy installation.
Step 6: Connect Car Charger
Plug the car charger into the car cigarette lighter socket. Connect the power cord from the dash cam to the car charger.

Image: Connecting the car charger to the cigarette lighter.
Step 7: Install Rear Camera (Optional)
If using the rear camera, follow its specific installation instructions, typically involving mounting it on the rear windshield and connecting it to the main dash cam unit.

Image: Dual camera setup for front and rear recording.
Operating Instructions
Basic Operation:
- Automatic Recording: The dash cam automatically starts recording when the vehicle's ignition is turned on.
- Loop Recording: When the memory card is full, the oldest video files are automatically overwritten by new recordings.
- Emergency Recording (G-Sensor): In case of a sudden shake or collision, the built-in G-sensor triggers an emergency recording, which is locked and will not be overwritten.
- Night Vision: The dash cam is equipped with powerful night vision capabilities to capture clear footage in low-light conditions.

Image: G-sensor detecting a collision and initiating emergency recording.

Image: Clear night vision recording example.
Advanced Features:
- 24-Hour Parking Surveillance: When the vehicle is parked, the dash cam monitors for sudden movements or impacts. An optional 70mai Hardwire Kit UP02 (ASIN: B08R5SBKZR) is required for this feature to function continuously.
- Advanced Driving-Assistance System (ADAS): The ADAS provides real-time voice alerts for lane departure warnings and forward collision warnings to enhance driving safety.
- Built-in GPS: Records and displays real-time driving data such as speed, time, and coordinates. This data can be crucial for accident reconstruction and insurance claims.

Image: Smart Parking Guardian Mode features.
Image: Built-in Wi-Fi, App Control, and GPS Tracking features.
Maintenance
Firmware Update:
Regularly check for and install firmware updates to ensure optimal performance and access to new features. Firmware updates are typically performed via the 70mai mobile application.
Video: Guide on how to update the firmware of your 70mai A800S Dash Cam using the mobile app.
Note: The video provided is for installation, but the firmware update process is similar in terms of app interaction and device connection. Always follow the on-screen instructions in the 70mai app for firmware updates.
SD Card Management:
The dash cam supports Micro SD cards from 32GB to 512GB. It is recommended to format the SD card periodically (e.g., once a month) to maintain optimal performance and prevent data corruption. Always use a high-endurance Class 10 or U1/U3 Micro SD card.
Image: Micro SD card capacity options and recording durations.
Troubleshooting
If you encounter issues with your 70mai A800S Dash Cam, consider the following common solutions:
- Dash Cam Not Powering On:
- Ensure the car charger is securely plugged into the cigarette lighter and the car's ignition is on.
- Check the power cable connection to the dash cam.
- Test the car charger with another device or try a different car charger if available.
- Recording Issues (e.g., skipped frames, corrupted files):
- Format the Micro SD card using the dash cam's settings or the 70mai app.
- Ensure you are using a high-endurance Class 10 or U1/U3 Micro SD card. Lower quality cards may not keep up with 4K recording speeds.
- Replace the Micro SD card if issues persist.
- Wi-Fi Connection Problems:
- Ensure the 70mai app is updated to the latest version.
- Restart both your phone and the dash cam.
- Forget the dash cam's Wi-Fi network on your phone and reconnect.
- ADAS Not Functioning:
- Ensure the dash cam is correctly calibrated and positioned on the windshield according to the manual.
- Check the ADAS settings in the 70mai app to ensure features are enabled.
- Parking Surveillance Not Working:
- Verify that the optional 70mai Hardwire Kit UP02 is correctly installed and connected.
- Check parking surveillance settings in the 70mai app.
For further assistance, please refer to the Warranty & Support section.
Specifications
| Feature | Detail |
|---|---|
| Brand | 70mai |
| Model Name | 70mai A800S |
| Video Capture Resolution | 2160p (4K) |
| Special Feature | Built-In GPS, ADAS, Parking Surveillance, Wi-Fi |
| Mounting Type | Windshield Mount |
| Optical Sensor Technology | CMOS (Sony IMX415 Sensor) |
| Flash Memory Type | MicroSD (32GB-512GB supported) |
| Color | Black |
| Included Components | Dash Cam, Rear Camera, Mount, Power Cord, Car Charger, Wiring Trim Tool, Electrostatic Stickers, Adhesive Stickers, User Manuals |
Warranty and Support
70mai is committed to providing reliable products and customer service.
- Warranty: 18 Months
- Customer Support: 24 Hours
- Return Policy: 30 Days
For technical assistance or warranty claims, please contact:
- Email: help@70mai.com
- Phone: 1-877-746-6088 (Mon-Fri 9am-6pm PST)

Image: 70mai Customer Care information.