
Bewinner Bewinner7xs56behqt
Contents
Bewinner Dishy V2 to RJ45 Adapter and PoE Injector Kit Instruction Manual
Model: Bewinner7xs56behqt
1. Introduction
This manual provides detailed instructions for the installation, operation, and maintenance of your Bewinner Dishy V2 to RJ45 Adapter and PoE Injector Kit. This kit is designed to facilitate high-speed internet connectivity for Starlink Dishy V2 systems, offering robust performance in various environmental conditions.
2. Product Features
- High-Speed Connection: Compatible with 10/100/1000Mb/s network speeds, utilizing T568B pin allocation for efficient data transfer.
- PoE Injector Compatibility: Designed for seamless integration with Power over Ethernet (PoE) injectors, simplifying power transmission and setup.
- Environmental Adaptability: Operates stably in temperatures ranging from -20°C to +55°C and humidity from 10% to 90% (non-condensing).
- Efficient Storage: Features a storage temperature range of -40°C to +70°C, ensuring product reliability and stability when not in use.
- Compact Design: Lightweight and compact, making the adapter and cable easy to connect, use, and transport.
3. Package Contents
Please verify that all items are present in your package:
- 1 x Dishy V2 to RJ45 Adapter
- 1 x Ethernet Cable
4. Specifications
| Parameter | Value |
|---|---|
| Interface | Dishy Cable, RJ45 |
| RJ45 Pinout | T568B |
| Network Speed Compatibility | 10/100/1000 Mb/s |
| Operating Temperature Range | -20 to +55 °C |
| Operating Humidity Range | 10% - 90% (Non-condensing) |
| Storage Temperature Range | -40 to +70 °C |
| Compatible Devices | Starlink Dishy V2, PoE Injector |
| Connector Type | RJ45 |
| Number of Ports | 1 |
| Item Weight | 200 g |
5. Setup and Installation
Follow these steps to properly set up your Dishy V2 to RJ45 Adapter and PoE Injector Kit:
- Identify Components: Familiarize yourself with the adapter, Ethernet cable, and your existing Starlink Dishy V2 and PoE injector.
- Connect Dishy V2 Cable: Connect the cable from your Starlink Dishy V2 to the designated port on the Bewinner RJ45 adapter.
- Connect to PoE Injector: Use the provided Ethernet cable to connect the adapter to your PoE injector. Ensure the PoE injector is compatible and provides the correct power injection pinout (+V: 1,2,3,6; -V: 4,5,7,8).
- Connect to Router/PC: Connect the output of the PoE injector to your router or PC using a standard CAT6A (or better) Ethernet cable with T-568B pinout.
- Power On: Once all connections are secure, power on your PoE injector and Starlink system.
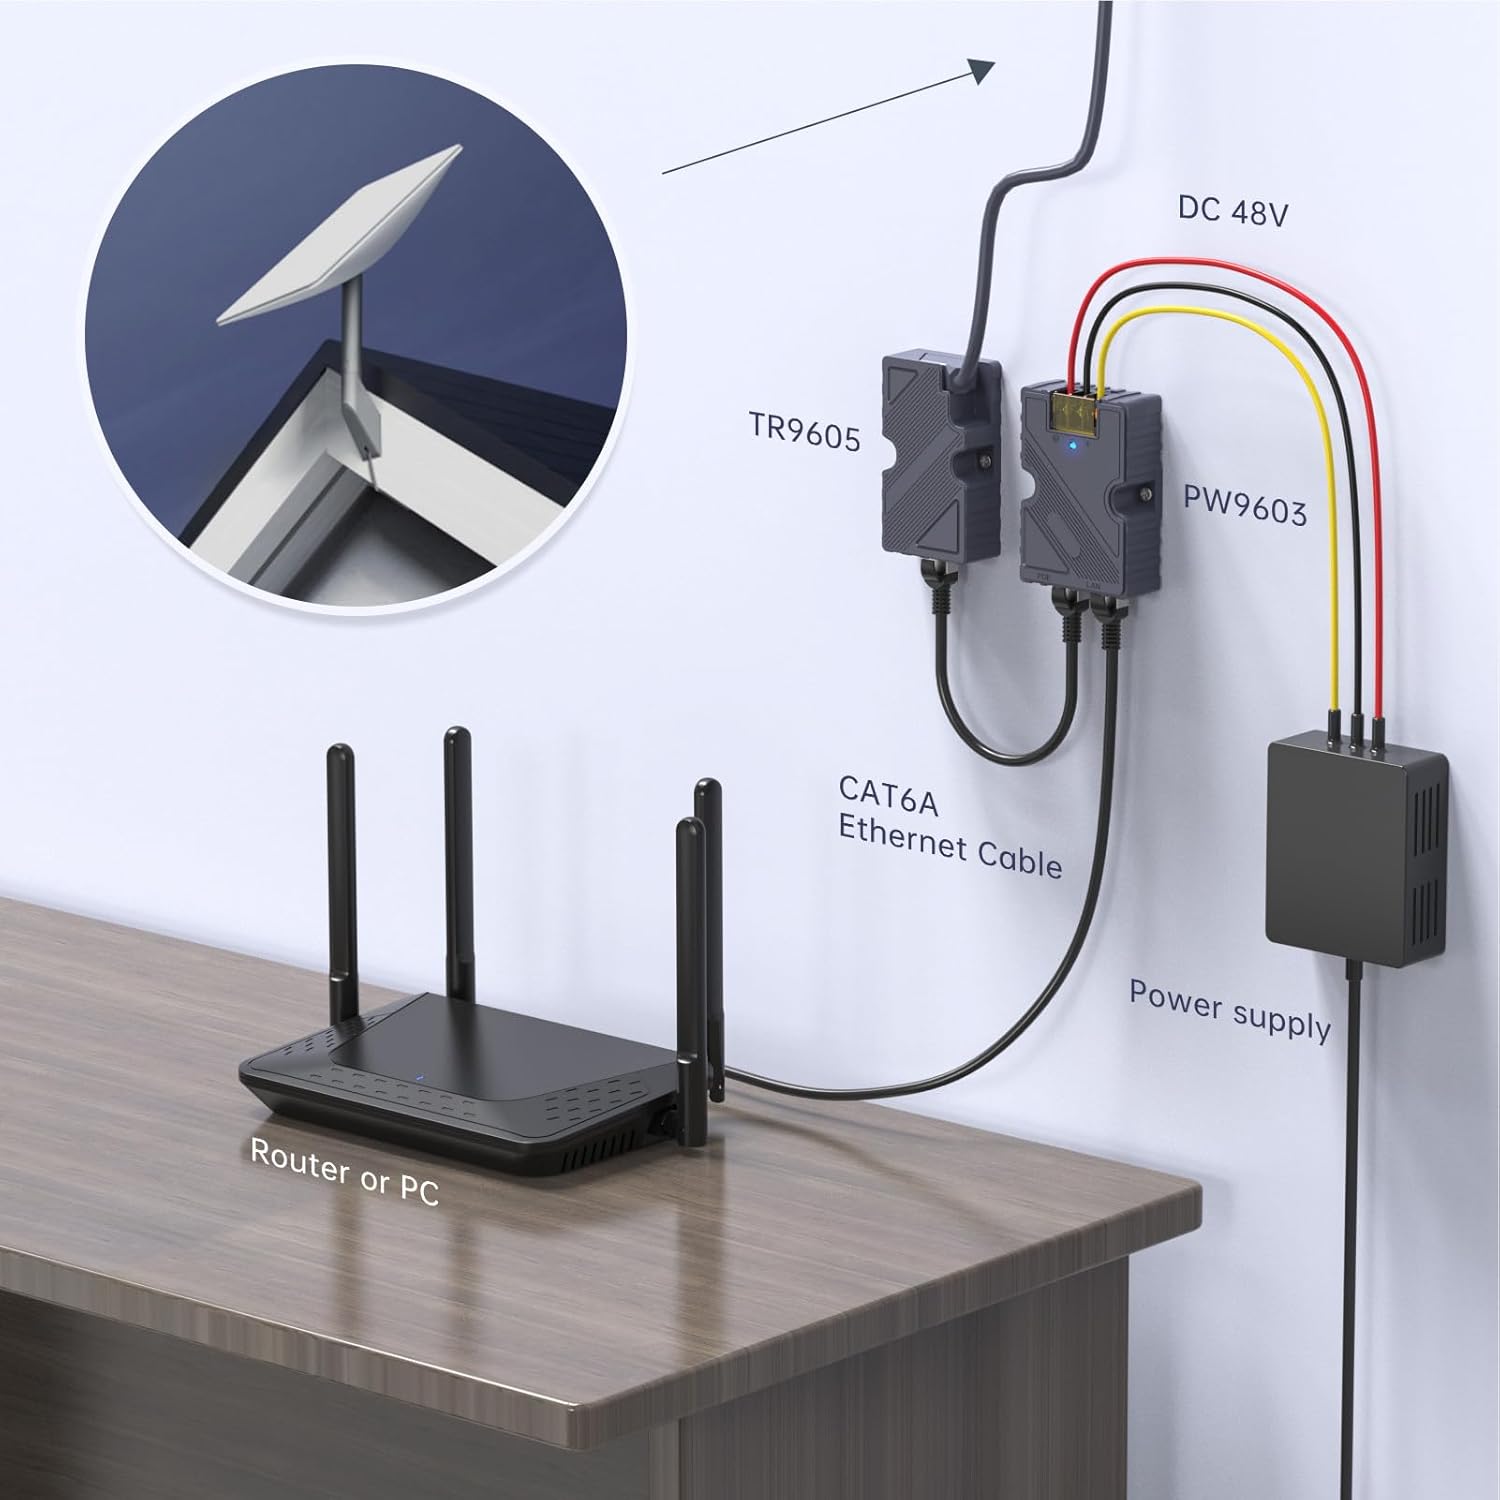
Figure 1: Connection diagram illustrating the setup with a router and power supply.

Figure 2: Critical wiring diagram for T-568B pinout and compatible PoE injector connections.

Figure 3: Exploded view detailing the components and their assembly.
WARNING: Using the wrong cable or PoE injector can lead to permanent equipment damage. Ensure all connections adhere to the T-568B standard and the specified PoE injection pinout.
5.1 Flexible Installation Options
The adapter is designed for versatile placement, supporting both desktop and wall-mounting configurations.

Figure 4: The adapter supports both desktop and wall-mounting for flexible setup.
6. Operating Instructions
Once properly installed, the Bewinner Dishy V2 to RJ45 Adapter and PoE Injector Kit operates automatically. It provides a stable and high-speed network connection from your Starlink Dishy V2 to your network devices.
- Ensure all cables are securely connected to maintain optimal performance.
- The adapter facilitates the conversion of the Dishy V2's proprietary cable to a standard RJ45 Ethernet connection, allowing it to interface with standard networking equipment.
- The PoE injector provides power to the Dishy V2 through the Ethernet cable, eliminating the need for a separate power source at the Dishy V2 location.
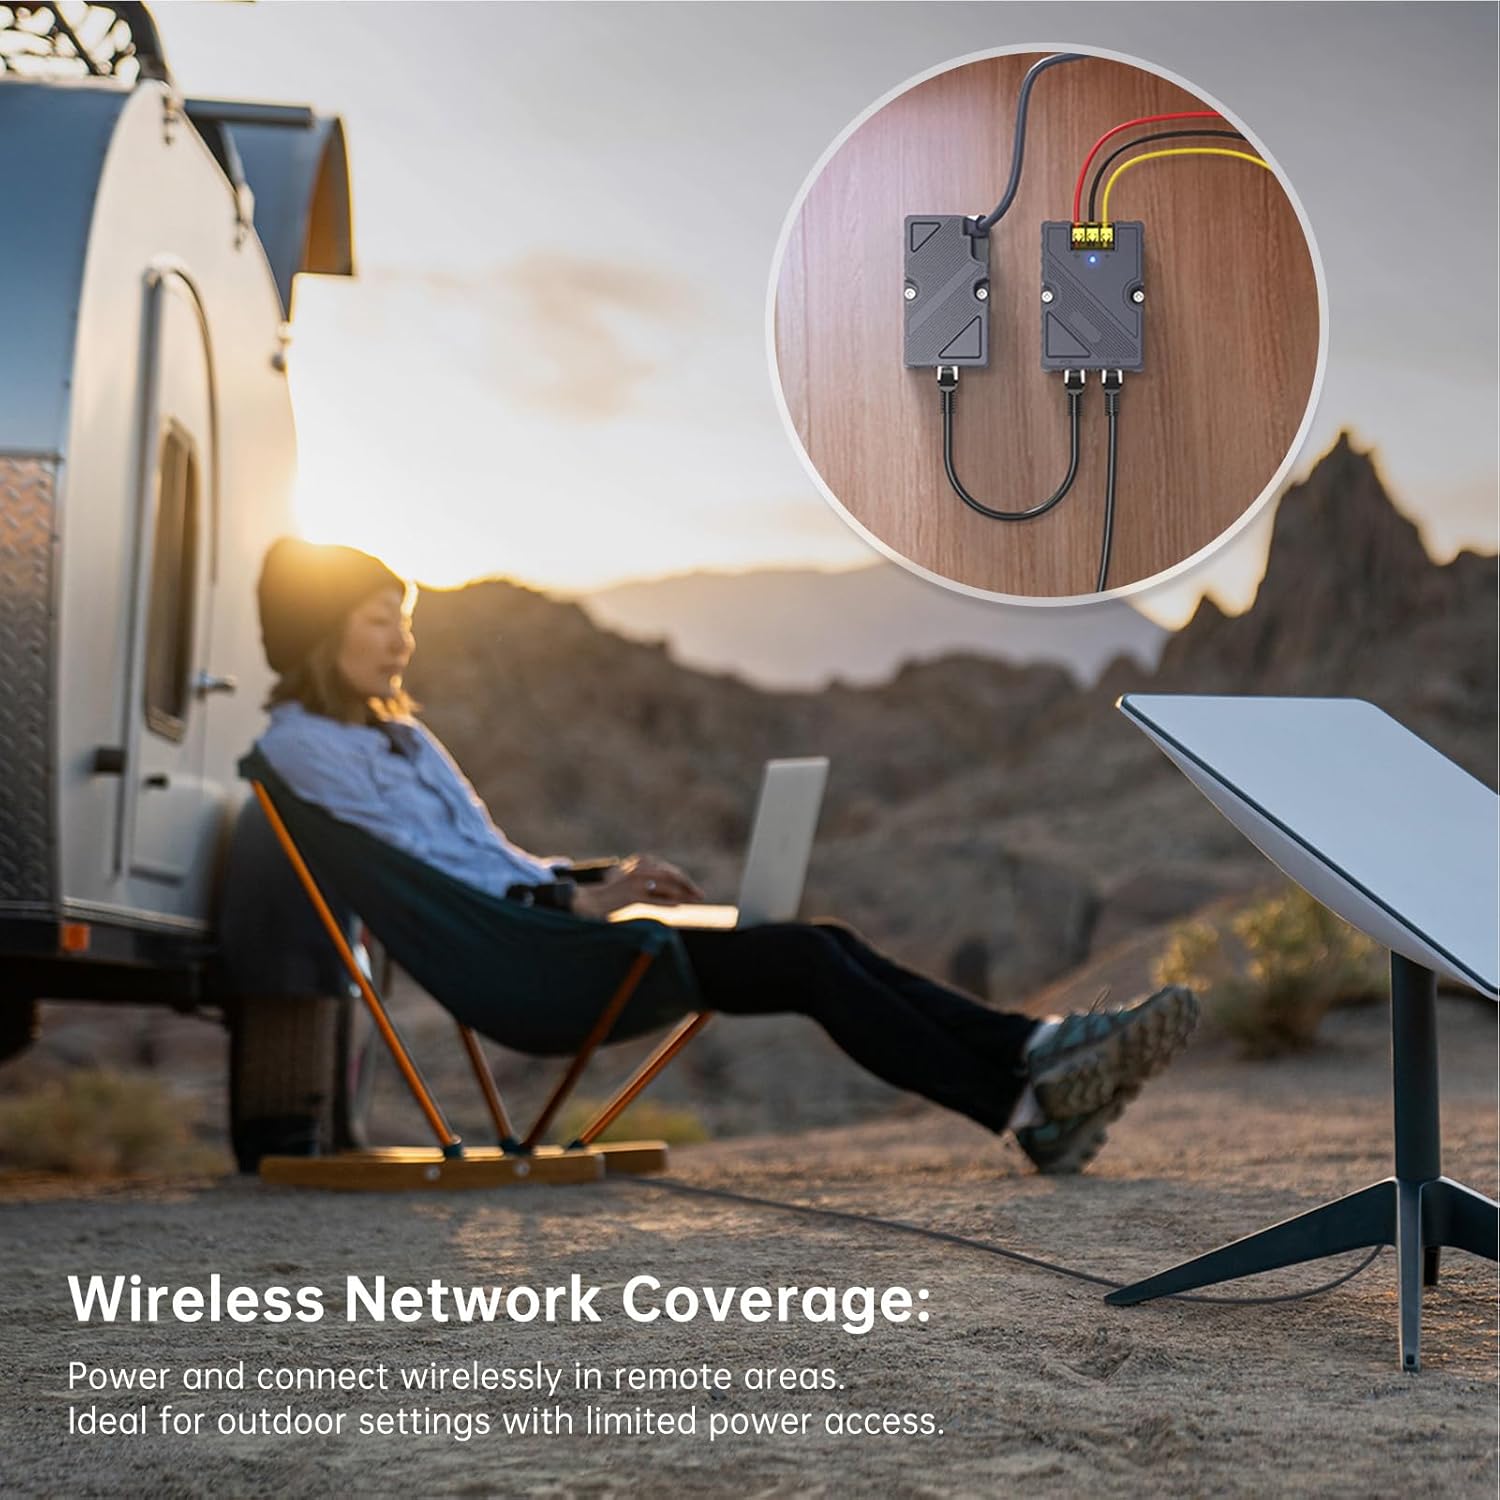
Figure 5: The adapter enables wireless network coverage in remote areas, ideal for outdoor use.

Figure 6: The compact design allows for use in confined spaces like vehicles.
7. Compatibility
This kit is specifically designed for Starlink Dishy V2. It requires a compatible PoE injector that provides 12V to 48V 3A 144W power. Incompatible PoE injectors (e.g., 12V to 48V 6A 288W) should not be used as they may damage the equipment.

Figure 7: Ensure your PoE injector matches the compatible specifications.
8. Maintenance
To ensure the longevity and optimal performance of your adapter kit, follow these maintenance guidelines:
- Cleaning: Use a soft, dry cloth to clean the adapter and cables. Avoid using liquid cleaners or solvents.
- Environmental Conditions: While the product is designed for various conditions, avoid prolonged exposure to extreme temperatures, direct sunlight, or high humidity when possible.
- Cable Integrity: Regularly inspect cables for any signs of wear, cuts, or damage. Replace damaged cables immediately to prevent performance issues or safety hazards.
- Storage: When not in use, store the kit in a cool, dry place within the specified storage temperature range (-40°C to +70°C).
9. Troubleshooting
If you encounter issues with your adapter kit, consider the following troubleshooting steps:
- No Network Connection:
- Verify all cable connections are secure and correctly seated.
- Ensure the PoE injector is powered on and functioning correctly.
- Check if your router or PC is properly configured for network access.
- Confirm that the Ethernet cable used is CAT6A or better and has the correct T-568B pinout.
- Slow Network Speed:
- Ensure your Ethernet cable is not damaged and is rated for gigabit speeds (CAT5e or CAT6/6A).
- Check for interference or other network congestion.
- Verify that your Starlink Dishy V2 is receiving a clear signal.
- Adapter Not Powering On:
- Confirm that the PoE injector is compatible (12V to 48V 3A 144W) and correctly connected.
- Ensure the power source for the PoE injector is active.
If problems persist after following these steps, please contact customer support.
10. Warranty and Support
Bewinner products are designed for reliability and performance. For warranty information or technical support, please refer to the product packaging or visit the official Bewinner website. Keep your purchase receipt for warranty claims.
Ask a question about this manual
Ask about setup, troubleshooting, compatibility, parts, safety, or missing instructions. Manuals+ will review the question and use this page’s manual context to help answer it.